Banana Snacking Cake

Lately, I find myself gravitating towards familiar foods in my kitchen. The meals and desserts that I’ve enjoyed since childhood are on rotation—grilled cheese and tomato soup, spaghetti made with sauce from a jar, and chocolate chip cookies. It feels easier, in these final chaotic days of the school year, to reach for recipes that I know both forwards and backwards.

While there are no moments of surprise with new flavors or textures, the comfort of these routine meals is indulgent in a different way, for both body and soul.

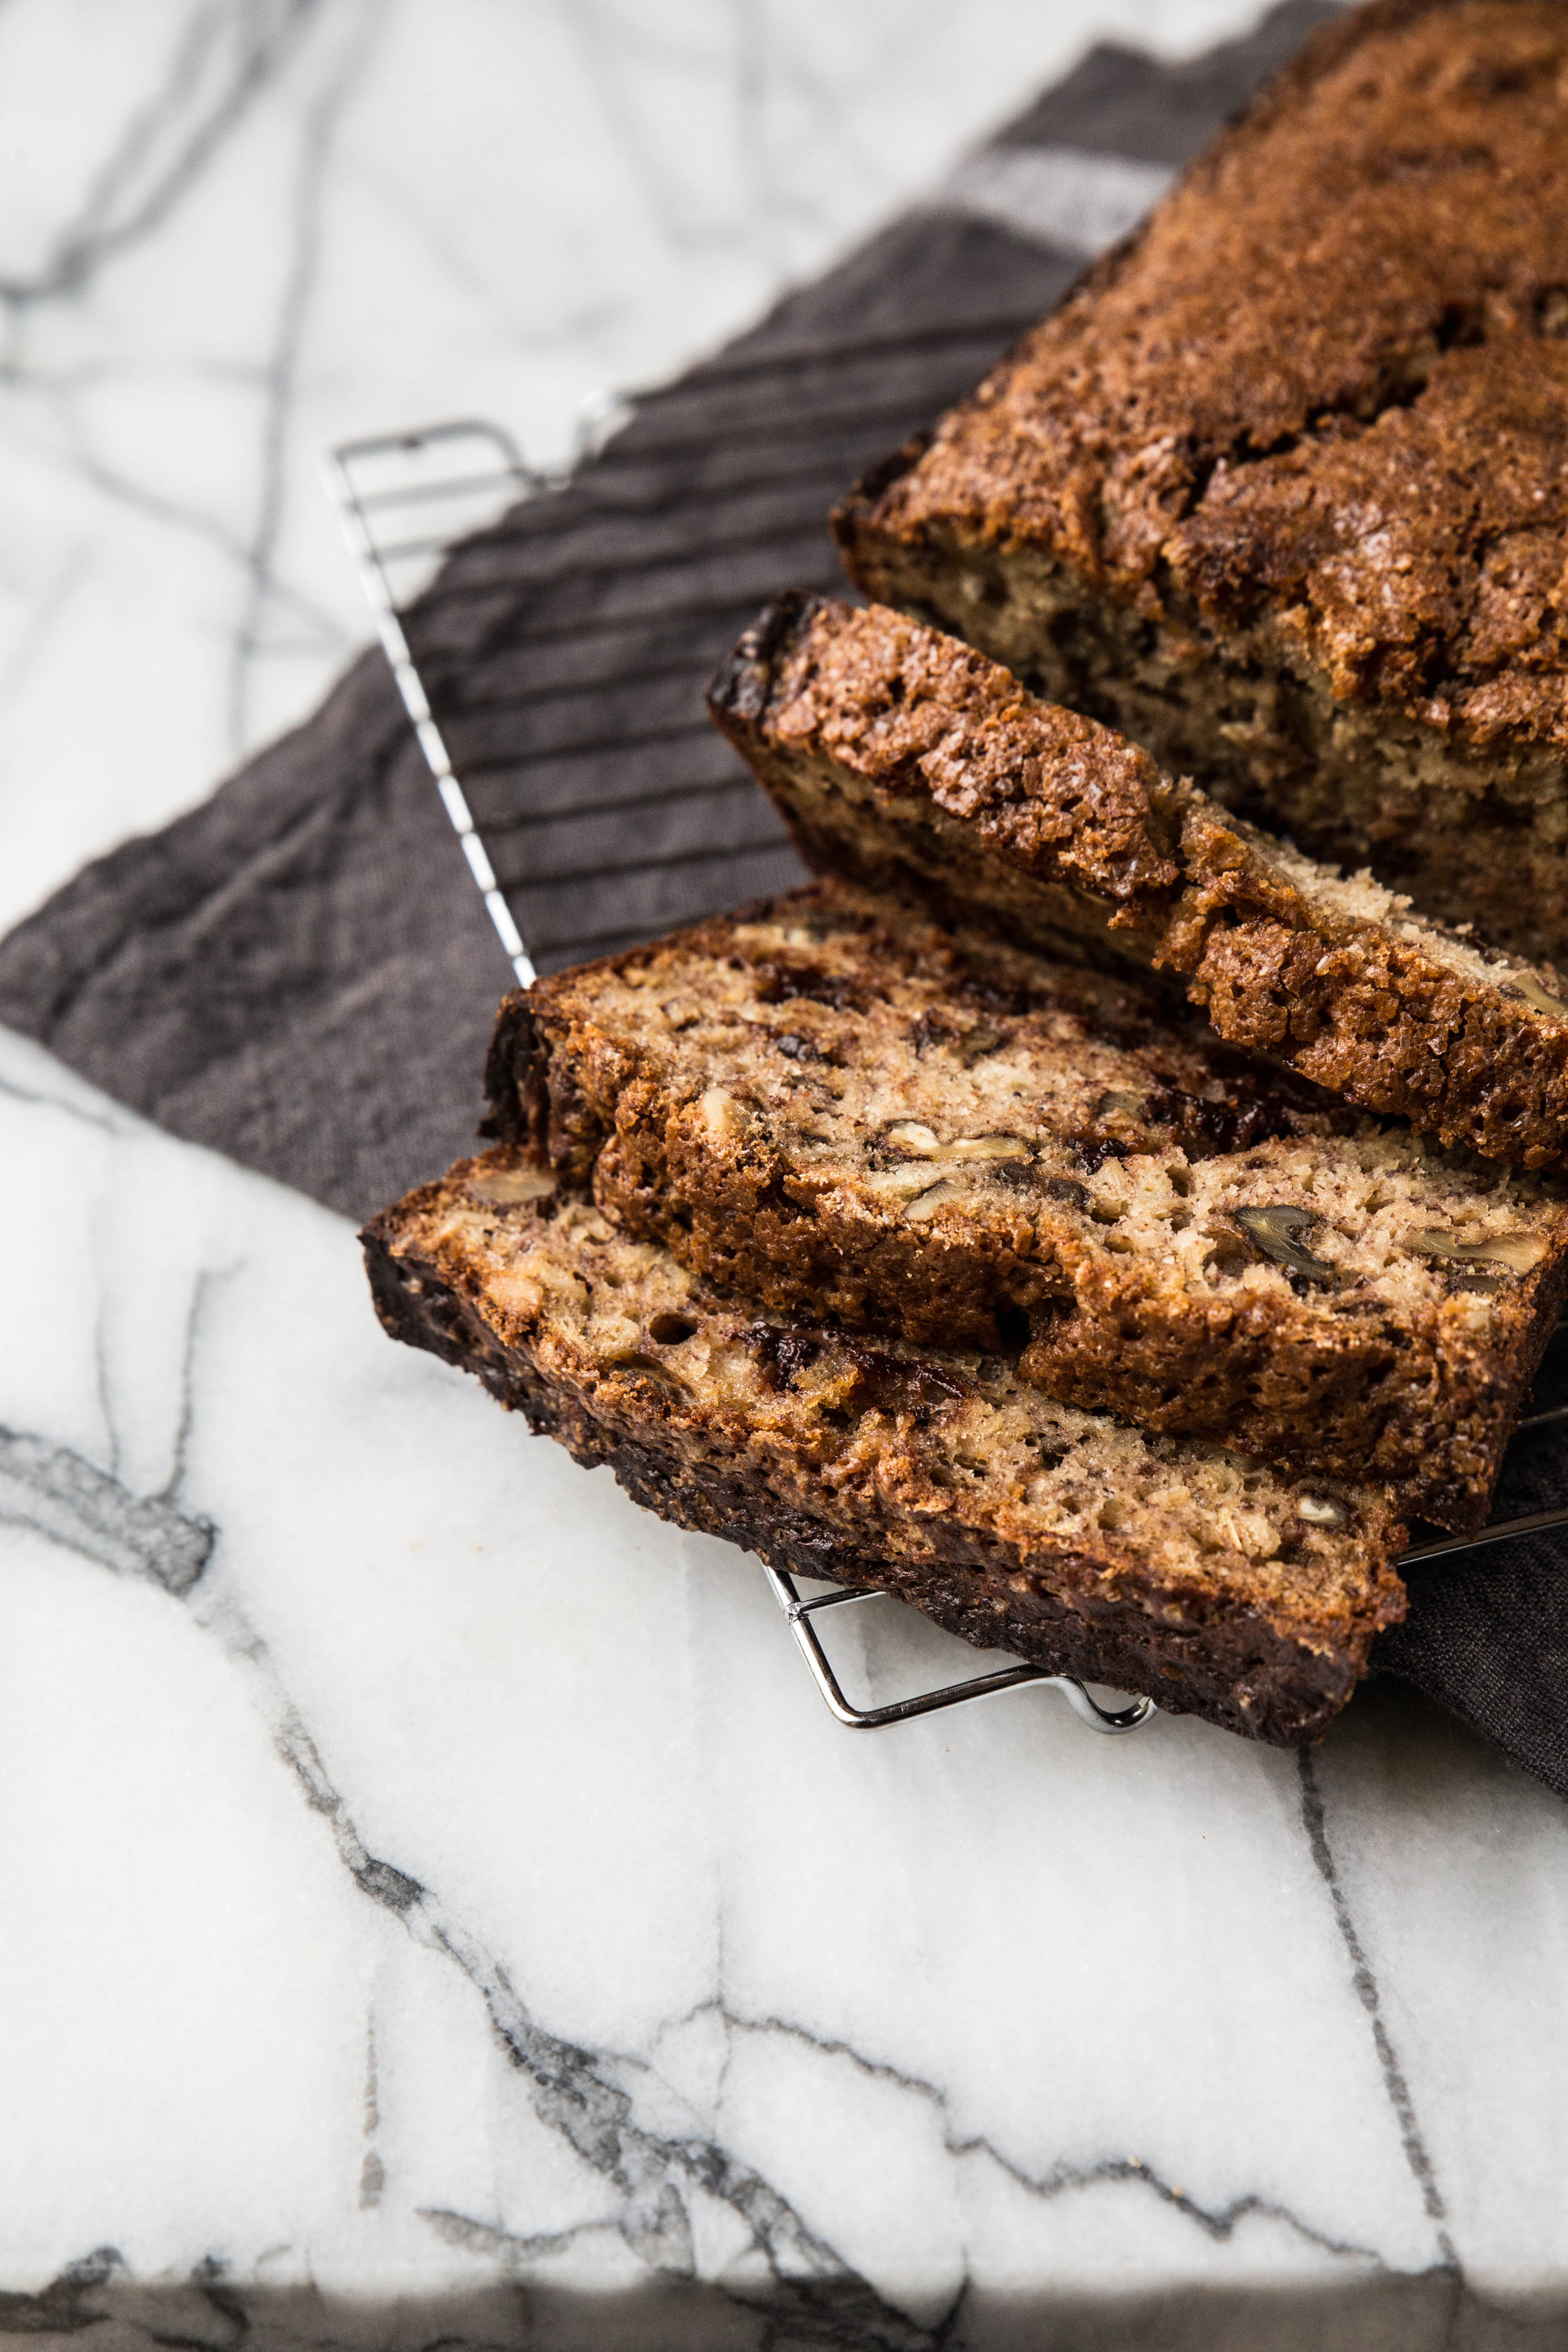
This banana cake is one that I remember fondly from my childhood. Whenever the bananas were forgotten on the counter long enough to blacken, the mixing bowls would come out and this cake would emerge from the oven. The aroma of banana filling the air was the cue for the rest of my family to flock to the kitchen, stealing a bite or two before the cake had properly cooled.

It has been many years since I’ve last eaten this cake. Perhaps having my own little one in the house is causing these food memories to stir up, but, regardless of the reason, I am delighted to revisit this recipe.

IMG_9578-2.jpg

This banana cake is a simple, unpretentious snacking cake—however, that doesn't mean this cake isn't something worth talking about.

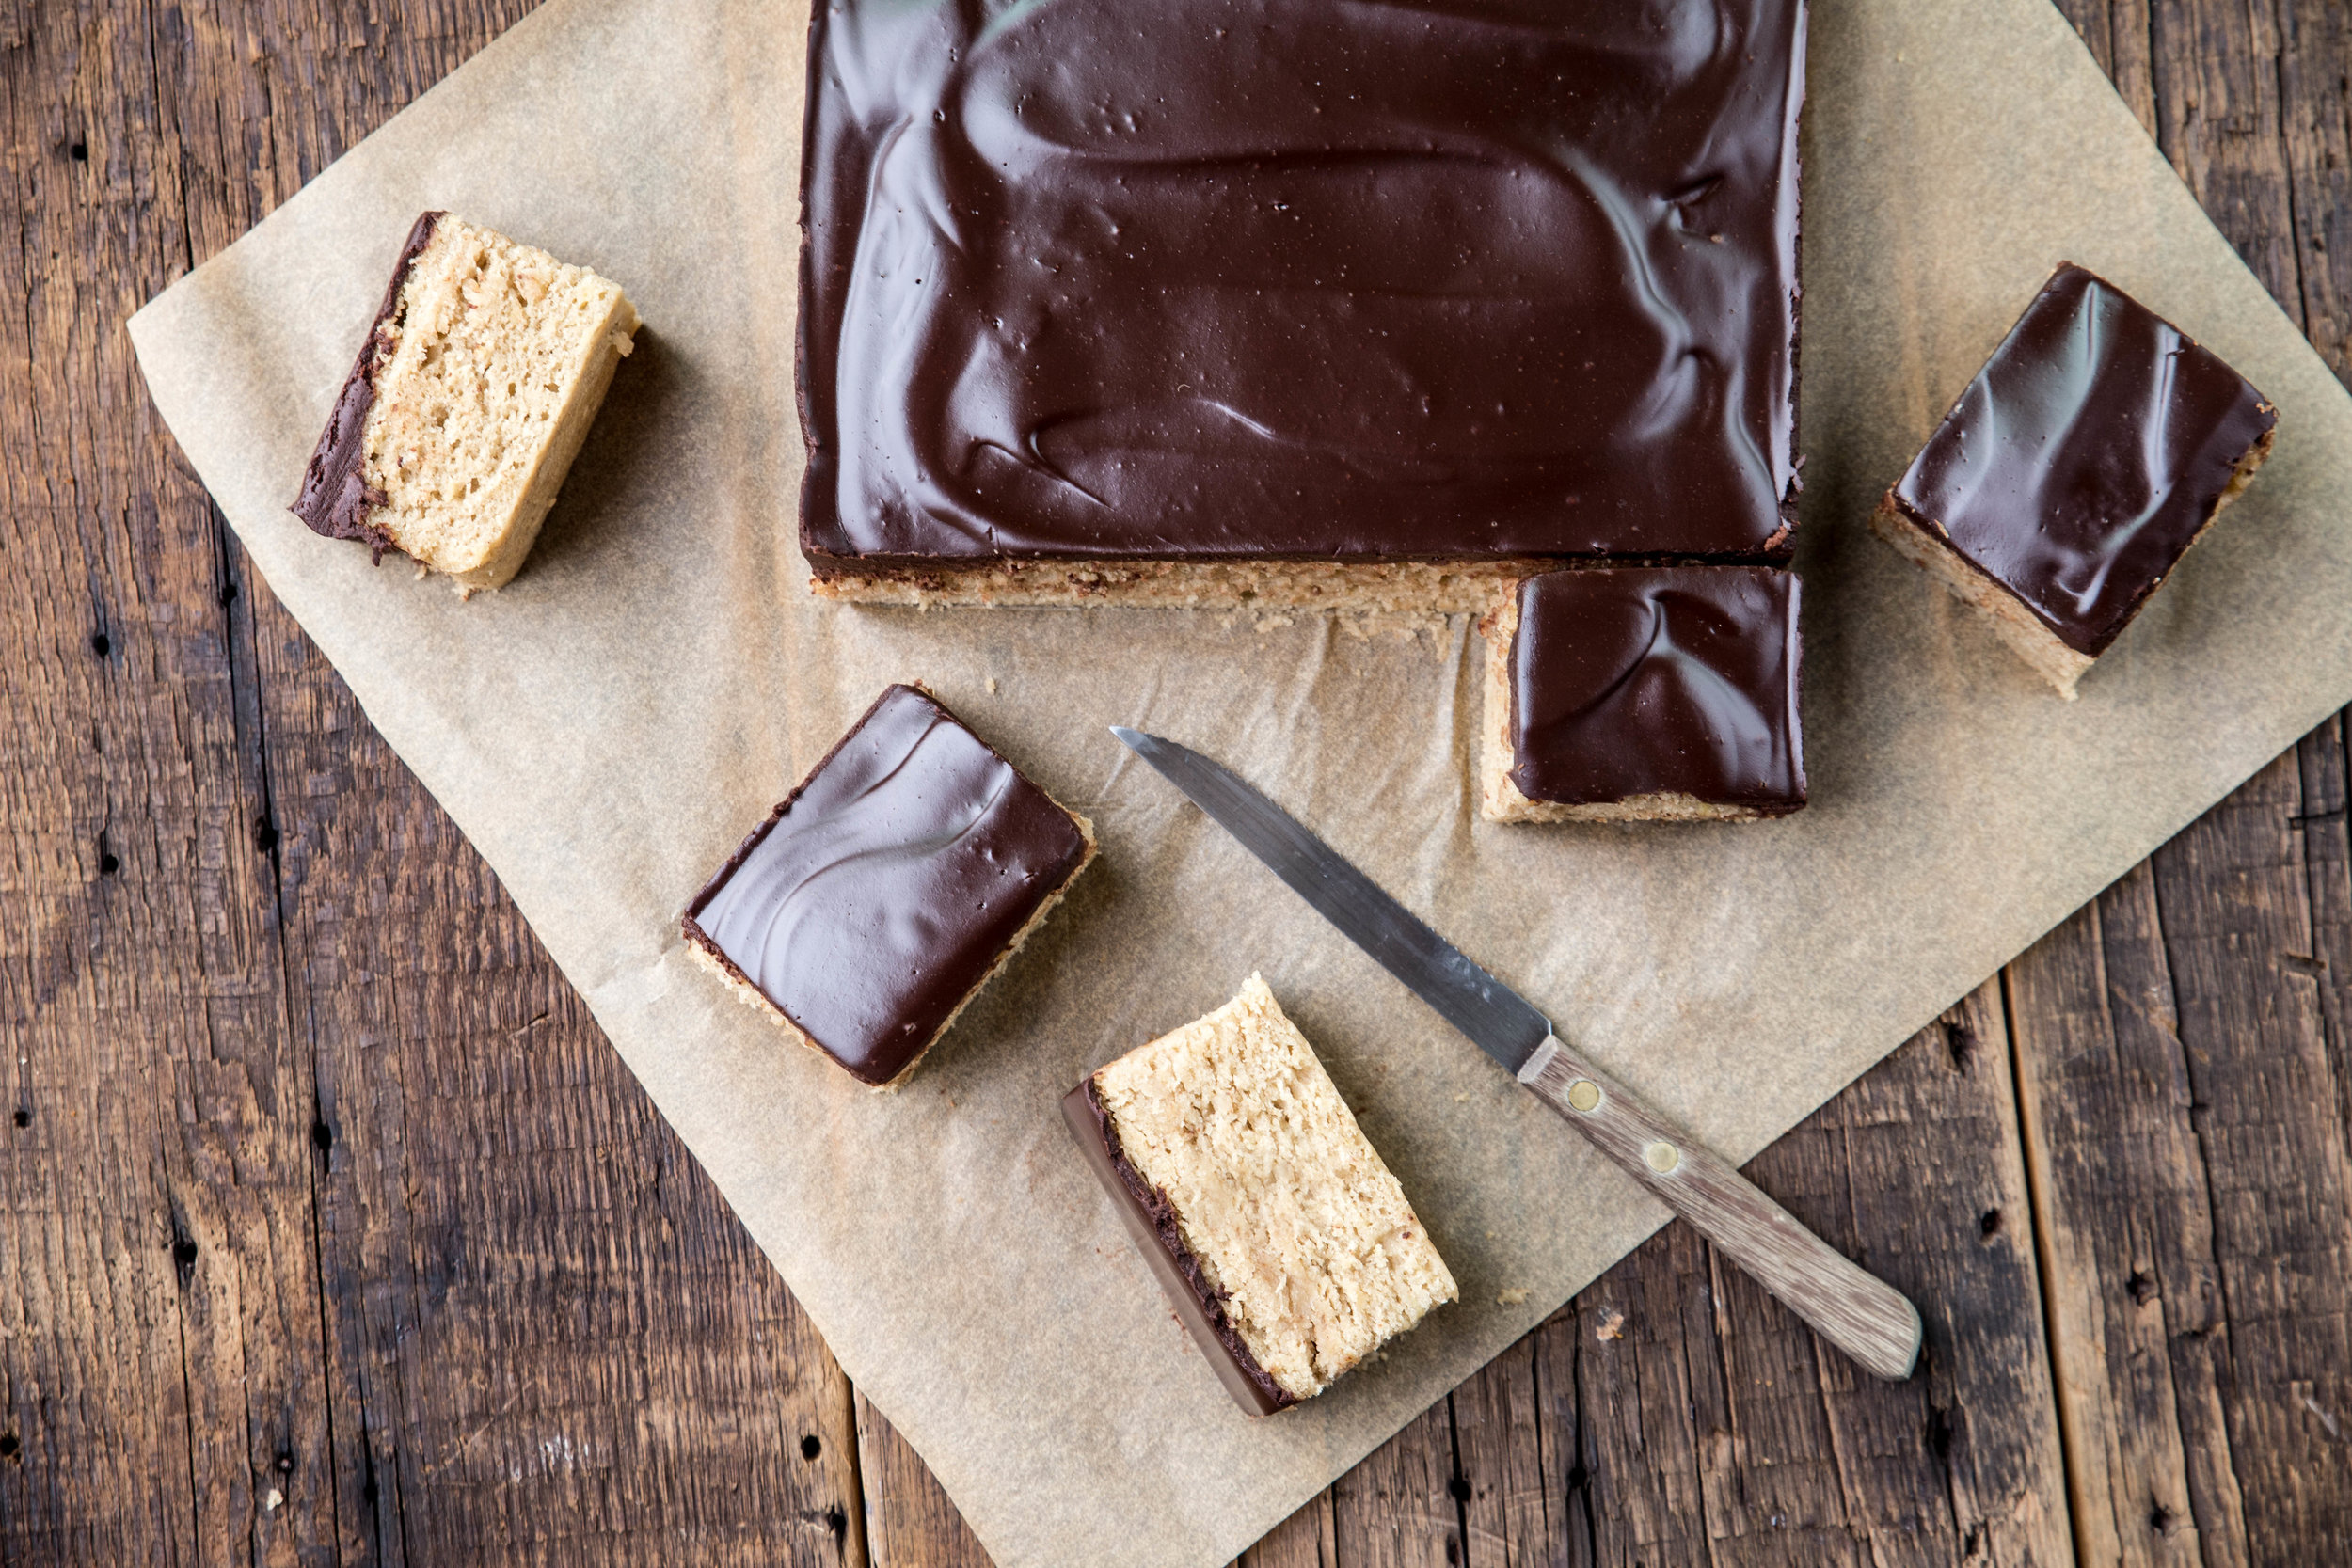
The texture is my favorite part of this cake. As with most banana breads and cake, the final product has a bit of heft, but I think it works in the cake’s favor instead of against it. The chocolate glaze is also made with butter instead of heavy cream like a traditional ganache, which lends itself to a more intense buttery, chocolate flavor.

All these years later, my family is still in debate about the best way to eat this cake. My dad and I prefer to eat this cake chilled. The cold brings out a heaviness to the cake we both love, and the chocolate glaze becomes stiff making it literally melt in your mouth. My sister, on the other hand, prefers the cake slightly warmed, which yields a lighter feel to the cake and turns the chocolate glaze silky smooth. Though our debate may never be settled, the truth is that this cake is delicious any way you choose to serve it.

Since it is my belief that snacking cakes should be easy to prepare, instead of making a chocolate glaze, you could simply add chocolate chips to the batter to bring in the chocolate flavor without needing to use more pans. The choice, as always, is yours.

This Banana Snacking Cake combines the classic flavors of chocolate and banana. The addition of mashed banana to the cake lends a moistness, while a touch of cinnamon brings out a greater depth of flavor. The chocolate glaze is simple to make, melting together only chocolate and butter, but I could eat it by the spoonful (and I usually do). The glaze spreads smooth when slightly warm and holds its shape like a dream. This cake is a good option to reach for when you are looking for a sweet snack and, if your kitchen is anything like mine, it will disappear before you are ready to see it go.

Banana Snacking Cake

Yields 9 x 13-inch cake

Banana Cake
2 1/2 cups (300 grams) all-purpose flour
1 tablespoon baking powder
1/2 teaspoon cinnamon
1/2 teaspoon salt
1/2 cup (113 grams) unsalted butter, room temperature
1/2 cup (100 grams) granulated sugar
3/4 cup (150 grams) brown sugar, packed
2 large eggs
3 medium ripe bananas, mashed
1 teaspoon vanilla extract
3/4 cup (180 mL) buttermilk (or regular milk)

Chocolate Glaze
6 ounces (170 grams) semi-sweet chocolate, coarsely chopped
1/2 cup (113 grams) butter, cubed

Preheat oven to 325 degrees F (160 degrees C). Grease a 9 x 13-inch baking pan.

To prepare the banana cake, whisk together flour, baking powder, cinnamon, and salt in a medium bowl. Set aside.

In a large mixing bowl, cream together the butter and sugars until light and fluffy. Add the eggs one at a time, beating well after each addition. Mix in the mashed bananas and vanilla extract.

Beat in the flour mixture and buttermilk in alternating additions, starting and ending with the flour. Pour batter evenly in the prepared baking pan and bake for 35-40 minutes, or until golden and a toothpick inserted in the center comes out clean. Allow the cake cool completely.

To prepare the chocolate glaze, melt together the chopped chocolate and cubed butter in a small saucepan over low heat until smooth and uniform. Spread evenly over the cooled cake and allow the glaze to set before cutting and serving the cake.

Banana Oat Bread

IMG_9802-2.jpg

In the last few weeks of pregnancy with Baby N, one of my goals was to fill the deep freeze with meals for after baby arrived. I hoped having a stash of easy-to-prepare meals would make the recovery and transition to motherhood smoother.

After haphazardly throwing together an ingredient list (and making a memorable trip to the grocery store with a very full shopping cart), I spent most of a Saturday in the kitchen prepping meals. Ingredients were tossed into freezer bags to create over a dozen crockpot meals. A soup pot filled with oatmeal boiled away on the stove. The oven ran at a steady 350 degrees for hours. My husband dutifully chopped ten large onions by hand, doing his best to fend off the tears.

It was a production.

With a newly filled freezer, I collapsed on the couch, exhausted but pleased to cross another item off the pre-baby to-do list.

bananaoatbread2.jpg

Ironically, a full three and a half months into parenthood, the deep freeze is still full of freezer meals. Although the breakfast sandwiches and oatmeal disappeared quickly, the rest of the thoughtfully prepared meals continue to wait their turn.

Although we hadn’t anticipated it, the act of cooking dinner each evening helped to keep us grounded. In our new role as parents—where everything felt new and unknown—we enjoyed the familiar routine of turning on the stove and cooking simple meals.

It was a way to connect our new lives with the old, as we evolved from a family of two into a family of three.

IMG_9819-3.jpg

Lately, however, there is increasingly less space for the frozen meals as the freezer space is steadily being replaced with bags of breastmilk. It’s time to start enjoying the fruits of our labor.

While reorganizing the freezer last weekend, I was delighted to find a hidden loaf of this Banana Oat Bread buried beneath a bag of Italian chicken and a marinated pork shoulder. Needless to say, it disappeared quickly (nursing hunger is real). Unfortunately for me, there are no more loaves hiding away (I double checked), so I’ll have to bake up another one to take its place.

With my free time for baking being limited since going back to work, it would be nice to have a reason to spend an afternoon in the kitchen again. My husband already said he’d take the baby for an afternoon so long as he gets a slice warm from the oven.

I think that’s a fair trade, don’t you?

IMG_9863-3.jpg

This Banana Oat Bread is simple in construction and customizable to your taste, The bread itself is subtly sweetened with maple syrup, which allows the banana flavor to shine. The addition of oats adds a comforting flavor to the loaf. My preference is to add chocolate chips and chopped walnuts to my loaves, but you can choose your own mix-ins (or forego them completely). While I like to toast each slice and slather it with butter, the bread is equally delicious served at room temperature straight from the pan.

Banana Oat Bread

Yields 5 x 9-inch loaf

4 large ripe bananas, mashed (about 2 cups or 450 grams)
1/2 cup (156 grams) pure maple syrup
1/2 cup (100 grams) vegetable oil
2 large eggs
2 teaspoons vanilla extract
1 teaspoon ground cinnamon
1/2 teaspoon ground nutmeg
1 teaspoon baking powder
1/2 teaspoon baking soda
1/2 teaspoon salt
1 1/3 cups (160 grams) all-purpose flour
1 cup (80 grams) old fashioned oats
1 cup (113 grams) chopped walnuts (optional)
2/3 cup (113 grams) chocolate chips (optional)
1 tablespoon raw or demerara sugar, for topping (optional)

Preheat oven to 350 degrees F (180 degrees C). Grease a 5 x 9-inch loaf pan. Set aside.

In a large mixing bowl, whisk together mashed bananas, maple syrup, vegetable oil, eggs, and vanilla extract until uniform. Whisk in the cinnamon, nutmeg, baking powder, baking soda, and salt. Gradually stir in the flour and oats. Fold in the chopped walnuts and chocolate chips. Set aside.

Pour batter into prepared pan and smooth until level. Sprinkle raw sugar evenly over the top. Bake for 55-65 minutes, or until a toothpick inserted in the center comes out clean. Cool in pan for 10 minutes before removing and placing on a cooling rack to cool completely. 

Chocolate Ginger Crinkle Cookies

This post is sponsored by Bob’s red mill. Thank you for supporting the brands I love and use in my own kitchen. As always, all thoughts and opinions are my own.

This post is sponsored by Bob’s red mill. Thank you for supporting the brands I love and use in my own kitchen. As always, all thoughts and opinions are my own.

With the holidays right around the corner (and a baby on the way!), December is shaping up to be a busy month for my family. In year’s past, it has been my holiday tradition to spend days in the kitchen meticulously cutting out and decorating my favorite holiday cookies—like these honey, sugar, and chocolate sugar cookies—to share with my family and friends.

This year I honestly don’t have the time to spare.

Instead, I’m going to feel out a new holiday baking tradition. My goal is to spend the next few days filling the freezer with cookies from easy-to-make recipes, and enjoying the remaining days by relaxing before our sweet baby arrives.

chocolategingercrinklecookies1.jpg

These Chocolate Ginger Crinkle Cookies meet all of my criteria this year: simple to make, freeze well, and quickly disappears from the serving plate.

For this cookie recipe, I turned to Bob’s Red Mill Unbleached White All-Purpose Flour. I prefer to use unbleached flour in my baking because it means the flour is not chemically treated. To create the classic light colored appearance and delicate texture of all-purpose flour, the wheat bran and germ are removed during the milling process (which is the key difference between whole wheat and all-purpose flour).

Crinkle cookies get their crackled appearance from being rolled in powdered sugar before baking. The sugar draws out moisture from the outside of the cookie, causing the edges to dry out before the interior is finished baking. This difference in moisture levels causes the top of the cookie to take on a crinkled appearance.

With a handful of chocolate chips to provide a richer chocolate flavor and ground ginger and cinnamon to give the cookie a spiced warmth, these cookies are sure to satisfy your sweet tooth this holiday season.

IMG_7445-2.jpg
IMG_7428-2.jpg
IMG_7492-2.jpg

One of the qualities I look for in a good holiday cookie is its ability to freeze well. Knowing I have homemade cookies stashed away that can be ready at a moment’s notice is a relief during a busy season when events pop up or unexpected guests drop by. Happily, these chocolate ginger crinkle cookies can be easily frozen using two methods.

The first method is to form the cookie dough into balls and freeze them before rolling them in powdered sugar. When ready to bake, the frozen cookie dough balls can be rolled in the sugar and head straight towards the oven. This method is great when you can spare a few minutes to bake or you want to serve hot cookies straight from the oven.

The second method is to bake the cookies as directed and allow them to fully cool before placing them in an airtight container in the freezer. When ready to be served, pull the cookies from the freezer and allow them to thaw. This method is best when you anticipate the cookies being eaten quickly since the powdered sugar can become sticky if the cookies are left out for longer periods of time.

IMG_7502-2.jpg

These Chocolate Ginger Crinkle Cookies are a seasonal take on the classic cookie. The chocolatey cookies are spiced with ginger and cinnamon to bring out traditional holiday flavors. After chilling the dough, the cookies are dipped in powdered sugar and baked until they take on a crinkled appearance. These cookies are best served alongside friends and family with a tall glass of milk.

One Year Ago: Marbled Pumpkin Chocolate Cake & Pumpkin Caramel Bread Pudding
Two Years Ago: Chocolate Gingersnap Tart
Three Years Ago: Caramel Apple Crumble Pie & Rosemary Olive Bread
Four Years Ago: Maple Syrup Cake with Toasted Almonds & Pumpkin Pie (Dairy-Free!)
Five Years Ago: Pumpkin Spiced Doughnuts & Stovetop Popcorn
Six Years Ago: Molasses Ginger Cookies, Marbled Butternut Squash Bread, Chai Pear Scones, & Hot Bourbon Apple Cider
Seven Years Ago: Grandma’s Applesauce, Honey Roasted Chickpeas, Caramel Apple Tart, & Cranberry Orange Brioche
Eight Years Ago: Fig & Balsamic Jam, Pumpkin Spice Oatmeal, & Raspberry Vanilla Creme Brulee

Chocolate Ginger Crinkle Cookies

Yield 18-22 cookies

1 cup (120 grams) Bob’s Red Mill Unbleached White All-Purpose Flour
1/2 cup (43 grams) cocoa powder
1/2 cup (100 grams) granulated sugar
1/4 cup (50 grams) brown sugar, packed
1 1/2 teaspoons ground ginger
1/2 teaspoon ground cinnamon
1 teaspoon baking powder
1/4 teaspoon salt
1/4 cup (60 mL) vegetable oil
2 large eggs
1 teaspoon vanilla extract
1/2 cup semisweet chocolate chips
3/4 cup (85 grams) powdered sugar

In a large mixing bowl, whisk together the flour, cocoa powder, granulated sugar, brown sugar, spices, baking powder, and salt. Mix in the vegetable oil, eggs, and vanilla, stirring until a uniform batter forms. Stir in the chocolate chips.

Place cookie dough in the refrigerator for 2 hours (or overnight) until completely chilled through.

Preheat oven to 350 degrees F (180 degrees C).

Place powdered sugar in a small bowl. Set aside.

Roll chilled cookie dough into 1-inch balls. Drop cookie dough balls into the powdered sugar and coat evenly on all sides. Place balls at least 2-inches apart onto a cookie sheet.

Bake for 10-13 minutes, or until cookies have a crackled appearance. Allow cookies to cool for 5 minutes before transferring them to a cooling rack to cool completely.