
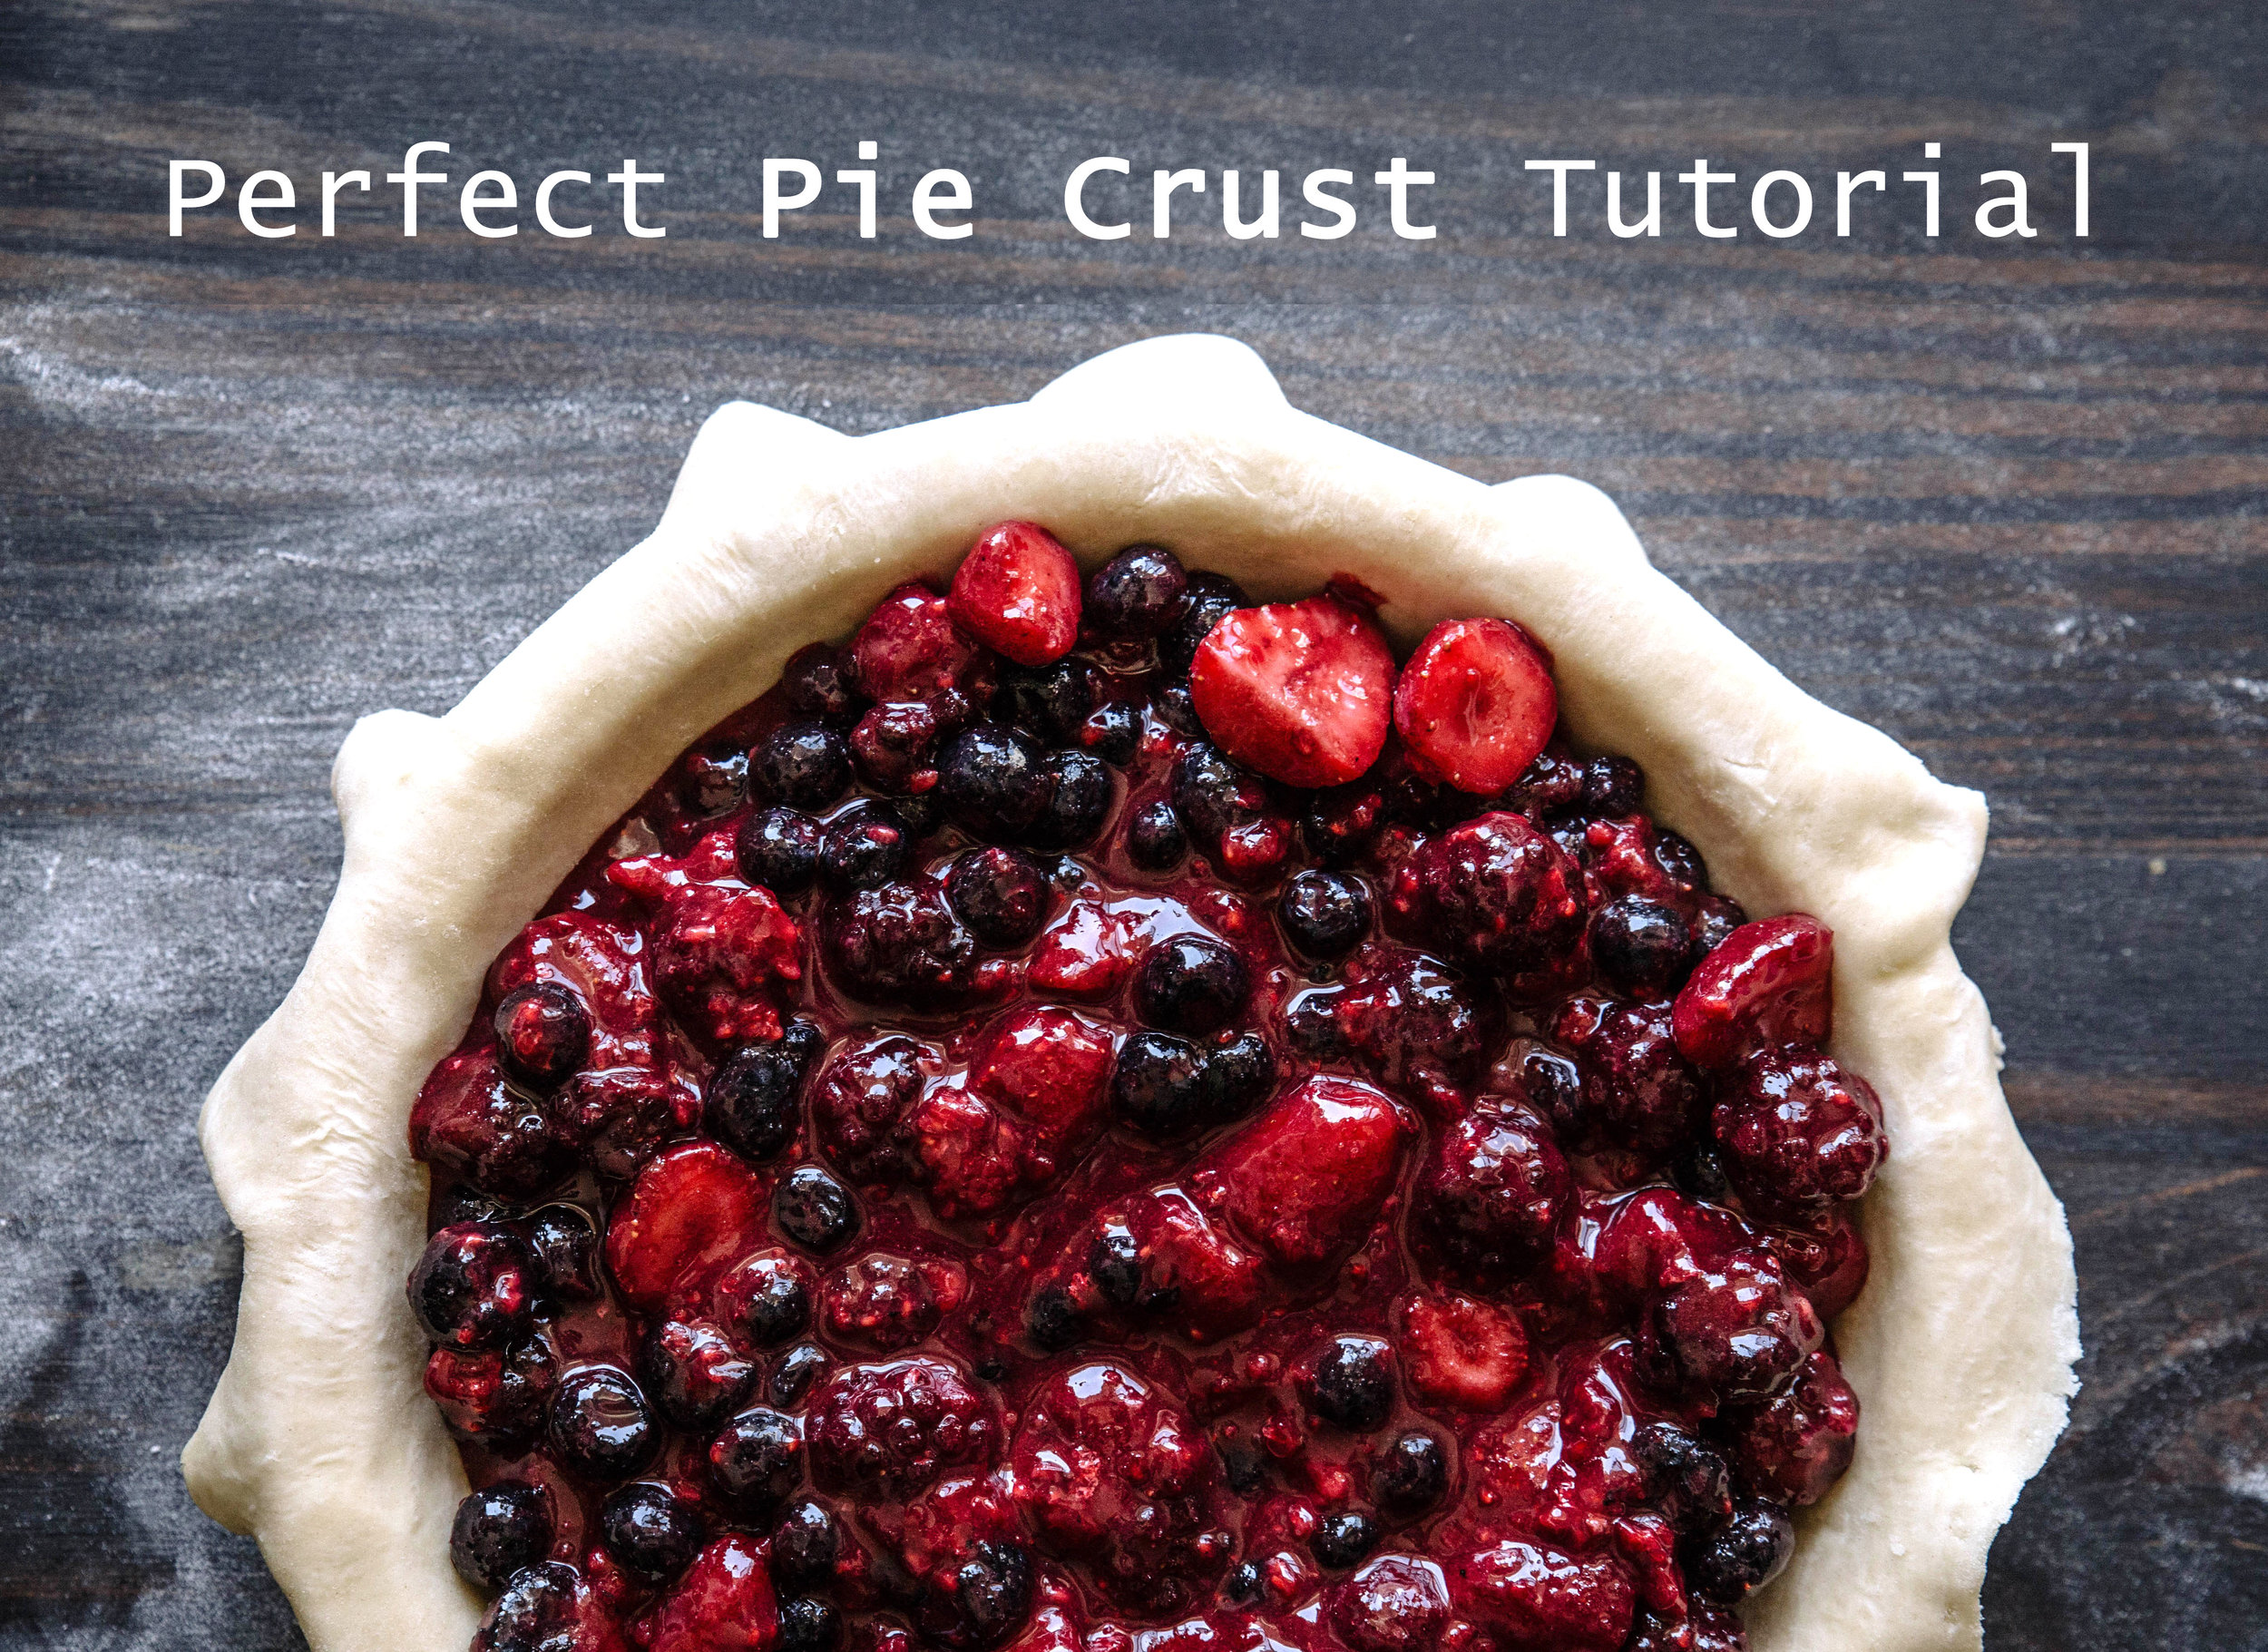
Perfect Pie Crust
/
For many years, baking pies only resulted in demanding, painful experiences. I fought with the dough constantly. It was too thin, too thick, or ripped too easily. It was such a nightmare that I used pie dough very sparingly in my baking. When I made this peach vanilla cardamom pie several years ago, I struggled with the dough for over an hour, manhandling it to produce the final, amateur lattice pattern. From then on, I opted for galettes whenever a flaky, fruity pastry was on the menu.
I had the right recipes, but the technique was missing. Several years (and many pies) later, I have the technique down solid. And now, I am going to share it with you.
The Perfect Pie Crust tutorial.

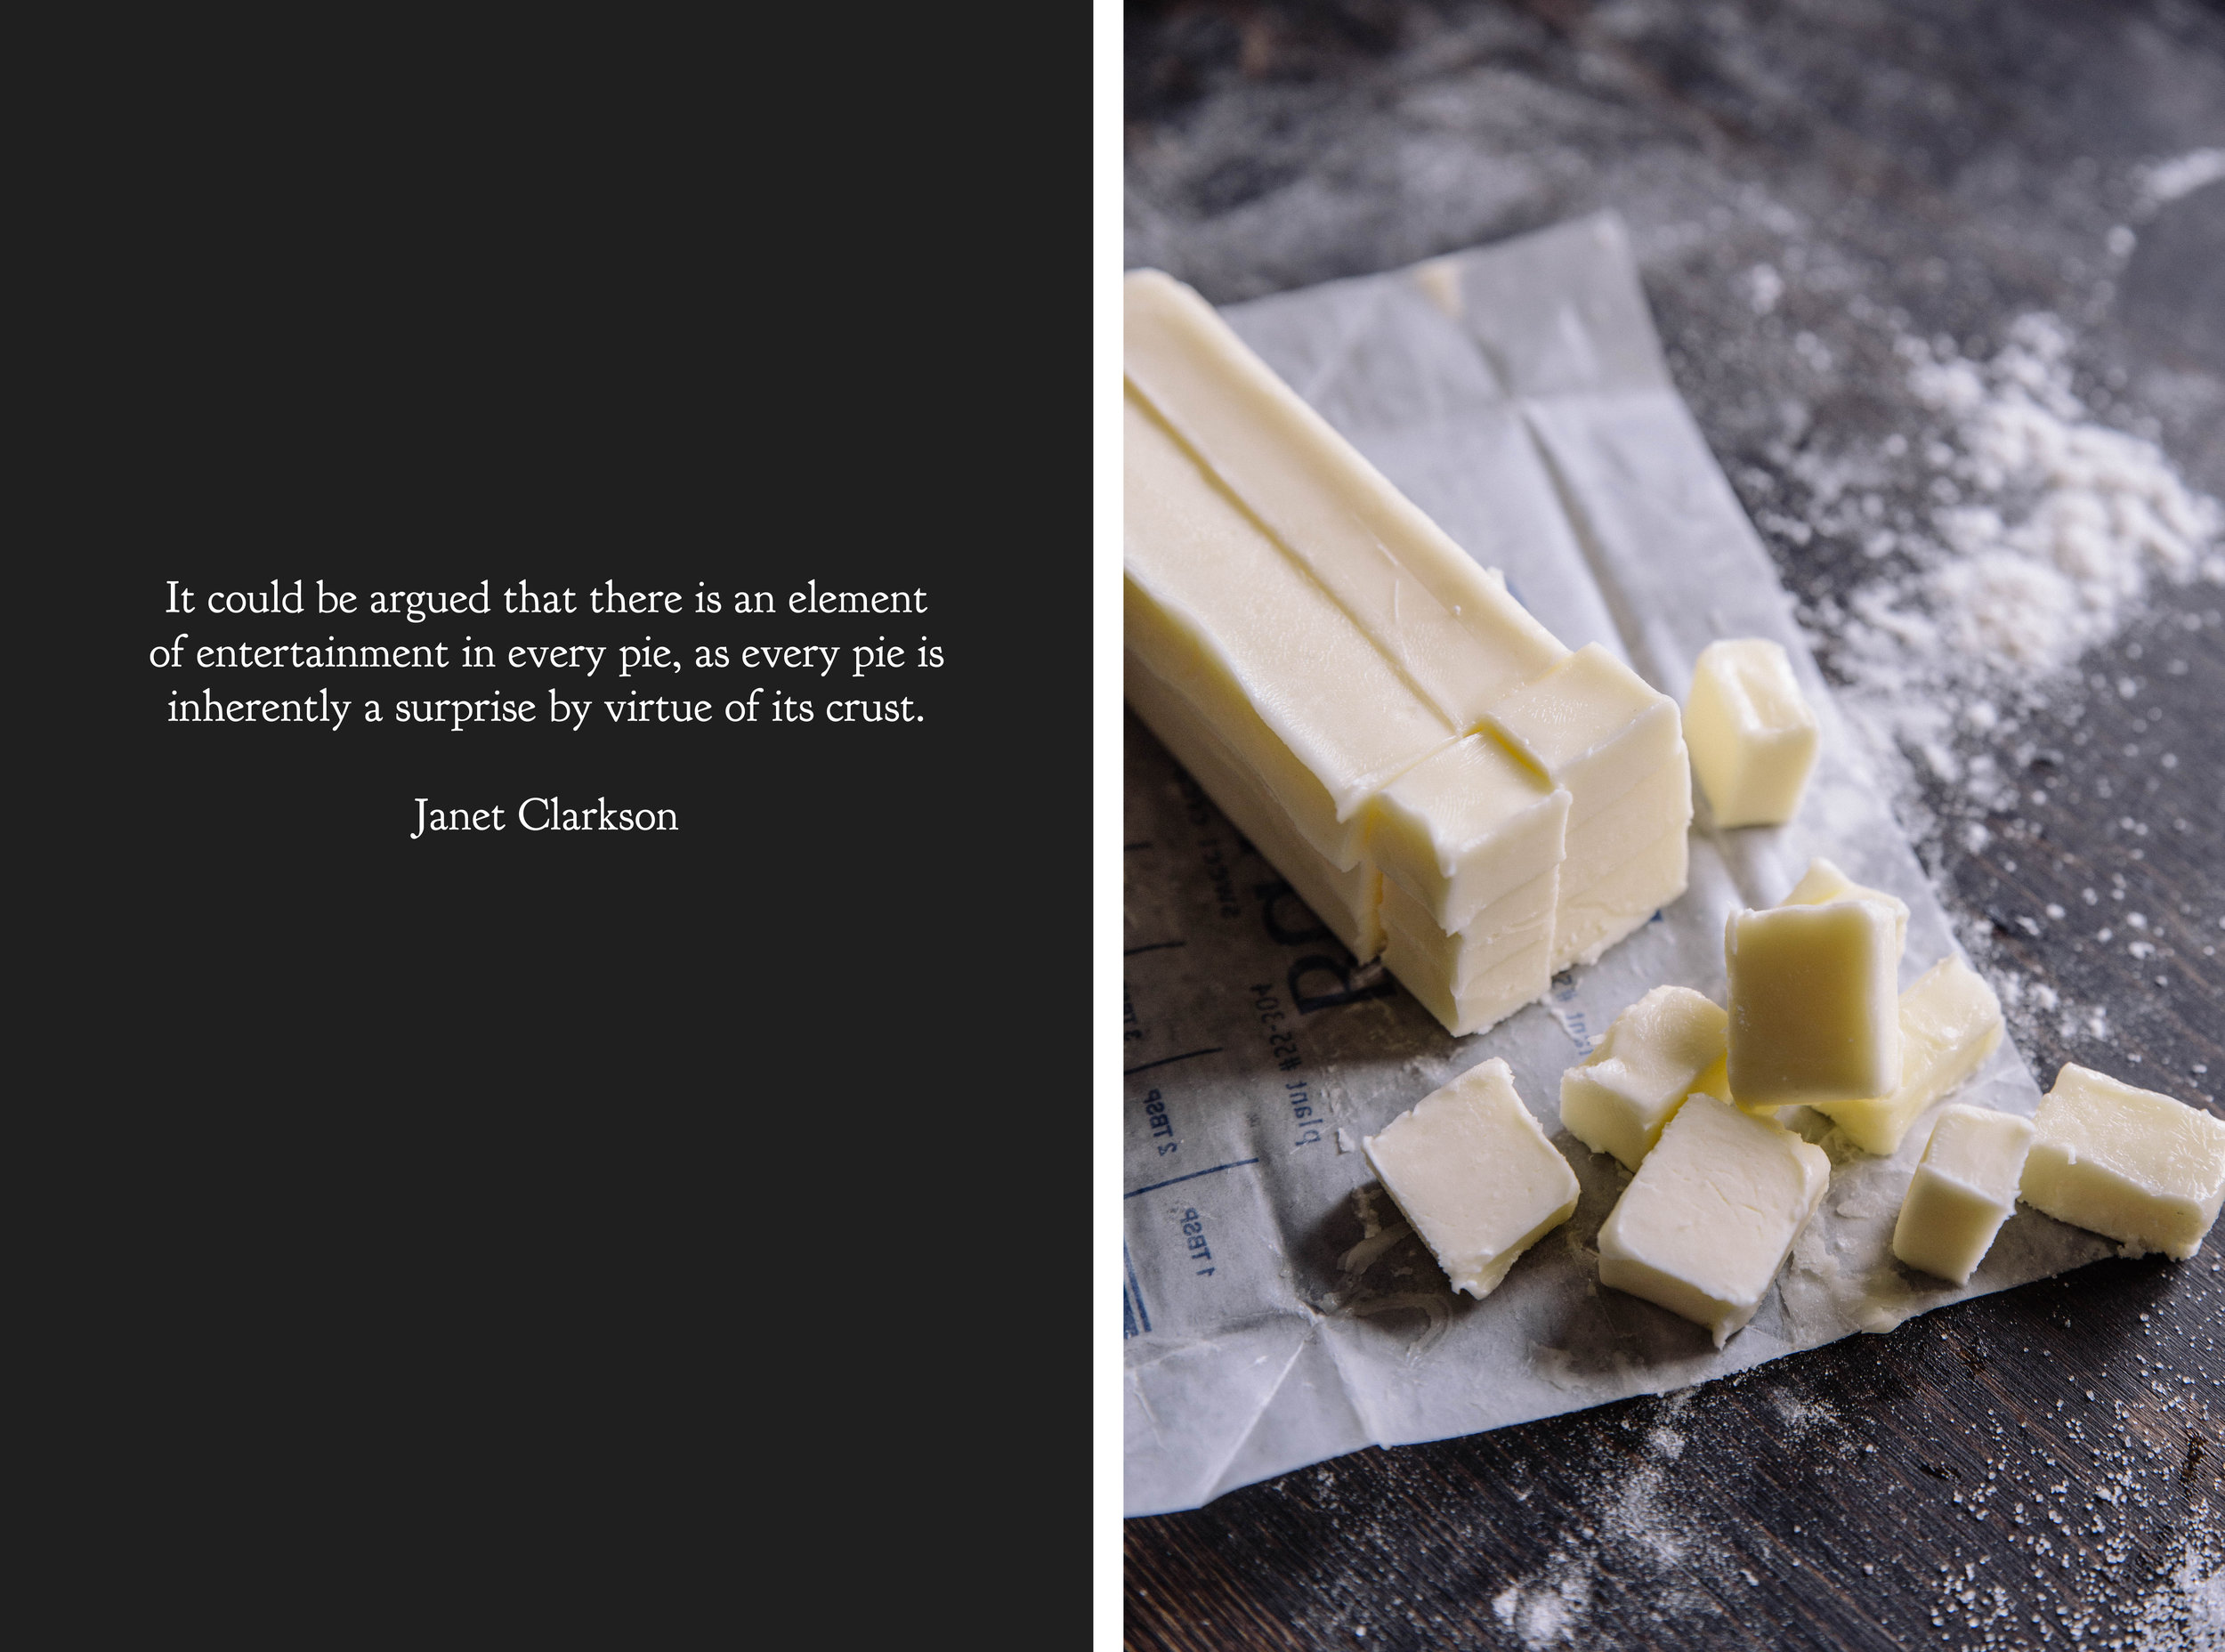
Pie dough starts with only a few simple ingredients: flour, butter, salt, and (sometimes) sugar. The method in which these ingredients are combined makes all the difference. I prefer to do most of the work by hand because it allows for greater control over the size of the butter and, ultimately, the final product. While it is possible to make pie dough using mixers or food processors, I find the final product to be inferior. For years I used appliances to do the bulk of the work. In retrospect, I believe it was this decision that caused most of my dough problems.
Once I took the dough into my own hands, the dough came together effortlessly and it was simple to roll out and shape.
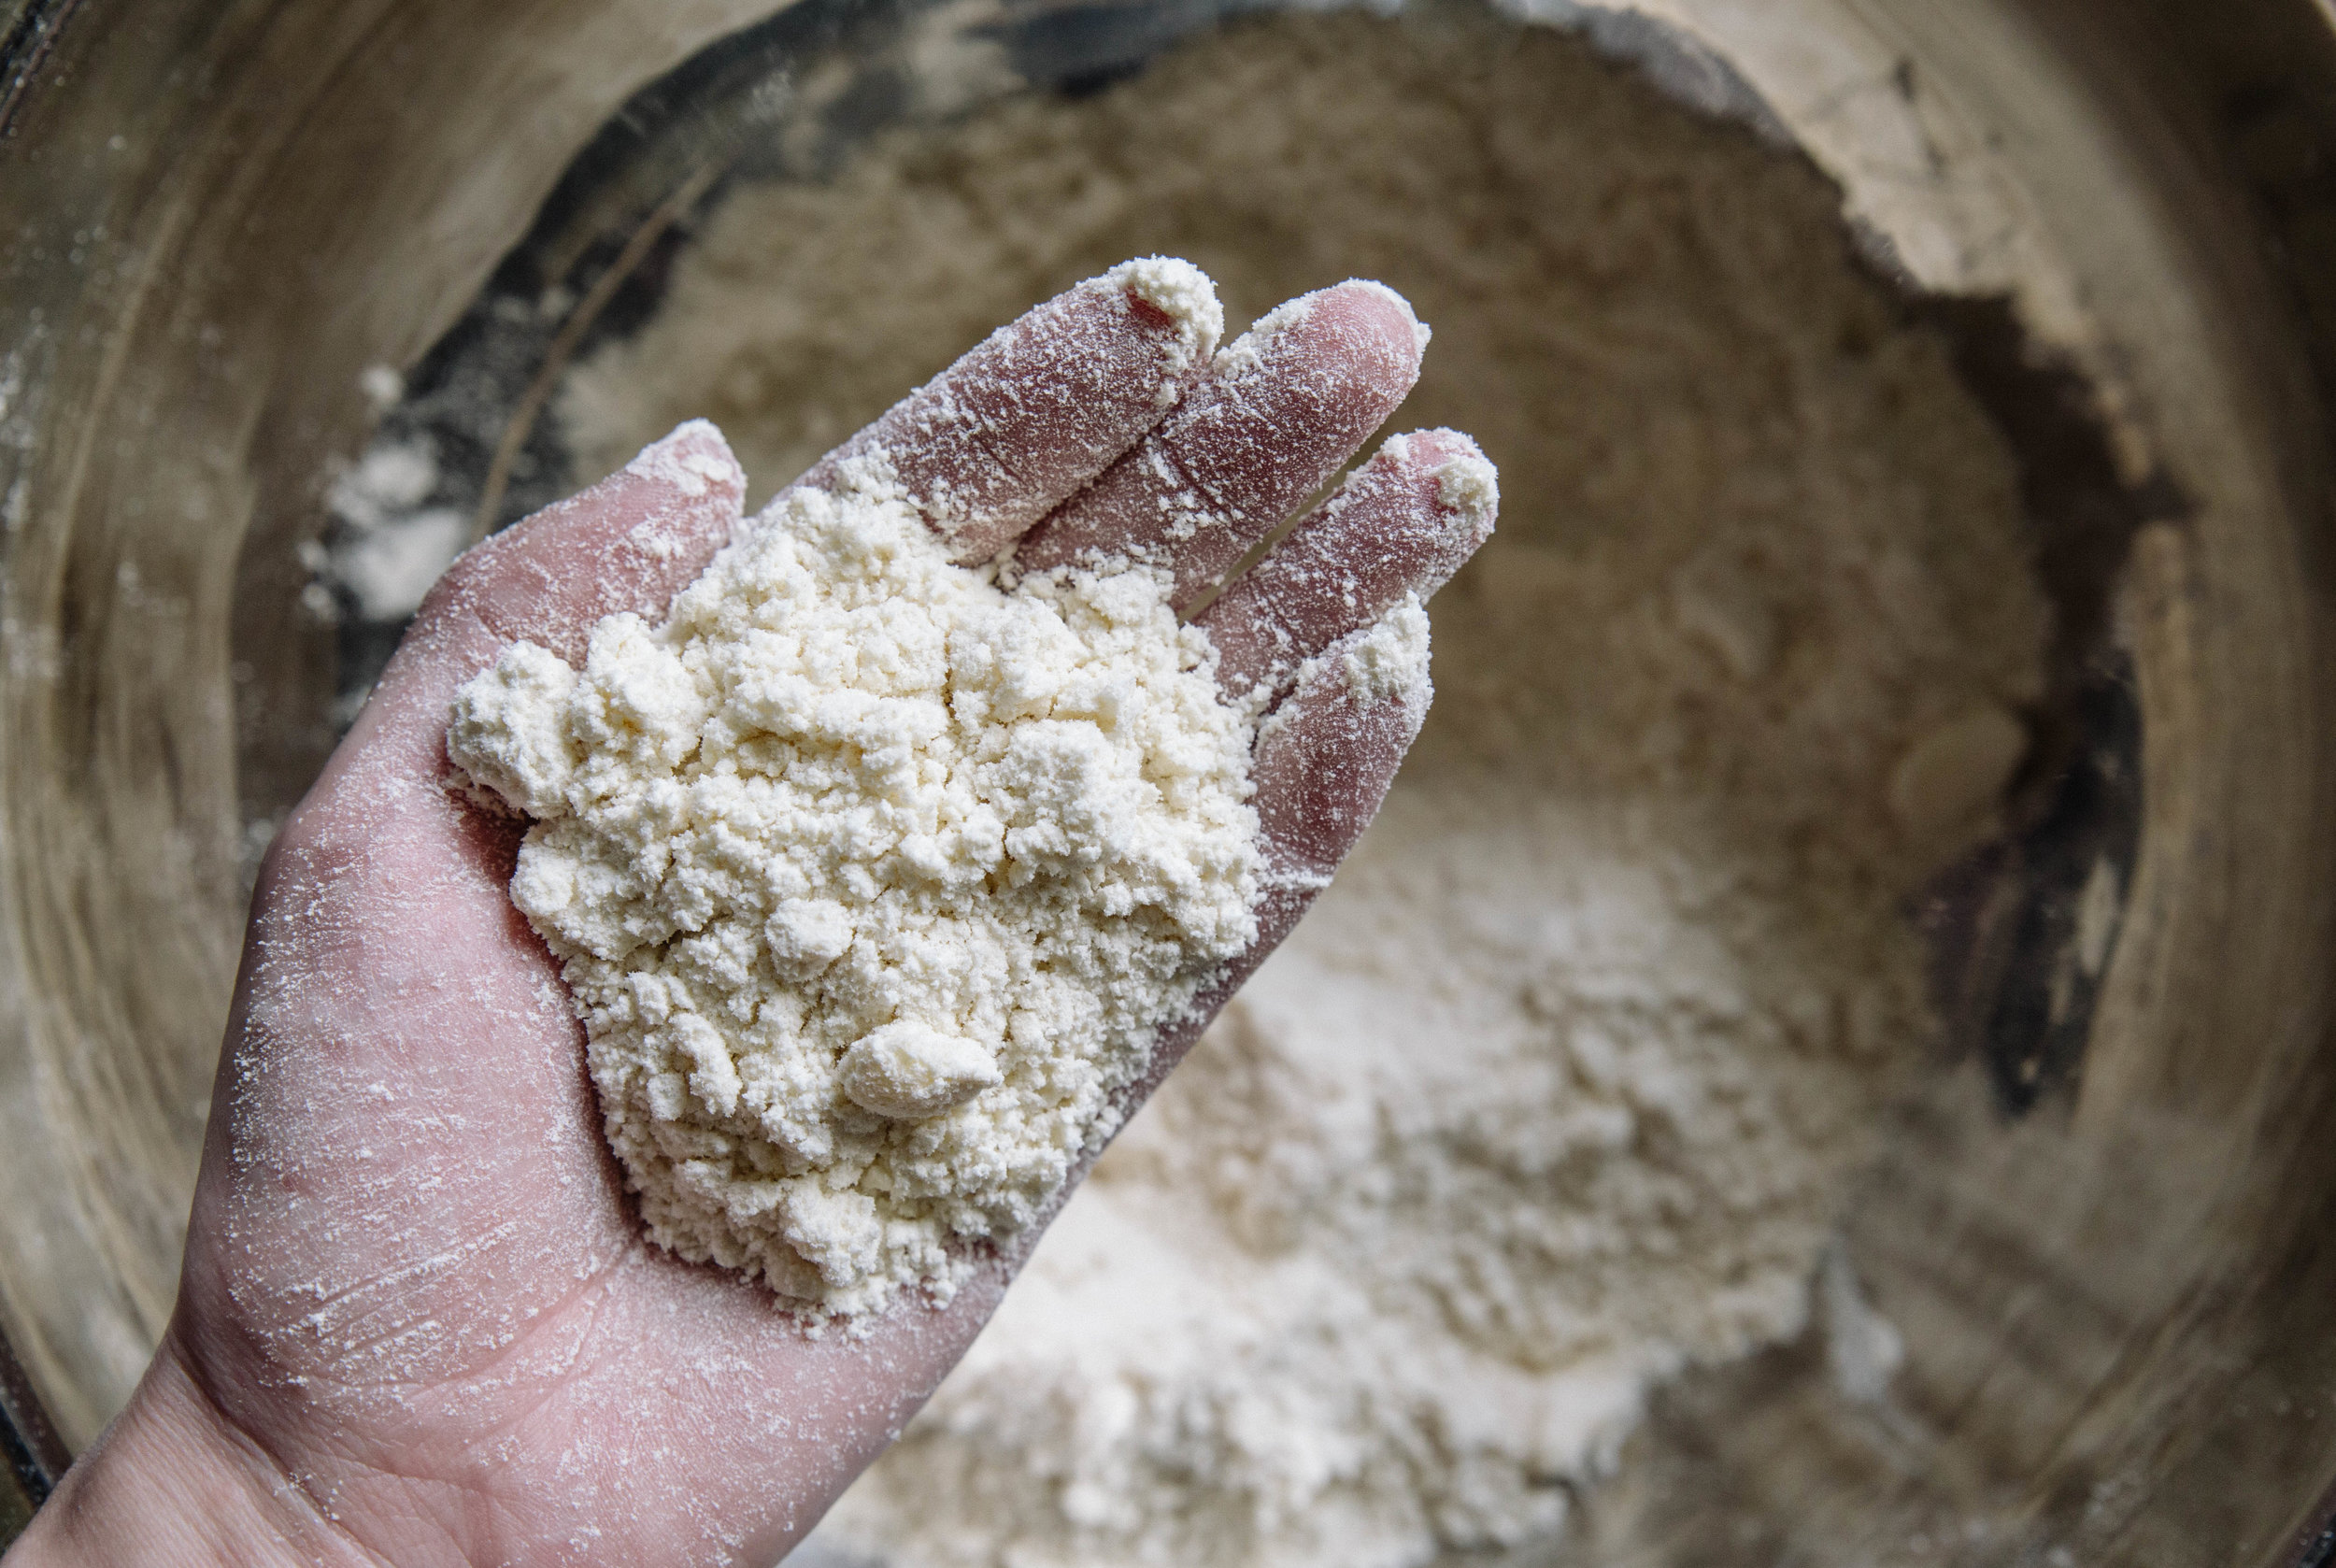
To start, whisk together the dry ingredients. Take half of the butter—which must be cold—and cube it with a knife. Add the butter to the dry ingredients and rub it between your fingers until the dough resembles a coarse sand, shown above. This process usually takes a few minutes

Next, take the second half of the cold butter, cube it, and rub it into the flour with your fingers. This time leave the butter in larger pieces. The pieces should be larger than you think is reasonable—it is perfectly acceptable for many of the pieces of butter to be as large as your thumbnail. The final size of the butter pieces is shown above for reference.
The first addition of butter is used to hold the dough together; the second addition of butter, when left in larger pieces, is used to create the classic flakiness of a pie crust.

Next, ice cold water is added to the dough to bring it together. I usually fill a measuring cup with water, throw in a couple ice cubes, and add water by the tablespoon to the dough. For a full batch, start with four tablespoons of water and mix the dough until it is uniform. I prefer to use a dough whisk, but a large whisk or spatula will also work well. From here, it is important to add the water slowly so you can see how each tablespoon of water affects the consistency of the dough. Unless you have added too much flour, you should not need to add more than 8 tablespoons of water.
In the photograph above, I added 5 tablespoons of water to the dough, and this resulted in the perfect amount of water for this batch. The dough will appear drier than you think is reasonable. However, if you squeeze it between your fingers, it should hold firmly together.
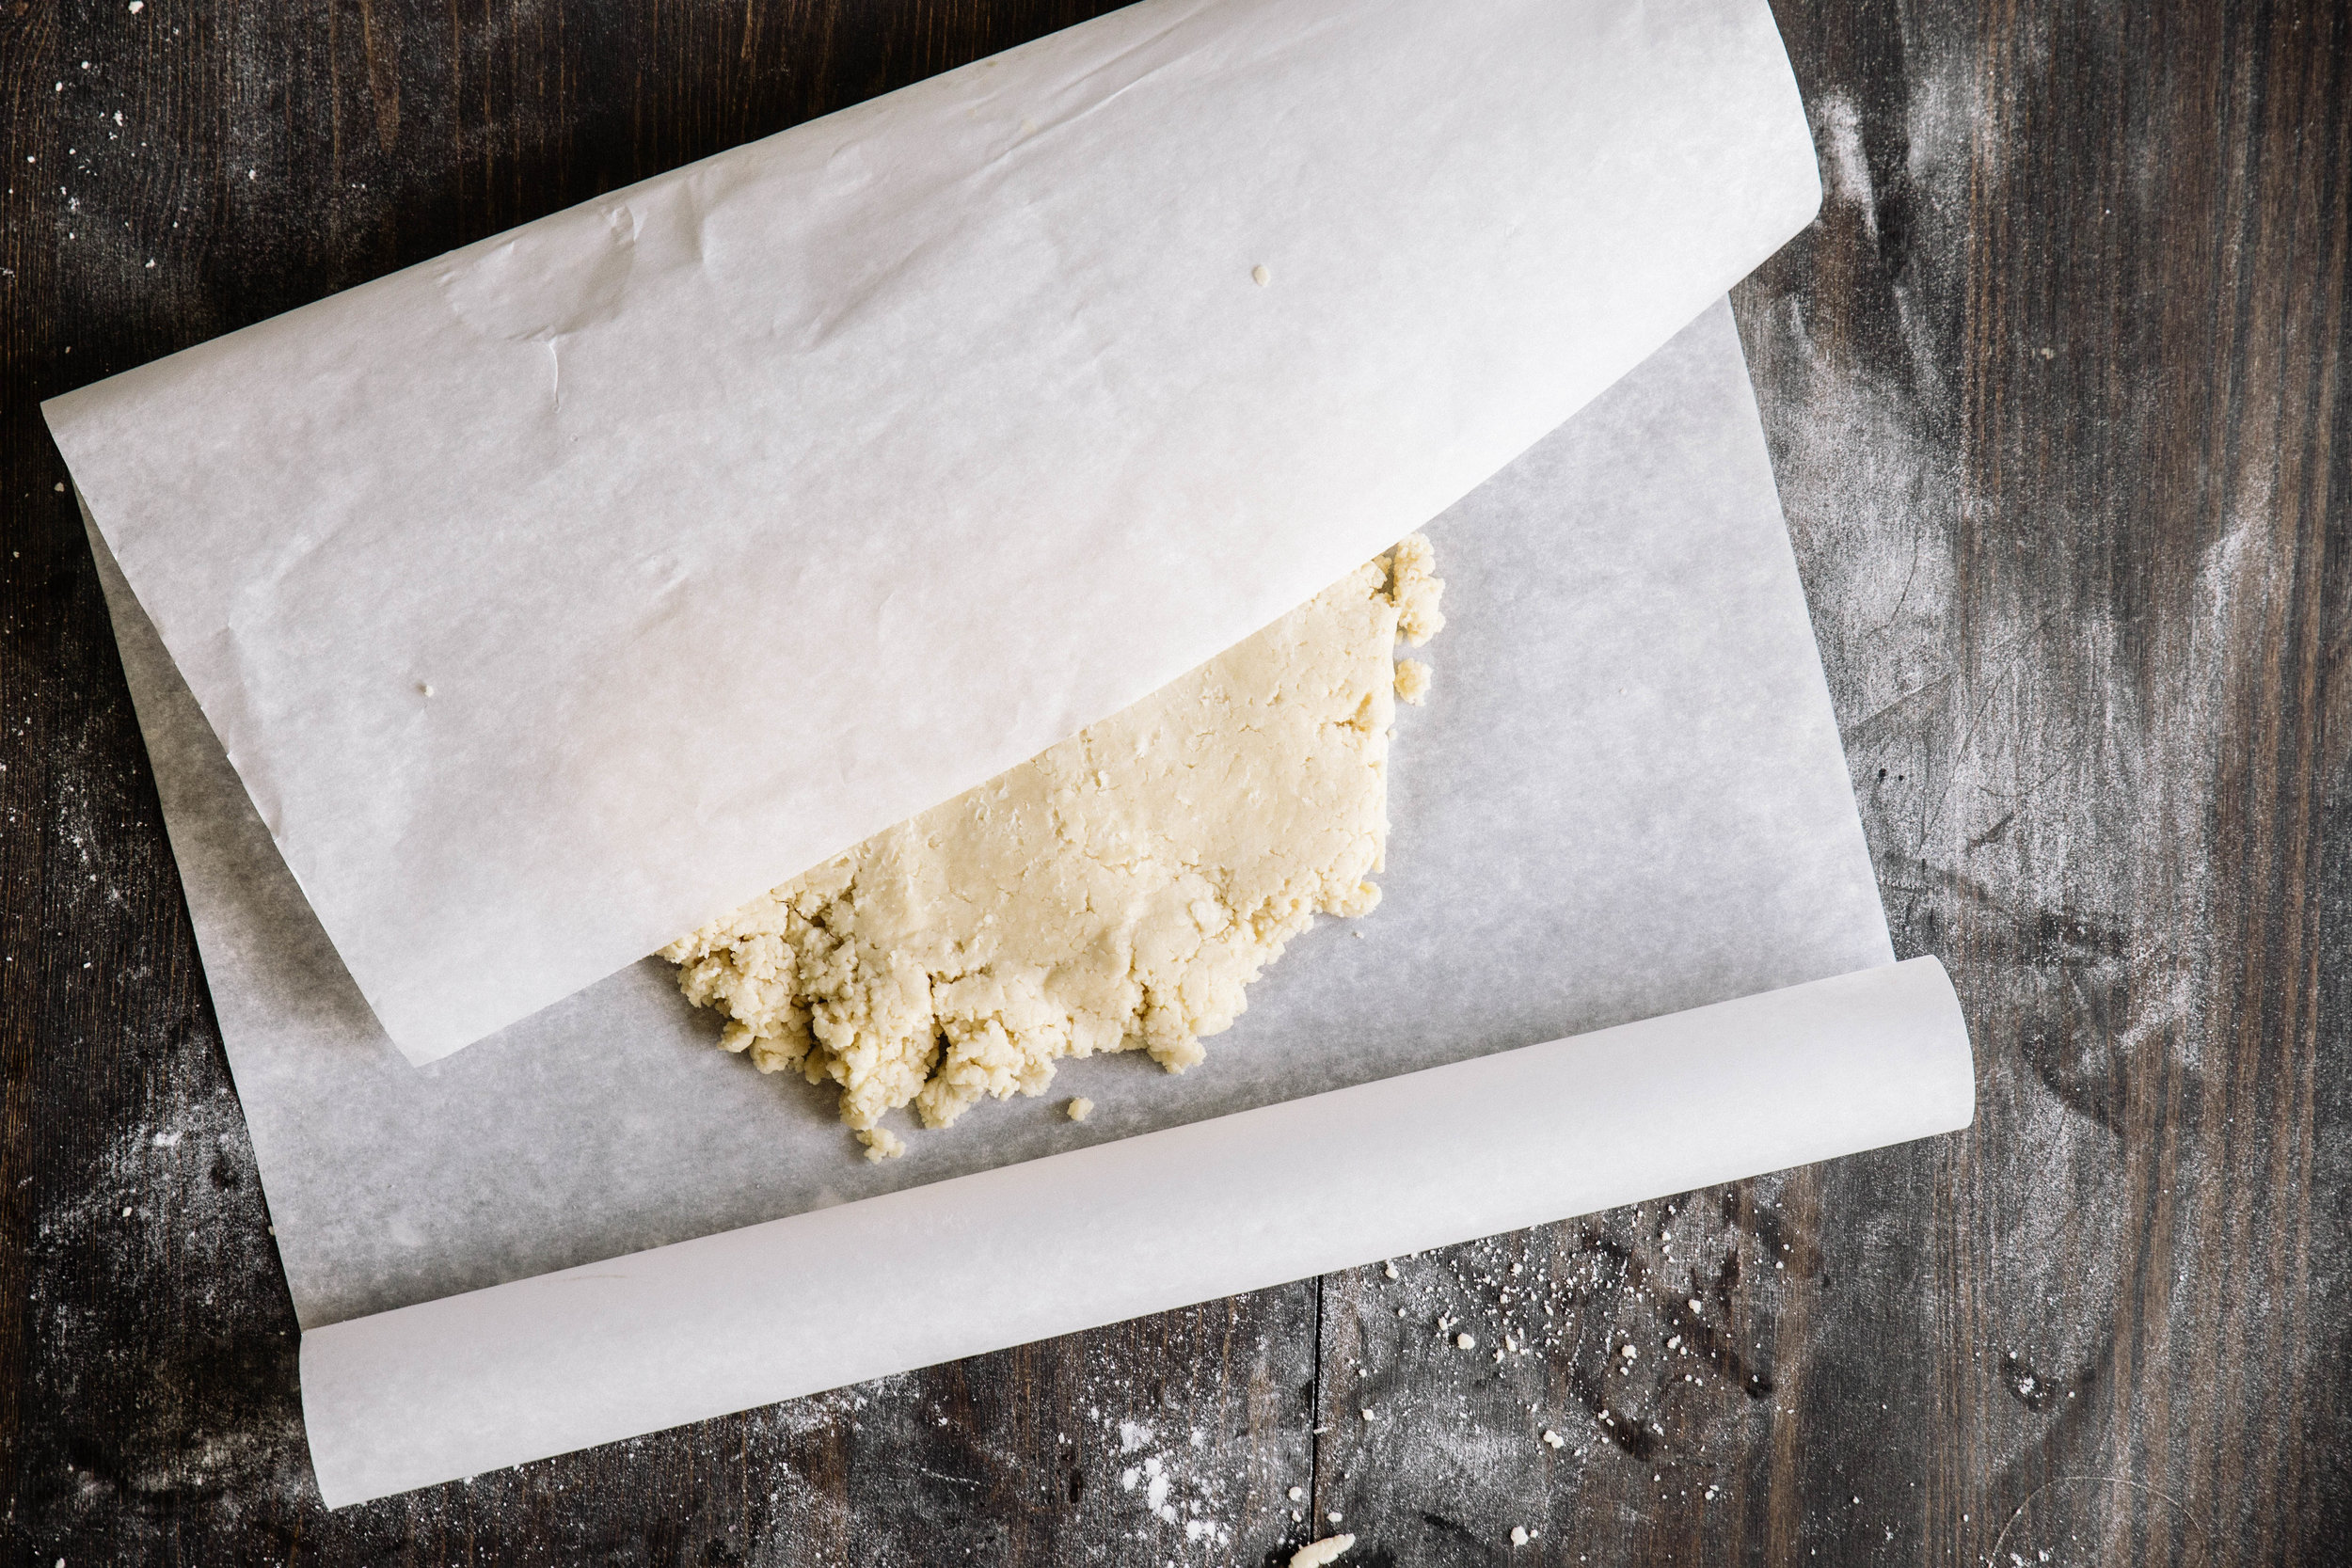
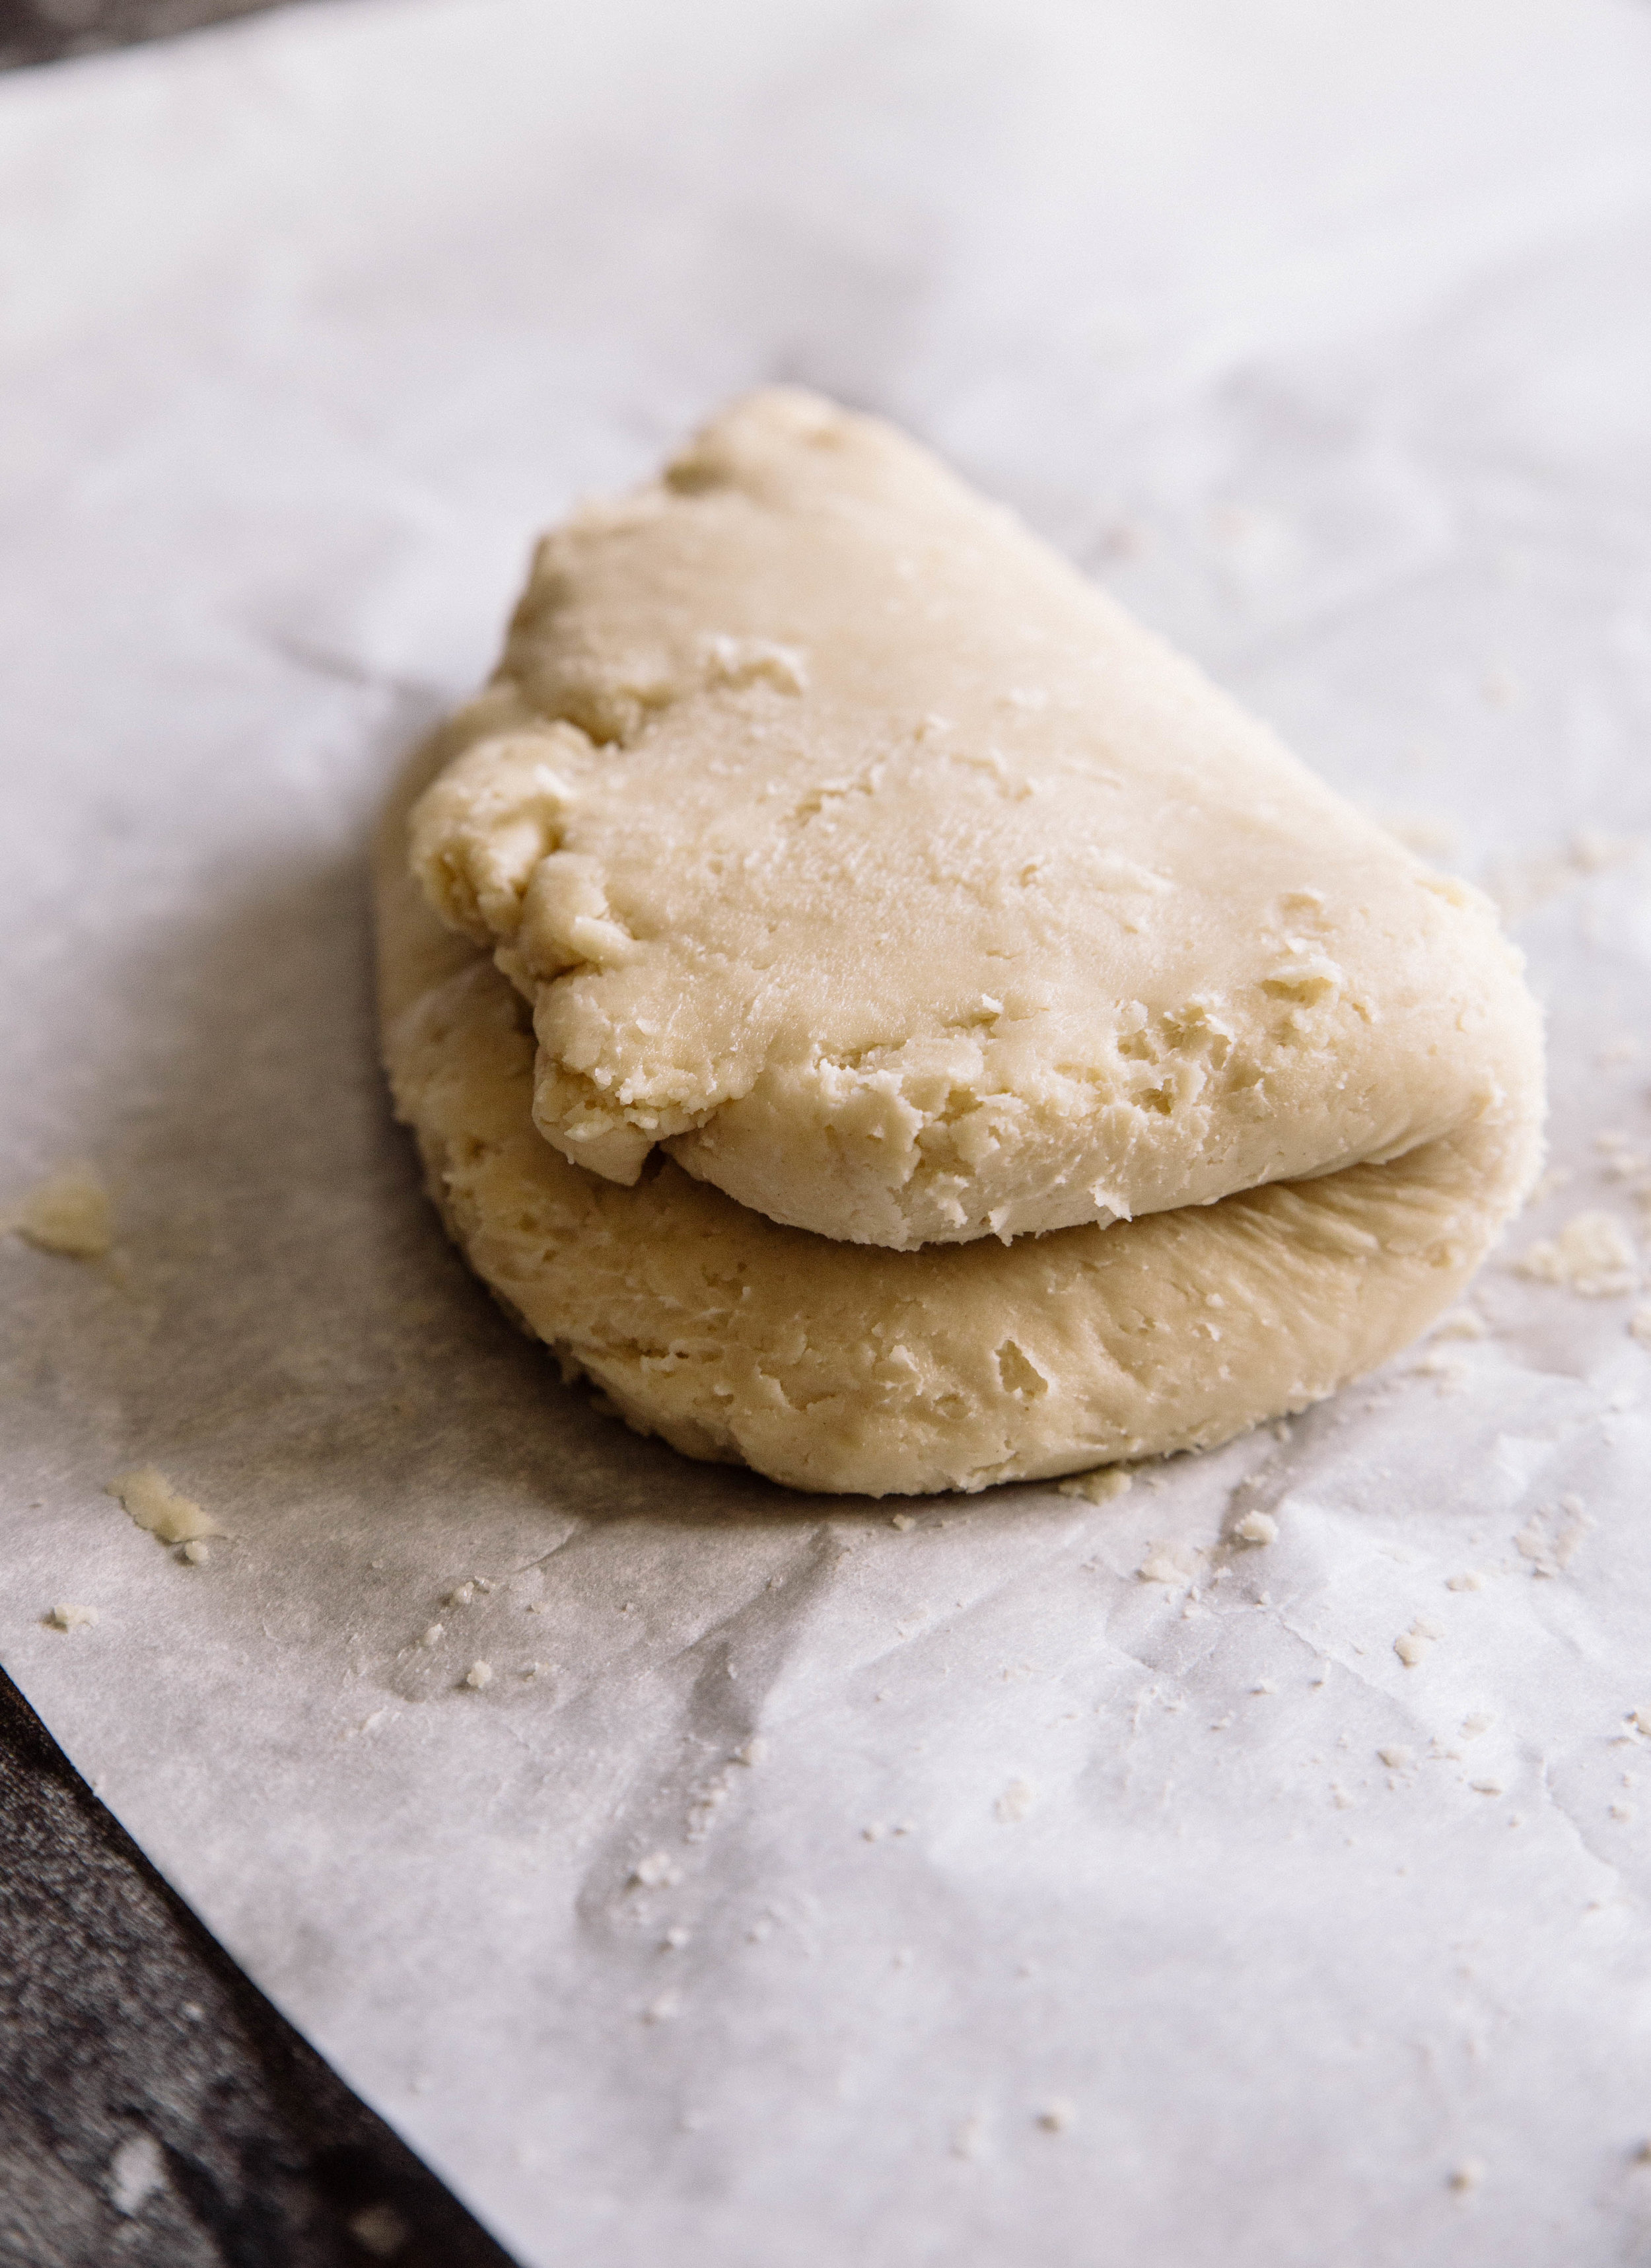
Place the pie dough onto a sheet of parchment paper. The dough will not stick to the paper, which makes it easy to shape. Using the paper as a tool, press down on the dough until it forms a disk. Most of the dough will come together easily, but you may have drier pieces around the edges. To bring these into the mix, fold the dough in half using the parchment paper. Press down on the disk and fold again in an alternating direction. Repeat until the dough is uniform (this typically occurs between 5-10 folds).
As a bonus, the folding technique adds more of the coveted flaky layers. The end of this stage is shown below.
Shape the dough into a disk and wrap it with plastic wrap. Chill in the refrigerator for at least a half hour (but no longer than 2-3 days). Chilling the dough is important because it evenly distributes the moisture throughout the dough, resulting in a product that is easier to roll out and shape.
When you are ready to form the crust, sprinkle a light amount of flour over the same parchment paper. Cut the dough in half (50/50 ratio) if creating a double crust pie or two single pie crusts. If creating a lattice pattern, cut dough in a 60/40 ratio since less dough is needed to cover the top. This ratio will provide extra dough for the bottom to make it easier to use and shape.
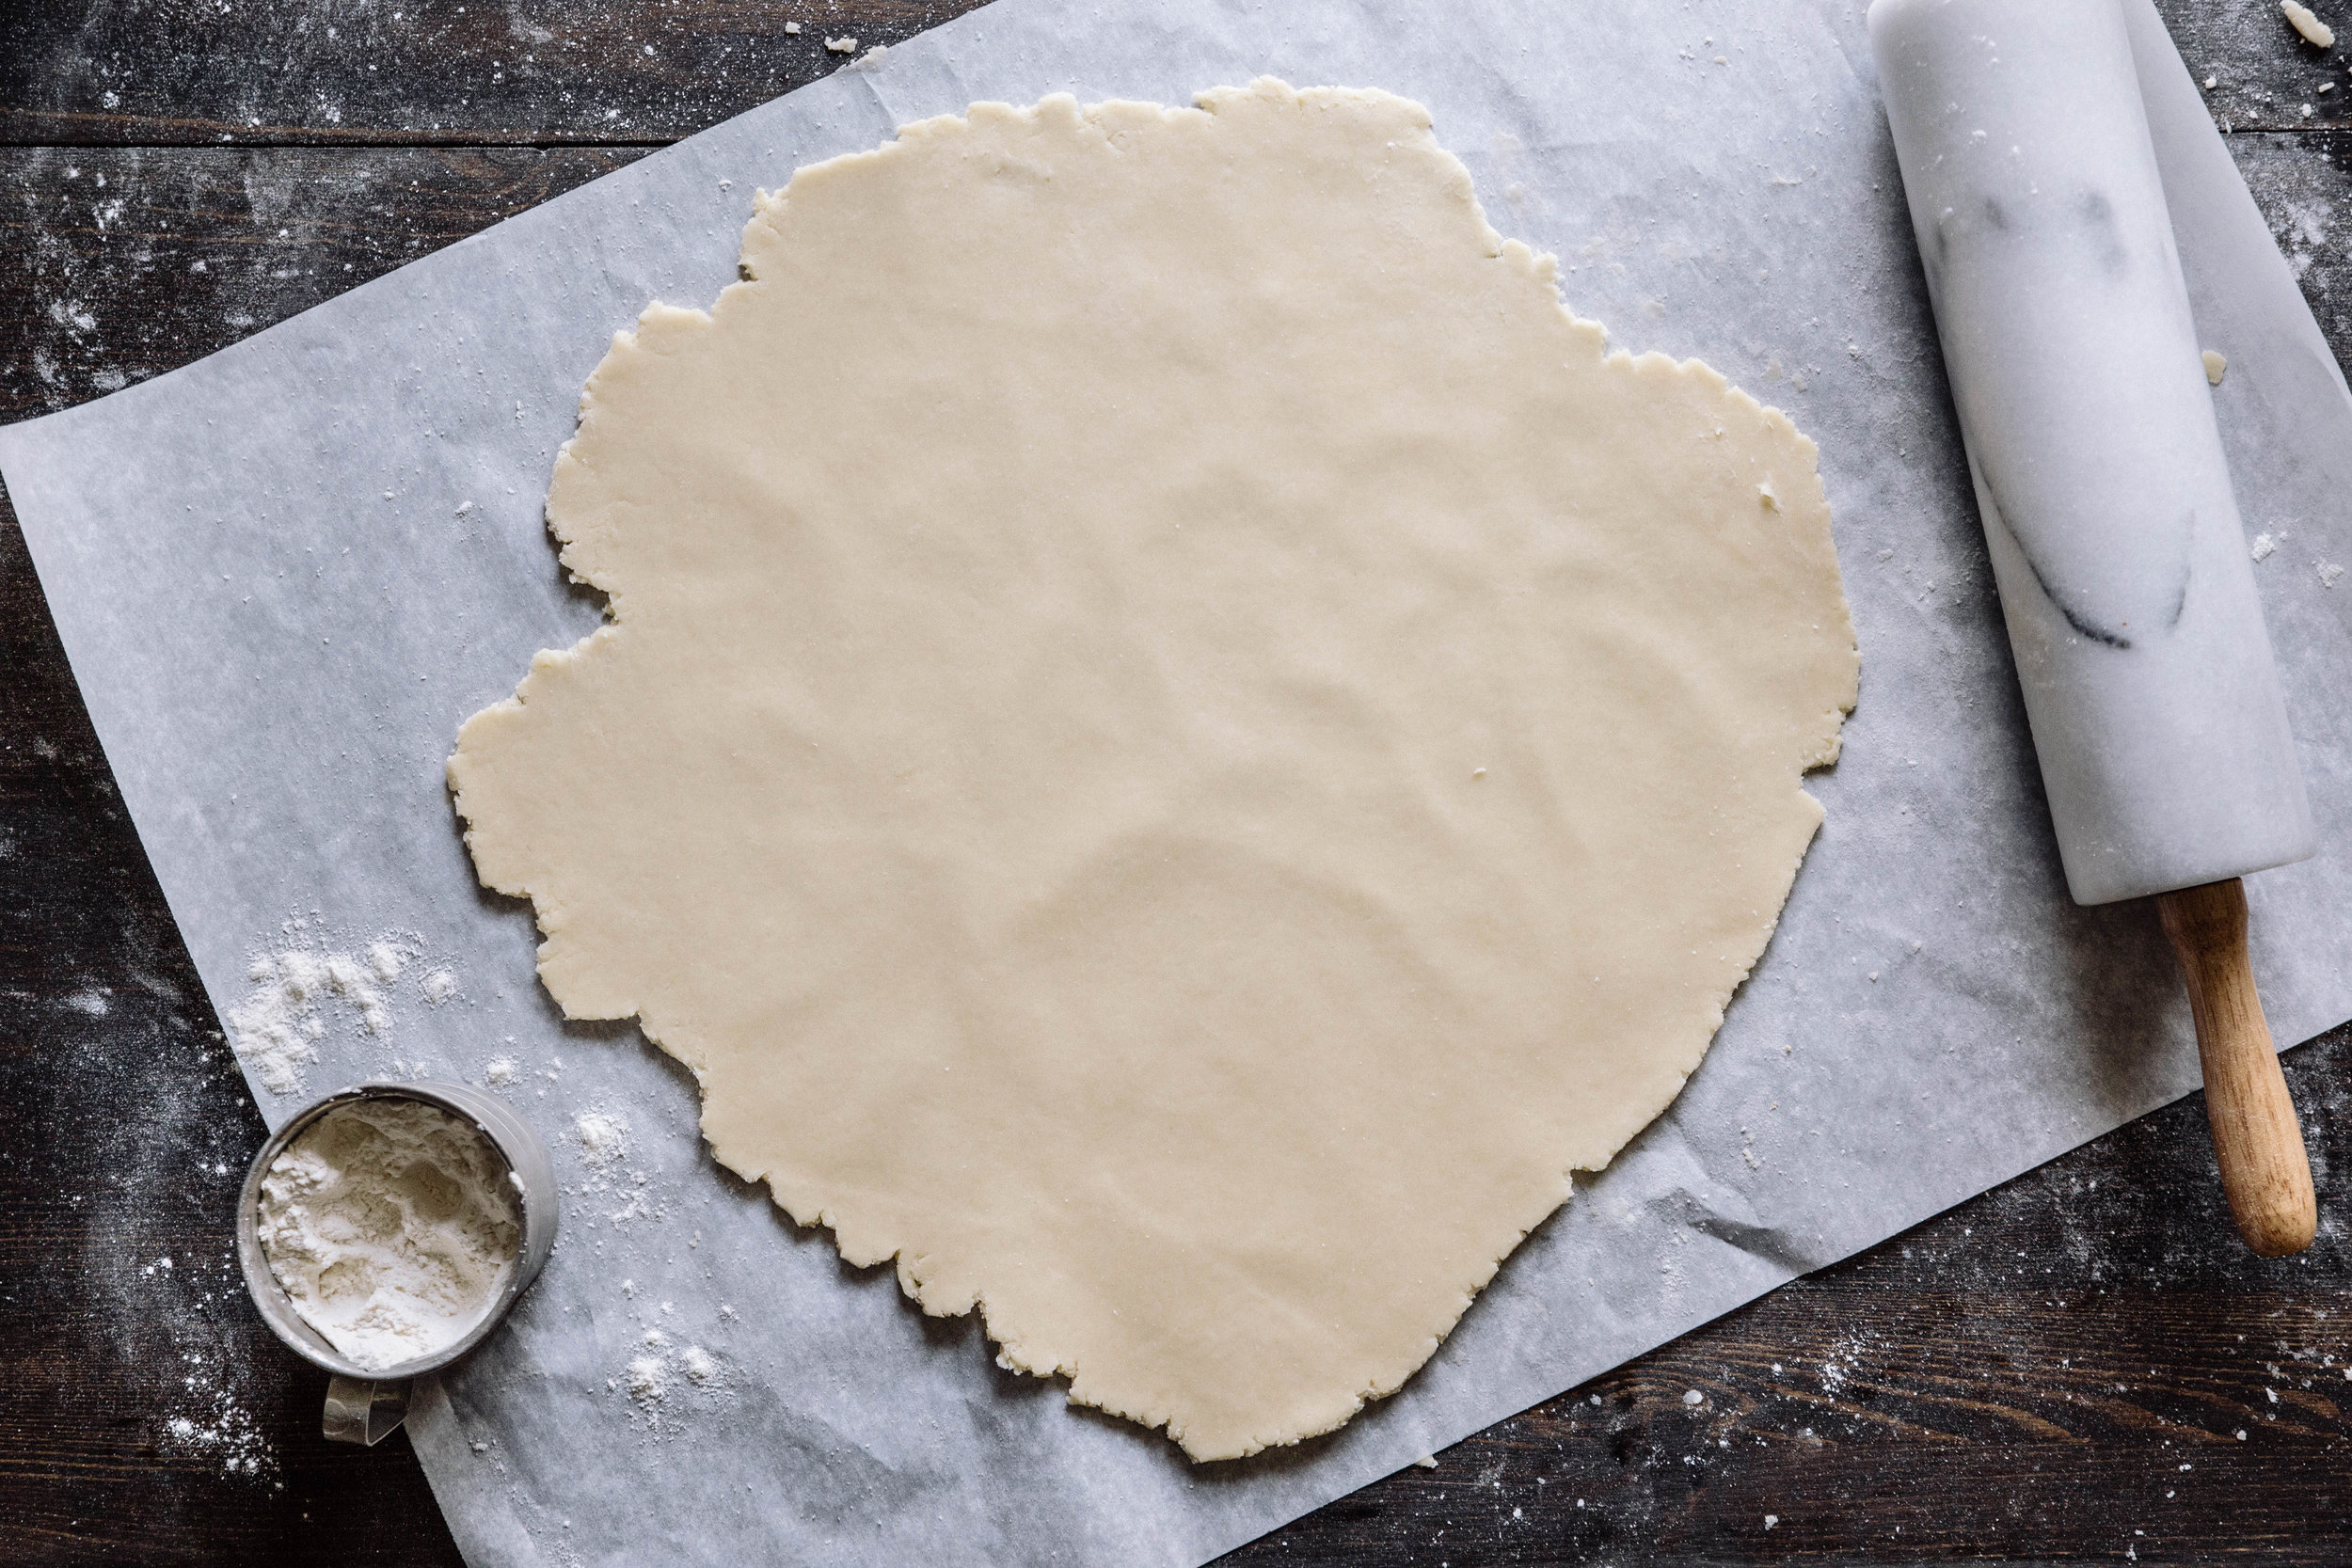
Sprinkle a light amount of flour over the pie dough and roll out using a rolling pin. The parchment paper is a nonstick surface which allows you to move the dough around as you roll it out, preventing it from sticking to the paper. Roll out in one direction, physically move the dough (not the paper), and roll out from another angle to create a circular shape. Let the dough come to you instead of twisting yourself to roll the dough—this will help you keep the dough an even thickness. Using the parchment paper to help you roll out the dough makes it easier to move and transfer the dough when the moment comes.
The dough should be approximately 14" round for a bottom crust in a 9" pie pan. The dough should be between 1/8" and 1/4" thick. Do not roll it thicker or it will not bake evenly; likewise, do not roll it thinner or it will be prone to ripping or tearing.

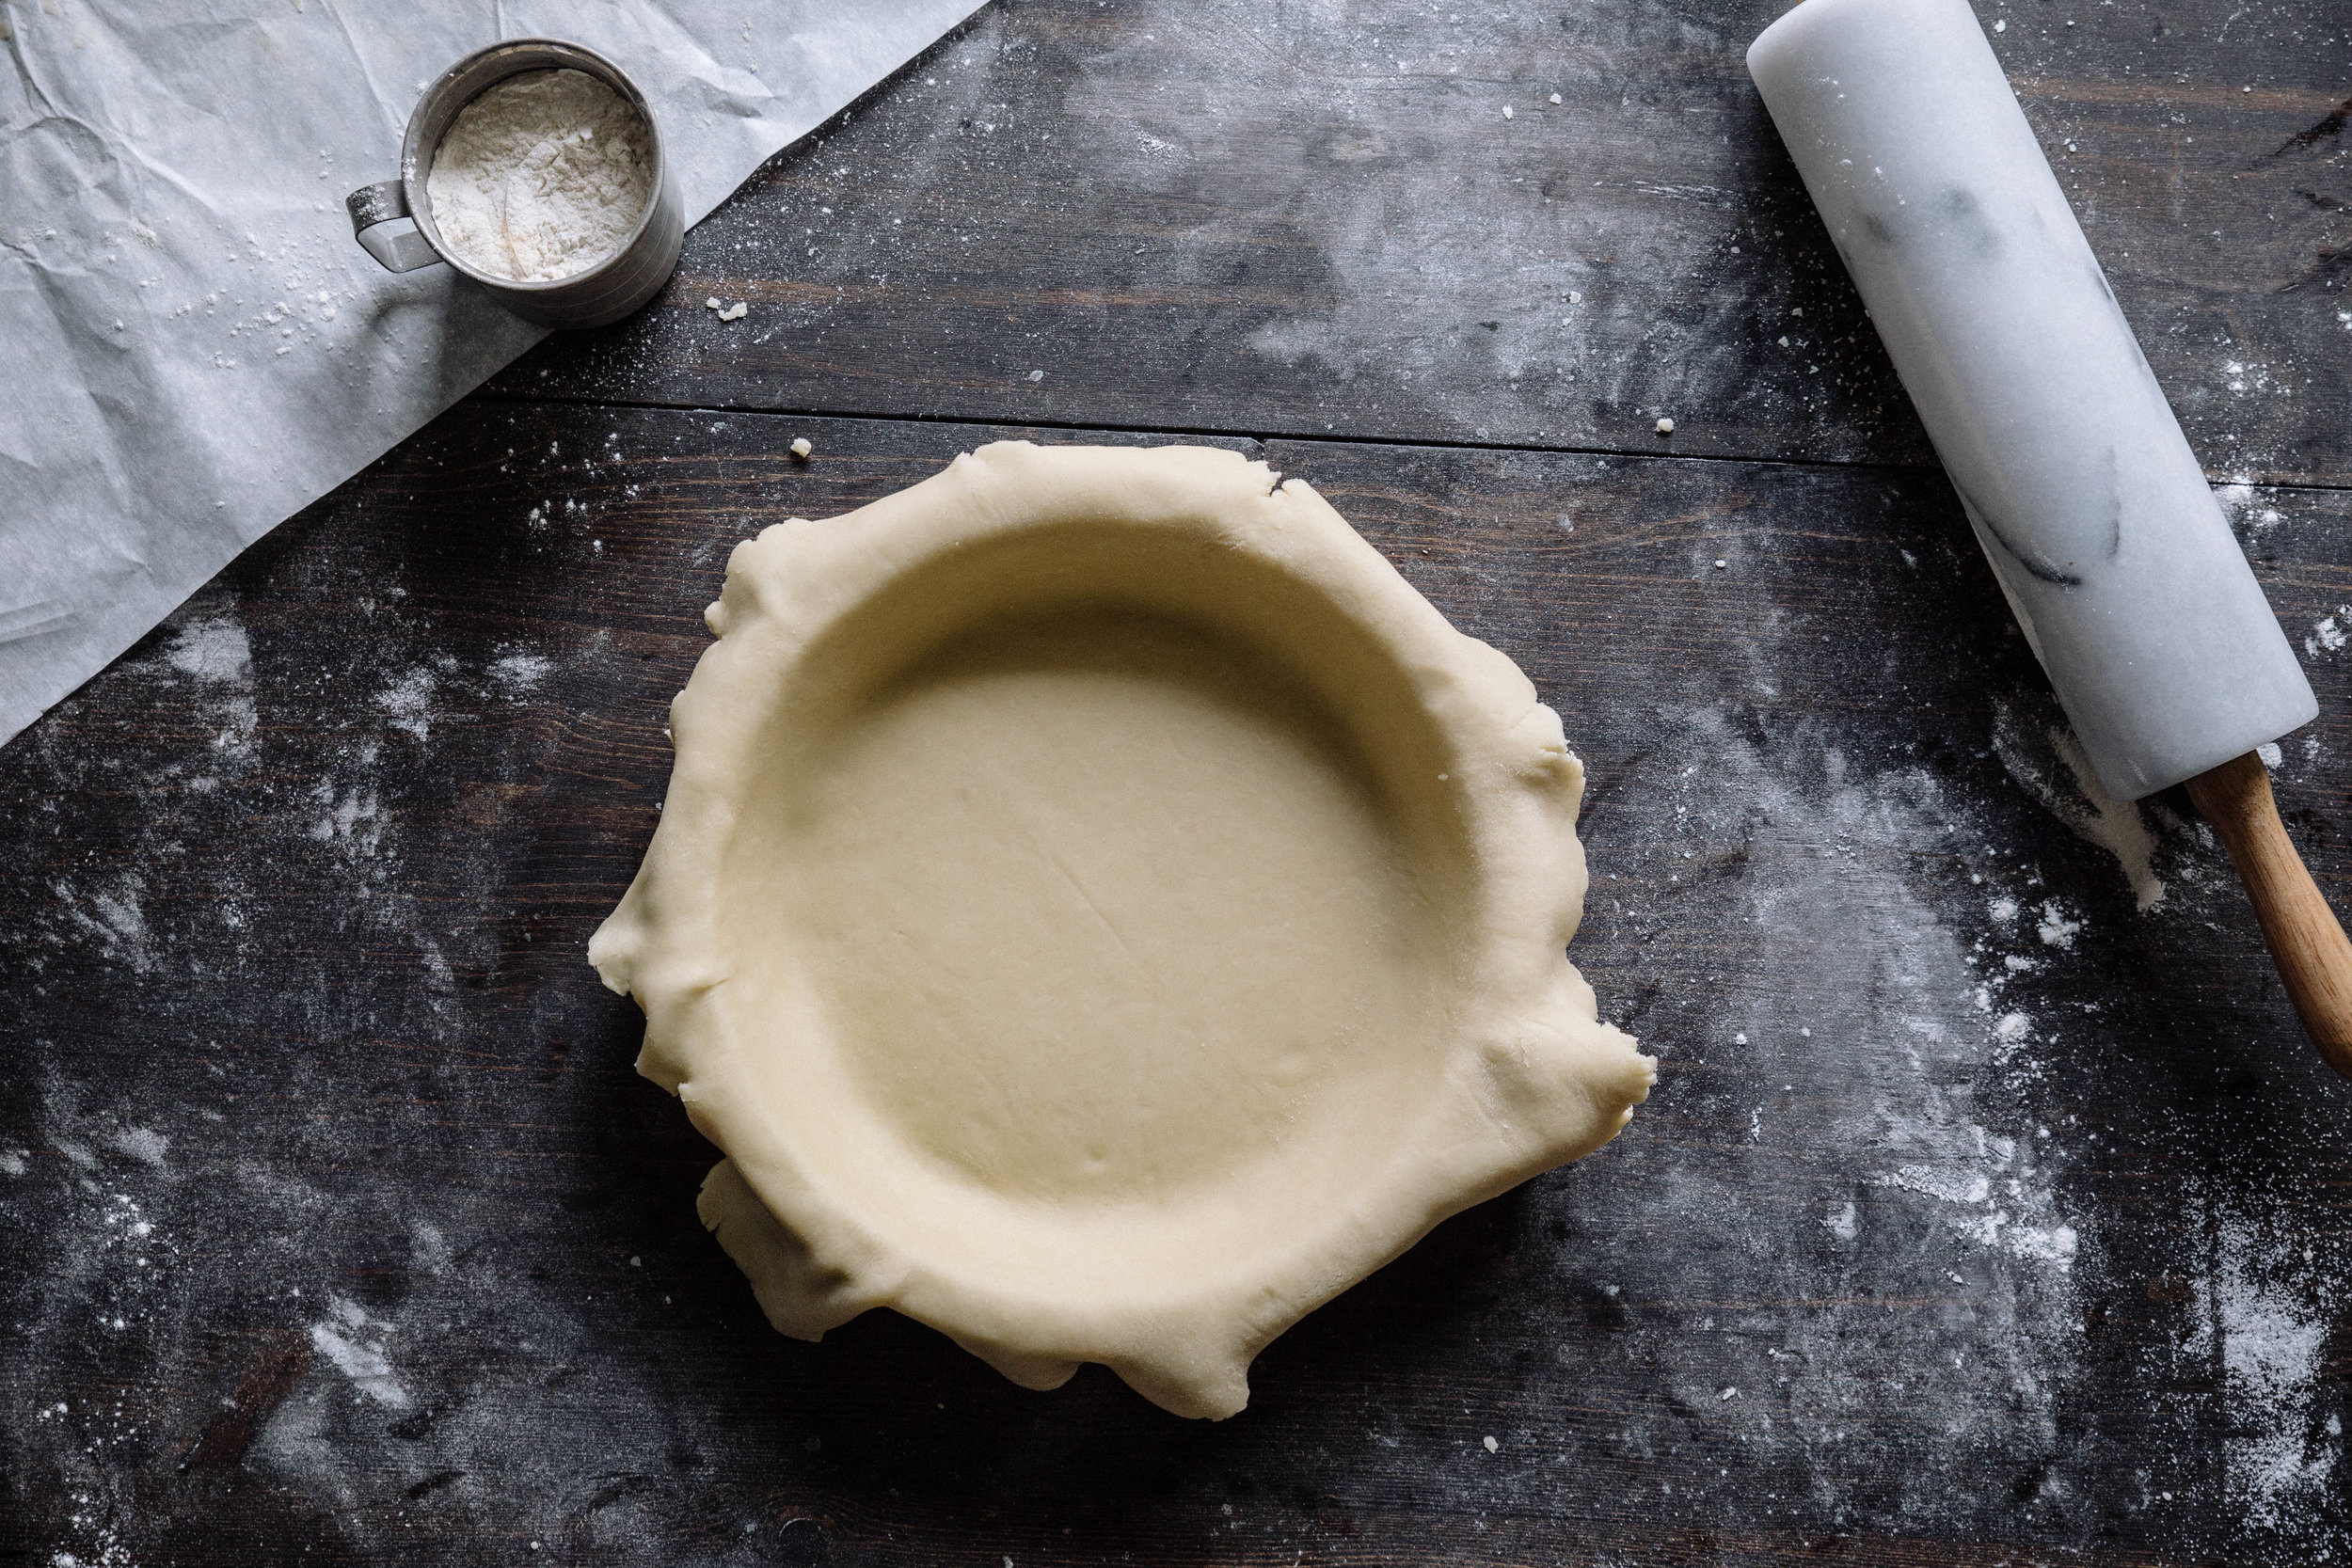
I often roll the edge of the dough over my forearm and transfer it to the pie pan. However, you can also roll the dough over the rolling pin to transfer or simply flip over the parchment paper onto the pie pan. The dough holds together well enough that it can be moved around until it is centered. Typically, the dough is trimmed so that there is a 1" overhang over the edge of the pan. The extra dough can be used to patch any holes or fill in areas around the edge.
Depending on the recipe, the techniques used to finish the pie will vary from this point. I prefer to use an all-butter pie crust for the flavor, but if you are using shortening, lard, or a combination of fats, the technique for the perfect pie crust is roughly the same.
Keep an eye out for the berry pie recipe below—I'll share it in time for Memorial Day weekend!
Happy Baking!

Note: To create a single 9" pie crust, cut the amount of each ingredient in half. Alternatively, pie dough can be kept in the freezer for up to 3 months when wrapped well. If you only need a single crust, consider storing the other half to use at a later date.
One Year Ago: Chocolate Blackberry Cupcakes
Two Years Ago: Whole Wheat Almond Waffles and Sparkling Pineapple Rum Cocktail
Three Years Ago: Honey Wheat Cake with Cream Cheese Icing, Blueberry Cheesecake Ice Cream, Strawberry Cream Cheese Pop Tarts, and Rhubarb Custard Tart
Four Years Ago: Chocolate Filled Buns, Malted Chocolate Chip Cookies, Minted Lime Licuado, and Chocolate Raspberry Pots de Creme
Perfect (All-Butter) Pie Crust
Yields 1 double crust or 2 single 9" pie crusts
2 1/2 cups (315 grams) all-purpose flour
1/2 teaspoon salt
1 tablespoon granulated sugar (omit sugar for savory pies)
1 cup (225 grams) butter, cold and cubed*
4-8 tablespoons ice water
In a large bowl, whisk together the flour, salt, and sugar. Add half of the cold, cubed butter and rub the butter and flour between your fingers until it resembles coarse sand. Add the second half the cubed butter and rub in into the flour, but leave it in larger pieces (approximately the size of your thumbnail). Add four tablespoons of water and mix the dough together until uniform. Gradually add more water, one tablespoon at a time, until the dough holds together when squeezed in your hand.
Place the dough on parchment paper and use the paper to press the dough into a disk. To make the dough uniform, fold the dough in half, using the paper. Press down and fold in the opposite direction. Repeat until the dough appears uniform. Shape into a disk, wrap in plastic wrap, and chill for at least a half hour (or up to 2-3 days).
Cut the dough in half (or a 60/40 ratio if creating a lattice top). On a lightly floured surface, roll out the dough into a 14" round for a 9" pie pan. For a pie, wrap dough lightly around a rolling pin and transfer to the pie pan. Gently press dough into the bottom and sides of the pan. Trim the dough to allow a 1" overhang.
Depending on the recipe you are using, the directions will vary from this point onward.
* Increase salt to 1 teaspoon if using unsalted butter.


