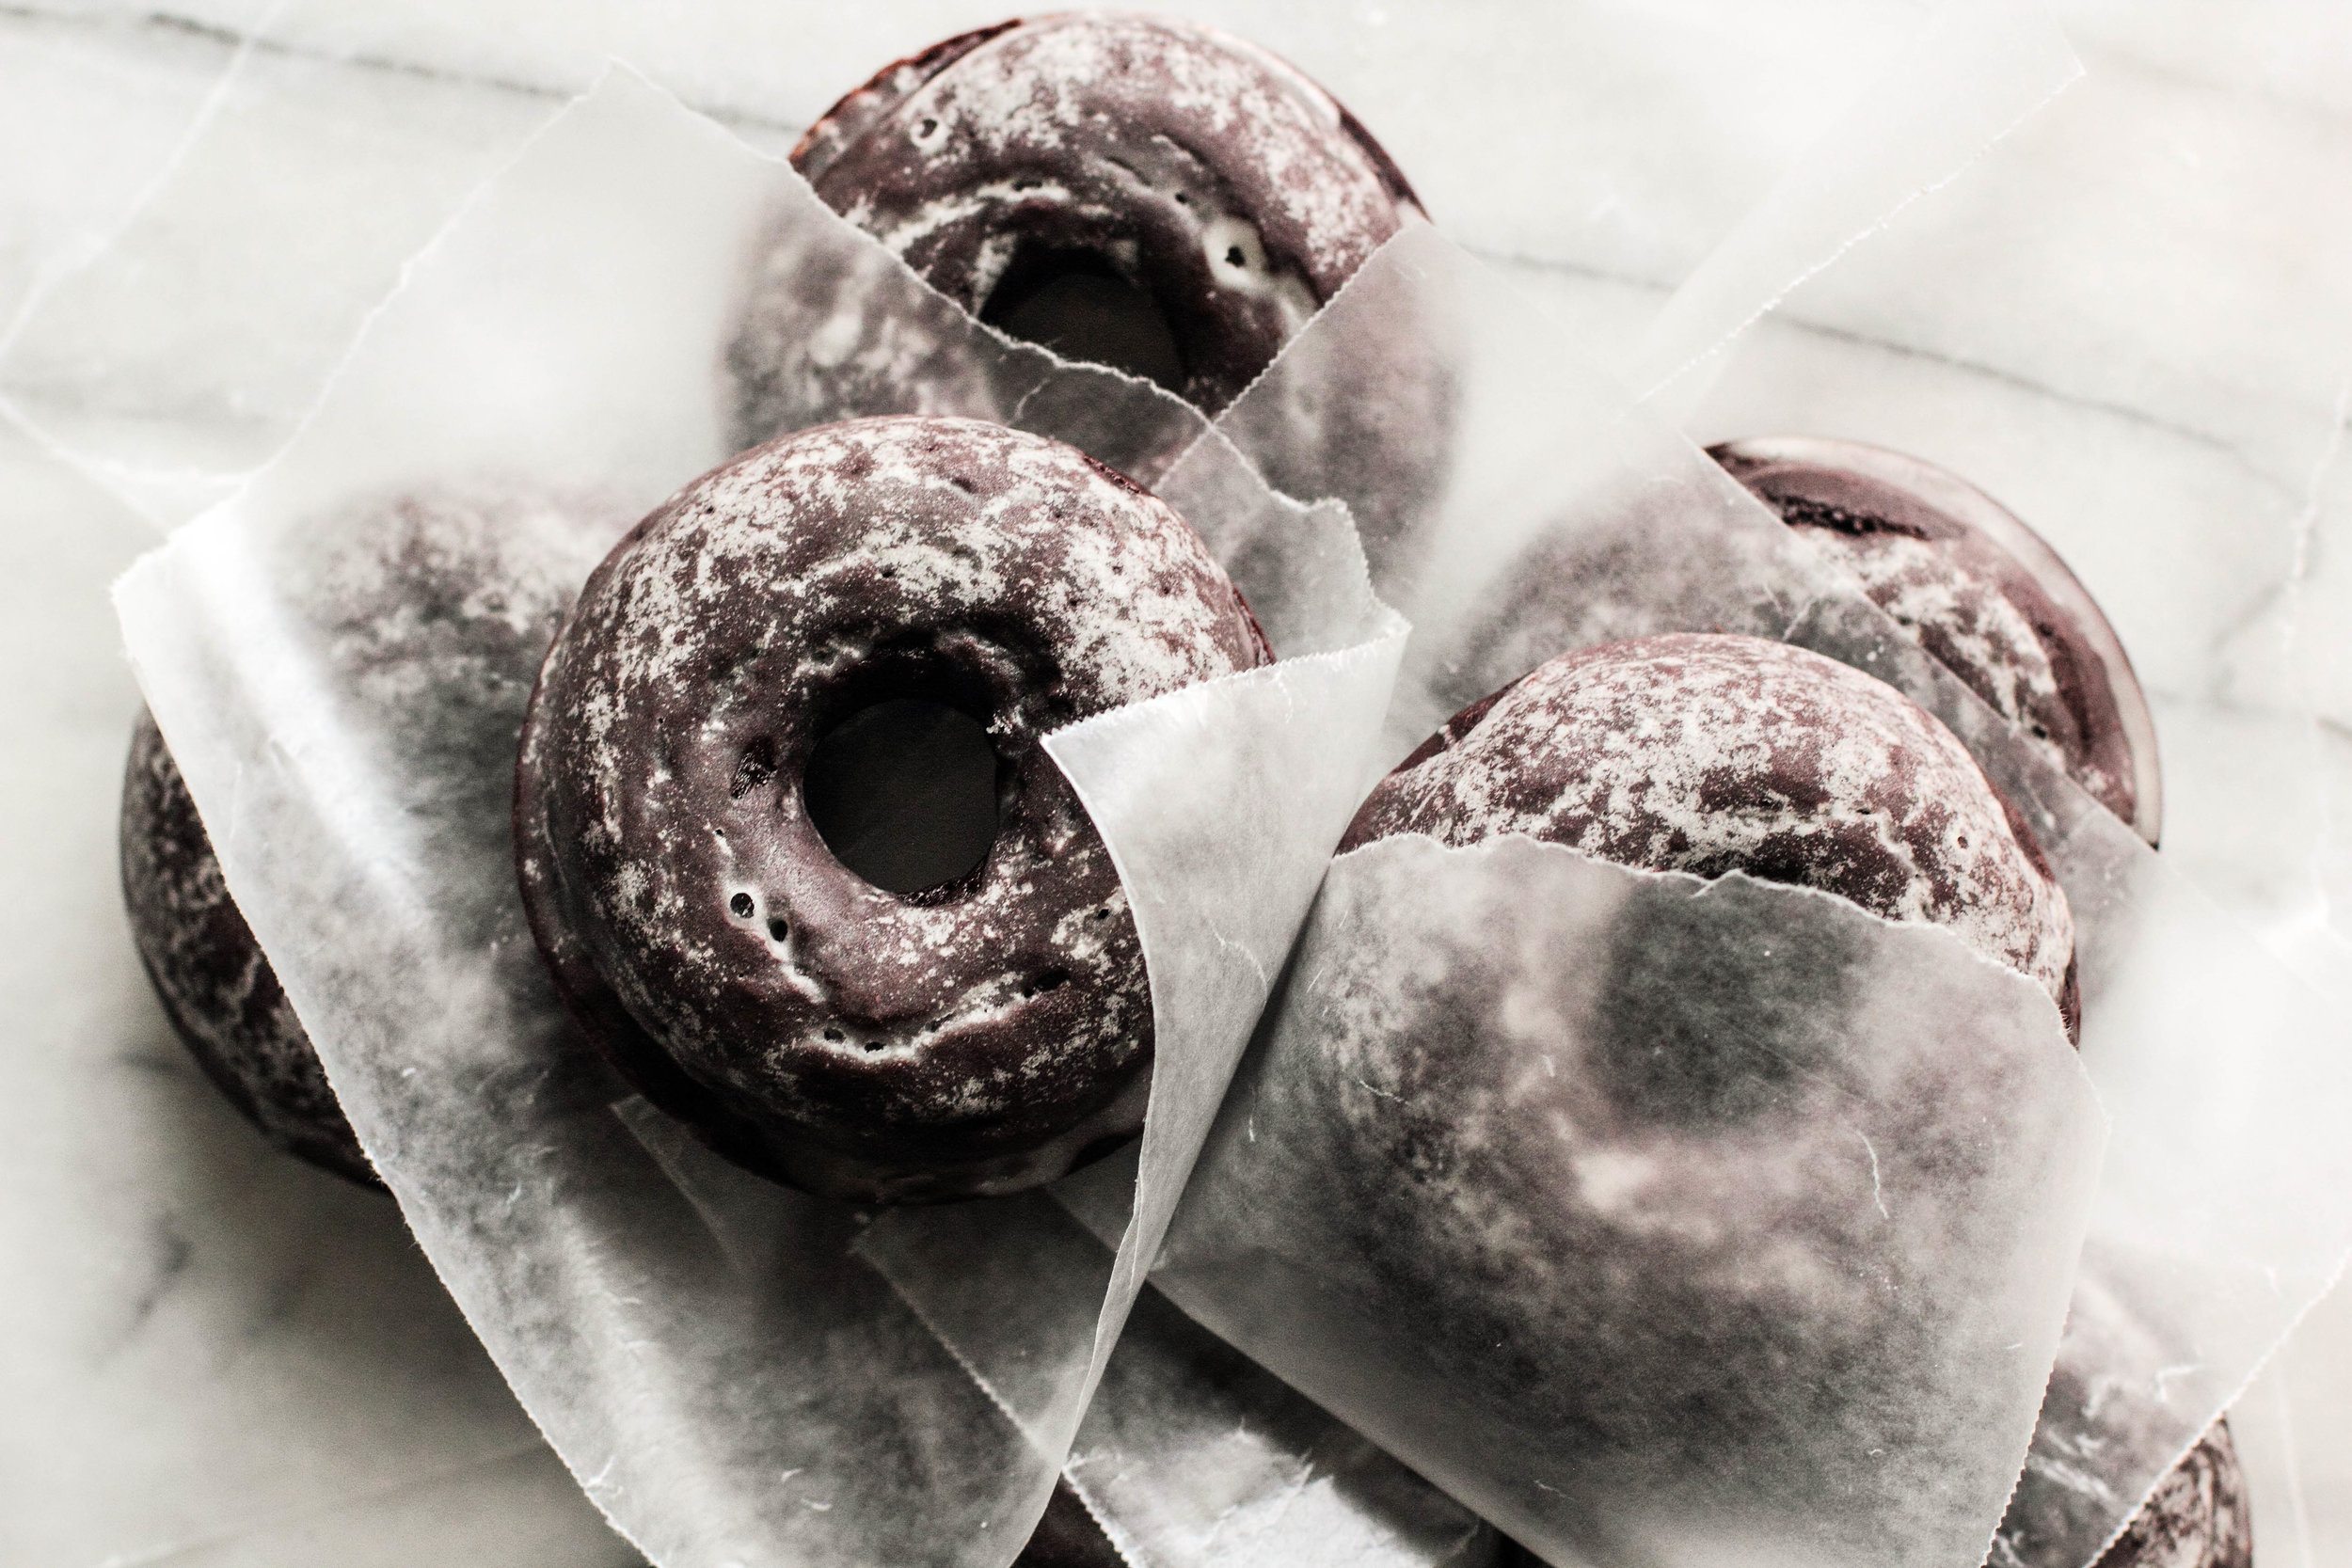
Glazed Chocolate Cake Doughnuts
/
This is a recipe for after Thanksgiving, when the food has been eaten, the dishes have been cleared, and the thanks has been given. Since the holiday is so near, I imagine the majority of you have your menus set and adding a last minute recipe to the list would only send you on another trip to the supermarket. This is a recipe to encourage you to take a moment to relax, sip a hot beverage, and rest your feet over the long weekend.
You deserve a break before the season of family and giving sweeps in.
Cake doughnuts are one of the ways I like to treat myself (as a bonus, it is also one of the cheapest, costing a whopping 89¢ per doughnut). Whenever I pass the bakery section of the store, I am drawn towards the doughnut case like a moth to the flame. Usually I am able to walk by after a moment of admiration, but sometimes the sprinkles and glaze are too much, and I find myself reaching into the case.
I appreciate that cake doughnuts stray towards the drier end of the spectrum because it makes them perfect to enjoy with a cup of coffee. Since this particular doughnut recipe is baked instead of fried, it has a similar texture to cake straight from the oven (i.e. light and moist). To remedy this, I let them sit out overnight which brought them to the texture I desired (though a few hours would also suffice).
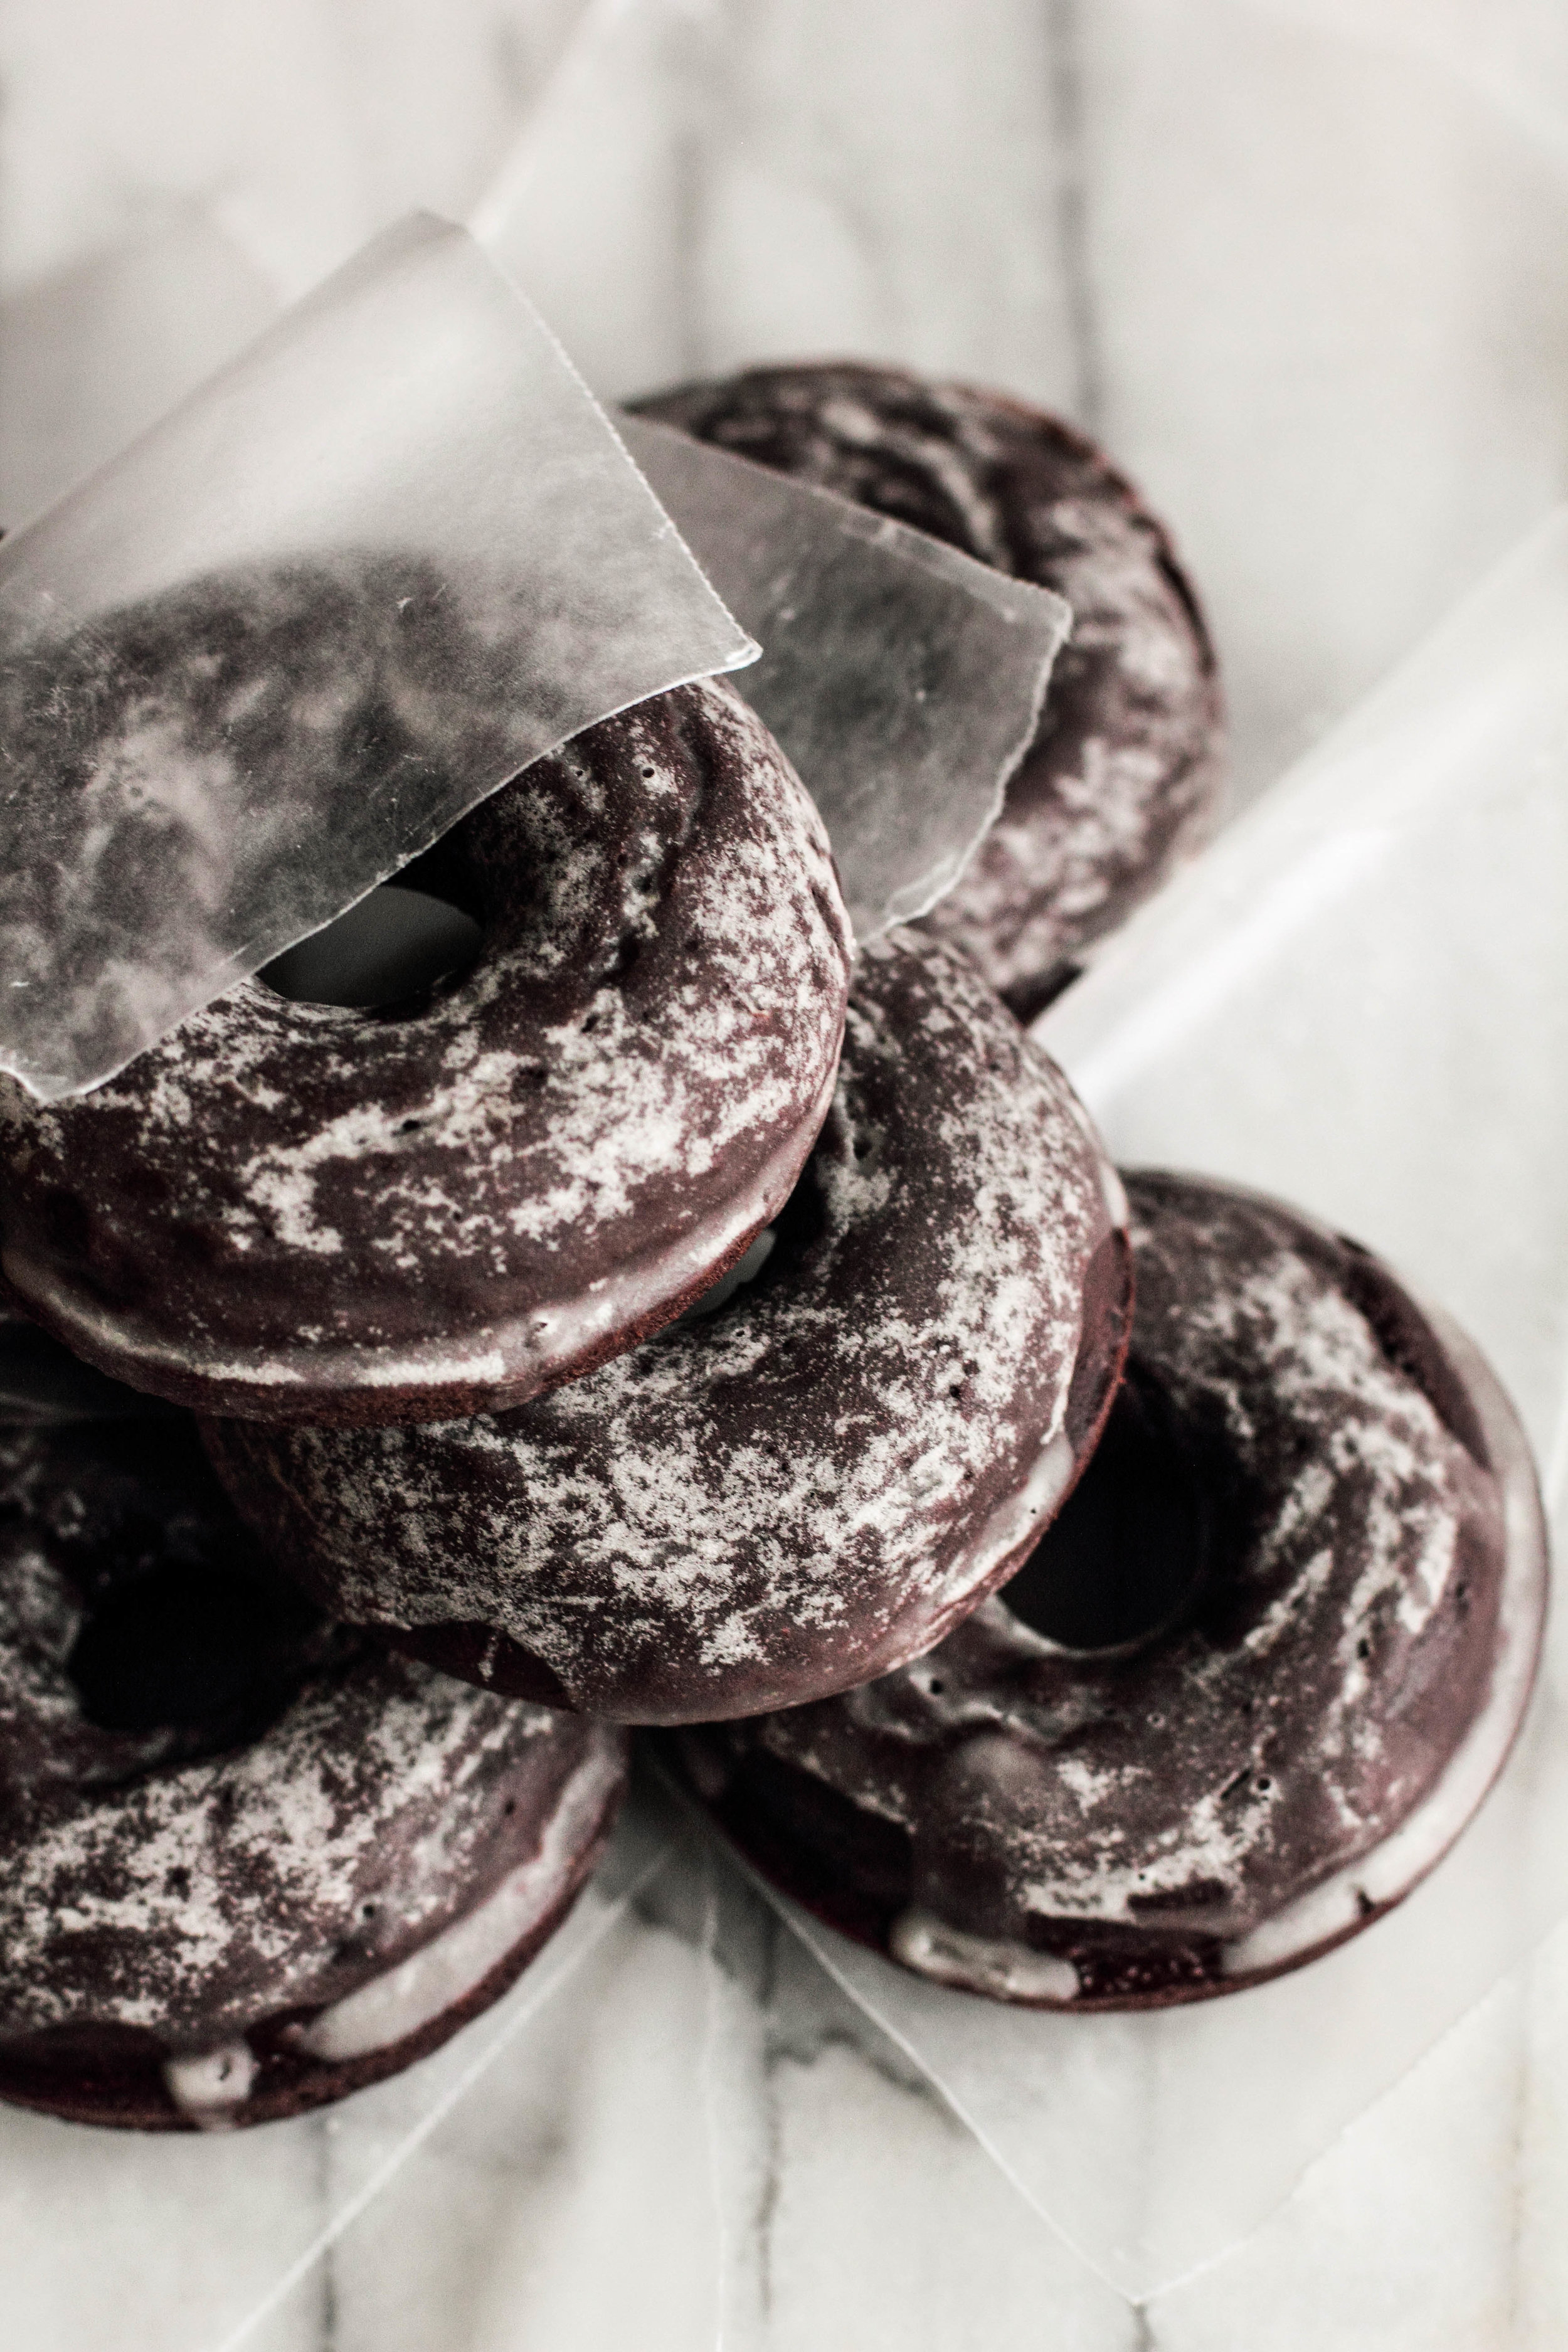
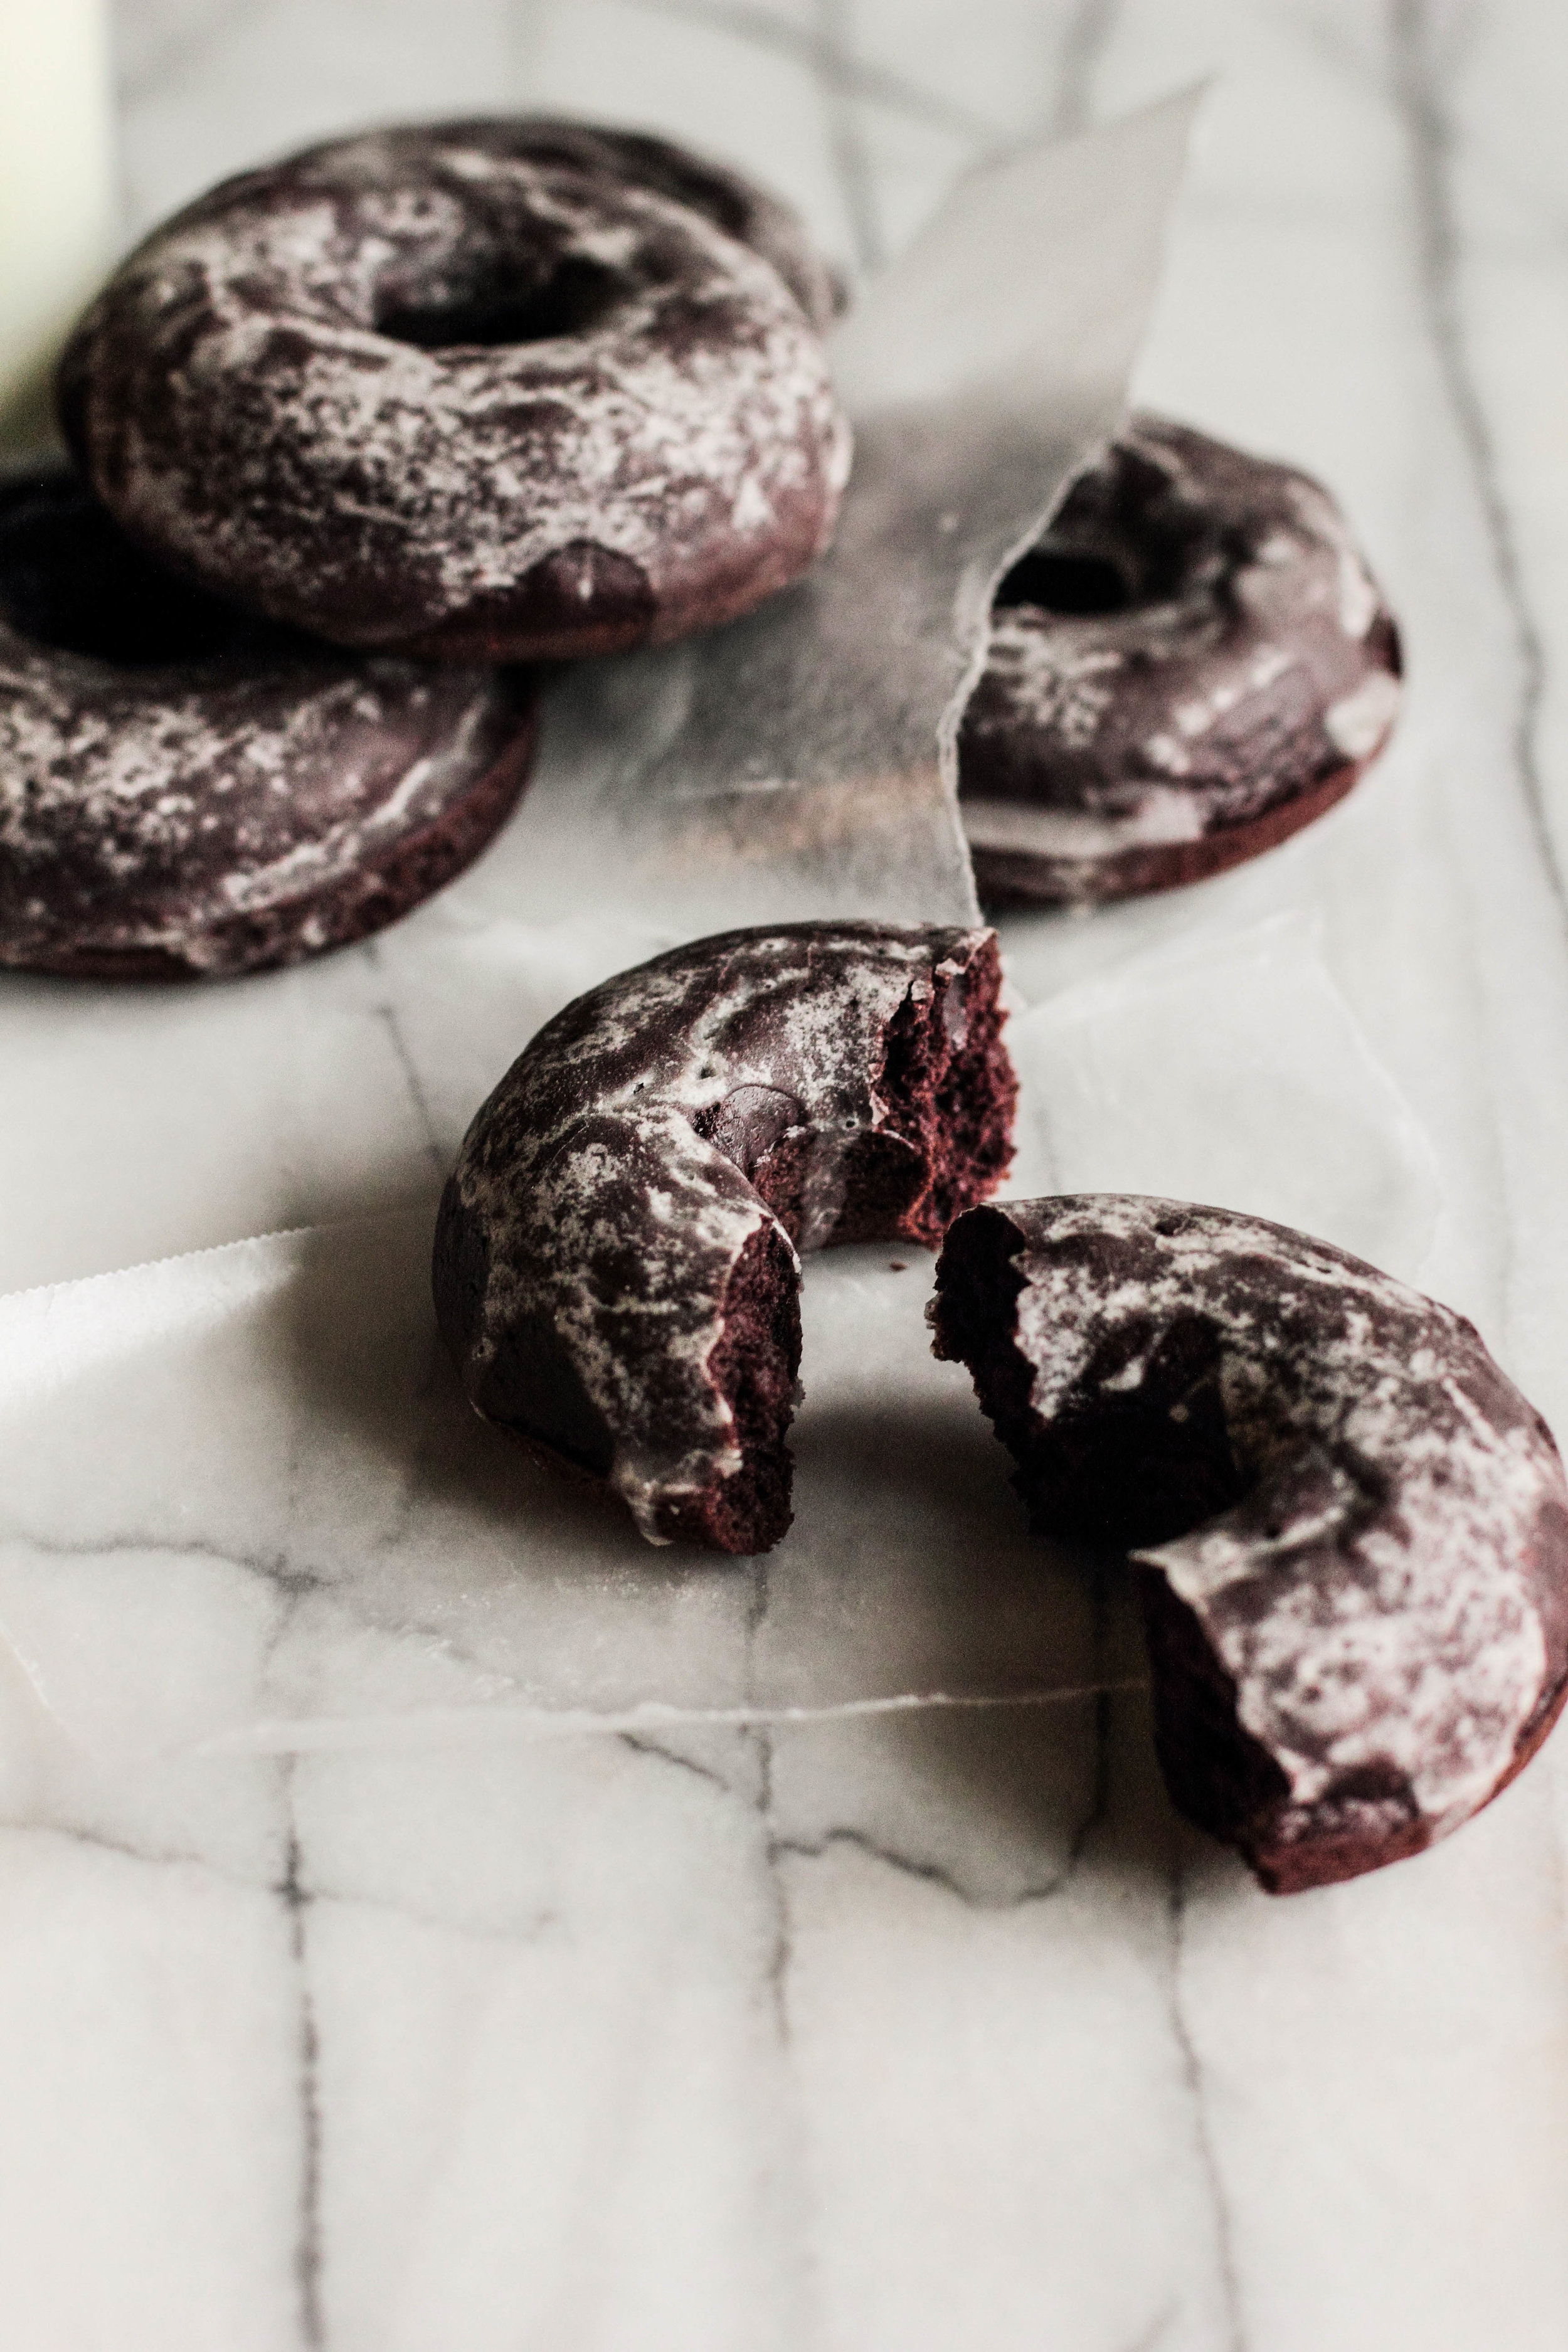
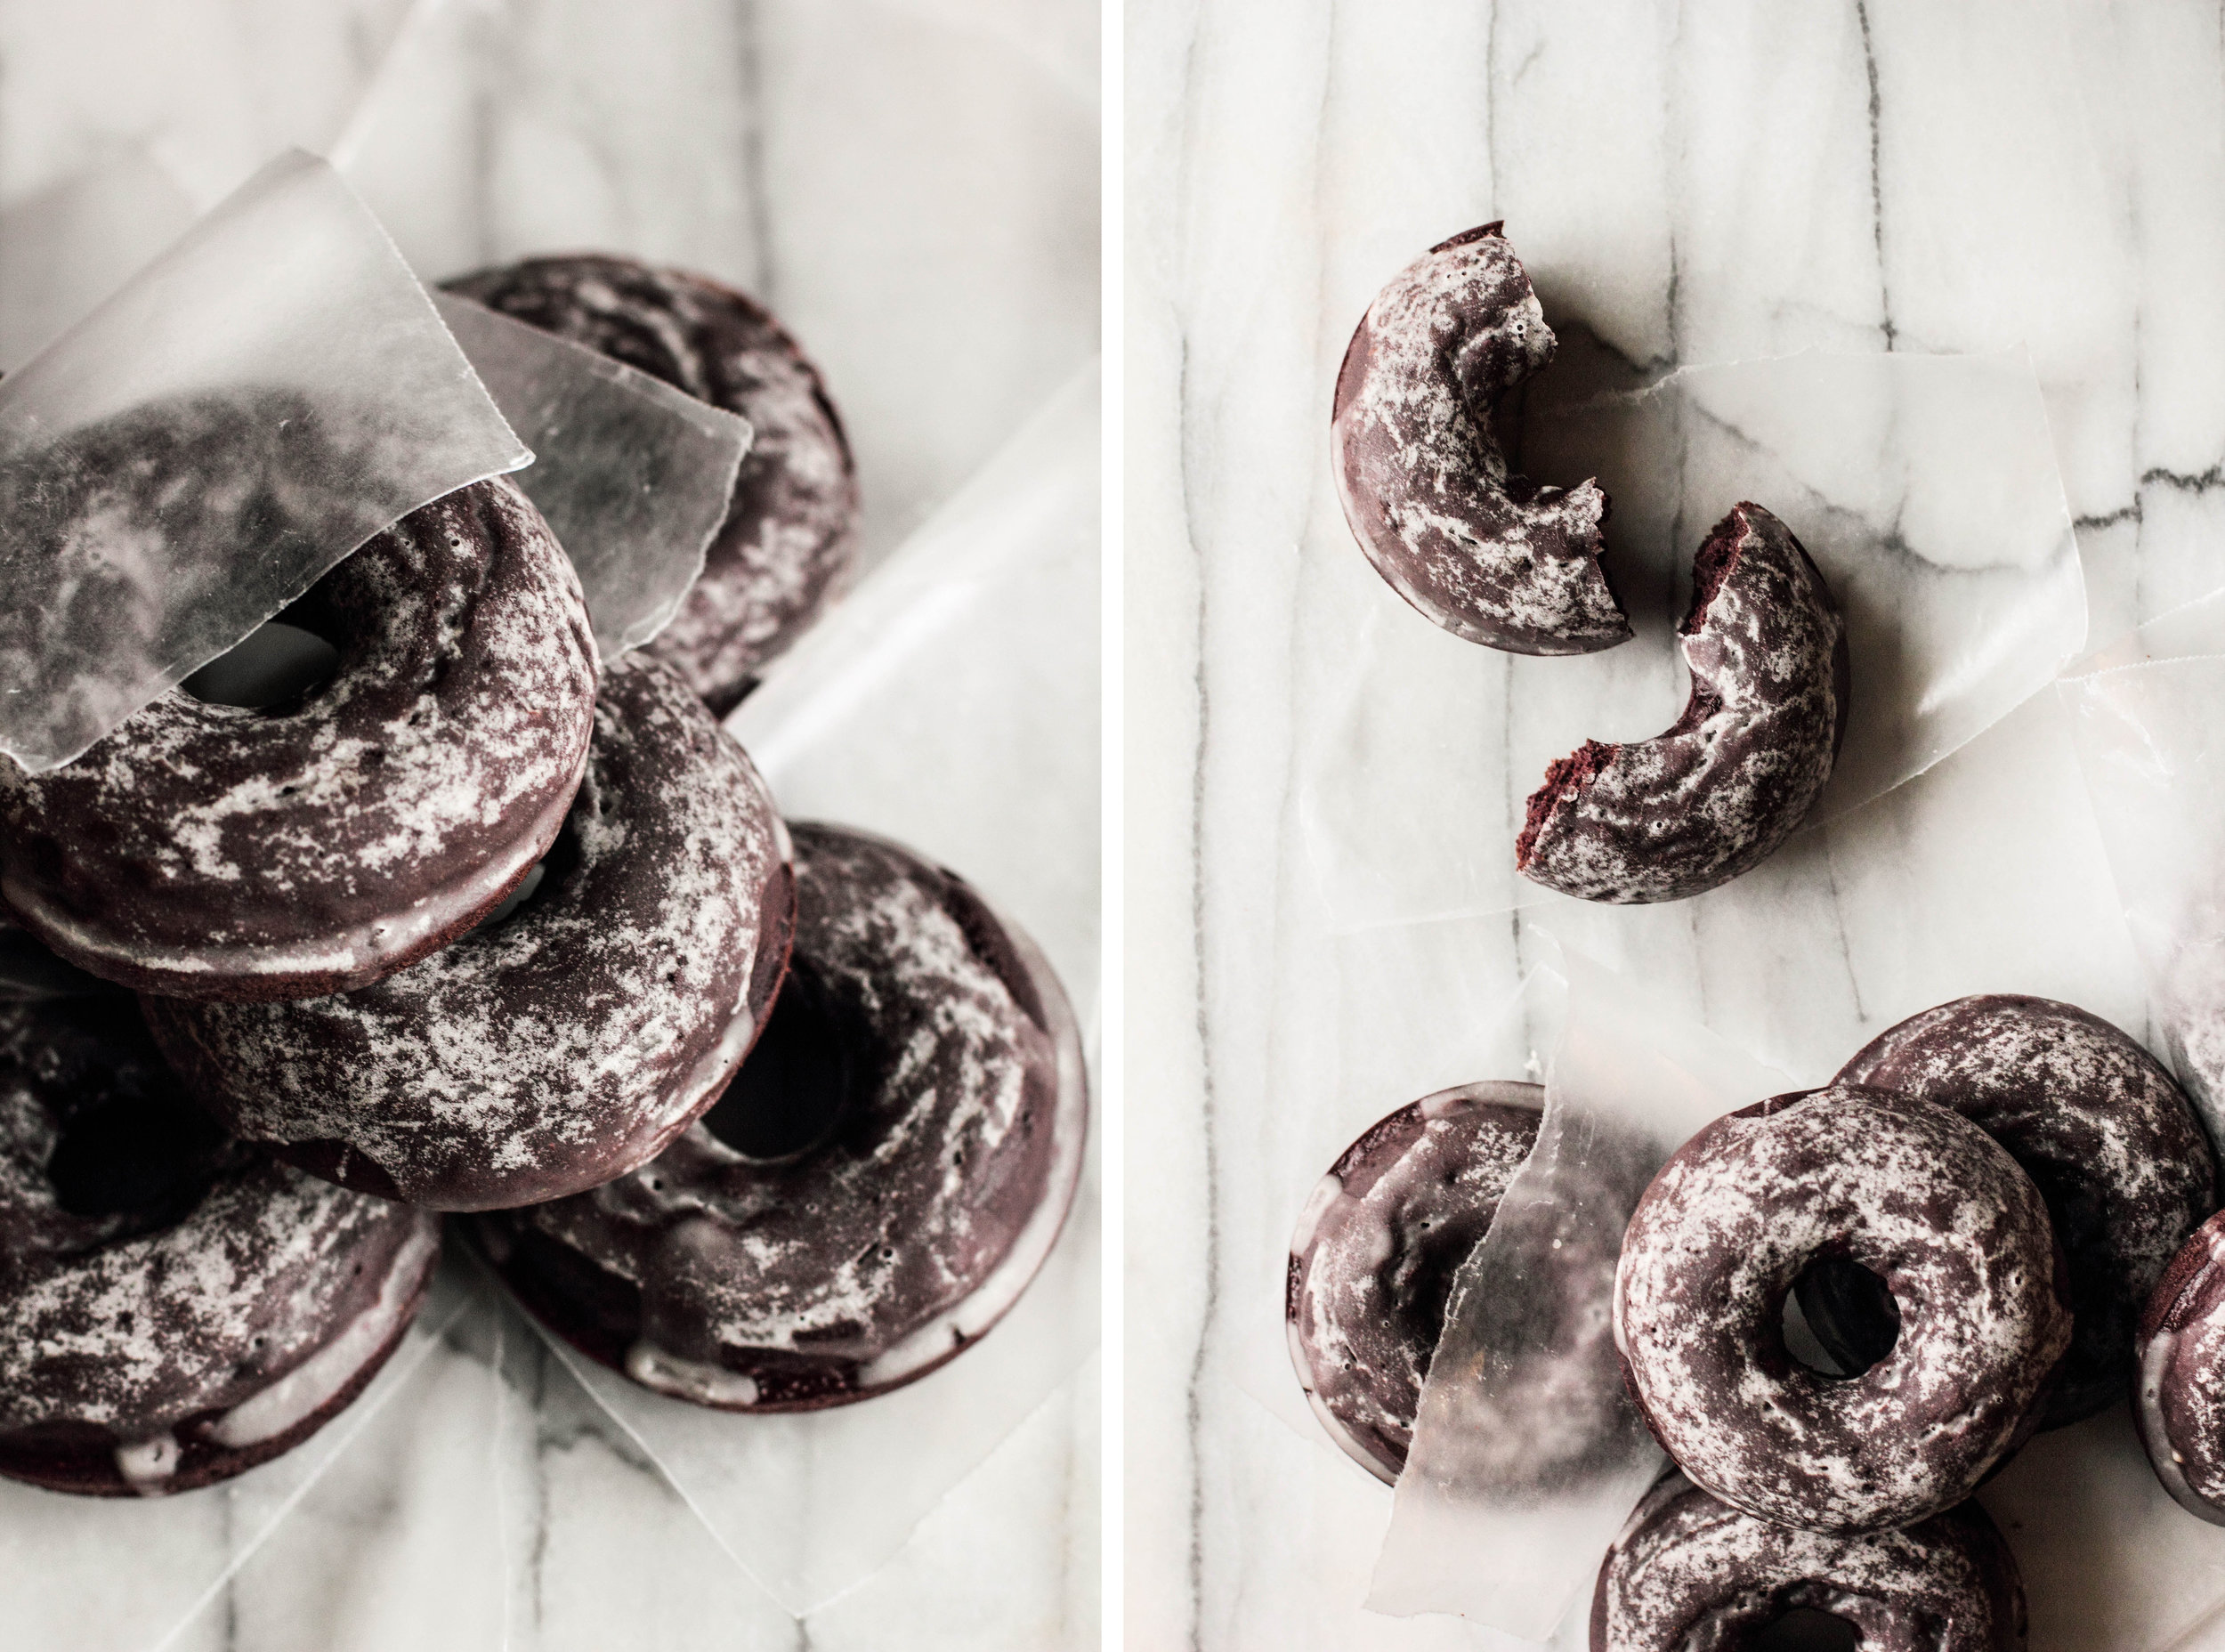
These Glazed Chocolate Cake Doughnuts are baked instead of fried, which makes them easy to make. The doughnuts are enriched with sour cream and spread with a light vanilla glaze. Serve with hot coffee or a glass of cold milk (or, if you are feeling particularly decadent, a mug of hot cocoa). Share with friends and family and enjoy the season.
One Year Ago: Pumpkin Streusel Muffins
Two Years Ago:Marbled Butternut Squash Bread, Chai Pear Scones, Hot Bourbon Apple Cider, and Pumpkin Pie Espresso Bars
Three Years Ago:Caramel Apple Cider, Apple Cinnamon Steel Cut Oats, Honey Cinnamon Roasted Chickpeas, and Caramel Apple Tart
Four Years Ago:Dried Cranberry Cocoa Rolls, 30 Second Sangria, Raspberry Vanilla Creme Brulee, and "Please, Sir, Can I Have Some More?" Cupcakes
Glazed Chocolate Cake Doughnuts
Yields 8 doughnuts
Chocolate Cake Doughnuts
3/4 cup (150 grams) granulated sugar
1 1/4 cup (160 grams) all-purpose flour
1/4 cup (20 grams) cocoa powder
1/2 teaspoon baking powder
1/2 teaspoon baking soda
1/2 teaspoon salt
1 large egg
1 teaspoon vanilla extract
2 tablespoons butter, melted
1/2 cup (115 grams) sour cream
1/3 cup (78 ml) milk
Preheat oven to 350 degrees F (180 degrees C). Grease a standard-size doughnut pan.
In a large mixing bowl, whisk together the sugar, flour, cocoa powder, baking soda, baking powder, and salt. Stir in the egg, vanilla, melted butter, sour cream, and milk until thoroughly mixed.
Transfer the batter to a pastry bag (or large kitchen bag with the corner snipped off). Fill the depressions in the prepared pan with the batter until 2/3 full. Alternatively, if appearance does not matter, you could spread the batter into the pan using an offset spatula, but this results in more unevenly shaped doughnuts. Bake the doughnuts for 15-18 minutes, or until puffed and a toothpick inserted into the center comes out clean. Cool in the pan for 5-10 minutes, before transfering to a cooling rack to cool completely.
Vanilla Glaze
1 cup (125 grams) powdered sugar
1 teaspoon vanilla extract
1 1/2 tablespoons milk
In a small bowl, stir together all ingredients until smooth. If the glaze is too thick, thin with a teaspoon or two of milk.
Spoon the glaze over the cooled doughnuts, allowing any excess to drip off. The glaze will take 10-15 minutes to set, depending on the thickness.