Cold Brew with Vanilla Almond Milk Creamer

 
This post is sponsored through a partnership with The J.M. Smucker Company © 2017. DD IP Holder LLC. All thoughts and opinions are my own.
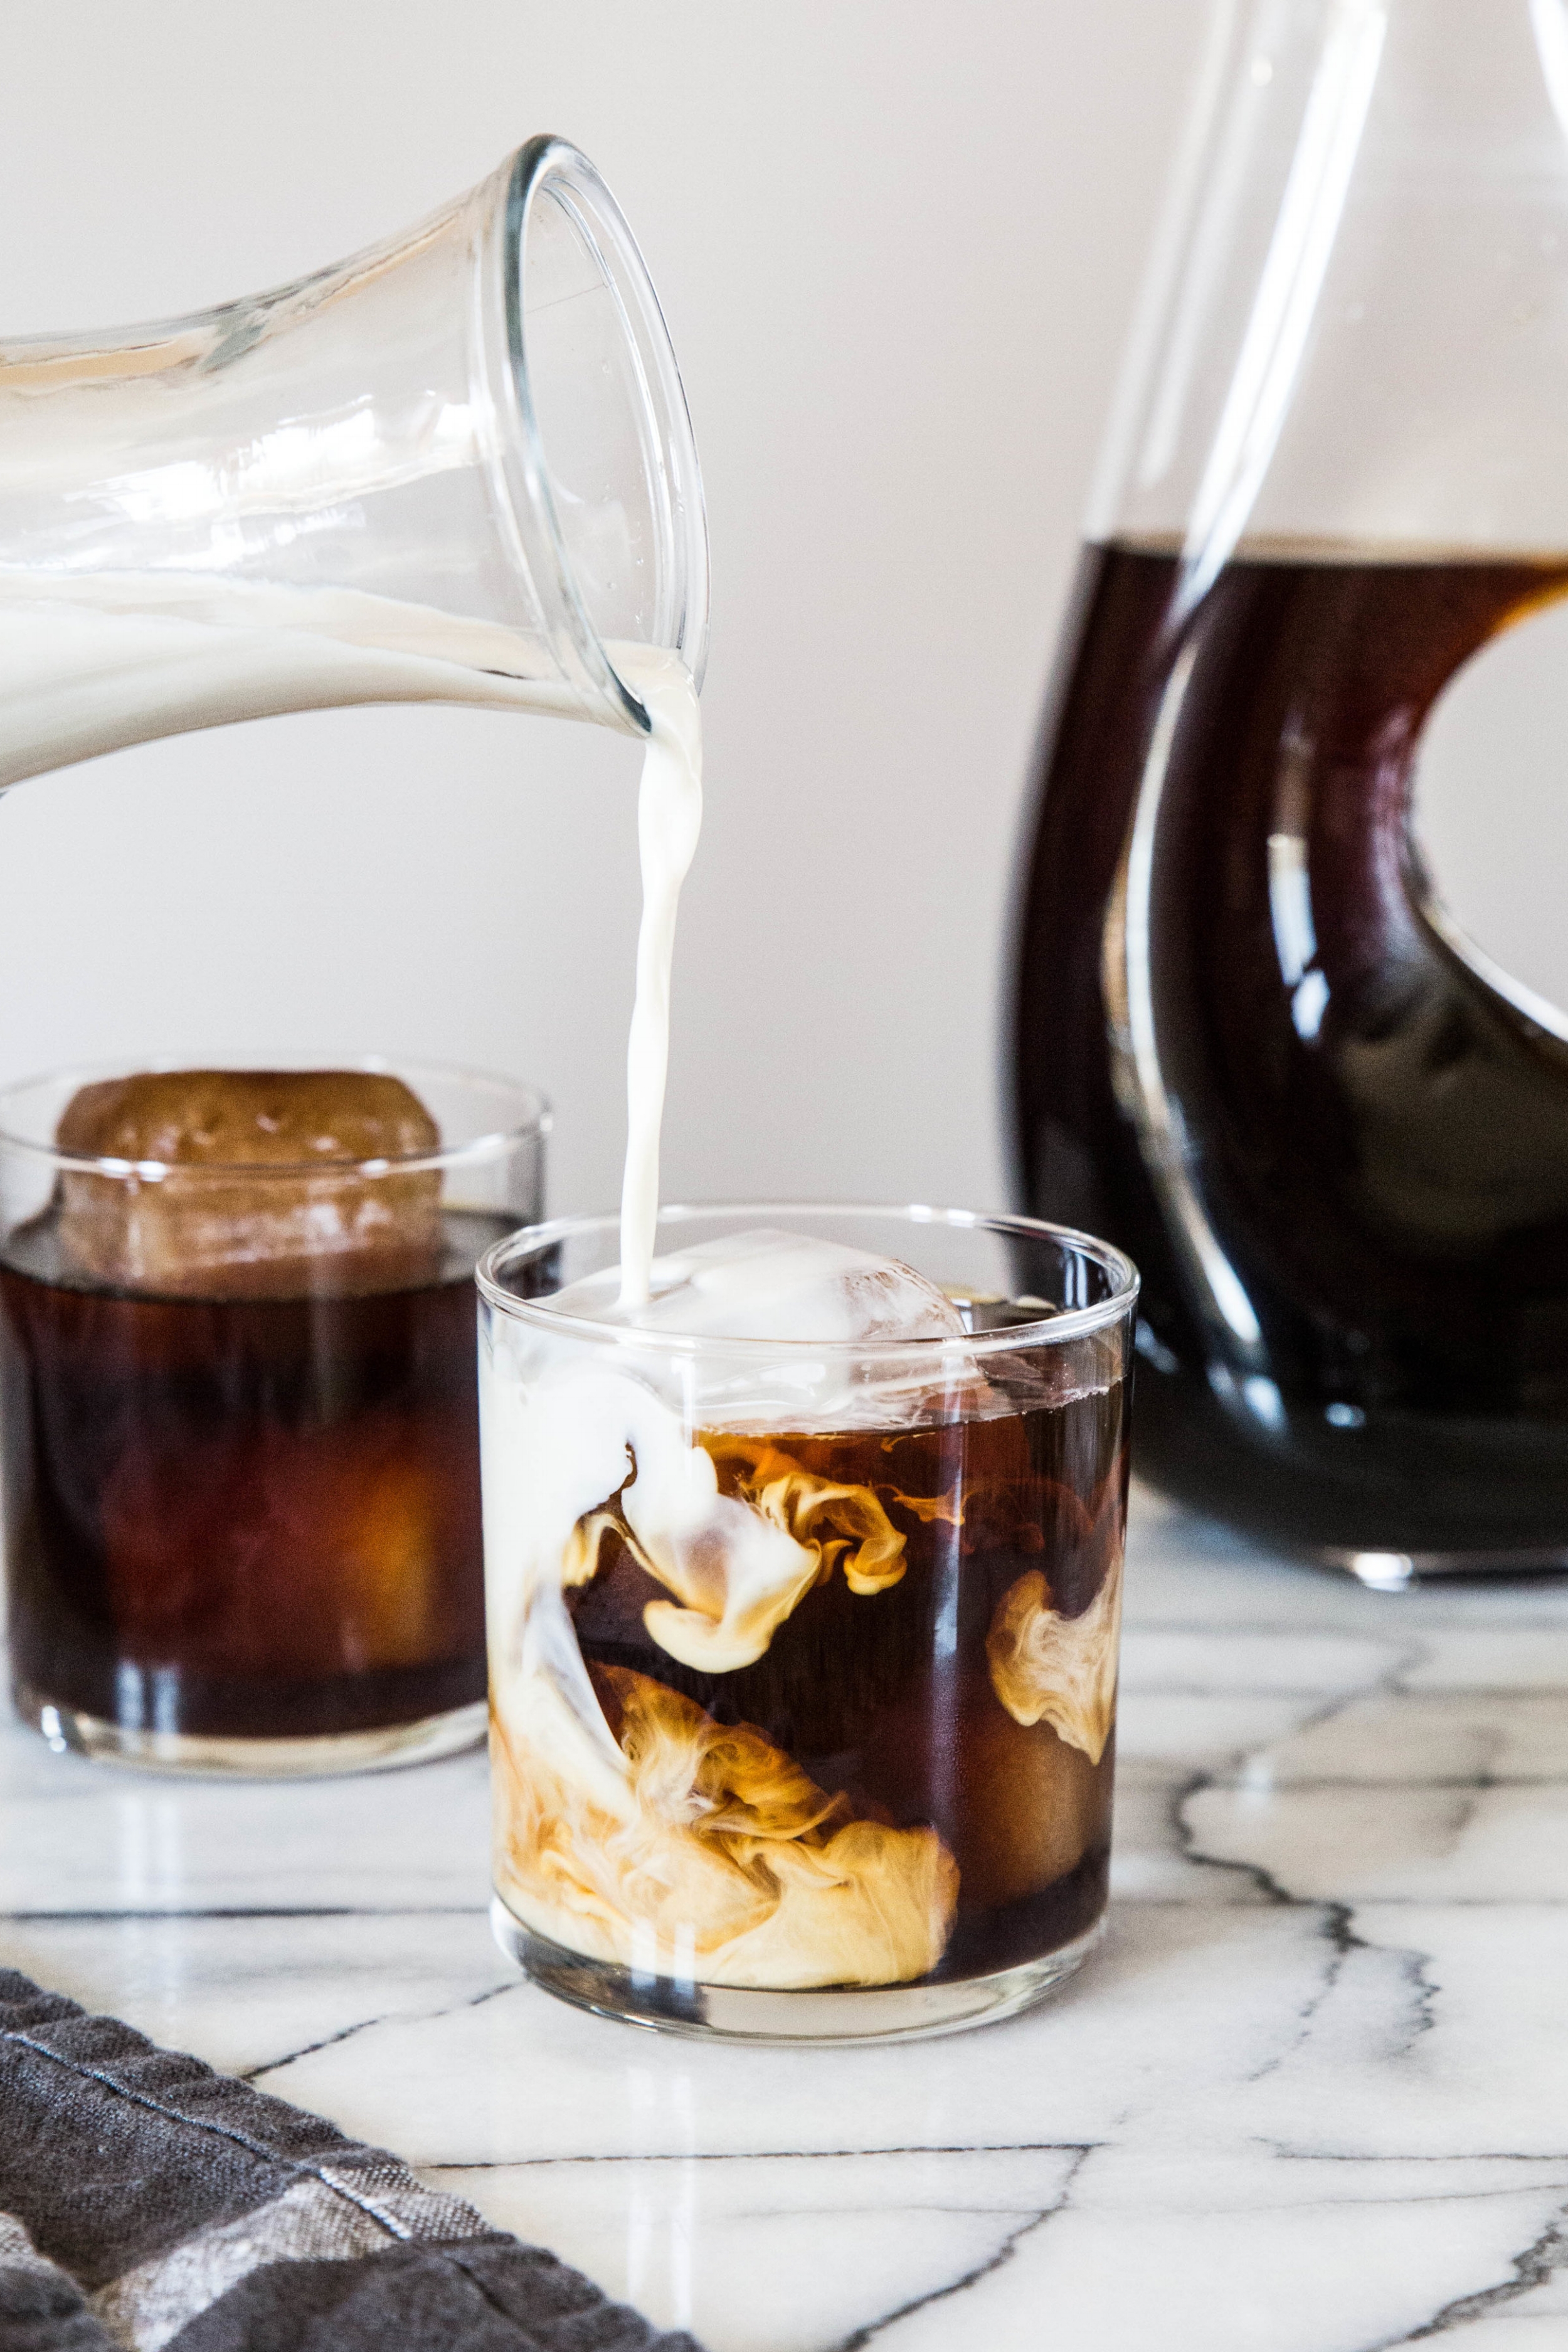
This post is sponsored through a partnership with The J.M. Smucker Company © 2017. DD IP Holder LLC. All thoughts and opinions are my own.


With warmer days approaching (and the end of the school year), my mind drifts towards the slower days of summer.  I've stuffed the sweaters into the back of the closet, bringing the t-shirts front and center.

A defining line between the cold and warm months, however, is my switch from hot coffee to cold brew. 

As a teacher, I drink my fair share of coffee. My favorite moments to enjoy a cup is relaxing after a long day at work, with my feet up on the couch, or on a slow-moving weekend morning.

Lately, I've been drinking Dunkin' Donuts Cold Brew. It's easy to prepare and has a smooth finish, with no acidity or bitter taste.

On Sunday nights, I prep the cold brew by placing two coffee pouches into a two-quart pitcher with four cups of water and leave it to steep in the refrigerator overnight. The next morning, I remove the pouches, add a few cups of water to dilute it to my taste, and it is ready to enjoy. Best of all, the pitcher lasts the rest of the week so the work is complete in two simple steps.

One of my favorite cold brew tricks is to freeze some of the cold brew into ice cubes after it has finished brewing. Then, when it's time to enjoy the coffee, I add a few cold brew cubes. The drink stays cold longer, and the coffee cubes prevent the drink from becoming watered down as the ice melts. 

IMG_9975-2.jpg
coldbrewcreamer1.jpg

I prefer my cold brew with creamer to add a hint of flavor and sweetness. After finding disappointment with dairy-free brands, I set out to create my own. As I often do for a dairy-free alternative, I reached for the can of full-fat coconut milk. While homemade coconut milk creamer works well in hot beverages, the fat separates to the top when it hits a cold beverage, rendering it undrinkable.

Almonds, however, do the job and do it well.

This homemade almond milk creamer holds together well in a cold drink and lends itself to customization. To give the creamer its creaminess, I follow a similar approach as I do with my recipe for homemade almond milk. The difference is that I add less water when blending so the almond milk is concentrated. 

IMG_0135-2.jpg

With pure vanilla extract for flavor and maple syrup to sweeten to taste, this homemade almond milk creamer is complete. I adore this creamer because it mimics the coffee house experience with simple, wholesome ingredients.

The coffee creamer may appear to separate if it is left to rest, but a quick swirl of the glass will bring it back to a uniform appearance. Use as much or as little as you like in your next glass of cold brew.


This cold brew with homemade vanilla almond milk creamer works as a great afternoon pick-me-up. Brewed with Dunkin' Donuts Cold Brew Coffee Packs, the coffee has a smooth, rich finish. I prefer to enjoy it with homemade creamer flavored with vanilla and sweetened with maple syrup, but you can customize the drink to your taste. Enjoy!

One Year Ago: Strawberry Scones
Two Years Ago: Chocolate Hazelnut Rolls
Three Years Ago: Blueberry Oat Bars (GF)  & Peanut Butter Chocolate Chunk Cookies (GF)
Four Years Ago: Chocolate Blackberry Cupcakes
Five Years Ago:  Sunflower Seed Bread, Blackberry Fool, Lime Curd Tart, & Honey Chocolate Chunk Cookies
Six Years Ago: Tiramisu Cake, Peanut Butter Cornmeal Cookies, Honey Wheat Cake, & Chocolate Almond Ice Cream
Seven Years Ago:  Chocolate-Filled Buns, Malted Chocolate Chip Cookies, & Parmesan Poppy Seed Crackers

Cold Brew with Vanilla Almond Milk Creamer

Yields 6 servings

1 pouch Dunkin’ Donuts Cold Brew Coffee Packs
1 cup (120 grams) raw almonds
3 1/2 cups (830 mL) filtered water, divided
3-5 tablespoons maple syrup, to taste
2 teaspoons pure vanilla extract

The cold brew and almond milk creamer need to be started the evening before serving.

To prepare the cold brew coffee, follow the directions according to the package.

To prepare the almond milk creamer, place almonds in a container and cover with 2 cups filtered water. Seal container and allow to soak overnight, for at least 8 hours or up to 2 days.

Strain almonds and rinse with fresh water. (The almonds release phytic acid while soaking, which prevents the body from absorbing nutrients; rinsing the almonds removes this acid.) Place almonds and 1 1/2 cups filtered water in a blender. Blend on high for 2-3 minutes. Using a nut bag, layered cheesecloth, or fine mesh strainer, strain the almond milk to remove the pulp. If using the fine mesh strainer, run the milk through several times to eliminate pulp. The leftover pulp can be used in smoothies, muffins, or bread, or it can be dehydrated and used in the same manner as almond flour. Add maple syrup and vanilla extract to the almond milk.

Keep the almond milk creamer refrigerated. It should stay fresh for 5 to 7 days. The creamer may undergo separation in the refrigerator. Give the creamer a good shake and it will come back together quickly.

To prepare the cold brew coffee drink, place prepared cold brew in a glass with ice and add almond milk creamer to taste. For best results, freeze some of the cold brew into ice cubes in advance. This method keeps the cold brew chilled and prevents it from getting watered down as the ice melts.


©The J.M. Smucker Company © 2017. DD IP Holder LLC

Maple Banana Bread

IMG_9993-2.jpg

A new year, a clean slate. As I welcomed in the new year, I spent time reflecting on the last year, on where I've been and where I'd like to go. In these moments, I have a tendency to focus on my weaknesses, to identify ways I feel I've come up short to my good intentions. Despite my efforts, my lifestyle leans towards the sedentary, the house is in a constant state of needing to be picked up, and my ever-present sweet tooth continues its habit of getting me into trouble. 

This year, instead of fixating on the negative, I intend to look towards the positive, to recognize all the ways I have grown (and can continue to grow). I have no list of resolutions for the new year. Instead, I am working on cultivating a series of intentions—to find the good in stressful situations, to maintain positivity when working with other people, and to push myself to become more skilled at things that I love (like teaching, baking, and woodworking). 

Luckily, practice makes perfect. I anticipate my oven will get plenty of work as I develop and play around with new recipes.

maplebanana1.jpg
IMG_9964-2.jpg

In the past, I have been guilty of loading my banana breads with so many extras that the banana flavor can be lost or overpowered. Certainly these versions have their moments—this loaf with a chocolate hazelnut swirl makes for a lovely dessert and this chocolate cacao nib loaf is best for a morning snack—but sometimes it is worth it to tend towards the traditional. 

This recipe for Maple Banana Bread is a lighter version of the classic loaf, allowing the flavor and natural sweetness of the banana to shine. With the addition of maple syrup, the sweetness hits a subtle, but pure note. Whole wheat flour is added to bring in whole grains and the loaf is spiced with cinnamon and nutmeg to round out the flavor. As with all of my quick breads, I like to sprinkle a little raw sugar over the top for extra sweetness, giving the loaf something unique.

IMG_0027-2.jpg
IMG_9953-2.jpg

Maple Banana Bread is a lighter take on the traditional loaf of banana bread. Sweetened with maple syrup and gently spiced, this recipe allows the flavor of the banana to shine. A topping of cinnamon and raw sugar give the loaf additional sweetness and texture. Serve alongside a mug of coffee or tea with breakfast or an afternoon snack. 

One Year Ago: Roasted Banana Muffins
Two Years Ago: Coconut Matcha Pudding,  
Three Years Ago: Coconut Almond Quinoa 
Four Years Ago: Almond Date Banana Smoothie 
Five Years Ago:  Chocolate (Dairy-Free) Ice CreamPeanut Butter Banana Oatmeal, & Raspberry White Chocolate Scones
Six Years Ago: Peppermint Hot ChocolateGreen Tea Coconut Ice Cream, & Chocolate Lavender Cupcakes
Seven Years Ago: Banana Cinnamon MuffinsVanilla Pear MilkCranberry Chocolate Muffins, & Salted Caramels

Maple Banana Bread

Yields 5 x 9-inch loaf

Banana Bread
4 large ripe bananas, mashed (about 2 cups or 450 grams)
1/2 cup (156 grams) pure maple syrup
1/2 cup (100 grams) vegetable oil
2 large eggs
2 teaspoons vanilla extract
1 teaspoon ground cinnamon
1/2 teaspoon ground nutmeg
1 teaspoon baking powder
1/2 teaspoons baking soda
1/2 teaspoon salt
1 cup (120 grams) all-purpose flour
1 cup (120 grams) whole wheat flour

Topping
1 tablespoon raw or demerara sugar
1/4 teaspoon ground cinnamon
Thinly sliced banana, for garnish (optional)

Preheat oven to 350 degrees F (180 degrees C). Grease a 5 x 9-inch loaf pan. Set aside.

In a large mixing bowl, whisk together mashed banana, maple syrup, vegetable oil, eggs, and vanilla extract until uniform. Whisk in the cinnamon, nutmeg, baking powder, baking soda, and salt. Gradually stir in the flours. Set aside.

For the topping, stir together the raw sugar and ground cinnamon. Set aside.

Pour batter into prepared pan and smooth until level. Sprinkle topping evenly over the top. If desired, place two pieces of thinly sliced banana on top for garnish. Bake for 55-65 minutes, or until a toothpick inserted in the center comes out clean. Cool in pan for 10 minutes before removing and placing on a cooling rack to cool completely. 

Maple Syrup Cake with Toasted Almonds

My Canadian roommate introduced me to maple syrup when I first moved to Montreal. You've never tried real maple syrup before? We need to fix that. She poured a little on a spoon, handed it over, and my love for the sticky sweetener began. In the past, I drowned my pancakes and waffles in Aunt Jemima and Mrs. Butterworth's, but pure maple syrup would be my future. 

In Canada, maple syrup is considered a standard commodity and is sold in 15 oz cans, perfect for stacking away in the cupboard. When I moved back to the United States, I tucked a stack of cans of maple syrup in my suitcase. Some were for gifts, but most were for myself. After leaving the land of maple syrup festivals, I thought it best to pack away as much as I could before the only syrup I could get my hands on would come in small, maple leaf-shaped containers.

This Maple Syrup Cake comes from Linda Lomelino's newly translated cookbook Lomelino's Cakes: 27 Pretty Cakes to Make Any Day SpecialI have been an admirer of Linda's blog Call Me Cupcake since I began blogging over four years ago. Her first cookbook was published in 2012, written in Swedish, her native tongue. I have anxiously awaited the day it would be translated into English. Her love of cake is pure and shines through in the way she creatively layers and decorates her desserts.

The English version of her cookbook is finally released today and cake seemed like the right way to celebrate. I ever so slightly adapted this recipe from her cookbook to suit the ingredients in my cupboards, substituting the almonds for pecans, and using brown sugar instead of muscovado. The maple flavor comes through so beautifully that I had a hard time leaving the cake along long enough to frost it. 

To celebrate a love for cake, I am giving away two copies of Linda's cookbook. To enter this giveaway, simply comment below and share your favorite type of cake.

The giveaway ends on Friday, November 14th, at 9:00 pm CST. The giveaway is open to U.S. and Canadian residents who measure their ingredients in cups. The winners will be chosen randomly and will be contacted shortly thereafter.

Edit: The giveaway is closed and the winners have been chosen.

Maple Syrup Cake with Toasted Almonds has all of the flavors of autumn. A little cinnamon, toasted nuts, and the sweet flavor of maple syrup form the seasonal medley. With maple syrup icing, the cake is complete. The cake recipe is written for 6-inch pans, but, since they can be difficult to come by, a larger pan could be used instead to make a single layer cake.

One Year Ago: Apple Crisp and Pumpkin Spiced Doughnuts
Two Years Ago: Pumpkin Waffles, Black Velvet Spider Cupcakes, Apple Cinnamon Scones, and Pear Crisp
Three Years Ago: Pumpkin Spice Latte, Oatmeal Raisin Crisps, Red Wine Chocolate Cake, and Pear & Almond Chocolate Spice Cake
Four Years Ago: Roasted Butternut Squash & Apple Soup, Homemade Apple Cider, and Fresh Ginger Cake with Caramelized Pears

Maple Syrup Cake with Toasted Almonds
Adapted from Lomelino's Cakes: 27 Pretty Cakes to Make Any Day Special

Yields 6-inch 3-layer cake (or 1 layer 9 inch cake)

Maple Syrup Cake
3/4 cup (106 grams) whole almonds (or pecans)
6 tablespoons (85 grams) unsalted butter, room temperature
1/2 cup (100 grams) brown sugar, loosely packed 
6 tablespoons (60 grams) maple syrup
1 large egg 
1 1/4 cups (156 grams) all-purpose flour
2 teaspoons baking powder
1/2 teaspoon ground cinnamon
1/4 teaspoon ground nutmeg
1/4 teaspoon salt
3/4 cup (177 ml) milk 

Preheat oven to 350 degrees F (180 degrees C). Grease three 6-inch cake pans. Set aside.

Spread the almonds on a rimmed baking sheet and toast for 8 minutes in the oven. Place in a food processor and process until the nuts resemble a coarse flour, about 1-3 minutes. Do not overprocess. Set aside.

In a large mixing bowl, beat the butter and brown sugar until light and fluffy, about 3 minutes. Add in the maple syrup and beat until smooth. Add the egg and completely incorporate it into the batter. Gradually add the flour, baking powder, spices, salt, and finely processed almonds. Stir in the milk until the batter is smooth.

Divide the batter evenly between the prepared pans and bake for 20-25 minutes, or until a toothpick inserted into the center comes out with moist crumbs. Cool the layers in the pans for 10 minutes before transferring to a cooling rack to cool completely.

Maple Syrup Frosting
(yields about 2 cups)
3 large egg whites
6 tablespoons (76 grams) granulated sugar
1/4 cup brown sugar, not packed
4 tablespoons (40 grams) maple syrup
3/4 cup (170 grams) unsalted butter, room temperature 

Place the egg whites and sugars into a heatproof bowl set over a pan of simmer water (or a double boiler). Use a whisk to beat the mixture until it reaches 150 degrees F (65 degrees C), or until the sugar crystals have dissolved and do not feel grainy when rubbed between your fingers. Remove from heat and add the maple syrup.

In a large mixing bowl, beat the meringue until the mixture is cool and thick and forms glossy, stiff peaks, about 5-7 minutes. Add room temperature butter a small amount at a time. Continue beating frosting 3-5 minutes after all butter has been added.

To Assemble
Place first layer on a serving plate. Spoon frosting into a pastry bag. Using a star tip, pipe circles around the top of the cake, beginning at the outer edge and working inward. It's easier to see what you are doing if you start at the outer edge. If you want the cake to be higher, pipe an extra circle around the outer edge, on top of the previous circle of frosting.

Place next layer on top and repeat the piped circles. Place the last layer on top, cut side down, and leave the exterior unfrosted. Garnish with gold sprinkles, if desired.