Cinnamon Sugar Swirl Loaf

IMG_1851.jpg

When I imagine rolling pins and sheets of dough, I think of my grandmother. When I was young, just tall enough to peer over the kitchen counter, I would watch her construct German dishes from scratch. A bowl of dough was her beginning—a blank slate. She would create her coveted bread rolls in the palms of her hands. A long cylinder would be cut into logs to create shoop noodles. Sheets were rolled, paper thin, and coiled for strudels (which were later unraveled by greedy, hungry hands).

The motions were practiced, repeated thousands of time over her many years, but the awe factor never diminished for me.

IMG_1886.jpg

I am learning to see dough as a blank slate, a starting point instead of an unfinished product. Though my motions may still be clumsy, inexperienced from my few years, I can feel the progress beneath my fingertips. This past weekend, I kneaded together a sweet dough, challenging myself to roll it into a shape new to me. I have long admired braided and swirled breads for their intricate designs and used the pattern as my inspiration.

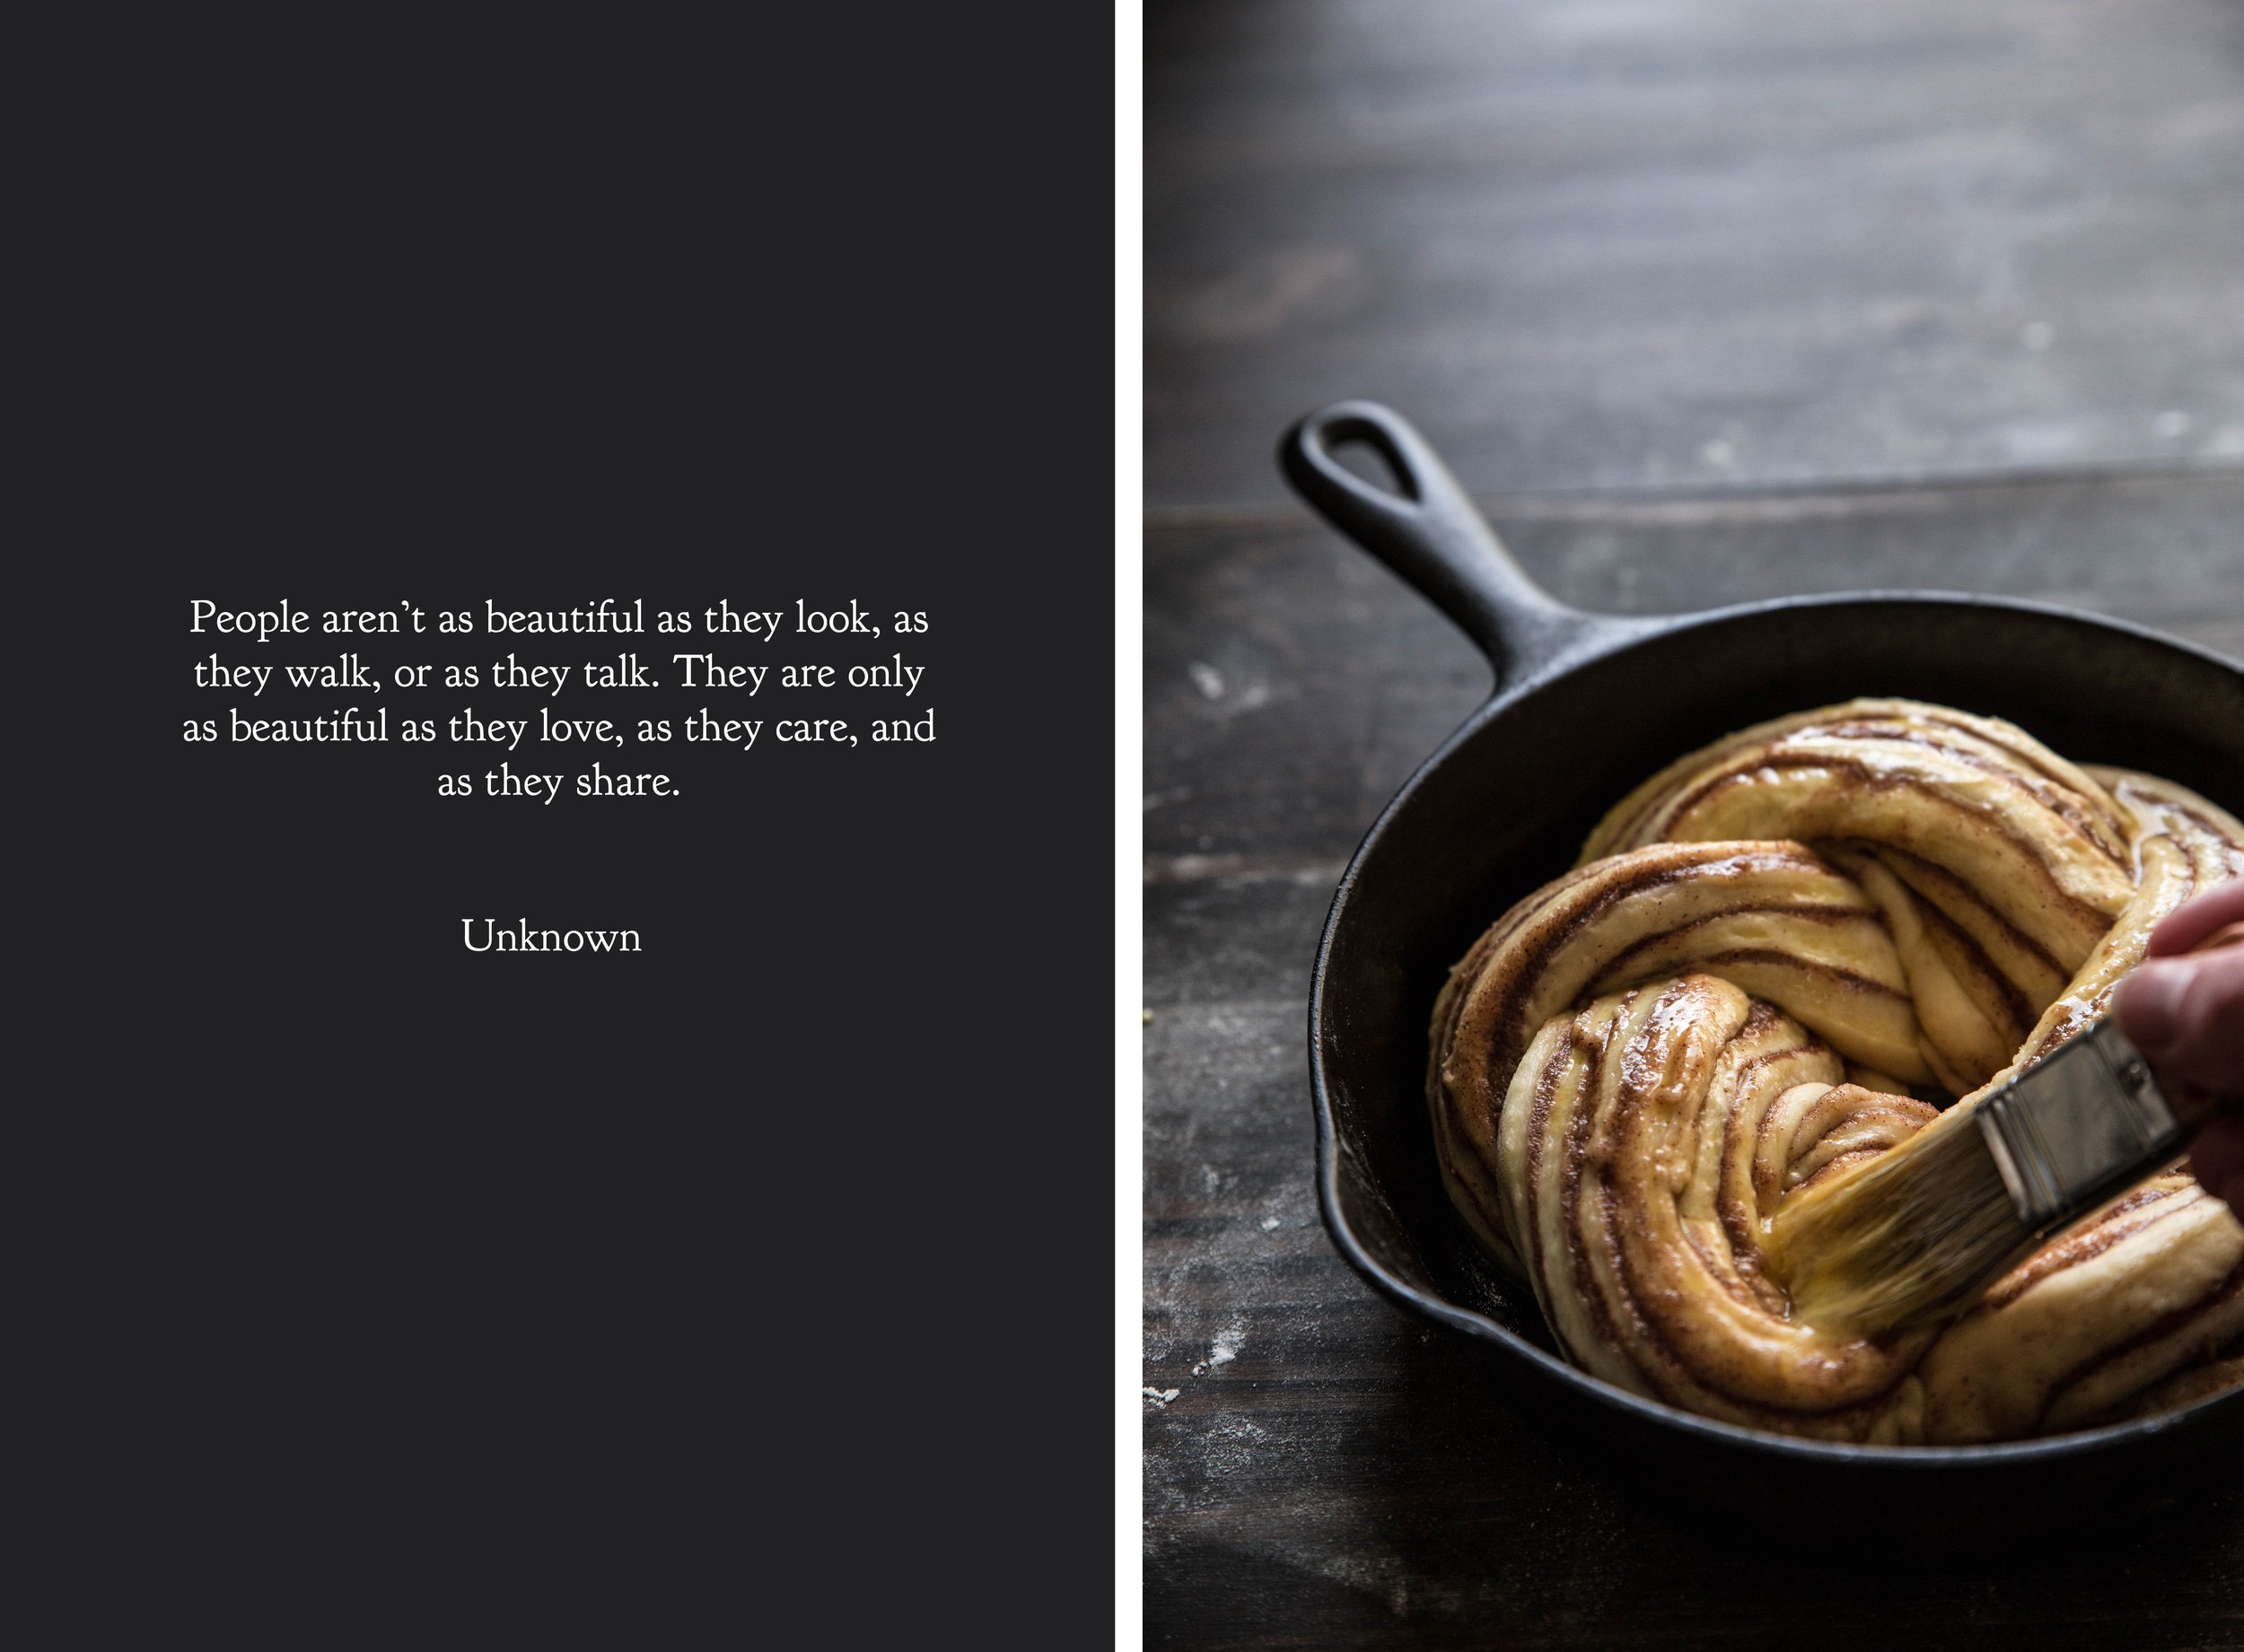
Though braided and swirled loaves may often look beyond the reach of a home baker, I can assure that most are well within the realm. This dough begins as cinnamon rolls do—a rectangle, which is rolled into a coil. Instead of being cut into individual rolls, however, the dough is split lengthwise down the center and the inside is revealed. The dough is braided, the ends pinched together, and it goes into the pan to bake.

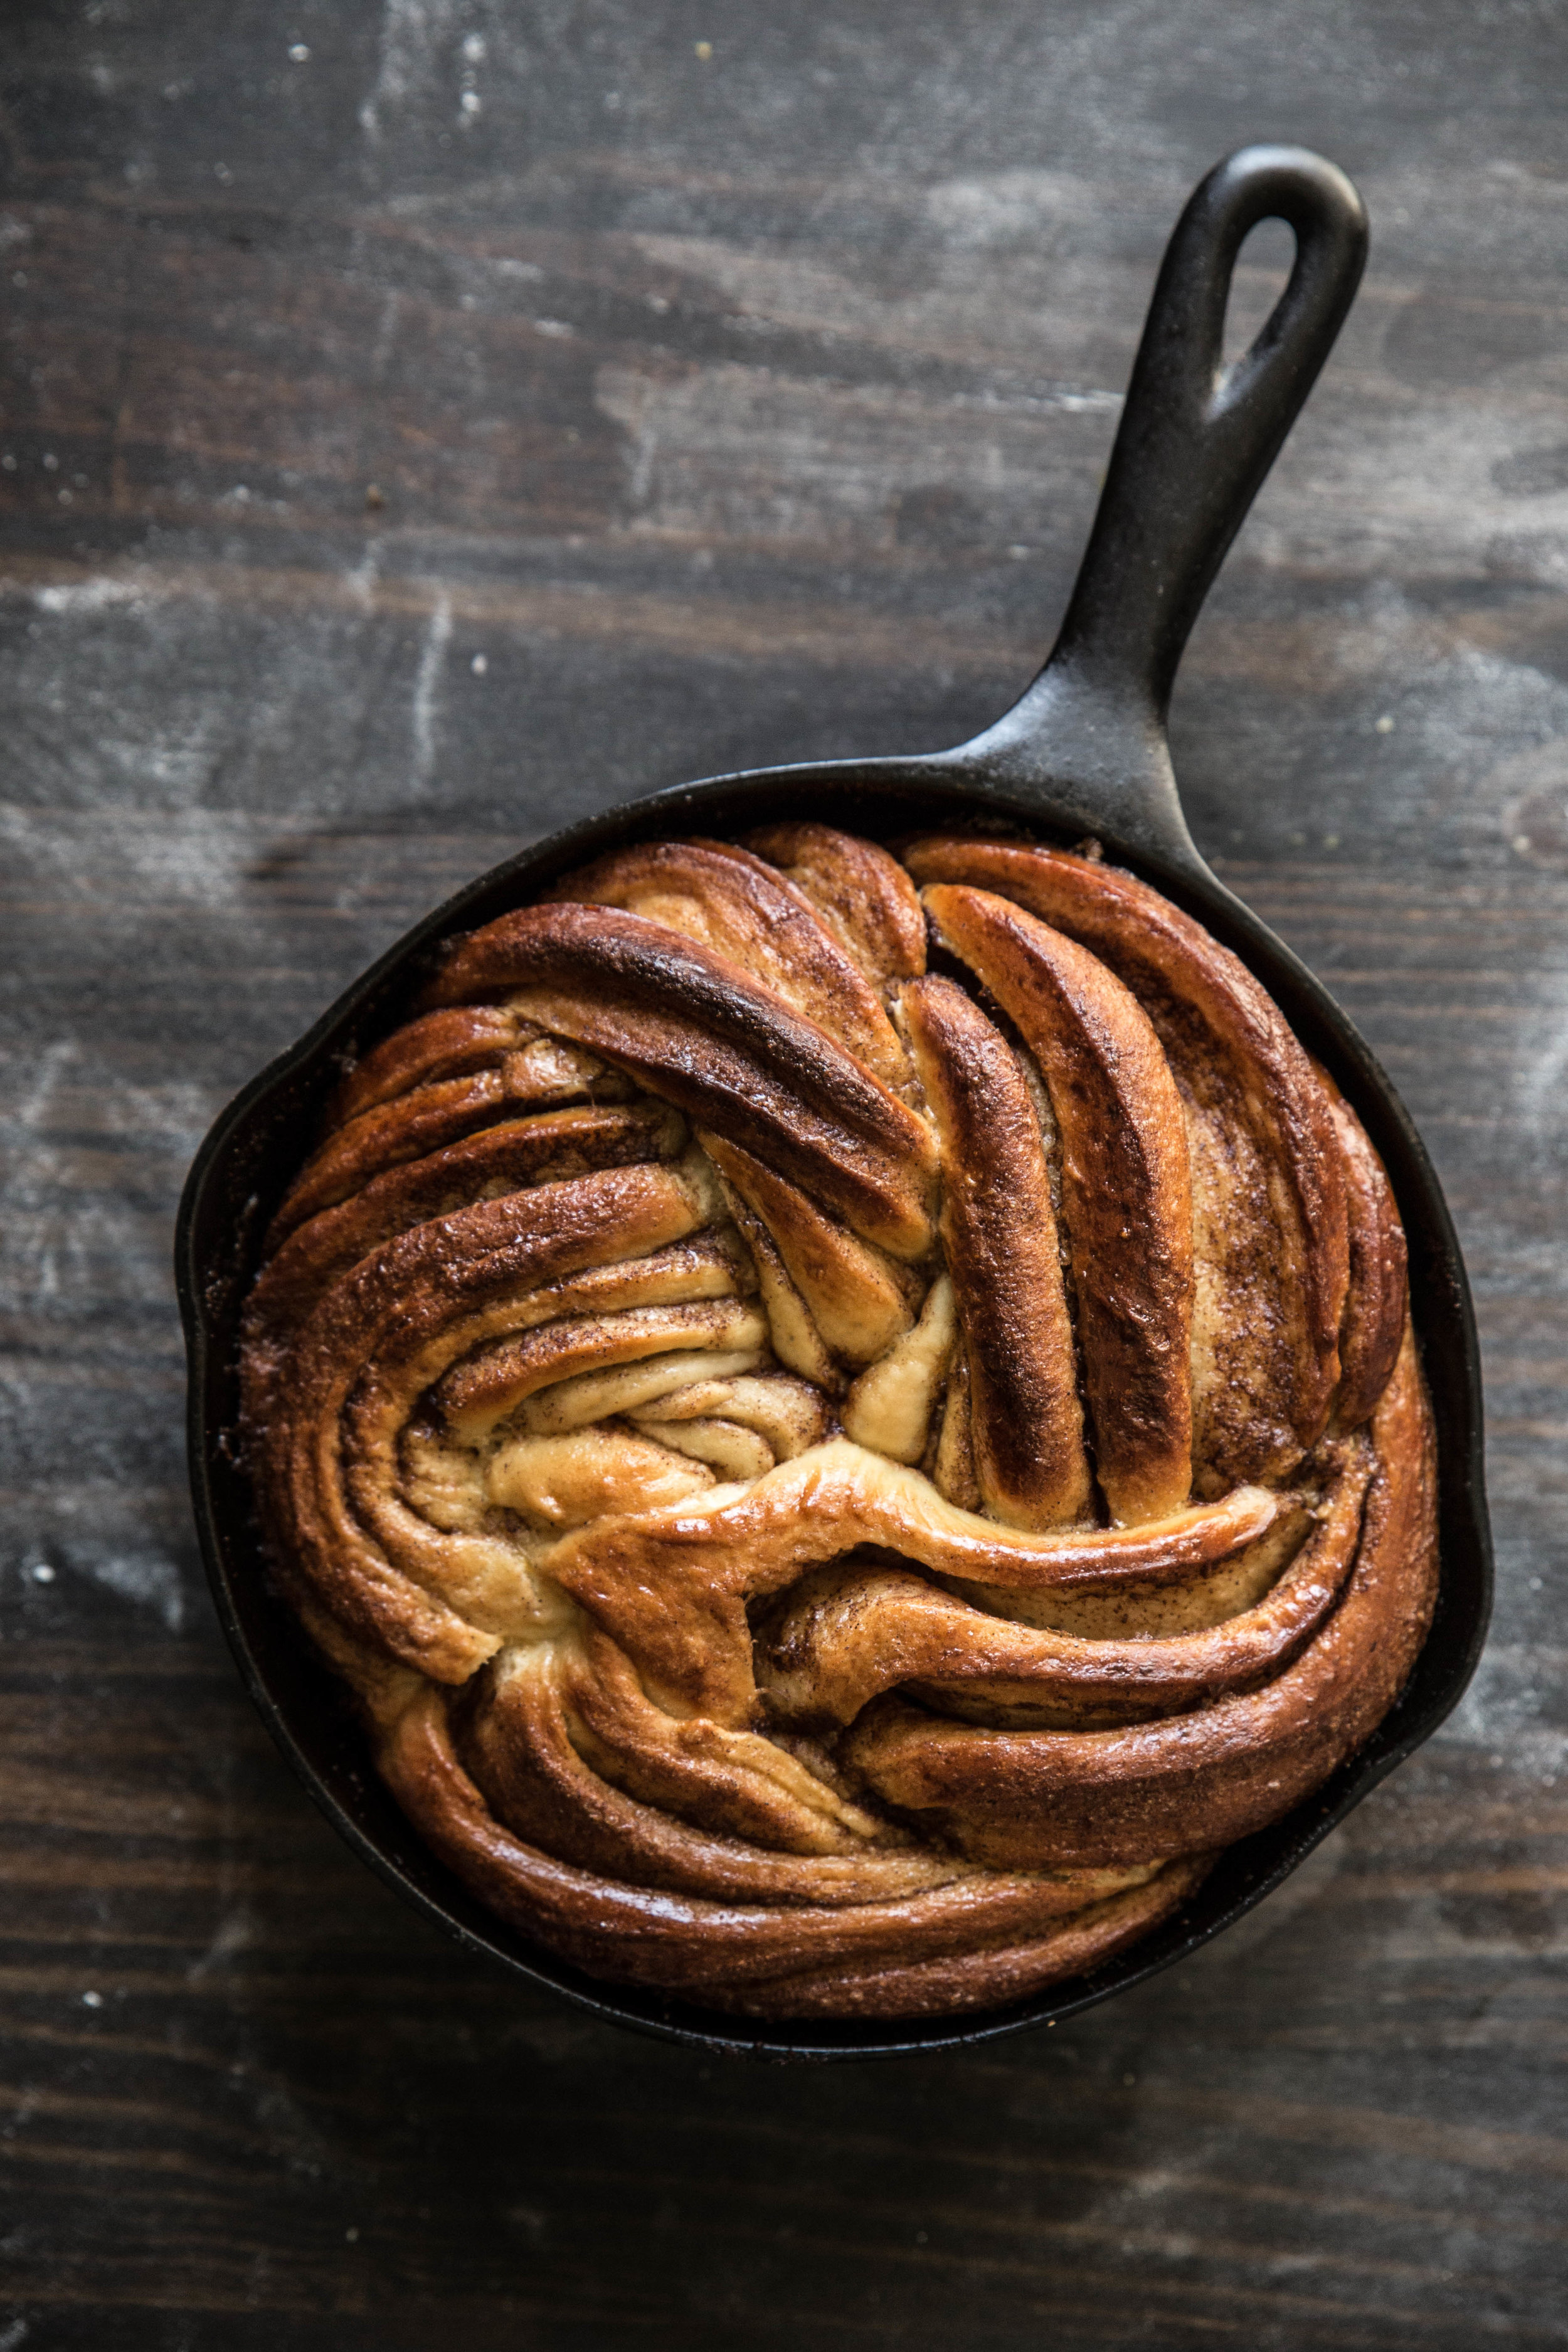
The complicated layers and swirls are revealed in the oven. Each time the pattern may be new, but you can count on the flavor to remain the same.

PS: Pastry Affair has been nominated for Saveur Magazine's 2015 food blog awards in the Best Baking & Desserts Category! It is your support that has brought me here. Again, I want to take a moment to say thank you. To vote, head over to Saveur's website, take a moment to register, and select your favorites

This Cinnamon Sugar Swirled Loaf falls somewhere between a breakfast roll and a slice of coffee cake in texture. Cinnamon and sugar are present in every layer, adding a spiced sweetness that pervades the loaf. Served with a cup of black tea or coffee, the loaf becomes a part of a weekend breakfast or mid-morning treat.

One Year Ago: Coconut Tapioca Pudding
Two Years Ago: Mango Lassi, Peanut Butter & Jelly Muffinsand Almond Butter Chocolate Chip Cookies
Three Years Ago: Blackberry Goat Cheese Tart, Arborio Rice Pudding, Chocolate Marshmallow Whoopie Pies, and Hot Cross Buns
Four Years Ago: Flourless Peanut Butter Cookies, Orange Scones, Strawberry Oat Parfait, and Honey Rolls

Cinnamon Sugar Swirl Loaf

Yields 1 loaf

Dough
1/2 cup (120 ml) milk 
3 tablespoons (43 grams) butter, melted 
2 to 2 1/4 cups (250-280 grams) all purpose flour
1/4 cup (50 grams) granulated sugar 
1 large egg 
1 1/2 teaspoons active dry yeast
1/2 teaspoon salt

Warm milk and butter until about 100 degrees F (38 degrees C), or until lightly warm to the touch. Transfer to a large mixing bowl and add 2 cups flour, sugar, egg, yeast, and salt. Fold together until the batter forms a dough. If the dough is too sticky, add more flour by the tablespoonful until it begins to form a ball. On a lightly floured surface, place the the dough and knead until smooth and elastic, about 5-8 minutes. Form into a ball.

Transfer the dough to a lightly oiled bowl. Cover and allow the dough to rise in a warm environment until doubled in volume, about 2 hours.

Filling
1/3 cup (66 grams) brown sugar, packed 
1 tablespoon ground cinnamon 
3 tablespoons (43 grams) butter, room temperature
1 large egg, beaten

Preheat oven to 375 degrees F (190 degrees C).

In a small bowl, mix together the brown sugar, cinnamon, and butter until it forms a uniform spread. Set aside.

On a lightly floured surface, roll out the dough to approximately an 11 x 15-inch rectangle. Using an offset spatula, spread the brown sugar mixture uniformly on the dough, leaving a 1/2-inch border around the edge. Starting lengthwise, roll the dough until coiled. Pinch together the edges to seal.

Using a sharp serrated knife, cut the coil in half lengthwise and face the inside upwards. Pinch together one end of the dough and braid the two long strands, facing the cut side upwards at all times. Pinch together the remaining end. Form the dough into a circular shape and pinch together the pinched ends. Transfer the circle to a lightly greased cast-iron pan or 10-inch round cake pan and brush with the beaten egg. Bake for 25-30 minutes, or until dark brown and fragrant.

Run a knife around the outside of the pan and allow to rest for 15-20 minutes before serving.

Cranberry Almond Granola

In the winter, when the snow is high and spirits are low, we head to the mountains to heal. We leave our lives behindour responsibilities, our technology, our connection to the rest of the worldin search of a lungful of fresh, pine-scented air. The long, curved mountain roads guide us towards the peaks, leading us to our home for the weekend.

When the sun stretches toward the heavens, we strap skis to our feet and fly across the landscape until our legs grow unsteady; when the sun falls below the sky, we rest near the fireplace, laughing, holding this feeling of family close. Our fears, our worries, our stubborn doubts fade and we remember, once again, how to become whole.

IMG_1650.JPG

Packed along with the winter gear, I brought a batch of granola to share among ourselves. The hearty grains were the start we needed in the dawn of the morning hours. During our stay, clouds hung heavy over the sky, releasing large, white flakes by the hour, enclosing the mountain with an opaque fog. The light, however, had a quality of warmth and wildness unknown to me in the Midwest. I could not resist the moment and pulled out my camera to capture the breakfast, the rough wood floor, and the trees blanketed in white.

The mountains teach lessons that cannot be learned from books; the mountains teach lessons that are learned directly through thin, crisp air, tired legs, and eyes full of wonder.

IMG_1618.JPG
IMG_1748.JPG

In other (exciting!) news, I am so honored to announce that Pastry Affair has been nominated for Saveur Magazine's 2015 food blog awards in the Best Baking & Desserts Category! It is your endless support that has brought me here, and I want to take a moment to say thank you. It means everything. I feel privileged to be listed among such talented company. 

To vote, head over to Saveur's website, take a moment to register, and select your favorites

Cranberry Almond Granola is textured and hearty, made for early mornings and days that are demanding. Almond butter is sweetened with honey and spices to give the base a full, natural flavor. Coarsely chopped almonds and dried cranberries are thrown in to add character. Serve with a thick yogurt or drown in a swirl of your favorite milk. 

Two Years Ago: Pita Bread, Homemade Pita Chips, and Almond Joy Candy Bars
Three Years Ago: Coconut Pineapple Banana Bread, Sundried Tomato Basil & Brie Spread, Strawberry Balsamic Jam, and Strawberry Honey Oatmeal Bars
Four Years Ago: Cereal & Milk Bars, Vanilla Almond Cupcakes, Banana Pudding, and Devil's Food Cake

Cranberry Almond Granola

Yields 5-6 cups

3 cups (270 grams) old-fashioned oats
1/2 cup (85 grams) quinoa, uncooked
1 cup (140 grams) whole almonds, chopped coarsely
1 tablespoon chia seeds (optional)
2 teaspoons ground cinnamon
1/2 teaspoon ground nutmeg
1/3 cup (78 ml) coconut oil, melted
1/3 cup (80 grams) almond butter
1/2 cup (170 grams) honey
1 teaspoon vanilla extract
1/2 teaspoon salt
1 egg white (optional)*
3/4 cup (120 grams) dried cranberries

Preheat oven to 325 degrees F (170 degrees C).

In a large mixing bowl, stir together the oats, quinoa, chopped almonds, chia seeds, cinnamon, and nutmeg. In a separate bowl, whisk together the melted coconut oil, almond butter, honey, vanilla, salt, and egg white until uniform. Pour the liquid ingredients over the dry and stir until evenly coated.

Spread out evenly on a baking sheet and bake for 20-25 minutes, or until golden and fragrant. If the egg white was omitted, stir halfway through baking; if it was added, do not stir the granola and leave it to set while baking. Cool completely before storing. Stir in dried cranberries.

*The egg white binds the granola together for a chunkier texture, allowing you to break it apart into small or large pieces of your choosing. If you prefer a looser granola, omit this ingredient.

Banana Chocolate Hazelnut Cupcakes

There are a dozen or so recipes that are regarded as family recipes in my home, passed down from earlier generations. Among those held most dear are our honey cookies, which grace the dessert table when the holidays arrive, and my Grandmother Irene's orange rolls, which are made when the snow melts and stand for the hallmark beginning of spring. As I've grown older, I've quietly added a few of my mother's recipes to this coveted list, the recipes that I remember most from childhood. 

And that is what brings me to this banana cake.

My mother originally found her recipe in an old church cookbook. Written by a friend of my grandmother, the cake had just six ingredients—sugar, sour cream, eggs, flour, baking soda, and bananas. My mother played around with the basic recipe, adding an unavoidable chocolate glaze (or chocolate chips in a pinch). Eventually shortening was added to give the cake a source of fat, which produced less of a bread-like texture and more like the feel of a cake. 

After I took hold of the recipe, I couldn't help myself from giving it my own twist and took it through a few more iterations before reaching this point. The spirit of the original, however, is just the same. 

The cake is made with shortening, which may be an unusual choice in the age of "butter is best," but I can assure you that it is the right choice. Shortening gives the cake a bit of heft, the feel of a peanut butter sandwich against the roof of your mouth, without weighing the cake down. Butter is just not capable of this texture in the same situation. The addition of sour cream and buttermilk ensure the cake has a tender crumb. It is the banana cake I remember, in its purest form.

As you know by now, I can never leave anything alone for long. I filled the cupcakes with homemade chocolate hazelnut spread (though the brand name alternative would also suit). For the pièce de résistance, the cupcake is topped with a banana buttercream. A fresh banana is beat into the frosting with a little lemon juice to prevent browning. The subsequent flavor is so true and vibrant I wondered why I haven't been doing this from the beginning.

bananachocolatehazelnutcupcakes1.jpg

Banana Chocolate Hazelnut Cupcakes is one of the evolutions of my mother's banana cake. The cake itself is rich in crumb and flavor, but the sweetness does not overwhelm. Filled with chocolate hazelnut spread, the chocolate complements, but does not overpower the subtle flavor of the banana. Topped with a banana buttercream, the banana flavor is confirmed once more, providing a light texture contrast to the cake. 

One Year Ago:  Coconut Macaroons and Honey Almond Quinoa Granola
Two Years Ago: Coconut Whipped Cream, Chocolate Candied Ginger Biscotti,  Banana Cinnamon Pancakes, and Raspberry Cream Cheese Lemon Cupcakes
Three Years Ago: Chocolate Toffee Scones, Rosemary Sea Salt Crackers, Grapefruit Cake, and Chocolate Caramel Crispy Bars
Four Years Ago: Coconut Cream Cupcakes, Yeasted Waffles, Italian Breadstick Popcorn, and Peanut Butter Chocolate Chip Cookies

 Banana Cupcakes with Chocolate Hazelnut Filling and Banana Frosting

Yields 2 dozen cupcakes

Banana Cupcakes with Chocolate Hazelnut Filling
1/2 cup (100 grams) shortening, room temperature
1/2 cup (100 grams) white sugar
3/4 cup (150 grams) brown sugar
2 large eggs
3 medium to large overripe bananas, mashed
1/2 cup (115 grams) sour cream
1 teaspoon vanilla extract
2 1/2 cups (315 grams) all-purpose flour
2 teaspoons baking powder
1/2 teaspoon ground cinnamon
1/2 teaspoon salt
1/2 cup (120 ml) buttermilk
1 cup (280 grams) chocolate hazelnut spread

Preheat oven to 350 degrees F (180 degrees C). Line cupcake pan with liners.

In a medium bowl, whisk together flour, baking powder, cinnamon, and salt. Set aside.

In a large mixing bowl, cream together the shortening and sugars until light and fluffy. Add the eggs one at a time, beating well after each addition. Mix in the mashed bananas, sour cream, and vanilla extract. 

Alternatively add and beat in the flour mixture and buttermilk in 3 additions, starting and ending with the flour. Fill baking liners 3/4 full with batter. Bake for 20-30 minutes, or until golden and a toothpick inserted in the center comes out clean. Cool completely before filling and frosting.

To fill, use a sharp knife (or cupcake corer) to cut out a small cavity in the center of the cupcake. I run the knife in a circular motion, while always pointing the knife towards the center of the cupcake. Aim for the cavity to be cone shaped. Using a pastry bag filled with chocolate hazelnut spread, fill the cupcake with the spread until nearly to the top. Cut the top off the cupcake piece you removed and press it back on the cupcake to seal the filling.

Banana Frosting
1 large ripe banana, mashed (about 1/2 cup)*
1 teaspoon lemon juice
1/2 cup (113 grams) butter, room temperature
1 teaspoon vanilla extract
1/2 teaspoon salt
3 1/4 to 4 cups (400-500 grams) powdered sugar
Banana chips (for garnish)

In a small bowl, mash the banana with the lemon juice until very smooth. Set aside.

In a large mixing bowl, beat butter until smooth. Add the mashed banana, vanilla, and salt and continue beating until uniform. Gradually add the powdered sugar, stopping once a spreadable texture has been reached. Fill a pastry bag and pipe or spread frosting on the cupcakes. Garnish with a banana chip and crushed banana chip pieces.

* The banana should be ripe enough to eat, but contain no brown spots (it will stain the buttercream). If you do encounter a brown spot, cut it fully out of the banana before mashing.