Blackberry Coconut Scones

IMG_0996-2.jpg

In my early days of baking, there was a steep learning curve to overcome. A combination of inexperience and failure to read the directions caused many items to go straight from the oven and into the trash. It was the scones, however, that left me dumbfounded. Pan after pan came out dry or bitter or flavorless; they were inedible, in every possible way. It was almost absurd that I was not able to recreate this simple pastry in my own kitchen. I say almost because nothing is laughable about throwing that much butter in the bin.

It wasn't until I got a job in a bakeryand was tasked with baking dozens of scones on a daily basisthat I found my knack for this particular pastry.

In truth, scones are no more difficult to create than a biscuit. Fat is cut into flour, liquid is added to bring it together, and the servings are cut from the dough. Perhaps it was a lack of confidence that held me back long ago, but now I feel I could create a scone with my eyes closed, even years after working behind the pastry case. 

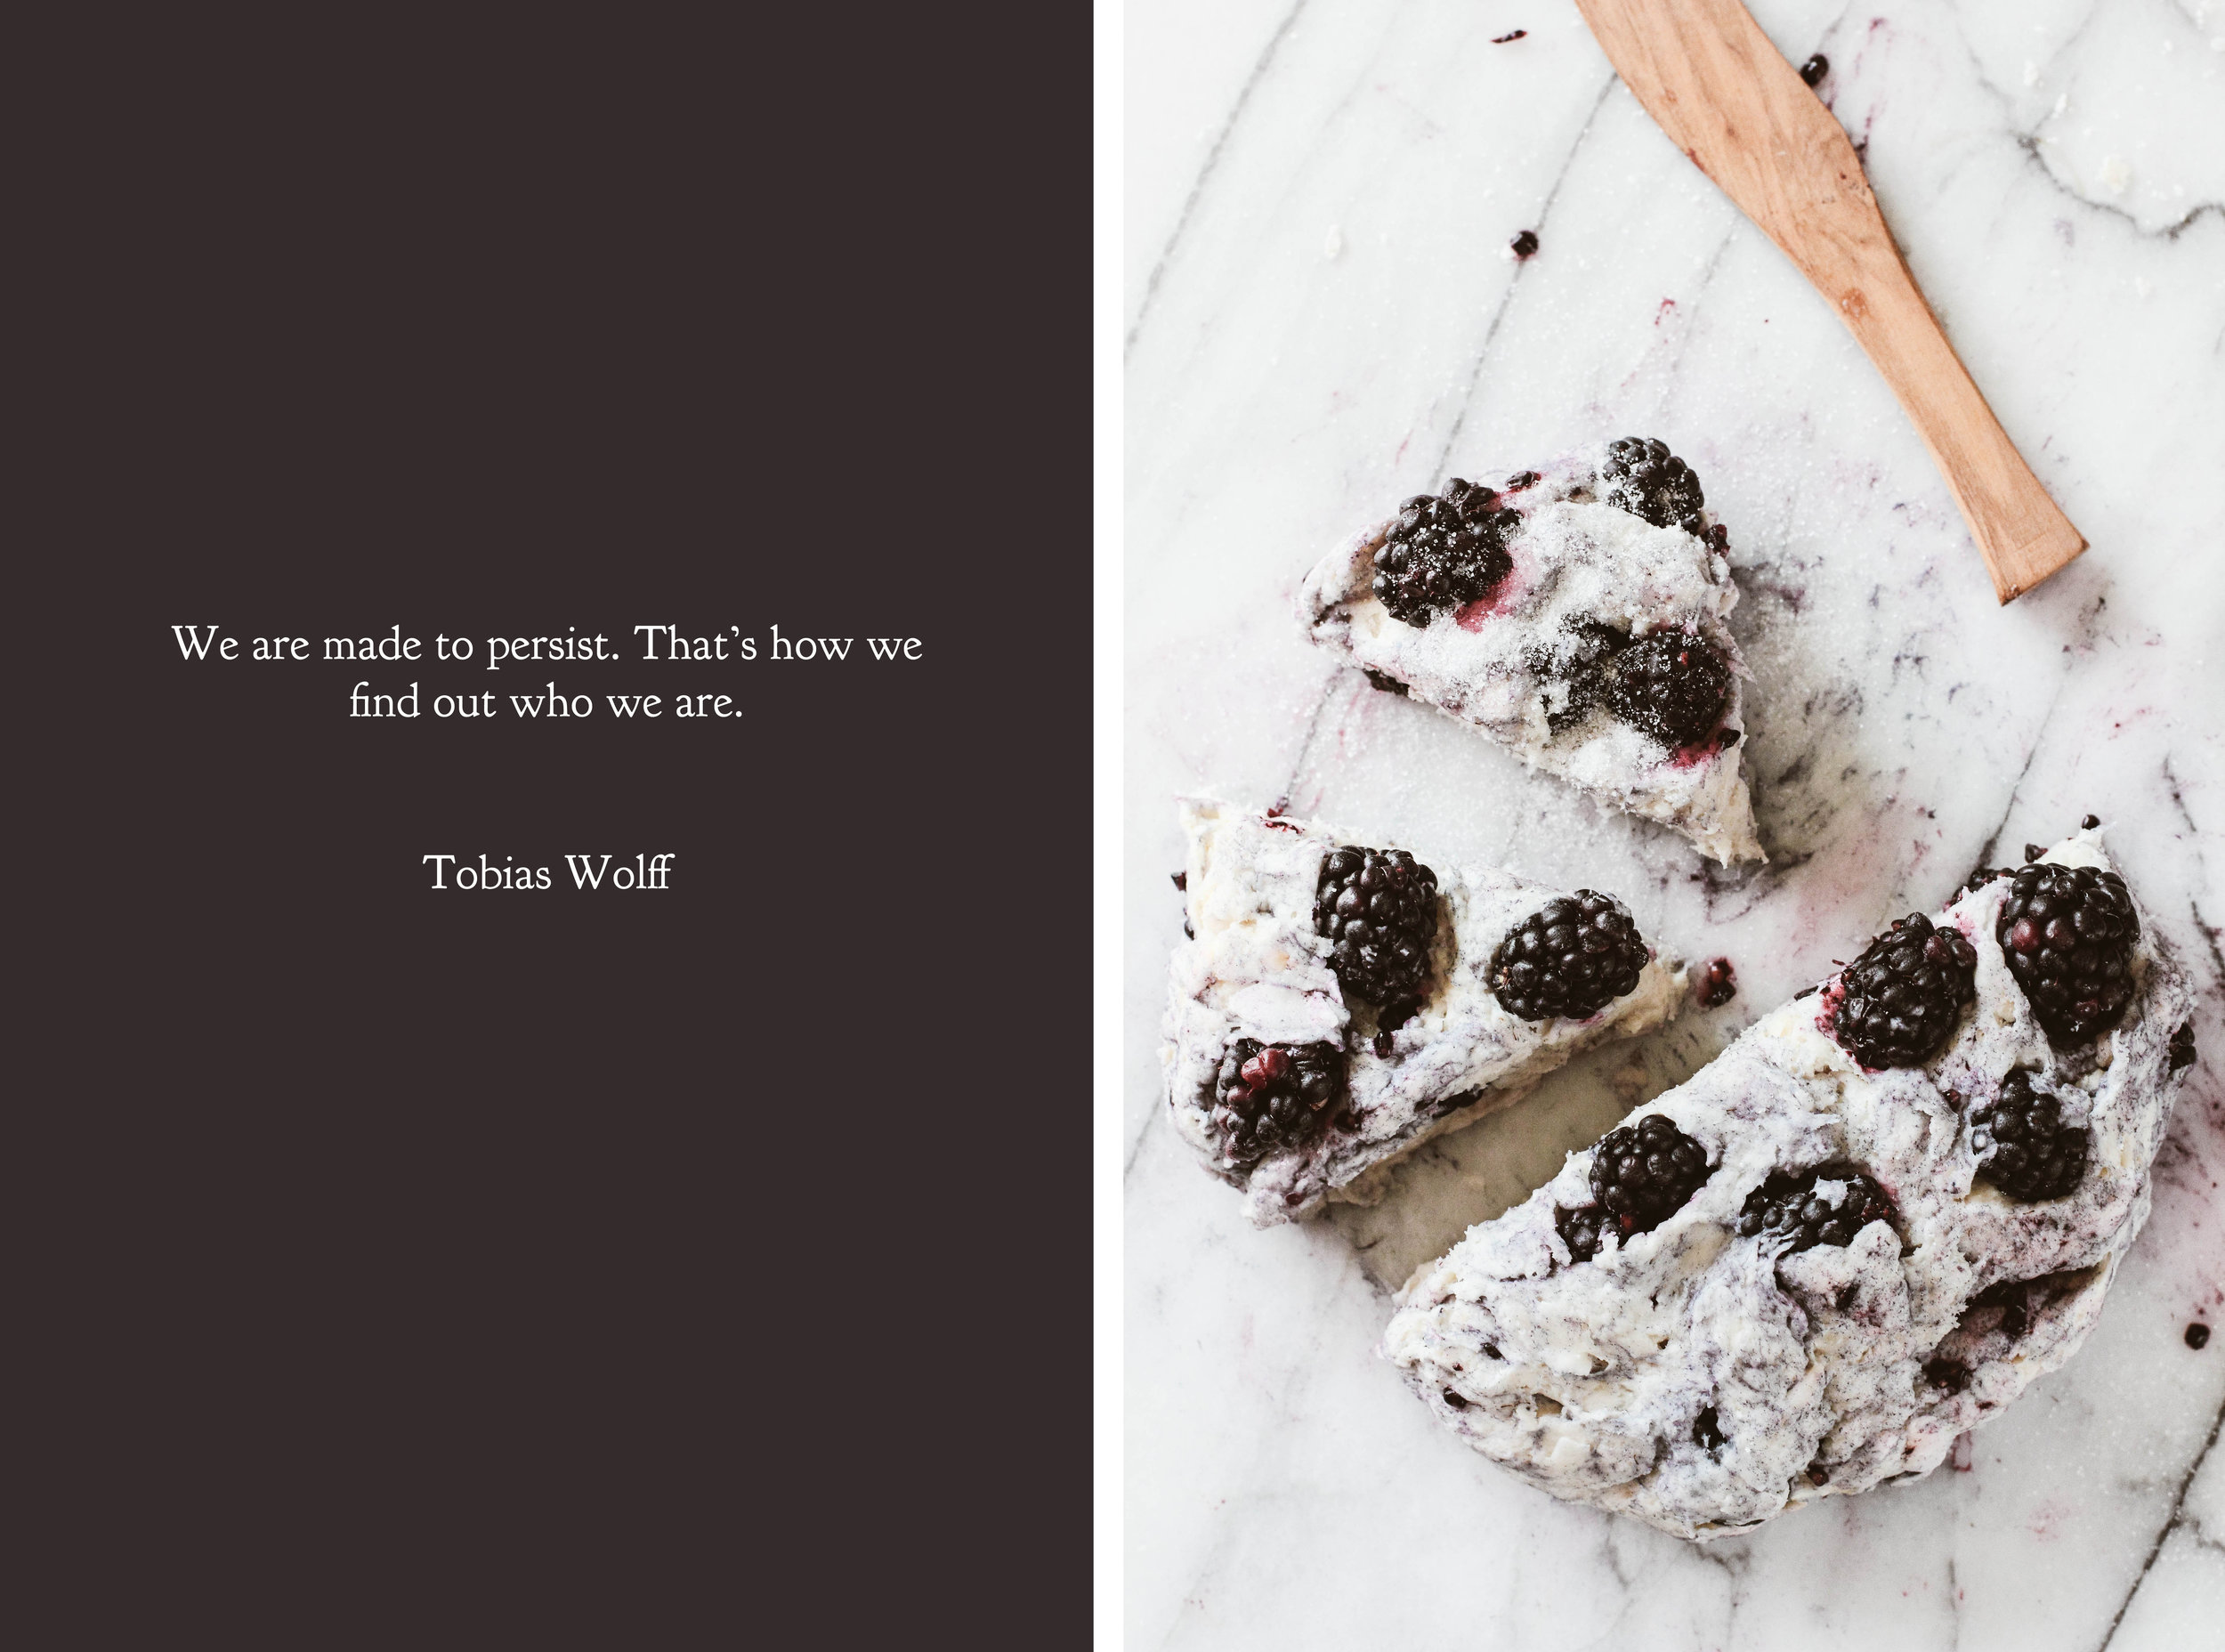
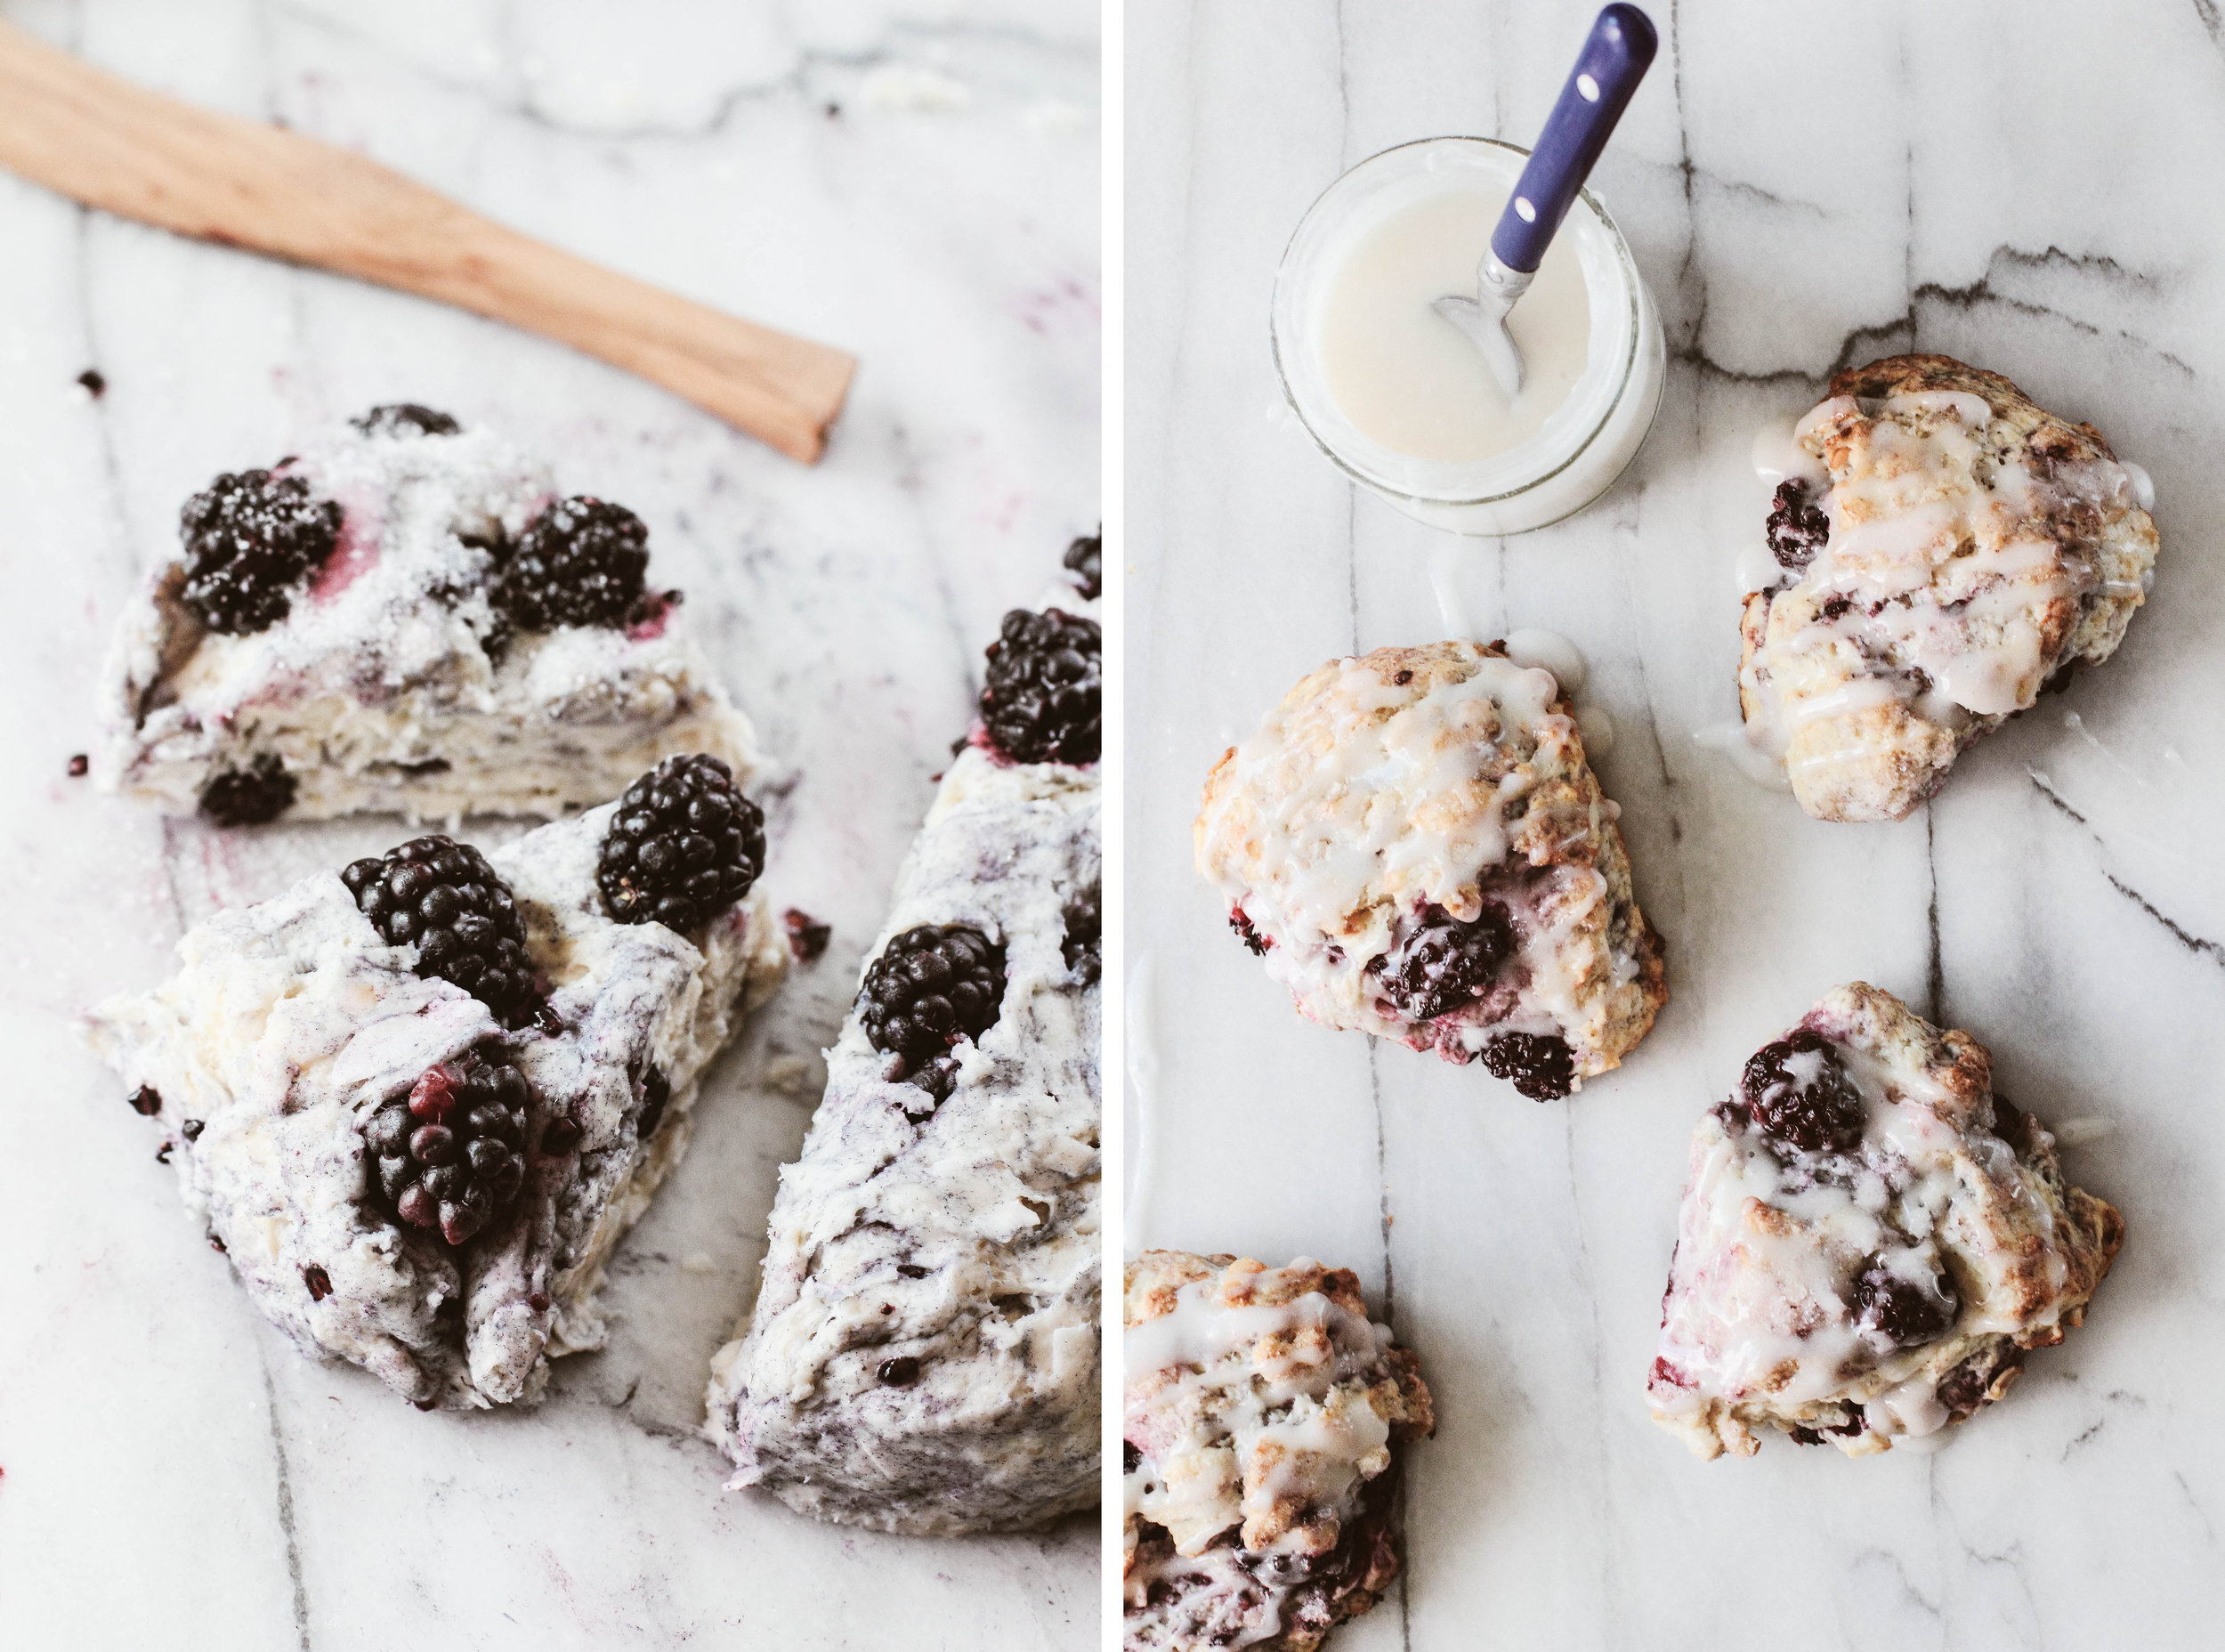
Blackberries are often discounted at my local market. Emerging from my winter cocoon, these berries feel like a bite of spring; I fill my basket each time I spot the red sale sign. With an excess of berries last Sunday, I added them to a basic coconut oil scone recipe to create a complement to brunch. Coconut oil has quickly become my favorite fat for scones because it results in a tender, delicate crumb. These (vegan!) scones may be simple, but the taste is lovely.

Blackberry Coconut Scones combine the fresh berry with coconut in three of its formscoconut milk, coconut oil, and coconut flakes. The result is a tender, flaky scone that foils the tart berry against the sweetness of the pastry. A light coconut glaze is drizzled over the top for an extra touch. While it could be omitted, I find it worth the extra effort.

One Year Ago:  Peanut Butter Chocolate Frosted Cake and Orange Coconut Pull-Apart Bread
Two Years Ago: Lemon Pudding Cake, Grapefruit Margaritas,  Chocolate Oatmeal Flaxseed Muffins, and Chocolate Chip Raisin Oatmeal Cookies
Three Years Ago: Cinnamon Sugar Muffins, Basic Caramel Sauce, Rum Raisin Ice Cream, and Butternut Squash & Spinach Tart
Four Years Ago: Yeasted Chocolate Coffee Cake, Meyer Lemon Curd, Lemon Chocolate Tart, and Peanut Butter Swirled Brownies

Coconut Scones with Coconut Glaze

Yields 6-8 scones

Blackberry Coconut Scones 
1  1/2 cups (187 grams) all-purpose flour 
1/4 cup (56 grams) granulated sugar 
2 teaspoons baking powder 
1/2 teaspoon salt 
1/3 cup coconut oil (solid state) 
1/2 cup unsweetened coconut flakes 
6 ounces (170 grams) fresh blackberries
3/4 cup (175 ml) coconut milk

Preheat oven to 375 degrees F (190 degrees C).

In a large mixing bowl, whisk together the flour, sugar, baking powder, and salt. Cut in the solid coconut oil with a pastry blender (or your fingers) until the mixture resembles coarse sand. Gently fold in the coconut flakes, fresh blackberries, and coconut milk until the mixture comes together.

Turn out dough onto a lightly floured surface and form into a disk roughly 1-inch thick. Cut the dough into 6-8 pie shaped wedges and move to a baking sheet. For extra sweetness, sprinkle granulated sugar over the top of the scones. Bake for 16-18 minutes, or until the edges take on a light color. Allow scones to cool completely before glazing.

Coconut Glaze 
1/2 cup (62 grams) powdered sugar 
1 tablespoon coconut milk
1 teaspoon vanilla extract

In a small bowl, stir together all ingredients. Using a spoon, drizzle glaze over cooled scones. Allow at least 15 minutes for the glaze to set before serving.

Chocolate Orange Cake

The feeling of spring is in the air, unusual for this time of year. Normally, the Upper Midwest is still buried in a thick layer of white, and spring is just a dream over the horizon. But now the snow has melted, and with unseasonally warm weather and longer daylight hours, I feel the anxiousness of  summer to arrive. To subdue my restlessness (and dread that winter will shortly reappear), I headed to the place where I feel calm.

With a few hours to spare, I decided on baking an everyday cake. With no occasion to celebrate or holiday to observe, a cake makes an ordinary weekend feel a little brighter.

Oftentimes, I feel that some cakesespecially cupcakesact entirely as acceptable vessels to consume frosting. When an average cake, perhaps slightly dry, is covered with a mound of buttercream, there is little complaint. Good buttercream frostings have this redeeming power (and thank goodness as it has rescued many a cake of mine).

With this particular cake, however, I prefered the cake itself to be the true star. To make the crumb tender, sour cream and buttermilk were used to soften the texture. Orange zest was rubbed into the sugar to release a vibrant orange scent and flavor. And, once the cakes were baked, the layers were brushed with fresh orange juice to give it a final touch.

As a lover of chocolate and orange flavors together, this cake managed the fusion with ease.

This Chocolate Orange Layer Cake is fresh and light. The cake is tender which balances the glaze that is thick and rich. I suggest a lighter touch of glaze than seen in the photographsjust enough to seal in the layersso it will meld with the cake instead of acting as a separate layer. For all the chocolate and orange lovers, this cake is for you.

One Year Ago:  Almond Cake
Two Years Ago:Chocolate Pudding, Black Tea Cake with Honey Buttercream,  Blueberry Lemon Pancakes, and Lavender Lemon Shortbread
Three Years Ago:Cappuccino Pancakes with Mocha Syrup, Hot Cocoa Cookies, Rosemary Focaccia, and Swedish Visiting Cake
Four Years Ago:Chocolate Blueberry Ice Cream, Heart Shaped Cinnamon Rolls, Mexican Hot Cocoa Mix, and Brown Butter Crispy Rice Treats

Chocolate Orange Cake with Glaze

Yields 2 layer 8-inch cake or 3 layer 6-inch cake

Chocolate Orange Cake
1 3/4 cups (350 grams) granulated sugar
Zest of 2 oranges
2 large eggs
1/2 cup (118 ml) vegetable oil
1/2 cup (115 grams) sour cream
1 teaspoon vanilla extract
1 3/4 cups (220 grams) all-purpose flour
3/4 cup (65 grams) cocoa powder
2 teaspoons baking soda
1 teaspoon baking powder
1/2 teaspoon salt
1 cup (237 ml) buttermilk
6 tablespoons freshly squeezed orange juice

Preheat oven to 350 degrees F (180 degrees C). Grease baking pans.

In a large bowl, combine granulated sugar with orange zest, rubbing it between your fingers to release the oils. Beat in the eggs, vegetable oil, sour cream, and vanilla extract until well combined. 

Gradually mix in the flour, cocoa powder, baking soda, baking powder, and salt, alternating with splashes of buttermilk. Stir until batter is uniform.

Divide batter evenly between baking pans and bake for 40-50 minutes, or until a toothpick inserted into the cake comes out clean with a few crumbs. While cakes are cooling, use a fork to poke a few holes in the top of the cake and evenly brush on the orange juice so it soaks in. Cool cakes to room temperature (or chill) before frosting.

Chocolate Orange Glaze
12 ounces (340 grams) semi-sweet chocolate
8 tablespoons (113 grams) butter
Zest of 1 orange
1/2 cup (115 grams) sour cream
1 tablespoon orange liqueur (optional)
Orange zest, for garnish (optional)

In a medium saucepan, melt the chocolate and butter on low until smooth. Remove from heat and stir in orange zest, sour cream, and orange liqueur. Allow to cool for 15-20 minutes to thicken.

To assemble, carefully place one layer of cake onto a serving platter, brushed side up. Spoon glaze onto surface until desired thickness. Arrange the second cake layer on top of the first and frost the cake with remaining glaze. I have found that a cold cake is easier to frost because the chocolate glaze will harden when it comes into contact with the cake. However, waiting until the frosting is thick and can hold its shape will also work and be easier to spread along the side. I also suggest a thinner layer of glaze than shown in the photographs to have a more even cake-to-frosting ratio.

Before serving, dust the top of the cake with orange zest.

Rosemary Soda Bread

IMG_0725-2.jpg

Winter, usually brusque and bitter, has taken on a milder disposition this year. Instead of windblown piles of snow so high the windows are partially covered, the snow is an afterthought. An inch of powder blows around by day and settles by night, simply to keep up appearances. Yet, the cold weather traditions of the Upper Midwest hold strong. We bundle up in layers, donning our hats and scarves early in the season (though we become looser on the dress code once we are adapted to the below freezing temperatures). We complain endlessly about the weather to one another, bonding over our shared displeasure with wind and iced car windows.

And, of course, there's the soup.

Sundays are for rich, hearty soups. When the weekend comes to a close, I try to make a large pot to last a few meals. My mother did this while I was growing up, and I am certain her mother did it for her as well. Soup is a comfort food, a way to squeeze in extra vegetables and keep our bodies warm.

Lately, I have been experimenting with making my own bone broth and creating twists on old favorites. Zuppa Toscana has been a well seasoned request, year after year. I throw in carrots, celery and extra handfuls of kale, and take out the cream. The flavor remains, but it becomes an arguably healthier dish. Tonight will be vegetable barley, with hamburger and leftover bacon just to throw the name in contention.

As experience has revealed, fresh bread tops the list as the perfect side to soup. This quick bread recipe takes as long to bake as the soup takes to stew, making them an inseparable duo. 

Rosemary Soda Bread is a quick bread that can go from an idea to a loaf in an hour. The bread is on the denser side, risen through baking soda alone, but the quality reminds me of a good biscuit. Seasoned with dried rosemary, the bread takes on a subtle flavor, but still pairs well with flavors both sweet and savory. While this bread works well to soak up hearty soups and gravies, I also find it at home with a spread of dark berry preserves.

One Year Ago:  Chocolate Almond Biscotti and Grapefruit Rum Cocktails
Two Years Ago:Toasted Almond Cookies with Fig Filling, Coconut Raisin Granola, and Hot Cocoa Popsicles
Three Years Ago:Beer Bread, Baked Corn Tortilla Chips, Roasted Pepper Feta Scones, and Flourless Chocolate Rum Cake
Four Years Ago:Vanilla Rum Soaked French Toast, Cocoa Almond Meringues, Banana Bread Oatmeal 

Rosemary Soda Bread

Yields 1 loaf

3 1/2 cups (440 grams) bread or all-purpose flour
1 teaspoon baking soda
1 teaspoon dried rosemary
1 teaspoon salt
1/4 cup (57 grams) butter, melted
1/2 cup (115 grams) sour cream
1 cup (237 ml) milk

Preheat oven to 400 degrees F (205 degree C). 

In a large mixing bowl, whisk together the flour, baking soda, rosemary, and salt. Add in melted butter, sour cream, and milk, stirring with a spatula to bring dough together. 

Turn out on a lightly floured surface and knead dough until it forms a ball. Place onto baking sheet and flatten the top. Using a sharp knife, cut a 1/4-inch deep cross into the top of the loaf. Dust lightly with flour and dried rosemary. Bake for 45-55 minutes, or until lightly browned.

Serve with a spread of butter and jam (I used wild blueberry preserves from Bonne Maman), or use it to soak up a hearty broth.