Bananas Foster Sauce

Brunch has become the way I do weekend lunch. For a girl with an early morning schedule, I would never survive the wait until actual brunch time to enjoy a towering plate of French toast. Instead, I eat when I rise and wait until the crowds have cleared around noon before reaching for the maple syrup.

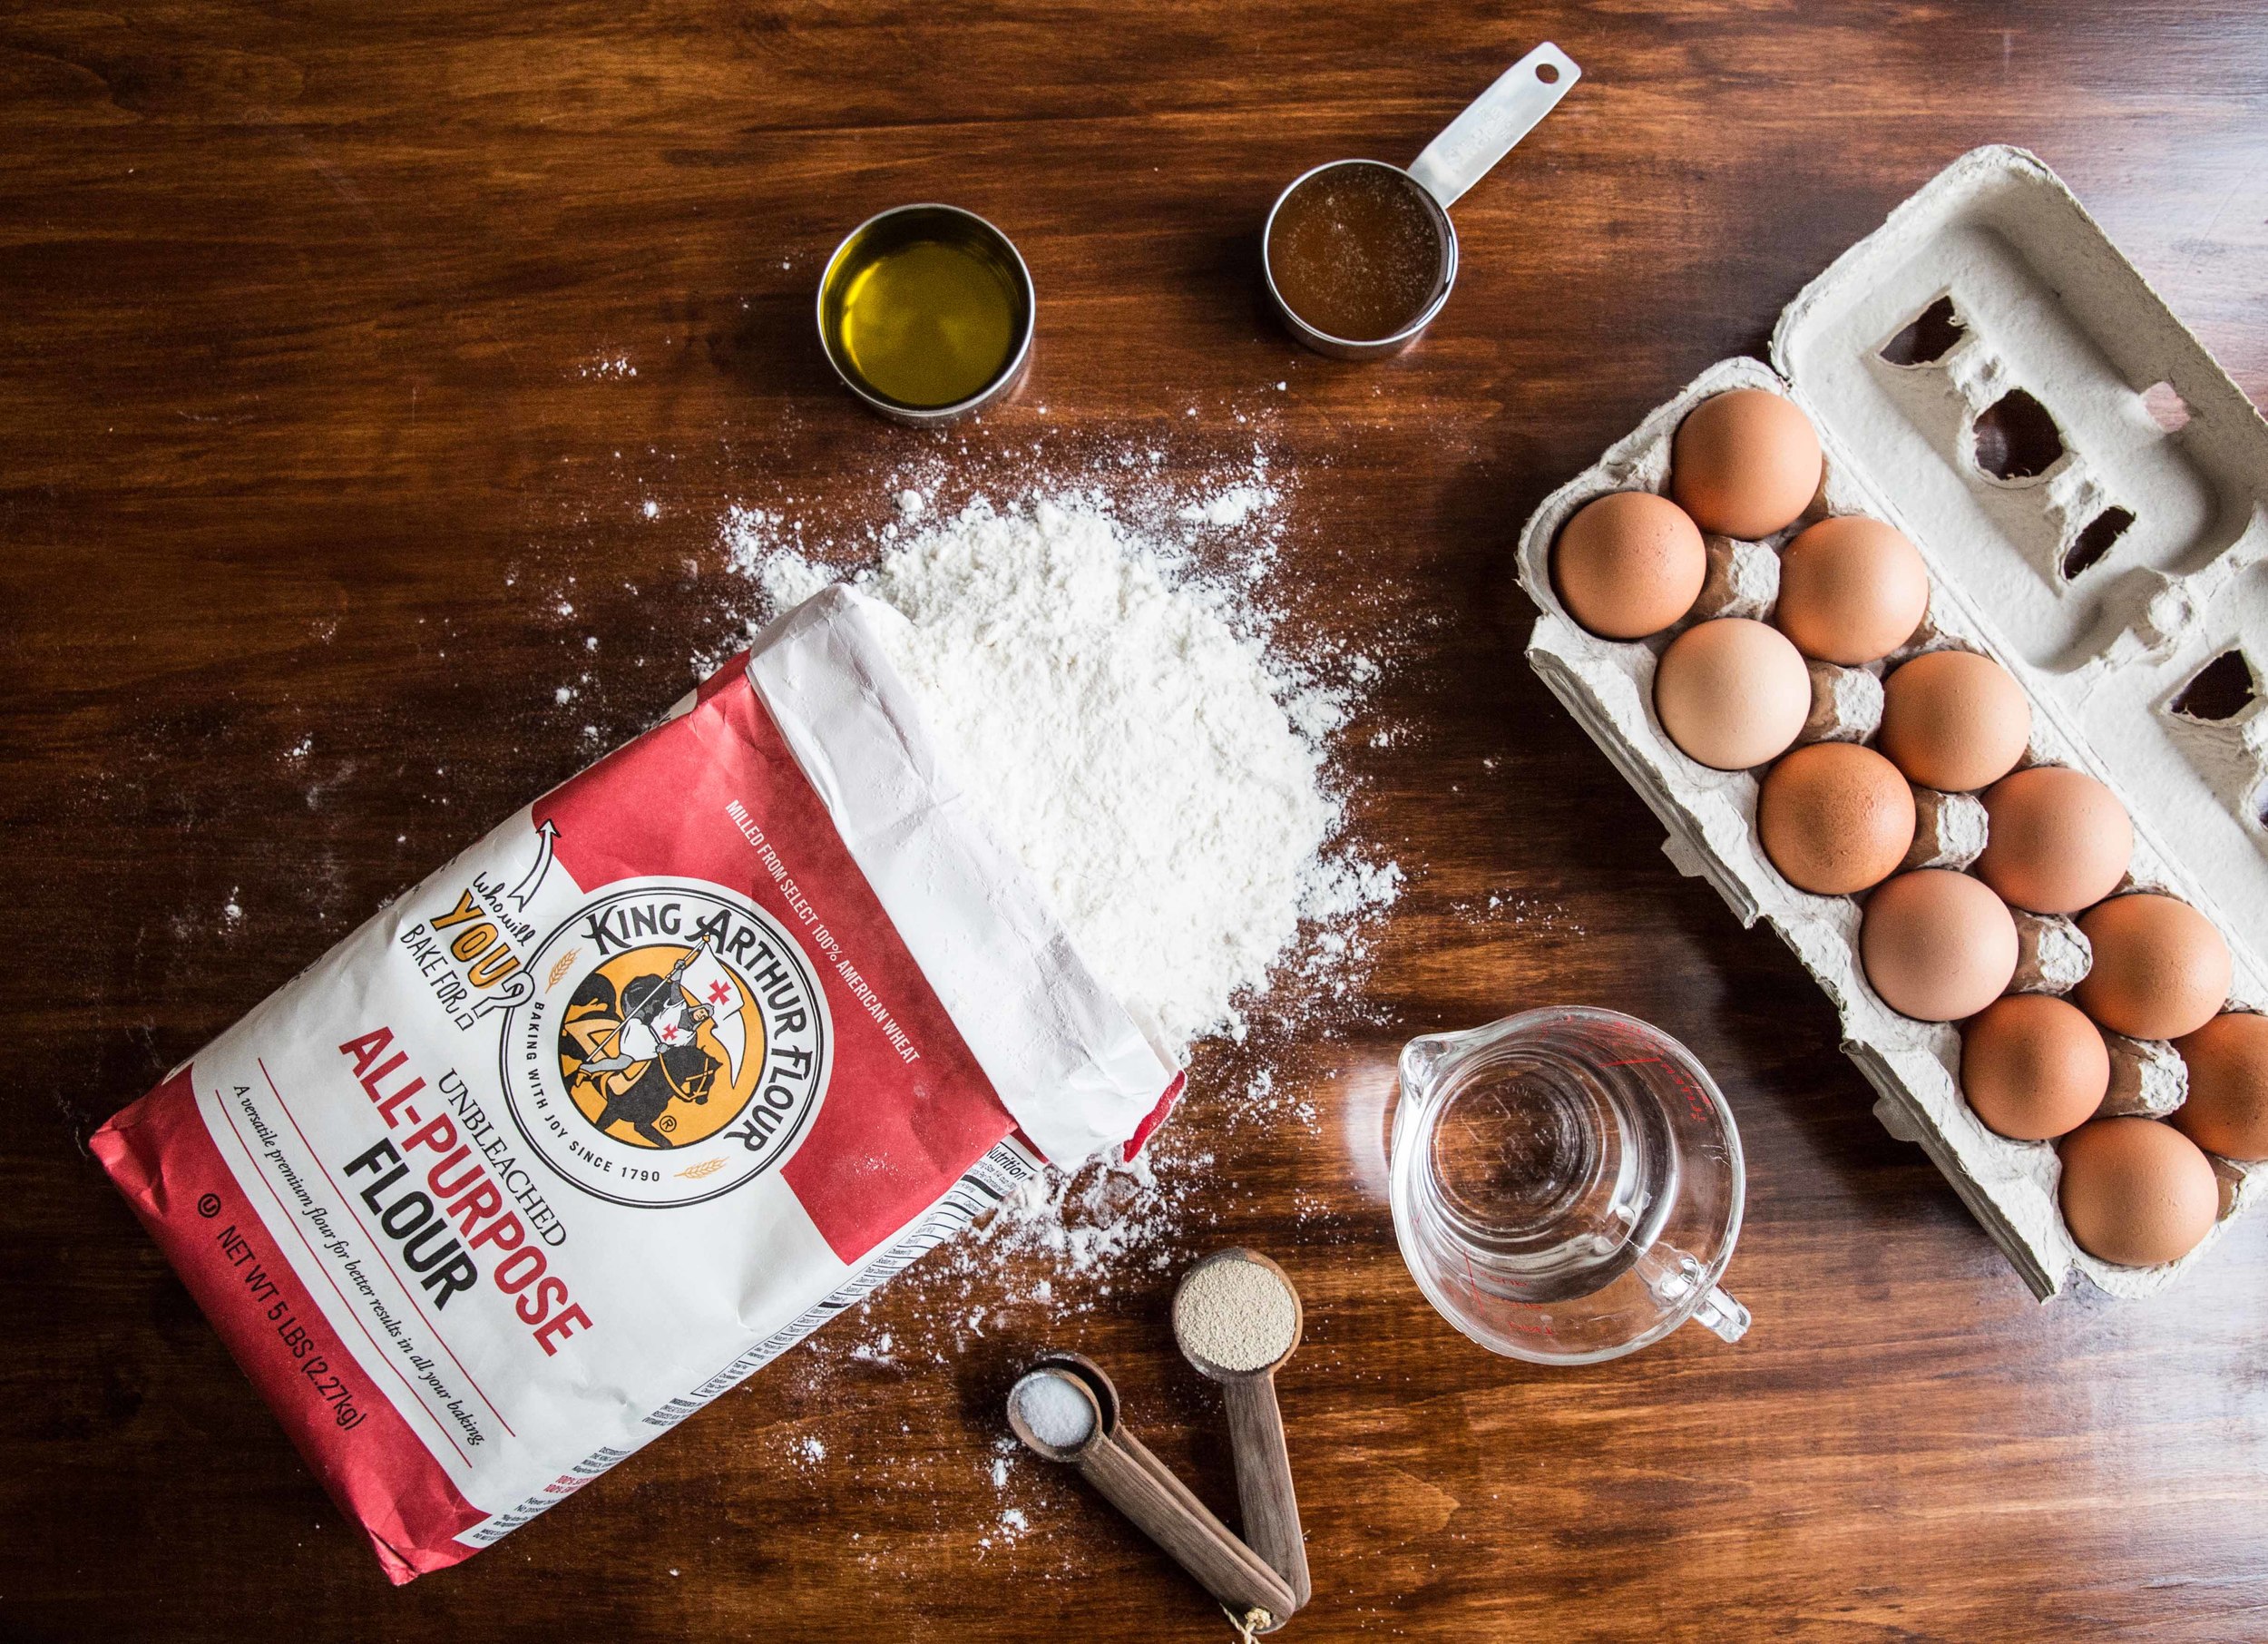
On days when I don't want to change out of my pajamas, the challenge is to whip up something equally delicious and simple in my own kitchen. This is where caramelized bananas enter the picture. After learning about bananas fostera dessert featuring warm caramelized bananas in a rum caramel sauce poured over vanilla ice creamI knew there had to be a way to bring this idea to brunch. I removed the ice cream and replaced it with your typical breakfast fare. Is it a little decadent? Sure. But that's why we do brunch.

As a long time non-stick cookware user (a trait I inherited from my mother), I was excited, but a little skeptical, when  Wolf Gourmet asked me to review its stainless steel and aluminum 10-Piece Cookware Set. Even though I associate the company with high quality, my only stainless steel cooking experience involved ruining my roommate's flimsy pan after trying (and failing) to fry an egg during my college years.

After a month of use, I can say with certainty that the pans have held up beautifully. The pans do well with deglazing after frying meat and vegetables to create sauces. With a seven-ply construction, the heavy pans heated food evenly, which felt reminiscent of cast iron. However, I was even more impressed with how it did with tasks for which I would normally use non-stick cookware. In the pursuit of brunch, I made crepes. I ran a light layer of olive oil around the pan, poured in the batter, and crossed my fingers that they would not stick. The crepes did not, but even more remarkable is that I didn't have to add more oil for the remainder of the batch. The layer of oil stayed in place and the crepes came out smoothly every time. I know I can't do that with my non-stick cookware.

And lastlyfor the purpose of honest disclosureafter I spectacularly burned my first batch of bananas foster sauce to a charred black ash due to inattention, the pan recovered to looking brand new with a soak in warm water. The high heat of the runaway caramel did not harm the pan. However, I did notice the bottom of one pan had minor discoloration after a few weeks, but it was nothing a little baking soda scrub couldn't cure.

Ultimately, high quality makes all the difference with stainless steel cookware. After my own personal use, I would recommend Wolf Gourmet. I would like to offer one Pastry Affair reader the opportunity to try the 10-inch skillet out in your own kitchen.

Edit: Giveaway is closed.

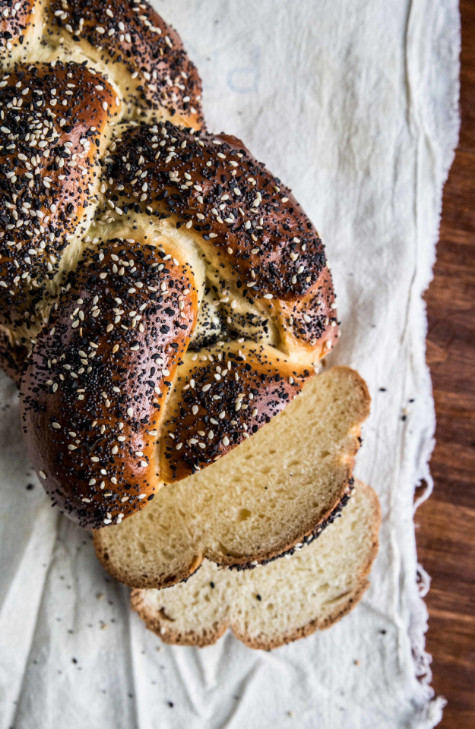
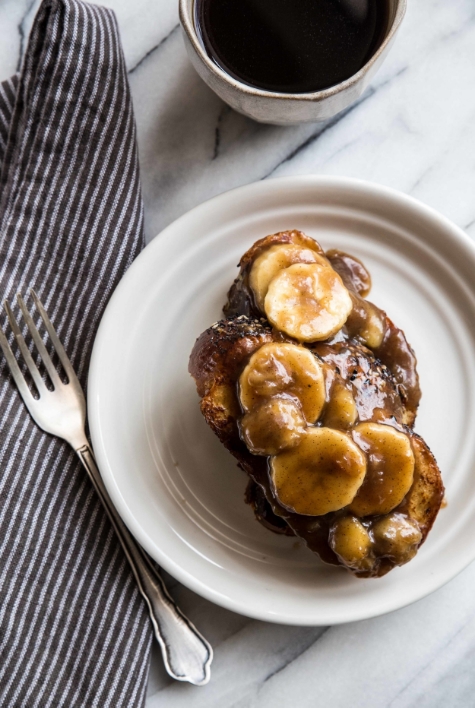
Bananas Foster is a warm sauce to be poured over sweet dishes and desserts. Bananas are caramelized with brown sugar and butter. With the warmth of cinnamon and the spice of rum, the sauce is elevated to another level. Though the traditional dessert featured the sauce poured over vanilla ice cream, the sauce is as lovely served over waffles, French toast (made with challah), or crepes.

One Year Ago: Banana Chocolate Hazelnut Cupcakes
Two Years Ago: Orange Coconut Pull-Apart Bread and Coconut Macaroons
Three Years Ago: Coconut Whipped Cream, Chocolate Ginger Biscotti, Banana Cinnamon Pancakes, Raspberry Lemon Cupcakes, and Pita Bread
Four Years Ago: Tropical Banana Bread, Strawberry Balsamic Jam, Strawberry Honey Oatmeal Bars, Blackberry Goat Cheese Tart, Arborio Rice Pudding, Chocolate Whoppie Pies, and Hot Cross Buns
Five Years Ago: Vanilla Almond Cupcakes, Banana Pudding, Devil's Food Cake, Flourless Peanut Butter Cookies, Orange Scones, and Honey Rolls

Bananas Foster Sauce

Yields about 1 cup of sauce

1/2 cup (100 grams) brown sugar, packed
2 tablespoons butter
1/4 teaspoon ground cinnamon
Pinch of salt
2 medium ripe, firm bananas, cut into 1/4-inch slices
2 tablespoons dark rum

In a heavy skillet, melt the brown sugar and butter over medium heat.  Add the cinnamon and salt.  Stir and bring sauce to a simmer. Add banana slices and cook, turning once, until soft, about 2-3 minutes per side. 

Gently stir in the the rum; take care not to break apart the banana slices. To flambé, use a long lighter to ignite the vapor above the sauce. Let the flames burn until they go out on their own, about 30 seconds. However, the sauce can be served without flame and does not need to be flambéd if you are uncomfortable with the process.

Serve immediately over vanilla ice cream, French toast, or waffles.

Disclosure: A complimentary 10-Piece Cookware Set was provided for review by Wolf Gourmet. As always, all thoughts and opinions are my own.

Traditional Challah

March 20 marks the first day of spring. Though, as Henry Van Dyke said, the first day of spring and the first spring day often have different timing. I hope that today is the latter for you. The first spring day came nearly a month ago, which is unprecedented in the upper Midwest. To celebrate these fortuitous weather patterns, I am baking foods that remind me of the spring season. 

In partnership with King Arthur Flour, each month I want to challenge you with a new recipe to help you grow and develop as a baker. This month we're exploring challah. Challah is a Jewish bread that is served on the Sabbath and other Jewish holidays. The soft bread is enriched with eggs and olive oil to bring color and flavor. It is reminiscent of brioche, which uses fewer eggs and butter instead of oil. With a hint of honey for sweetness, challah is a mildly decadent breadgreat for soaking up gravy and even better for making French toast.

To start, the liquid ingredientswater, yeast, olive oil, honey, eggswhisked together. The flour and salt are gradually added and stirred in with a bowl scraper. I prefer to use all-purpose flour because it creates a loaf with a soft and tender interior. When the dough looks shaggy, turn the dough out onto a lightly floured surface and bring it into a ball.

To knead, use the heel of your hand to push the dough downwards at an angle to stretch it away from you. Rotate the dough 90 degrees, fold it in half, and repeat the process. As the dough is kneaded, you will be able to feel the dough firm up as the gluten forms. After 5-10 minutes of kneading by hand, the dough will begin to feel elastic and spring back under your touch. When it has the appearance of the dough shown in the photograph in the top left, it is ready for the first rise.

I prefer to knead by hand to feel the texture of the dough change, but the dough can also be kneaded using a stand mixer on low speed with a dough hook attachment. Place in a bowl, cover, and allow to rise for 1 1/2 to 2 hours, or until doubled in size.

When the dough has risen, divide it into four equal pieces. Shape these pieces into logs. Then, using your hands, start in the middle of each log and apply pressure with the heels of your hands, rolling the dough back and forth. Gradually move your hands towards the ends of the log to stretch out the shape. The process should be repeated until each log is 16 inches in length and approximately 1 inch wide. Take the ends of the strands and pinch them together to start forming the loaf.

While challah can be braided into 3-, 4-, 5-, or 6-strand braids, I will be showing you the 4-strand braid. The extra strand gives the loaf a unique, braided appearance I enjoy. However, if you are interested in other strand braids, there are many tutorials available online

To help illustrate the process, the dough strands will be labeled 1 through 4, where 1 is always located on the far left. The numbers indicate the position of the strands; it will not be necessary to remember which number originally applied to each strand. Once the tops of each strand have been firmly pinched together, take strand 1 (far left) and place it between strands 3 and 4. Please note that all strands will cross over the top of the others; they will never cross underneath.

Strand 2 is placed between strands 3 and 4.

Strand 4 is placed between strands 1 and 2.

The process is then repeated. Strand 1 is placed between strands 3 and 4 again.

Keep following this pattern until the strands have been braided. Pinch the remaining ends of the strands together and tuck under the loaf.

The loaf is brushed with an egg wash, which will give it a deep golden color when baking. Sesame and poppy seeds are sprinkled heavily over the top for flavor and visual interest. The seeds stick well to the egg wash, keeping them firmly attached to the bread (especially while cutting and toasting and eating).

The bread bakes for approximately 35 minutes. When the bread has browned to your liking (around the 20-minute mark), tent aluminum foil over the bread to prevent further browning. This is one of the tricks for getting a perfectly golden loaf each time.

Challah is a classic Jewish bread enriched with eggs, olive oil, and honey. The loaf has a soft, tender interior with a browned crust. Often braided and sprinkled with seeds, it is a bread made to grace the dinner table. Challah is great as a side for soup and gravies, or simply spread with butter and jam. If your challah lasts several days, turn the remaining slices into French toasttrust me, it's divine. 

One Year Ago: Chocolate Orange Cake and Blackberry Coconut Scones
Two Years Ago: Almond Cake and Peanut Butter Chocolate Frosted Cake
Three Years Ago: Lavender Lemon Shortbread, Lemon Pudding Cake, Grapefruit Margarita, Chocolate Oat Muffins, & Chocolate Chip Oatmeal Raisin Cookies
Four Years Ago: Cinnamon Sugar Muffins, Caramel Sauce, Rum Raisin Ice Cream, Butternut Squash & Spinach Tart, Chocolate Toffee Scones, Rosemary Crackers, Grapefruit Cake, and Chocolate Caramel Crispy Bars
Five Years Ago: Chocolate Coffee Cake, Meyer Lemon Curd, Lemon Chocolate Tart, PB Swirled Brownies, Coconut Cream Cupcakes, Yeasted WafflesItalian Popcorn, and PB Chocolate Chip Cookies

Traditional Challah

Yields 1 large loaf

Dough
3/4 cup (177 mL) lukewarm water
2 1/4 teaspoons (7 grams) active dry yeast
1/3 cup (80 mL) olive oil
1/4 cup (85 grams) honey
2 large eggs
1 1/2 teaspoons (9 grams) salt
4 cups (480 grams) King Arthur Unbleached All-Purpose Flour

Topping
1 large egg
1 tablespoon water
Black and White Sesame Seeds, optional
Poppy Seeds, optional

In a large bowl, whisk together the water, yeast, olive oil, honey, eggs, and salt. Gradually add the flour and stir with a bowl scraper until combined.

Turn out onto a lightly floured surface and knead the dough for 5-10 minutes, or until elastic in appearance. Place into a lightly greased bowl, cover with plastic wrap, and allow to rise in a warm place for 1 1/2 to 2 hours, or until doubled in size.

Turn out dough onto a clean surface and divide into 4 even pieces and shape into logs. Using your hands, roll each log into a 16 inch- long rope. To create a 4-strand braid, pinch all four strands together at the top. From left to right, number the location of the strands 1-4. Cross strand 1 over strand 3. Cross strand 2 over strand 3. Cross strand 4 over strand 2. Repeat until you have reached the ends and pinch the loose ends together. Cover loaf with a clean towel and allow to rise an additional 30-45 minutes, or until doubled in size.

Preheat oven to 375 degrees F (190 degrees C).

To create the egg wash, whisk together the large egg and water. Brush over risen loaf. Sprinkle with sesame and poppy seeds until covered.

Bake for 20 minutes. Tent aluminum foil over the loaf to prevent over-browning and continue baking for another 15-20 minutes. The loaf will appear golden brown and should reach an internal temperature of 195 degrees F (90 degrees C) when done.

This post is sponsored through a partnership with King Arthur Flour. All thoughts and opinions are my own.

Quick Puff Pastry

As I was learning to bake, there were a number of pastries that intimidated me. The ingredients were familiar, but the techniques in which they were combined left me with a nervous feeling in the pit of my stomach. I avoided these sweet treats, placing them at the bottom of the baking list for a day when I felt adventurous. Even now, there are a few pastries I still shy away from (I'm looking at you, macarons). 

My first fear was scones. After a few batches, some failed and some successful, the routine grew comfortable, and they have remained trouble-free since. The second fear was pie crust. This one took quite a bit little longer to conquer. It wasn't until I realized my hands were a better mixing tool than any machine that the dough came together beautifully

Puff pastry is another of the pastry basics that intimidated me for many years. It is less of the technique that discourages me, and more of the sheer amount of time it takes to make laminated dough  (which can be days between the folding, rolling, and resting). I am impatient when it comes to pastry. Today, however, my impatience is a virtue because it resulted in this recipe for quick puff pastry. This flaky pastry can be mixed together in less than 30 minutes and has a puff that rivals that of the actual laminated dough.

To begin, all-purpose flour is mixed with salt and baking powder. Pastry purists may tell you that baking powder has no business in puff pastry, where the flaky layers should come from the butter alone. However, since this is a quick puff pastry, I figured anything that can give a little extra height on our pastry is welcome.

Cold, cubed butter is cut into the flour with a French technique known as fraisage. The butter is coated in flour and flattened with the heel of your hand, smearing it against the surface away from you. This process is repeated enough to flatten the butter cubes just once—perhaps a dozen times total. You don't want to overdo this step. The butter should still be quite large in size when finished (about the size of your thumbnail); large butter pieces helps provide those coveted flaky layers. If you overdo this step, the butter may melt and you will lose the flaky layers in the final product.

When you are finished cutting the butter into the flour, it should look similar to the image on the top left. Bring the dough together, form a well in the center, and pour in half of the ice cold water. Using a dough scraper, combine the water and flour. It may be a bit messy at first, but it will come together. Be careful not to over-mix the dough. Repeat with the remaining water. Then, form the dough into a square with floured hands.

The dough is rolled out into a 10 by 12-inch rectangle. If there is extra flour on the top, brush it off. Extra flour can make the flaky layers stick together, preventing them from reaching full height. Next, fold the dough into thirds, like you would do with a letter, continuing to brush off extra flour as you go. Then, flip the dough over and rotate it 90 degrees. The entire rolling and folding process is repeated another 4-5 times. Make sure to fold and rotate the dough in the same direction each time, to ensure a full rotation.

This folding and rolling process is what creates the flakiness of puff pastry. The butter is flattened into very thin layers so when the pastry hits the heat of the oven, the butter will melt, leaving space between the layers and creating the flaky appearance and texture. The dough should be wrapped and chilled for 30 minutes before using so the moisture in the dough can be distributed evenly and the butter can harden firmly.

The dough can be left in the refrigerator up to 3 days or frozen for several months before using. If frozen, thaw the dough in the refrigerator the night before for use the next day.

This recipe for Quick Puff Pastry creates a flaky pastry can be mixed together in less than 30 minutes and has a puff that rivals the standard recipe. Puff pastry is the base for many sweet and savory dishes, including rolls, turnovers, cookies, and elaborate desserts. Keep an eye out for puff pastry recipes over the next few months!

One Year Ago: Rosemary Soda Bread
Two Years Ago: Grapefruit Rum Cocktails
Three Years Ago: Hot Cocoa Popsicles, Chocolate Pudding, Black Tea Honey Cake, & Blueberry Lemon Pancakes
Four Years Ago: Cappuccino Pancakes, Hot Cocoa Cookies, Rosemary Focaccia, and Swedish Visiting Cake
Five Years Ago: Cinnamon Rolls, Mexican Hot Cocoa Mix, and Brown Butter Crispy Rice Bars

Quick Puff Pastry

2 cups (240 grams) all-purpose flour
1/2 teaspoon baking powder
1/4 teaspoon salt
1 1/4 cups (10 oz or 280 grams) cold butter, cubed
2/3 cup (156 mL) cold water

In a large mixing bowl, whisk together the flour, baking powder, and salt. Cut the cold, cubed butter into the flour with your hands. The dough should be crumbled in appearance, with large pieces of butter. Make a well in the dough and add half of the cold water, stirring and folding the dough with a dough scraper until the water is just combined. Repeat with the remaining water.

On a floured surface, pat the dough into a square and roll out into a 10 by 12-inch rectangle. Brush off excess flour and fold into thirds (like a letter). Flip over the dough and rotate it 90 degrees. Repeat the rolling and folding process 4-5 more times.

Wrap the dough in plastic wrap and chill for a minimum of 30 minutes before using.