Fresh Herb Bread

I started a small herb garden at the beginning of summer, featuring basil, oregano, rosemary, and thyme. The plants were arranged behind the sink in my new home, taking in the sunshine from the large windows. Historically, gardening has not been one of my specialties. Plants tend to last no more than a month or two, dying from a combination of under-watering, over-watering, or a simple stroke of bad luck. Even so, I could not seem to let go of the hopes that this will be the year my thumbs turn green.

Unexpectedly, my small herb garden quickly grew beyond its place behind the sink, spilling over the planters and slowly conquering all available counter space. As I carried the herb planters outside to regain my work space, I was certain the credit for the abundant plants was not my own. The large window and the brilliant sunshine deserved all of the praise. Who knew a green thumb and a south facing window were the same thing? Regardless, when herb plants are generous, we all win.

For this recipe, I featured the fresh Italian herbs in a fragrant loaf of bread. The bread is customizable to your tastes; use whichever herb or combination of herbs you prefer. Whether spread thickly with butter, sopping up gravy, or forming the base of a sandwich, the bread has become a staple in my kitchen. It seems as if there will never be enough loaves to keep up with my sun-grown plants. 

For the recipe for the Fresh Herb Bread, head over to Wolf Gourmet's blog, Food Notes.

This post is sponsored through a partnership with Wolf Gourmet. All thoughts and opinions are my own. 

Rosemary Olive Bread

The season of comfort foods and warm stews is upon us. Along with the holiday table classics, my dinner table features homemade breads for soaking up gravy and mashed potatoes. In years past, I have filled the bread basket with soft honey rolls, sweet cranberry orange brioche buns, and lightly spiced pumpkin rolls. As my love for crusty bread grows ever stronger, this year's table will feature a loaf with a thick crust and soft interiora texture perfect for mopping the plate clean.

In partnership with King Arthur Flour, each month I want to challenge you with a new recipe, filled with explanations and fresh techniques to help you grow and develop as a baker. This month we're tackling the crusty loaf and learning how to create it in your own kitchen. The recipe may appear long or complicated at first glance, but these are many details to make the new techniques easier for you. The recipe is at the same difficulty level and takes the same amount of active time as a traditional loaf of bread.

The bread starts with a poolish, which is a French term for a pre-ferment. A pre-ferment is exactly as it sounds dough that has been fermented before baking. The poolish is created the evening before by mixing together flour, water, and a pinch of yeast. Covered tightly with plastic wrap, it is left to rest overnight at room temperature for 12-18 hours. The ideal time for this poolish to be ready is roughly 15 hours, but bread is incredibly forgiving and the poolish will adjust to your own schedule. 

The poolish has a dual purpose: the fermentation adds a greater complexity of flavor to the bread and it helps the baked bread keep for a longer period of time. When ready, the poolish will have a uniform bubbled appearance, shown above.

When the remaining ingredients have been added to the bread, the dough will be very sticky. Contrary to popular belief, this is exactly what we want. A "wet dough" will yield a loaf with an open crumb, which results in a tender interior, and a firmer crust. Although you will have a strong temptation to add more flour, don't do it. Instead, we will knead the dough using wet dough techniques.

The use of a bench knife will be incredibly helpful for the next few steps.

Turn the dough out onto a clean, flourless surface (wooden cutting boards work best, but I have used a clean counter top with no issue). To knead the wet dough, form the dough into a log shape with your bench knife and, starting at one end, cut the dough at roughly a 45 degree angle. Continue the cutting motion, slicing the dough into 4-5 pieces. Use the bench knife to slide the dough pieces back together, rotate the loaf a quarter turn, and repeat the slicing process. Continue kneading in this manner for 3-5 minutes.

The process of cutting the dough helps the gluten to form quickly. After a few repetitions of the kneading process, you will notice the dough change texture. It will go from soft and lax to holding itself together in a tighter formation. When the dough has visibly changed textures (less sticky) and becomes difficult to slice, it is time to change kneading techniques.

rosemaryolivebread6.jpg

The second kneading technique will strengthen the dough and give it elasticity. Using the bench knife, bring the dough into a log shape. The long edge should be facing you. About 1/3 of the way in, pick up the dough with the tips of your fingers (no palms). Imagine picking up a cat under the front paws; the motion is similar. Rotate the dough 90 degrees and slap the bottom of the dough against the surface, pulling the top half of the dough back with your fingers to stretch it. Fold the dough back onto itself by bringing your hands down over the top of the dough, touching the surface, and pulling your hands out sideways to break free. This will help minimize sticking. Every few motions, scrape the surface clean with a bench knife to keep the dough together. 

Be aggressive and move quickly with the dough or it will stick to the table and be more difficult to work with. Don't be afraid of kneading incorrectly; you'll pick up the technique quickly when you can feel how your motions affect the dough. After 3-5 minutes of kneading, the dough will be ready. It will have a smooth appearance, lose much of its stickiness (you should be able to poke the dough without it sticking to your finger), and feel like a muscle (elastic). 

To clean your hands of sticky dough while kneading, rub them with a small amount of flour. The dough will come off easily, making it faster and less messy than using water or a towel. 

Place the kneaded dough into a bowl, cover, and let it to rise until it doubles in volume. This will take anywhere from 1-2 hours depending on the temperature of the room. I recommend putting the dough into a container with volume measurements (like the dough doubler pictured above)—it makes it easy to see exactly how much your dough has risen and how much farther it has left to go.

rosemaryolivebread1.jpg

When the dough has doubled in volume, turn it out onto a very lightly floured surface to prevent any sticking. (1) Take the corners of the dough and pull them into the center of the loaf. (2) This will create a square or rectangular appearance. (3) Then, take two adjacent corners and fold them in to form a triangular end. (4) Starting on this end, roll the dough into itself tightly, forming a loaf shape. Place the loaf seam side down onto parchment paper, cover with a towel, and let it rise until doubled in volume (30-40 minutes).

Before forming the loaf, turn on the oven to preheat the baking stone in the middle rack of the oven. It takes much longer than the oven to come to full temperature and should be given plenty of time to heat. I heat the oven while the bread completes its second rise. The use of a baking stone helps the loaf bake evenly by dispersing the heat evenly and helps the bottom of the loaf become crusty without burning. If you don't have a baking stone, a thick baking sheet can be used as a substitute. Place a cast iron pan (or edged broiler pan) on a different rack below the baking stone to heat as well; this will be used to create steam.

Just before baking, slash the loaf no more than 1/4" deep with a lame (or sharp knife) in a decorative pattern (I made a leaf). The slashes allow the loaf to rise evenly, with no breaks along the sides or top.

Use parchment paper to slide the dough onto the heated baking stone in the oven without disturbing the shape. Next, pour 1/2 cup water into the cast iron pan on the rack below. Quickly shut the oven door to trap the steam. The steam helps the bread rise and helps create the firm crust on the final loaf. The bread is ready when it has a well caramelized appearance and firm crust on all sides. Allow the bread to rest for 10-15 minutes before slicing. This will allow the moisture to distribute evenly and set the interior texture.

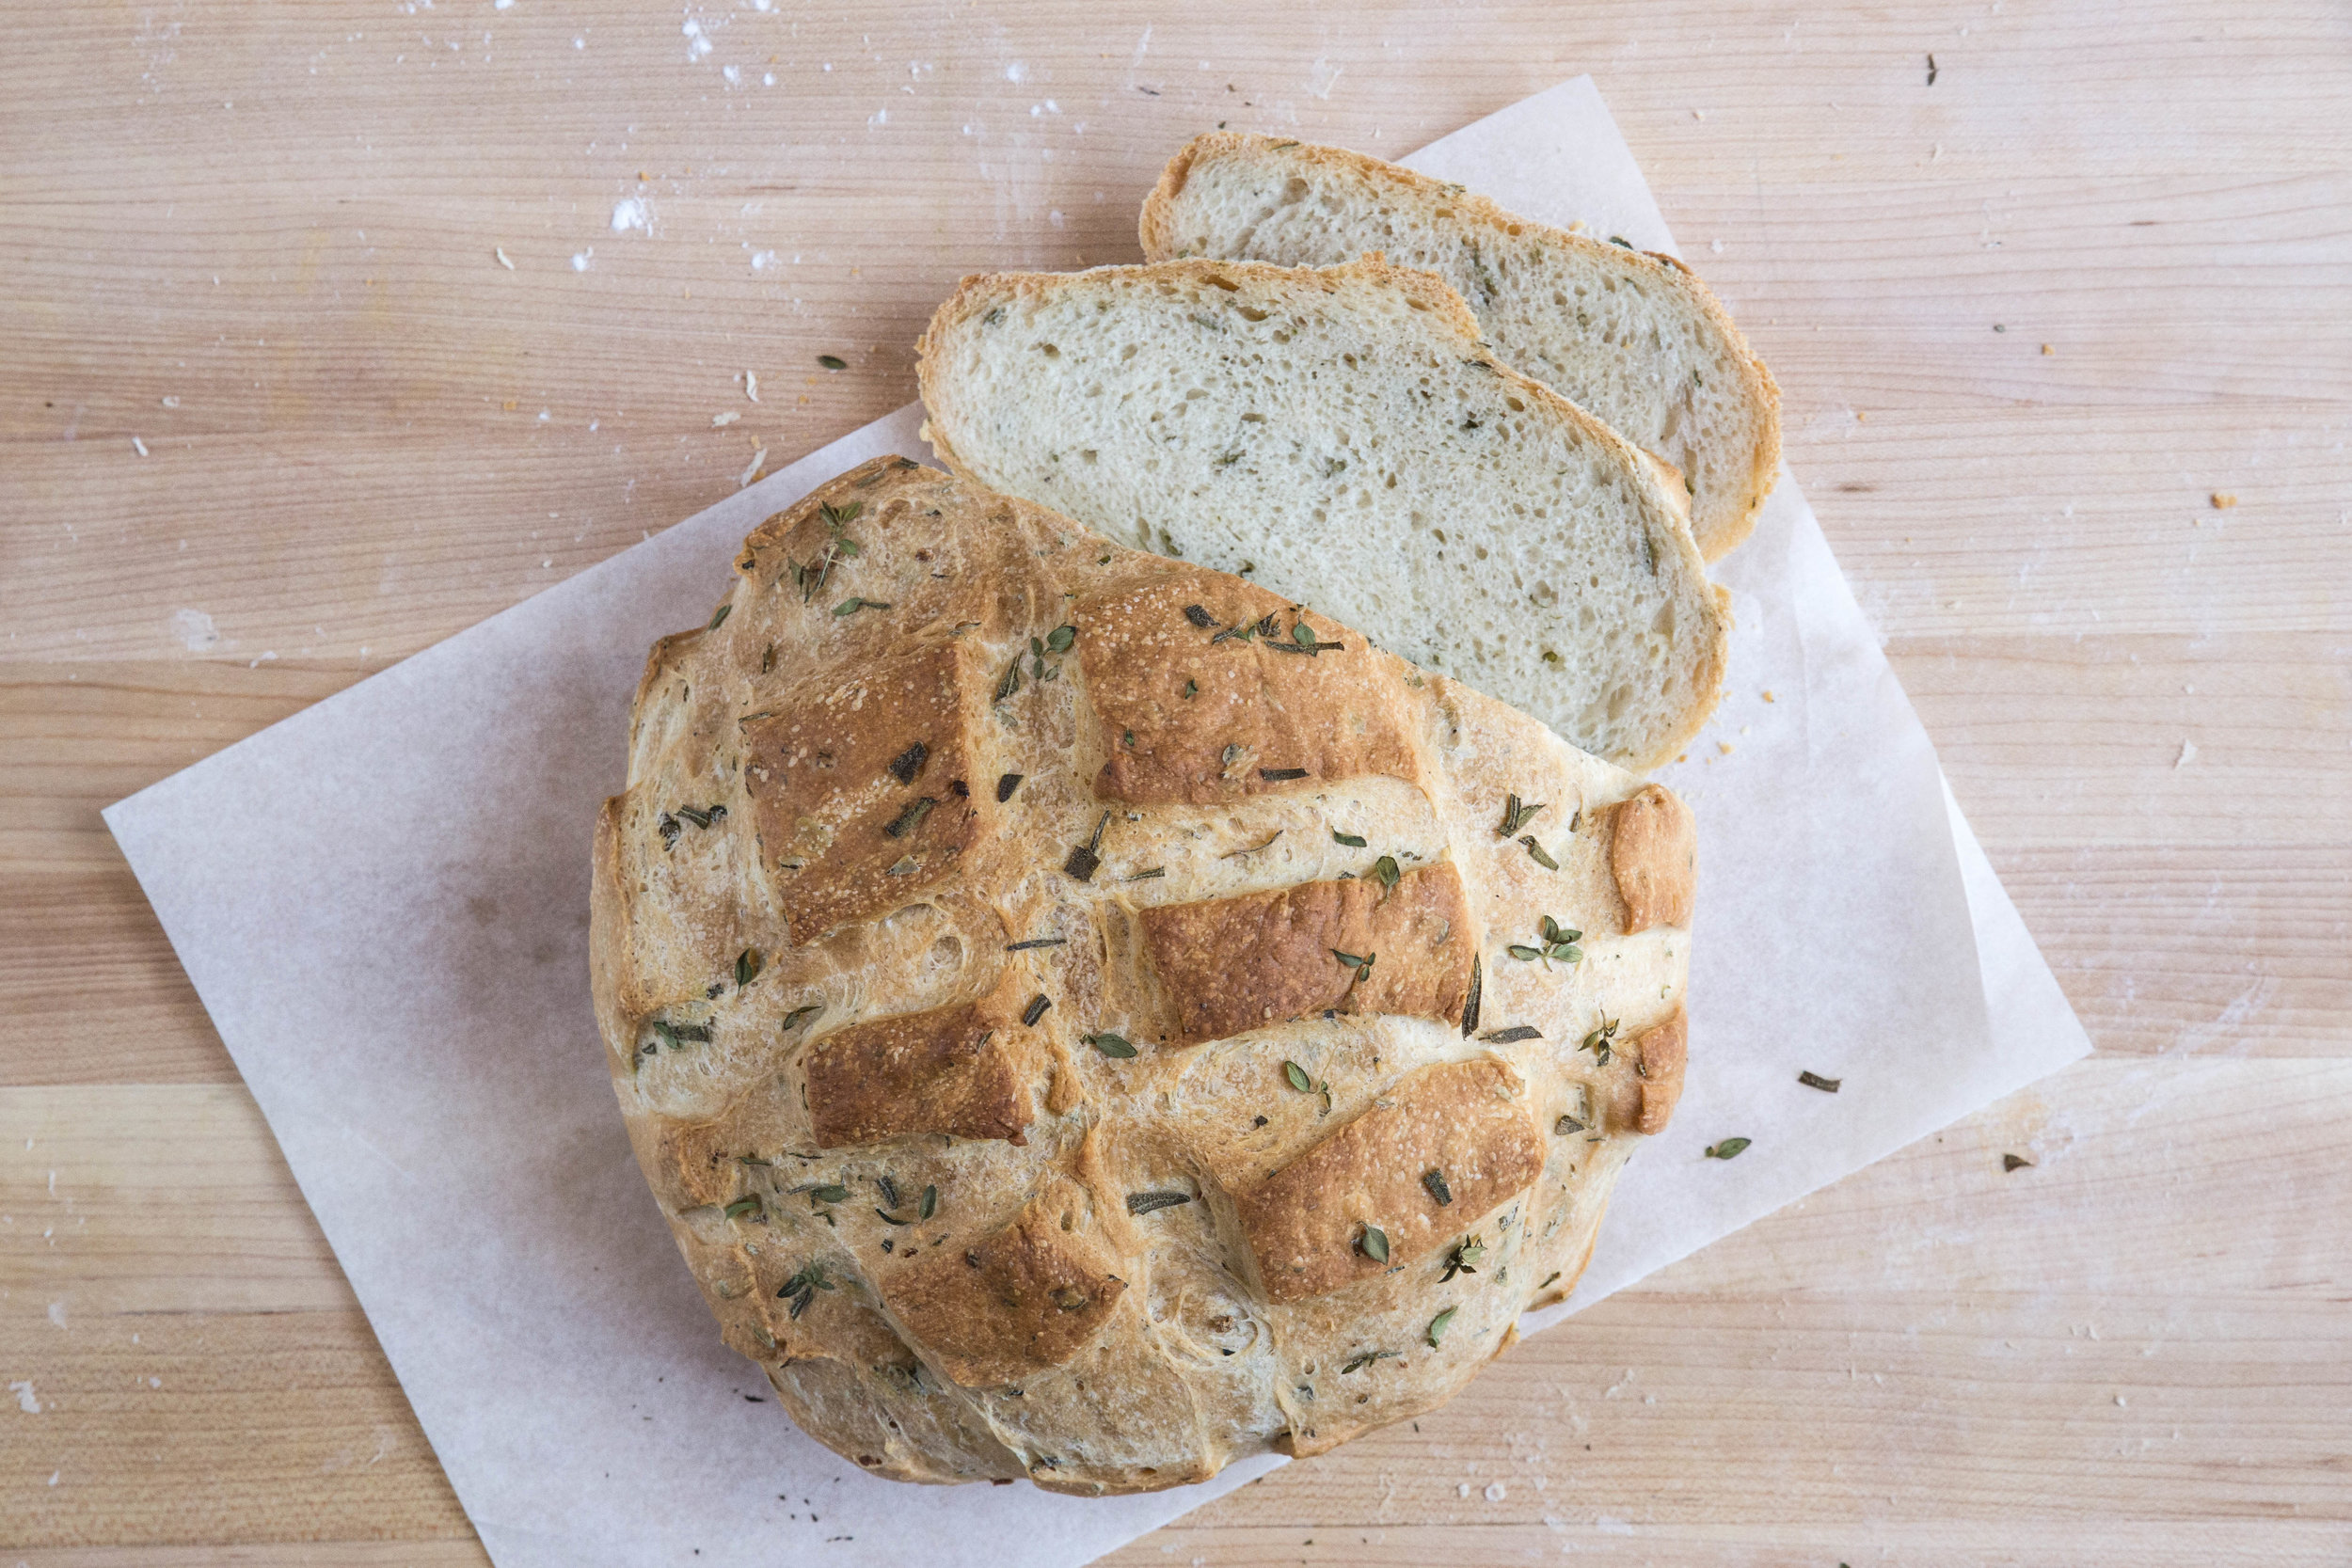
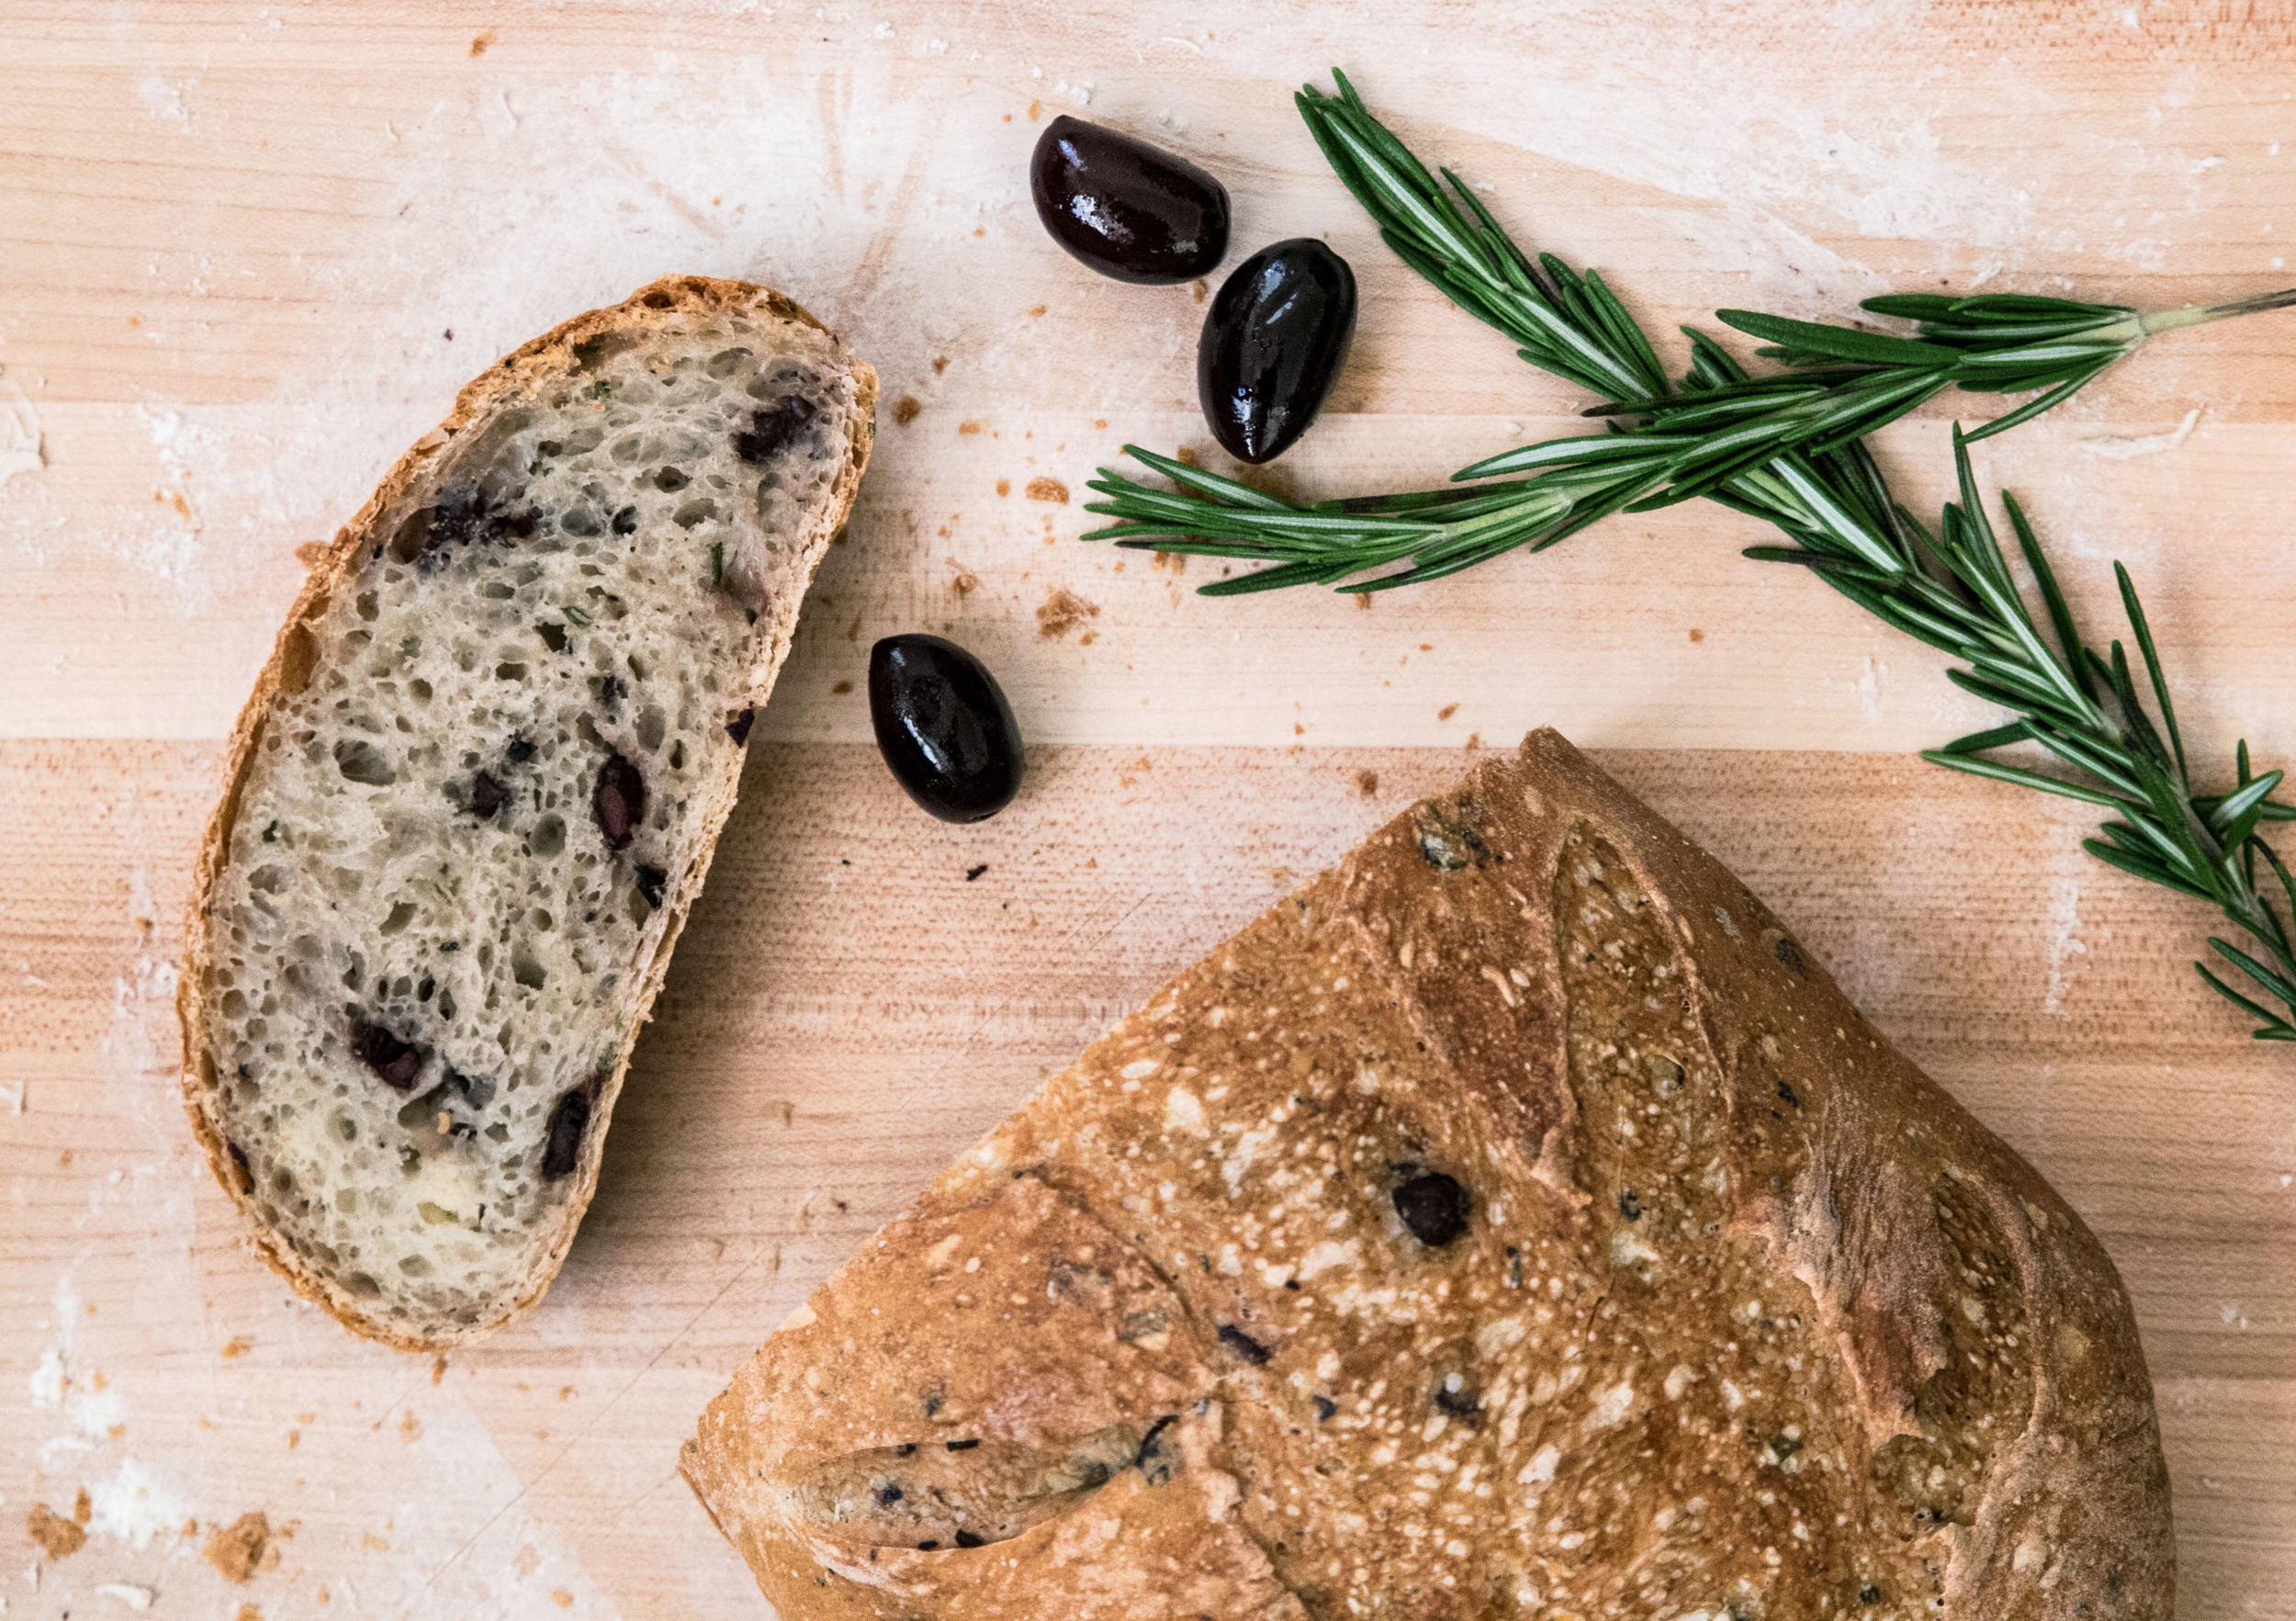
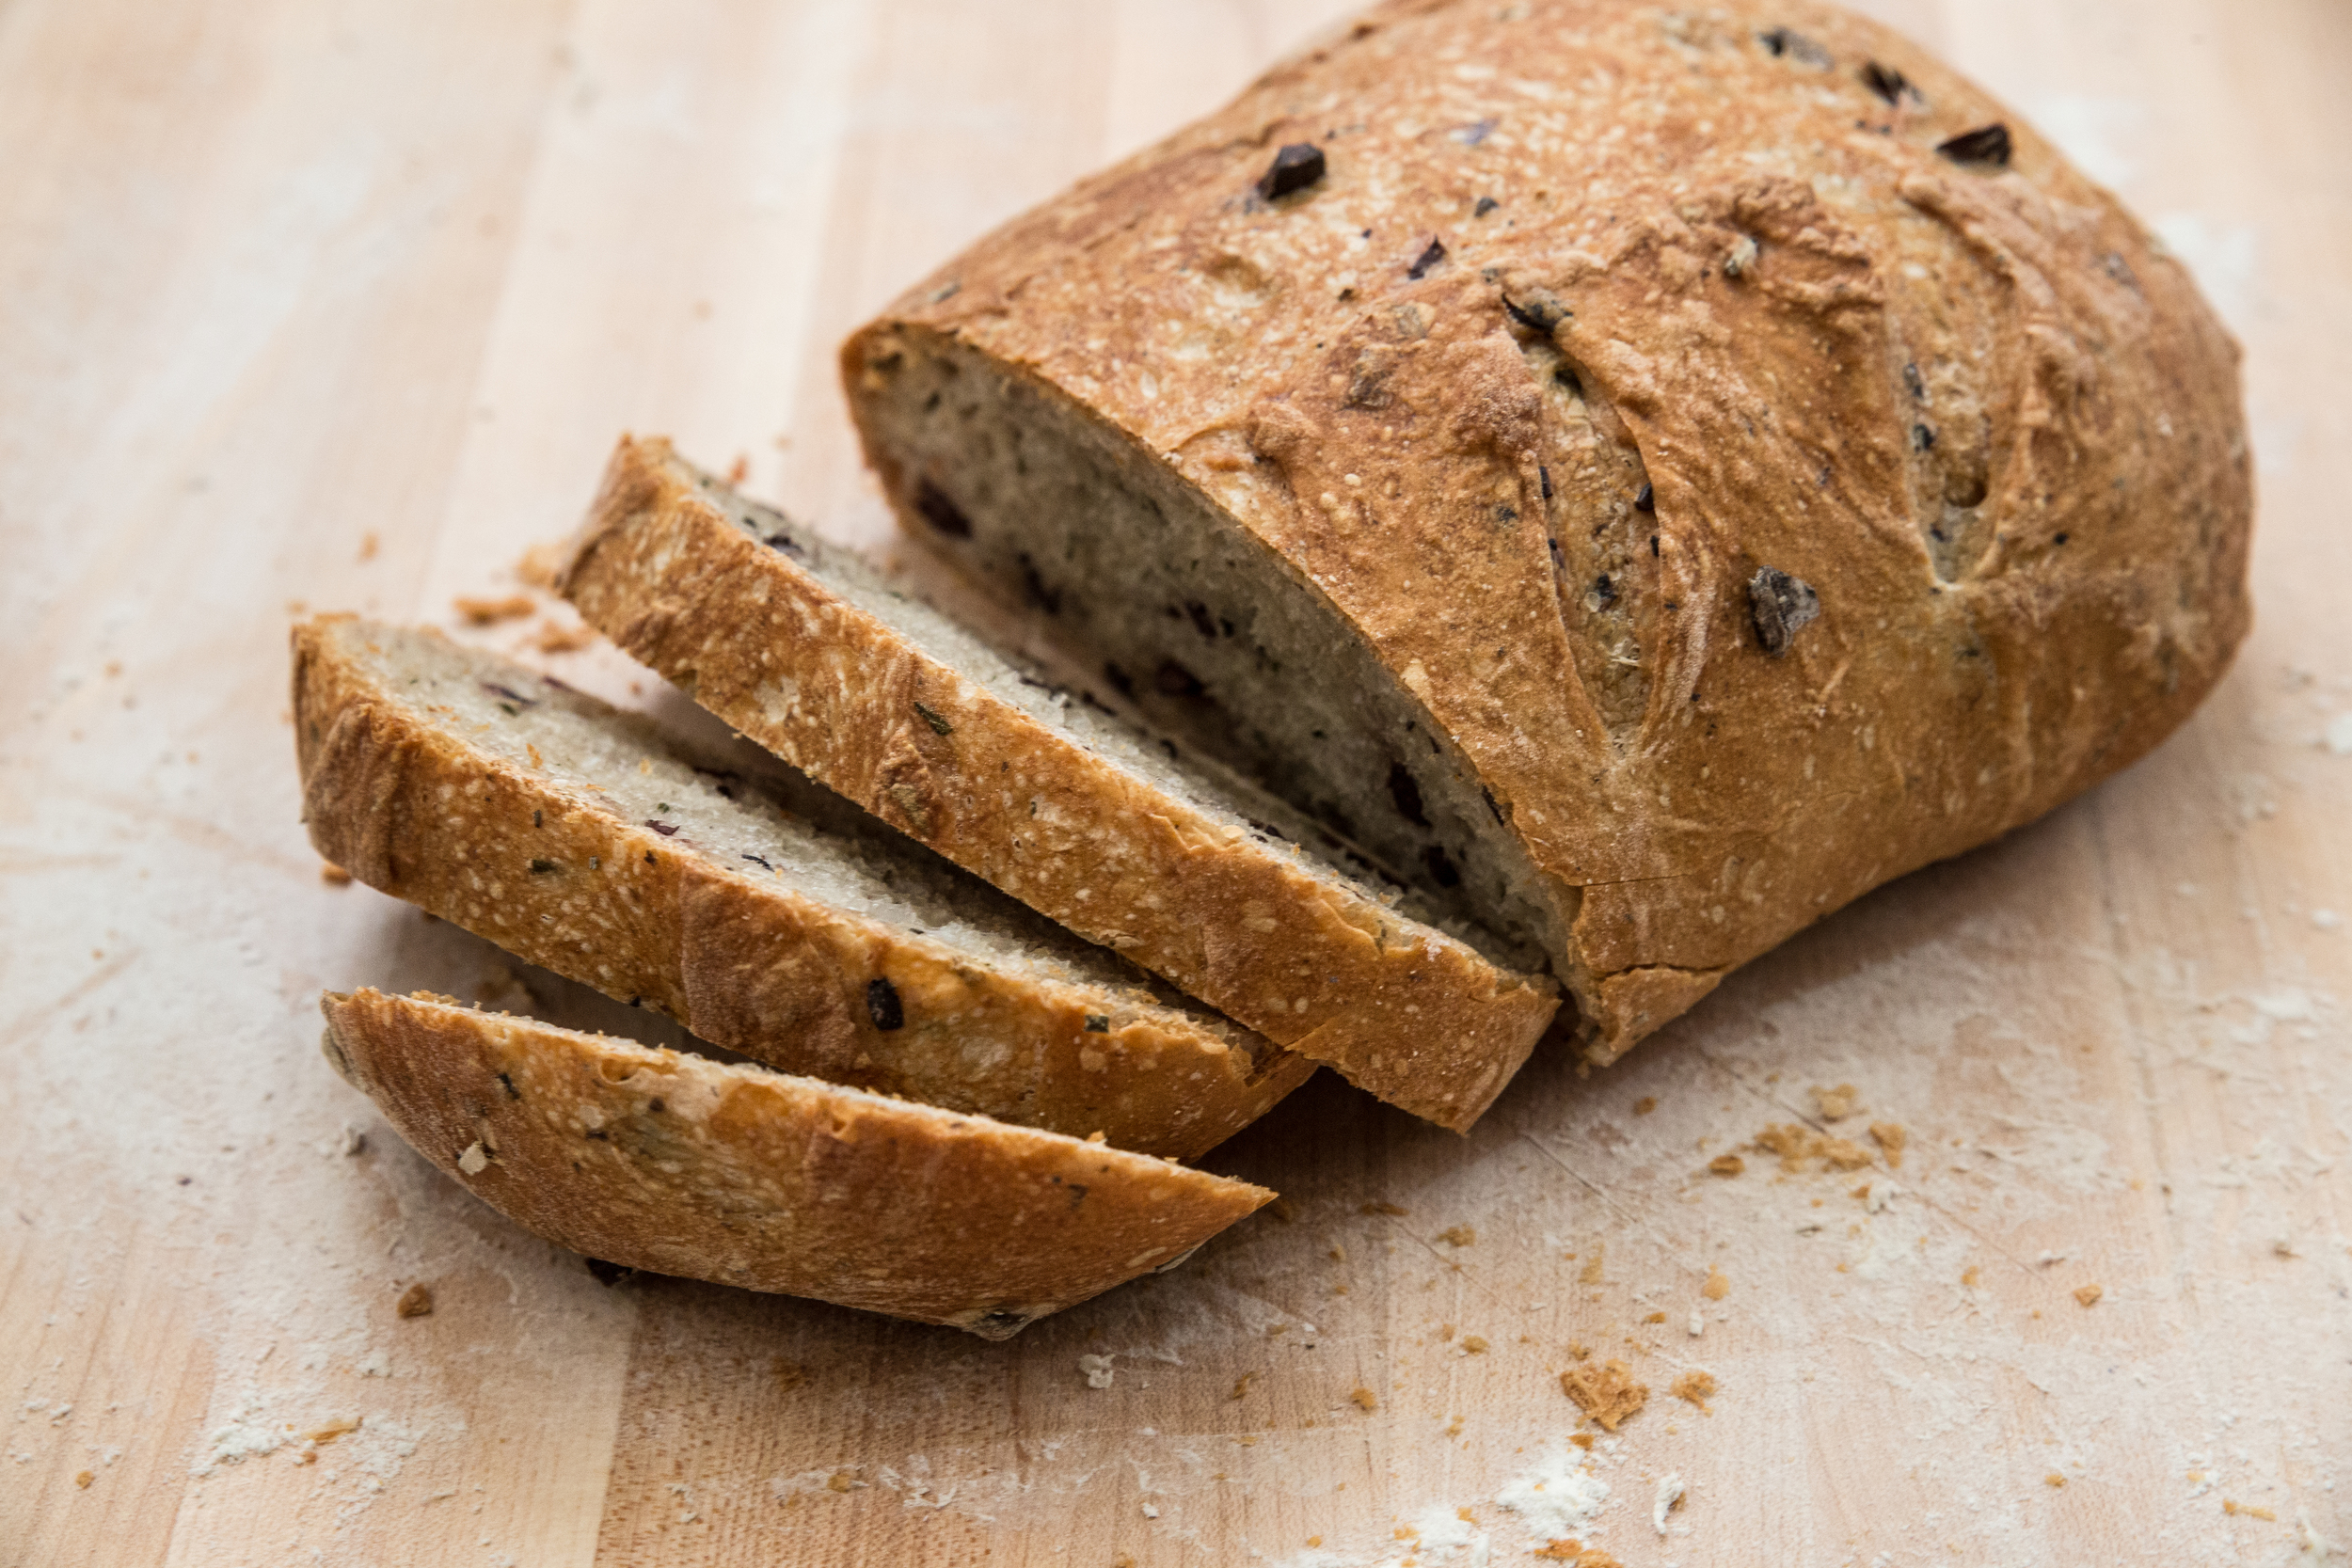
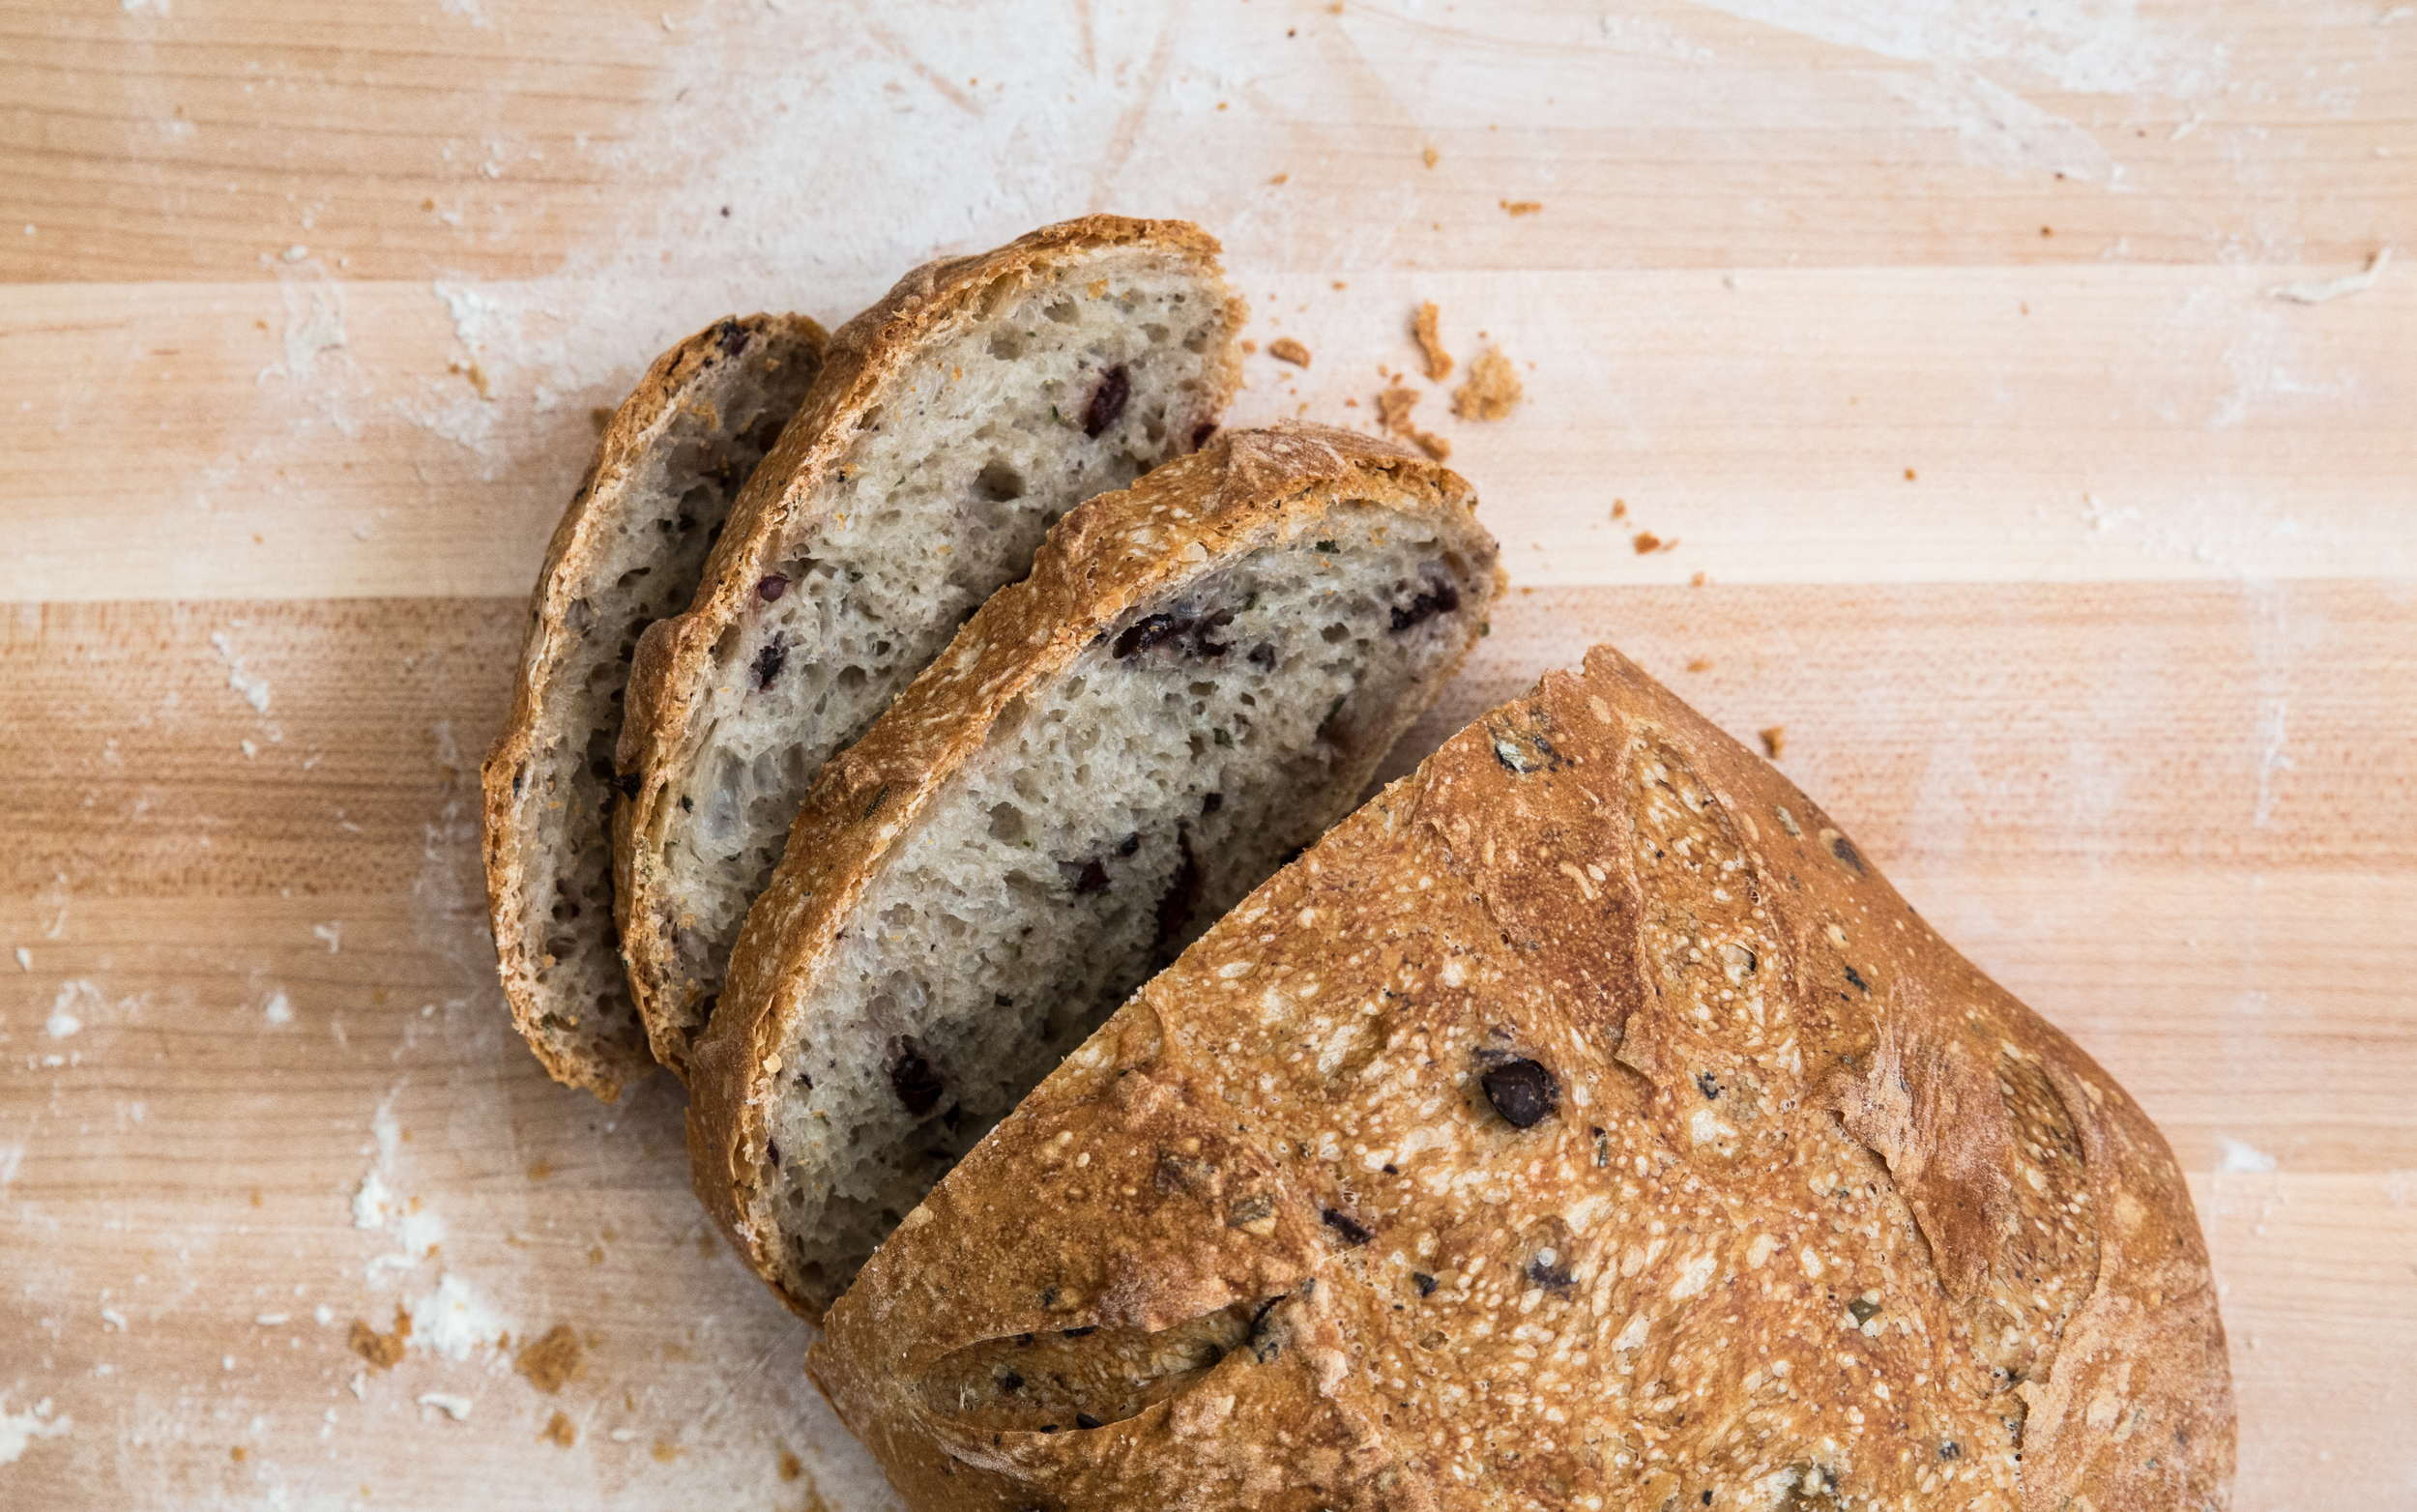
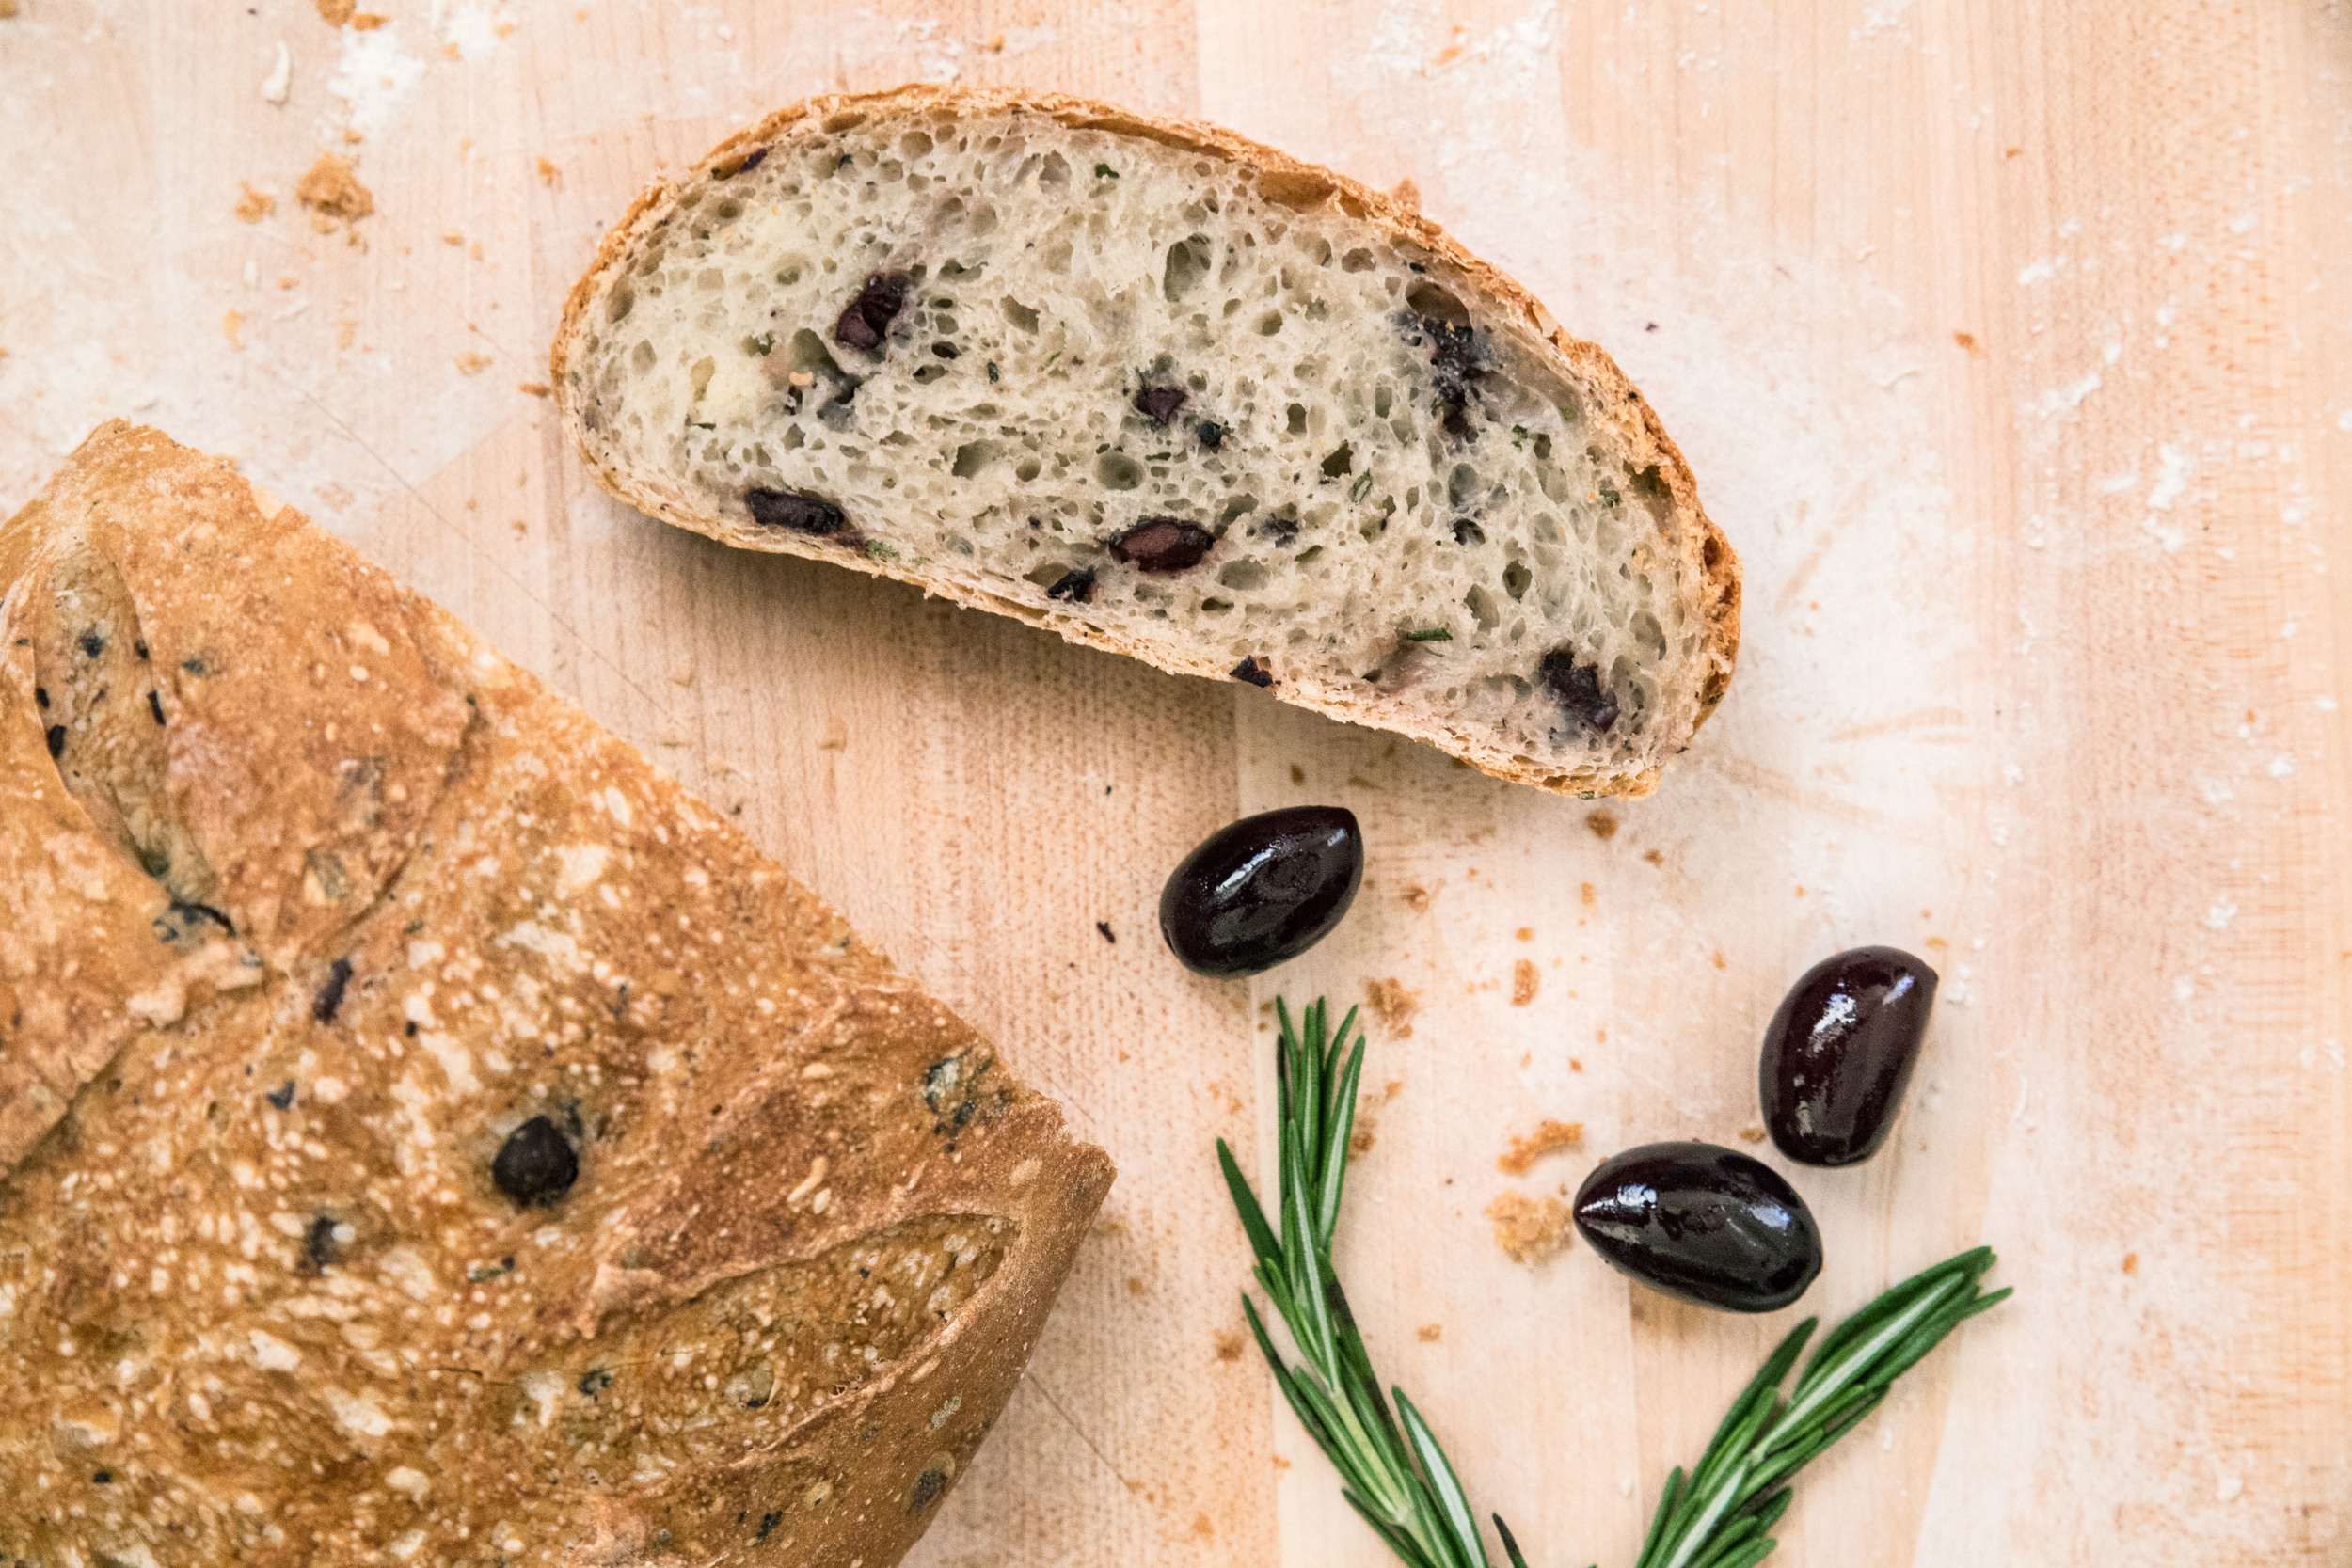
Rosemary Olive Bread is a hearty, full bodied bread to serve with warm dinners and stews. The fresh rosemary lends a subtle flavor, breathed in with each bite; the olives have a pleasant, salty flavor. Even though the olives are pervasive throughout the loaf, only the larger pieces provide strong flavor. These quiet flavors do not overpower, making this a versatile dinner loaf, whether it is served with a spread of butter or used to soak up a hearty stew.  

One Year Ago: Pumpkin Pie (Dairy-Free)
Two Years Ago: Stovetop Popcorn and Gingerbread Bundt Cake with Pear Caramel Glaze
Three Years Ago: Marbled Butternut Squash Bread, Chai Pear Scones, Hot Bourbon Apple Cider, and Pumpkin Pie Espresso Bars
Four Years Ago: Banana Muffins, Cranberry Orange Brioche Rolls, and Cranberry Sauce
Five Years Ago: Cranberry Cocoa Cinnamon Rolls, 30 Second Sangria, and Raspberry Vanilla Creme Brulee

Rosemary Olive Bread

Yields 1 loaf

Poolish
1 cup (120 grams) King Arthur Unbleached Bread Flour
3/4 cup (177 mL) water
1 pinch (approximately 1/16 teaspoon) active dry yeast

Final Dough
2 cups (240 grams)  King Arthur Unbleached Bread Flour*
1/2 cup (118 mL) water
1 tablespoon fresh rosemary, chopped (or 1 teaspoon dried rosemary)
1/3 cup (50 grams) Kalamata black olives, chopped and patted dry
1 teaspoon active dry yeast
1 teaspoon salt

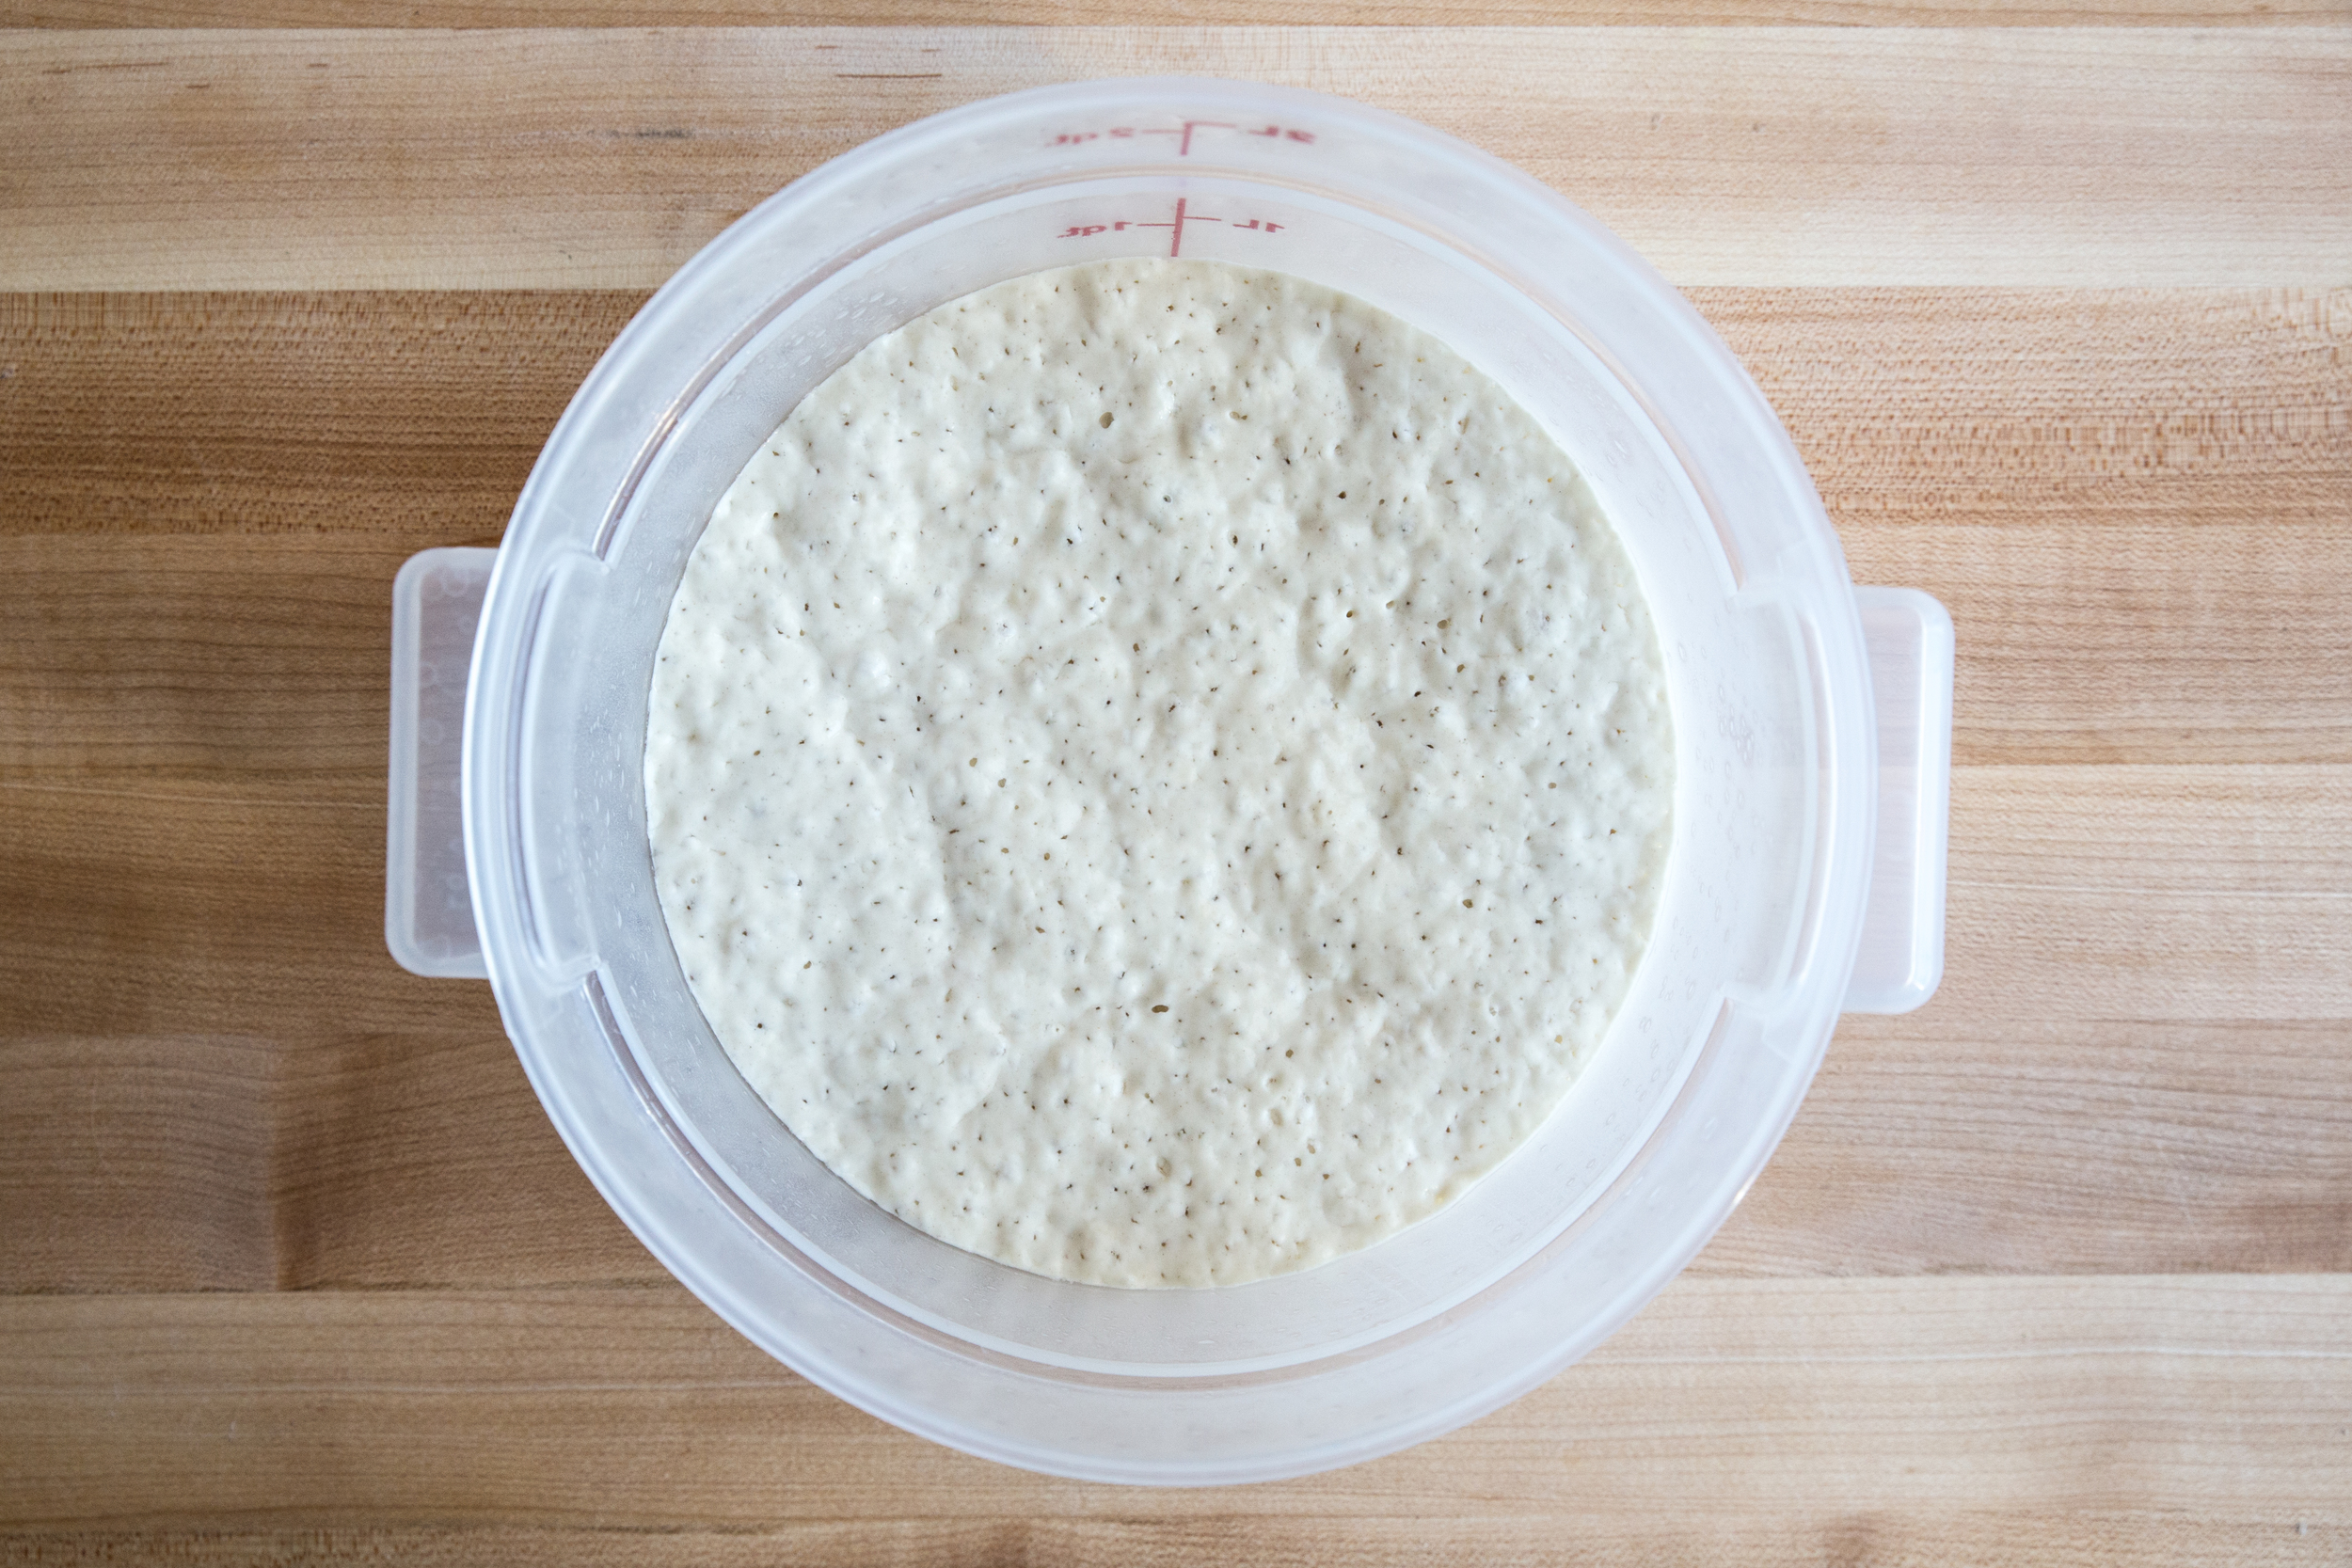
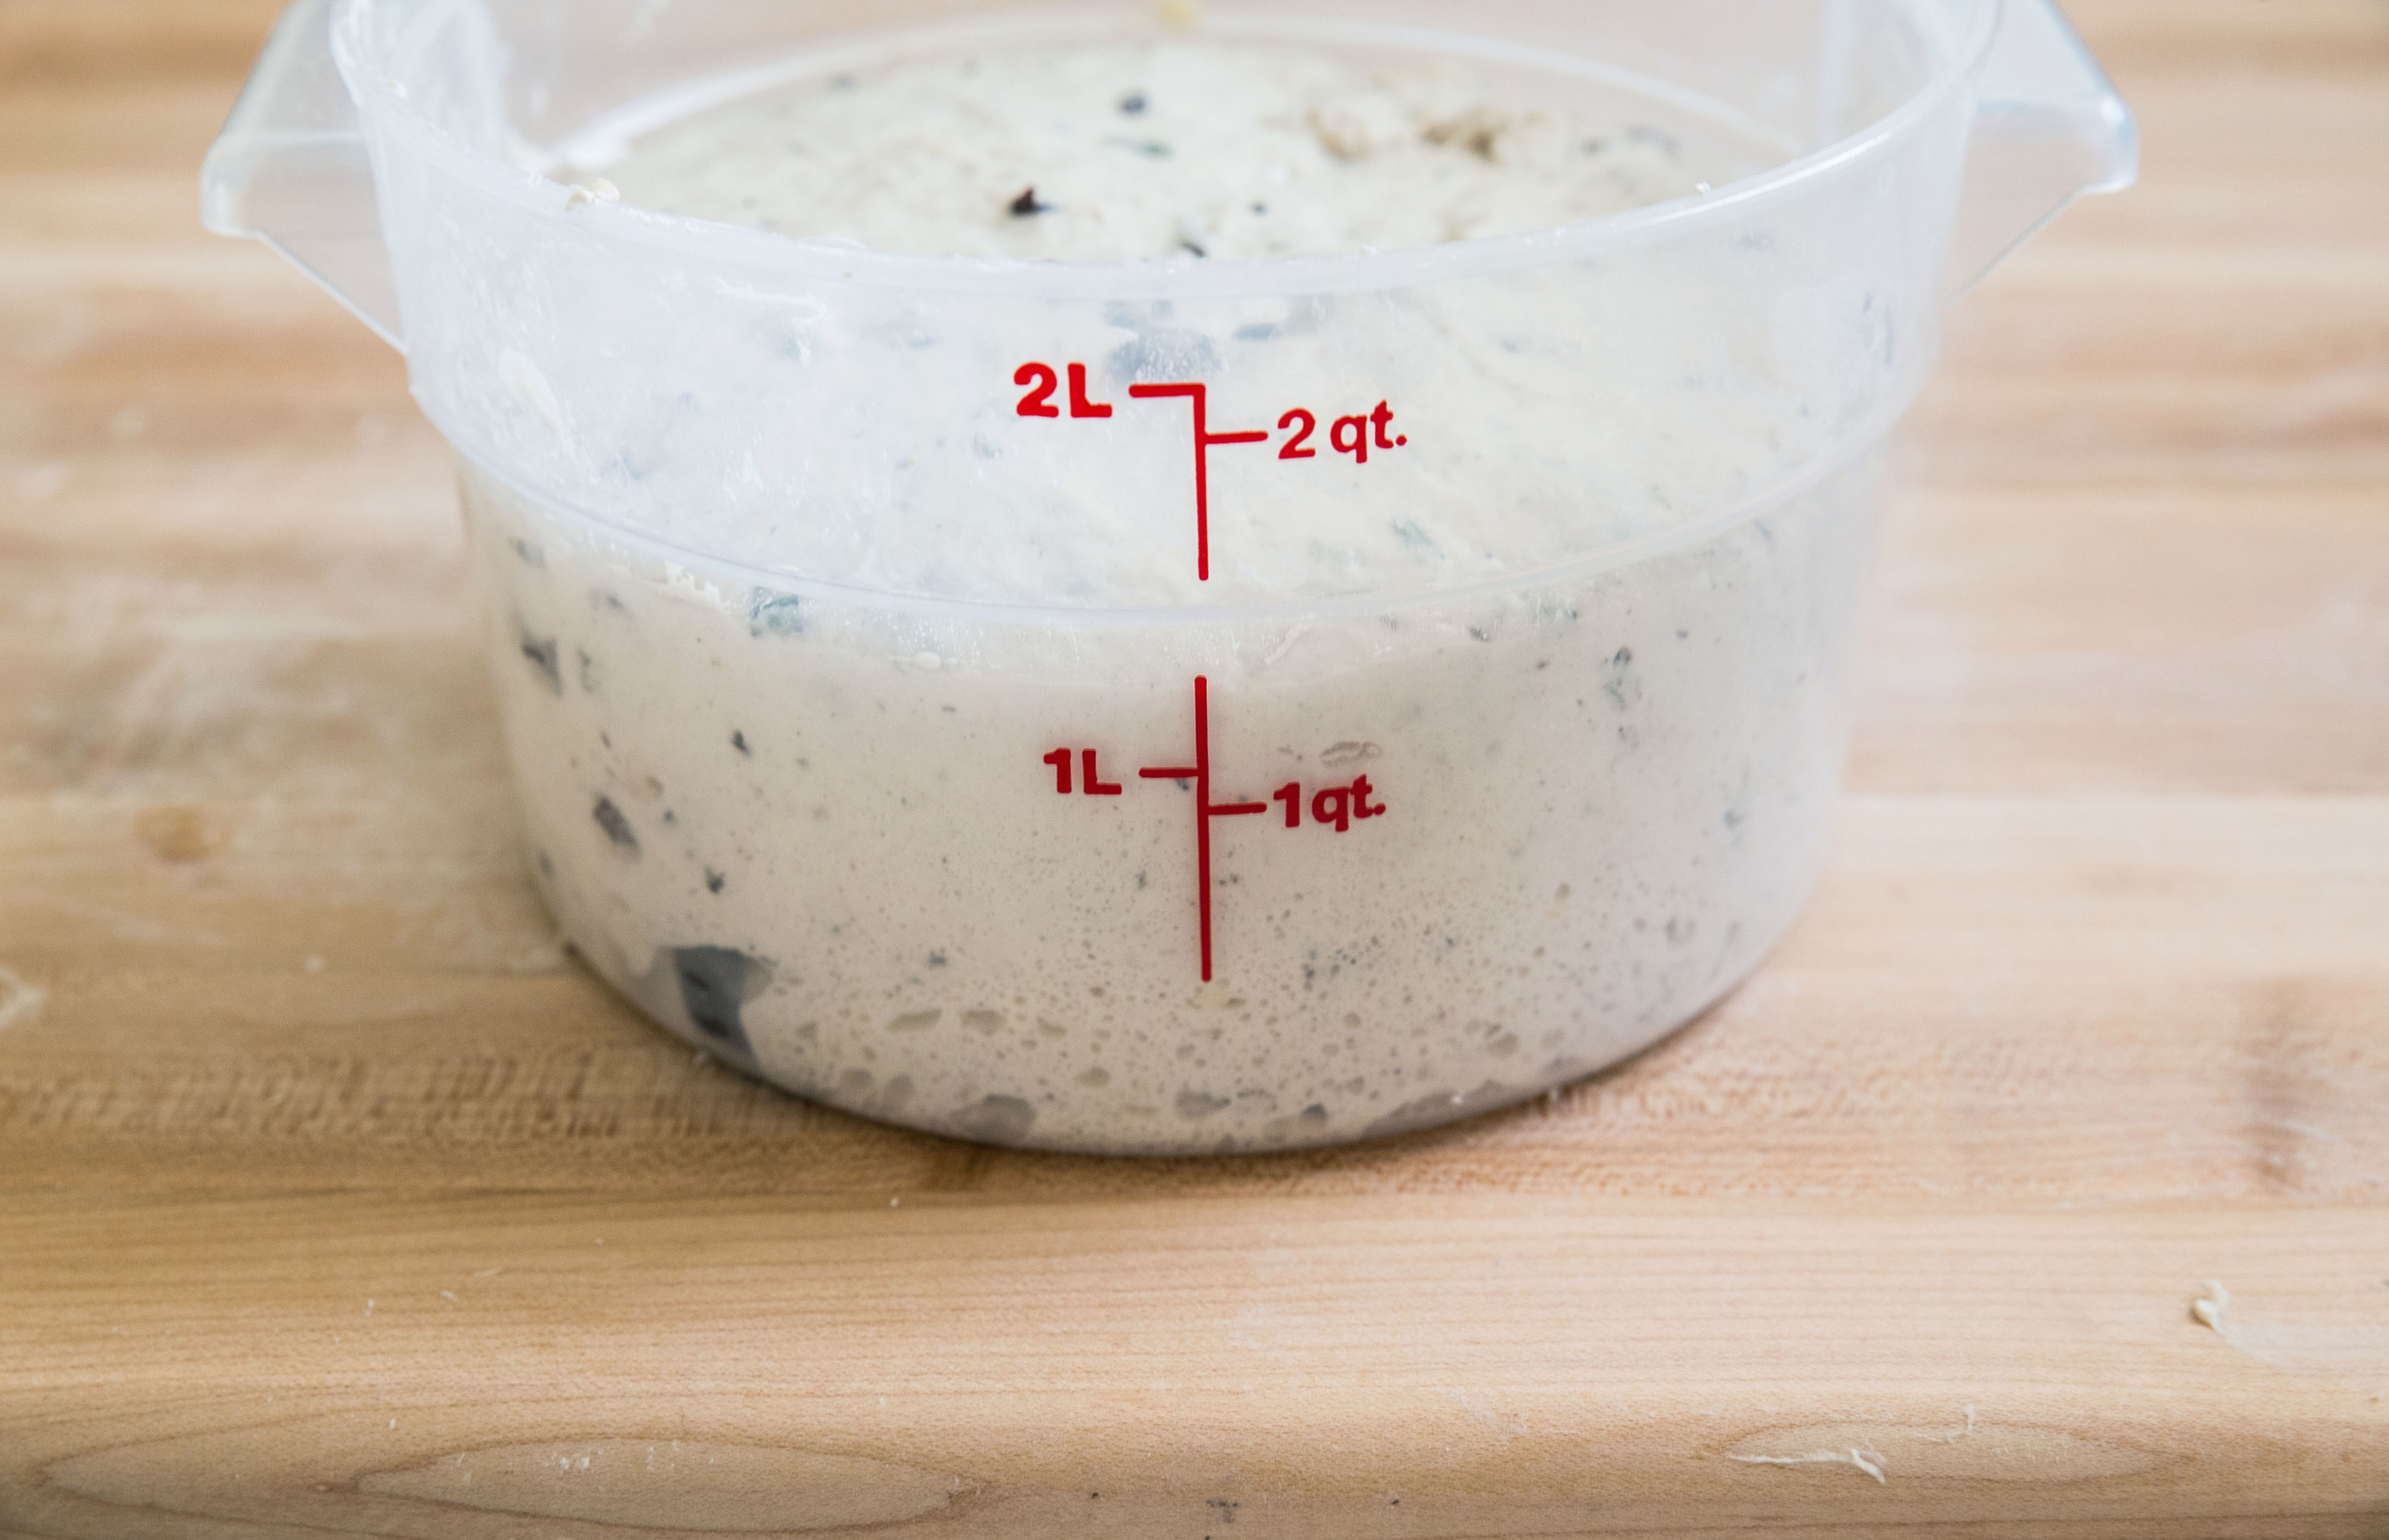
To create the poolish, stir together the flour, water, and a pinch of yeast the evening before baking. Cover tightly with plastic wrap and allow to rest for 12-18 hours at room temperature. The poolish will have a bubbled appearance when ready.

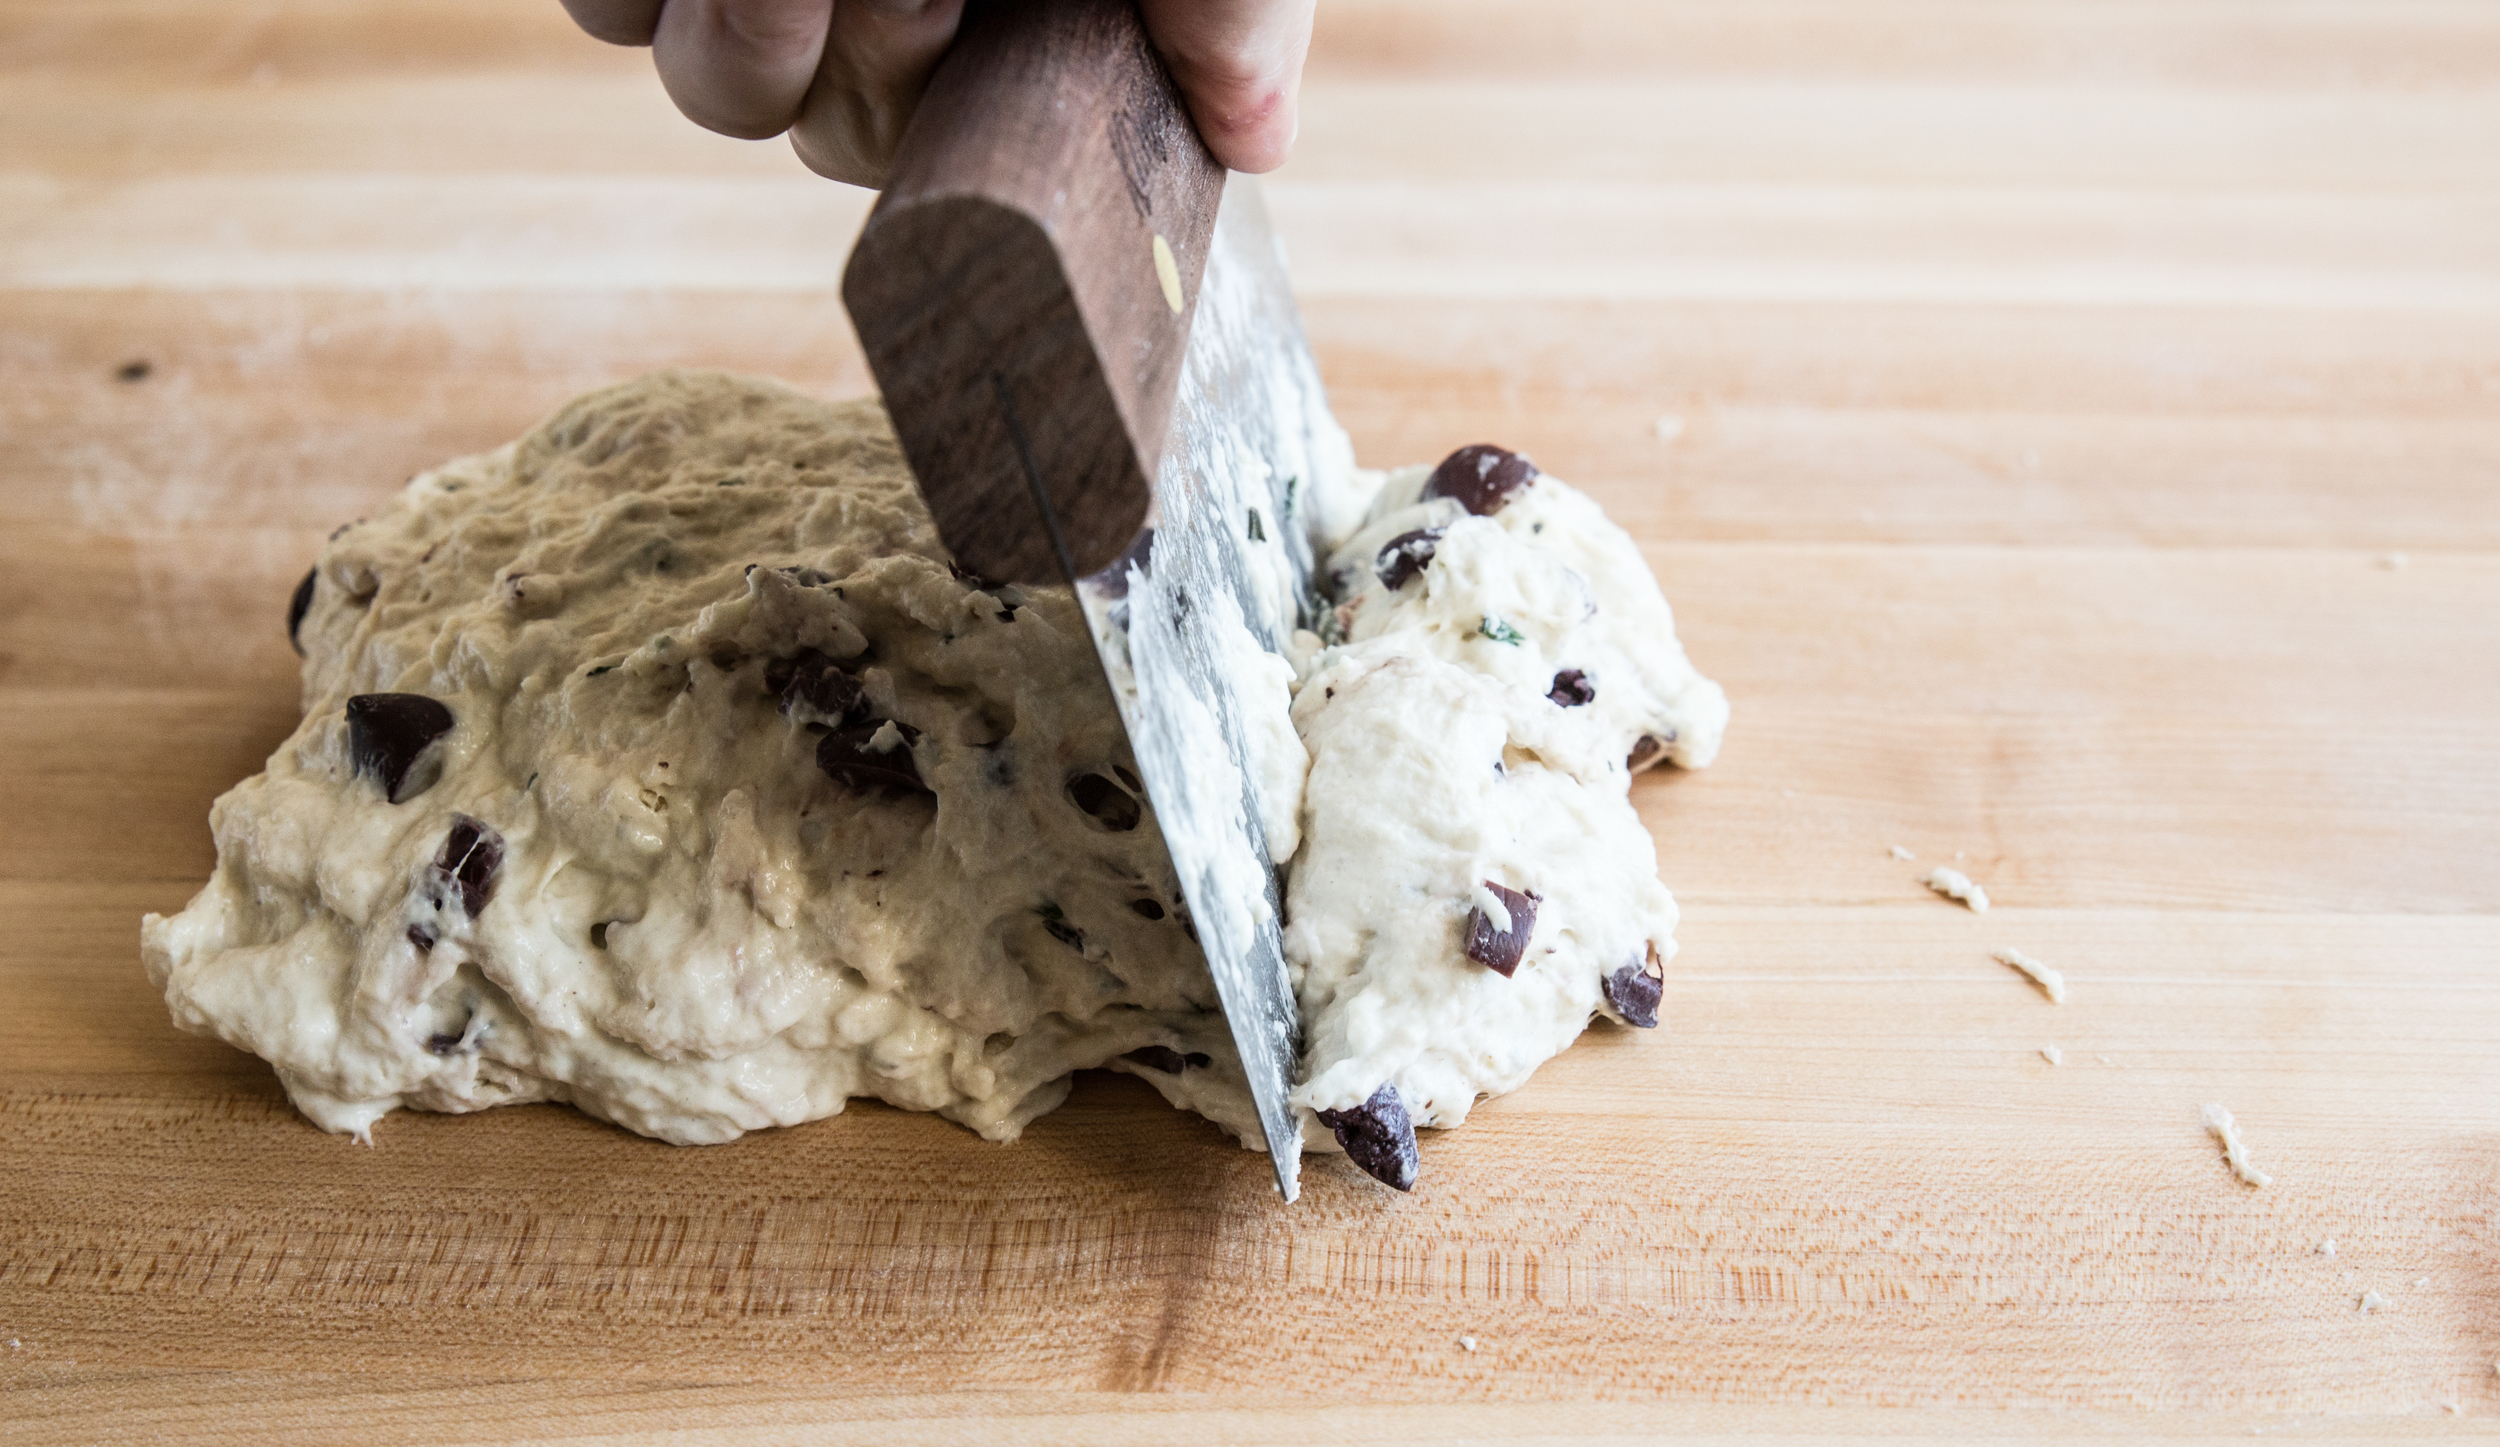
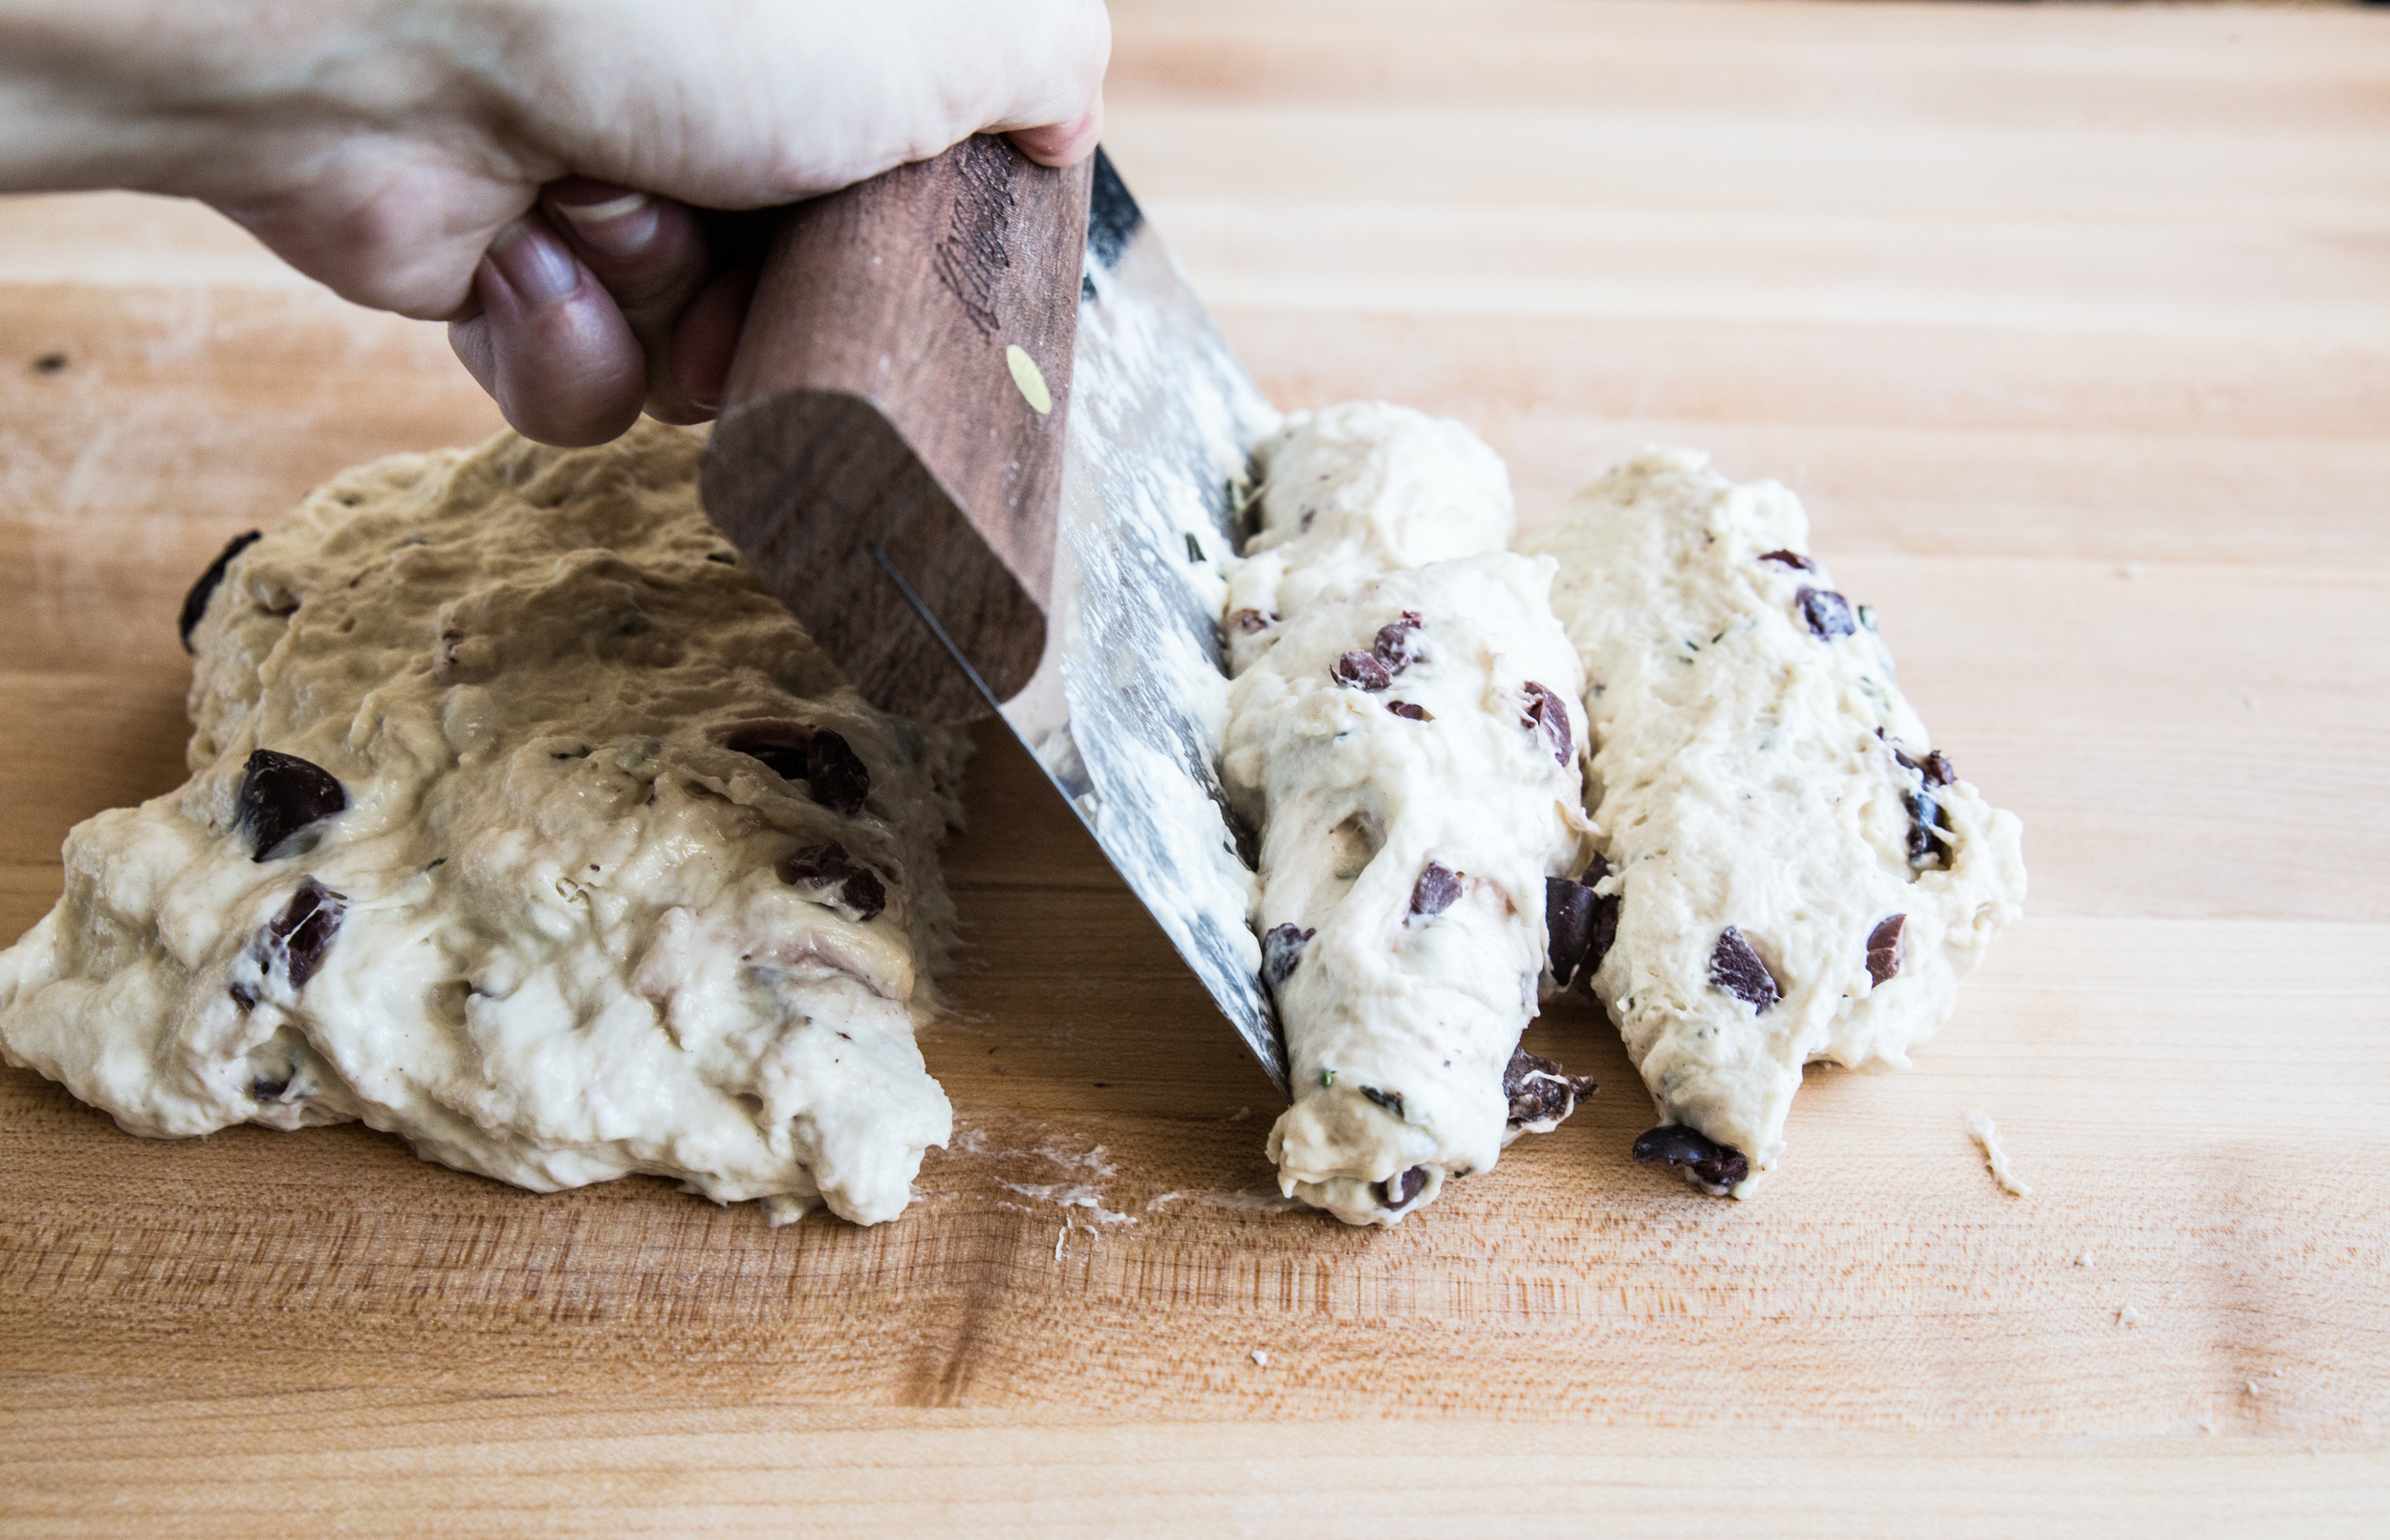
To create the final dough, add the remaining ingredients to the poolish and fold until uniform. The dough will be sticky; resist the temptation to add any additional flour. Turn the dough out onto a clean, flourless surface. To knead the wet dough, form dough into a log and, using a bench knife, cut the dough at an angle into 4-5 slices. Use the bench knife to bring the dough back together into the log shape and repeat the slicing process. Continue kneading for another 3-5 minutes. The dough will gradually change texture as the gluten forms.

When the dough easily holds together, form the log shape and, using your hands, pick up the dough 1/3 from the top of the log. Rotate the dough 90 degrees and "slap" the bottom of the dough onto the surface while pulling the top half of the dough towards you. This will stretch the dough. Fold the dough back onto itself by bringing your hands down over the top of the dough, touching the surface, and pulling your hands out sideways to break free. Repeat the process. This step must be completed quickly or the dough will stick to the surface. Use a dough knife to clean the surface as needed. Continue kneading for another 3-5 minutes. The dough will become easier to work with and have a smooth, elastic appearance when ready.

Place dough into a bowl and cover, allowing it to rise an additional 1-2 hours, or until doubled in size.

Preheat oven and baking stone (or cookie sheet) to 450 degrees F (230 degrees C). Place a cast iron pan (or edged broiler pan) on the bottom rack.

Turn out dough onto a very lightly floured surface and bring all four corners of the dough together until it resembles a rectangular shape. Take the two bottom corners together and fold them in again, creating a triangular shape on the edge. Begin rolling the dough from this end onto itself, placing the roll seam side down to create a loaf shape. Place on parchment paper and cover with a clean dish towel. Allow to rise an additional 30-40 minutes.

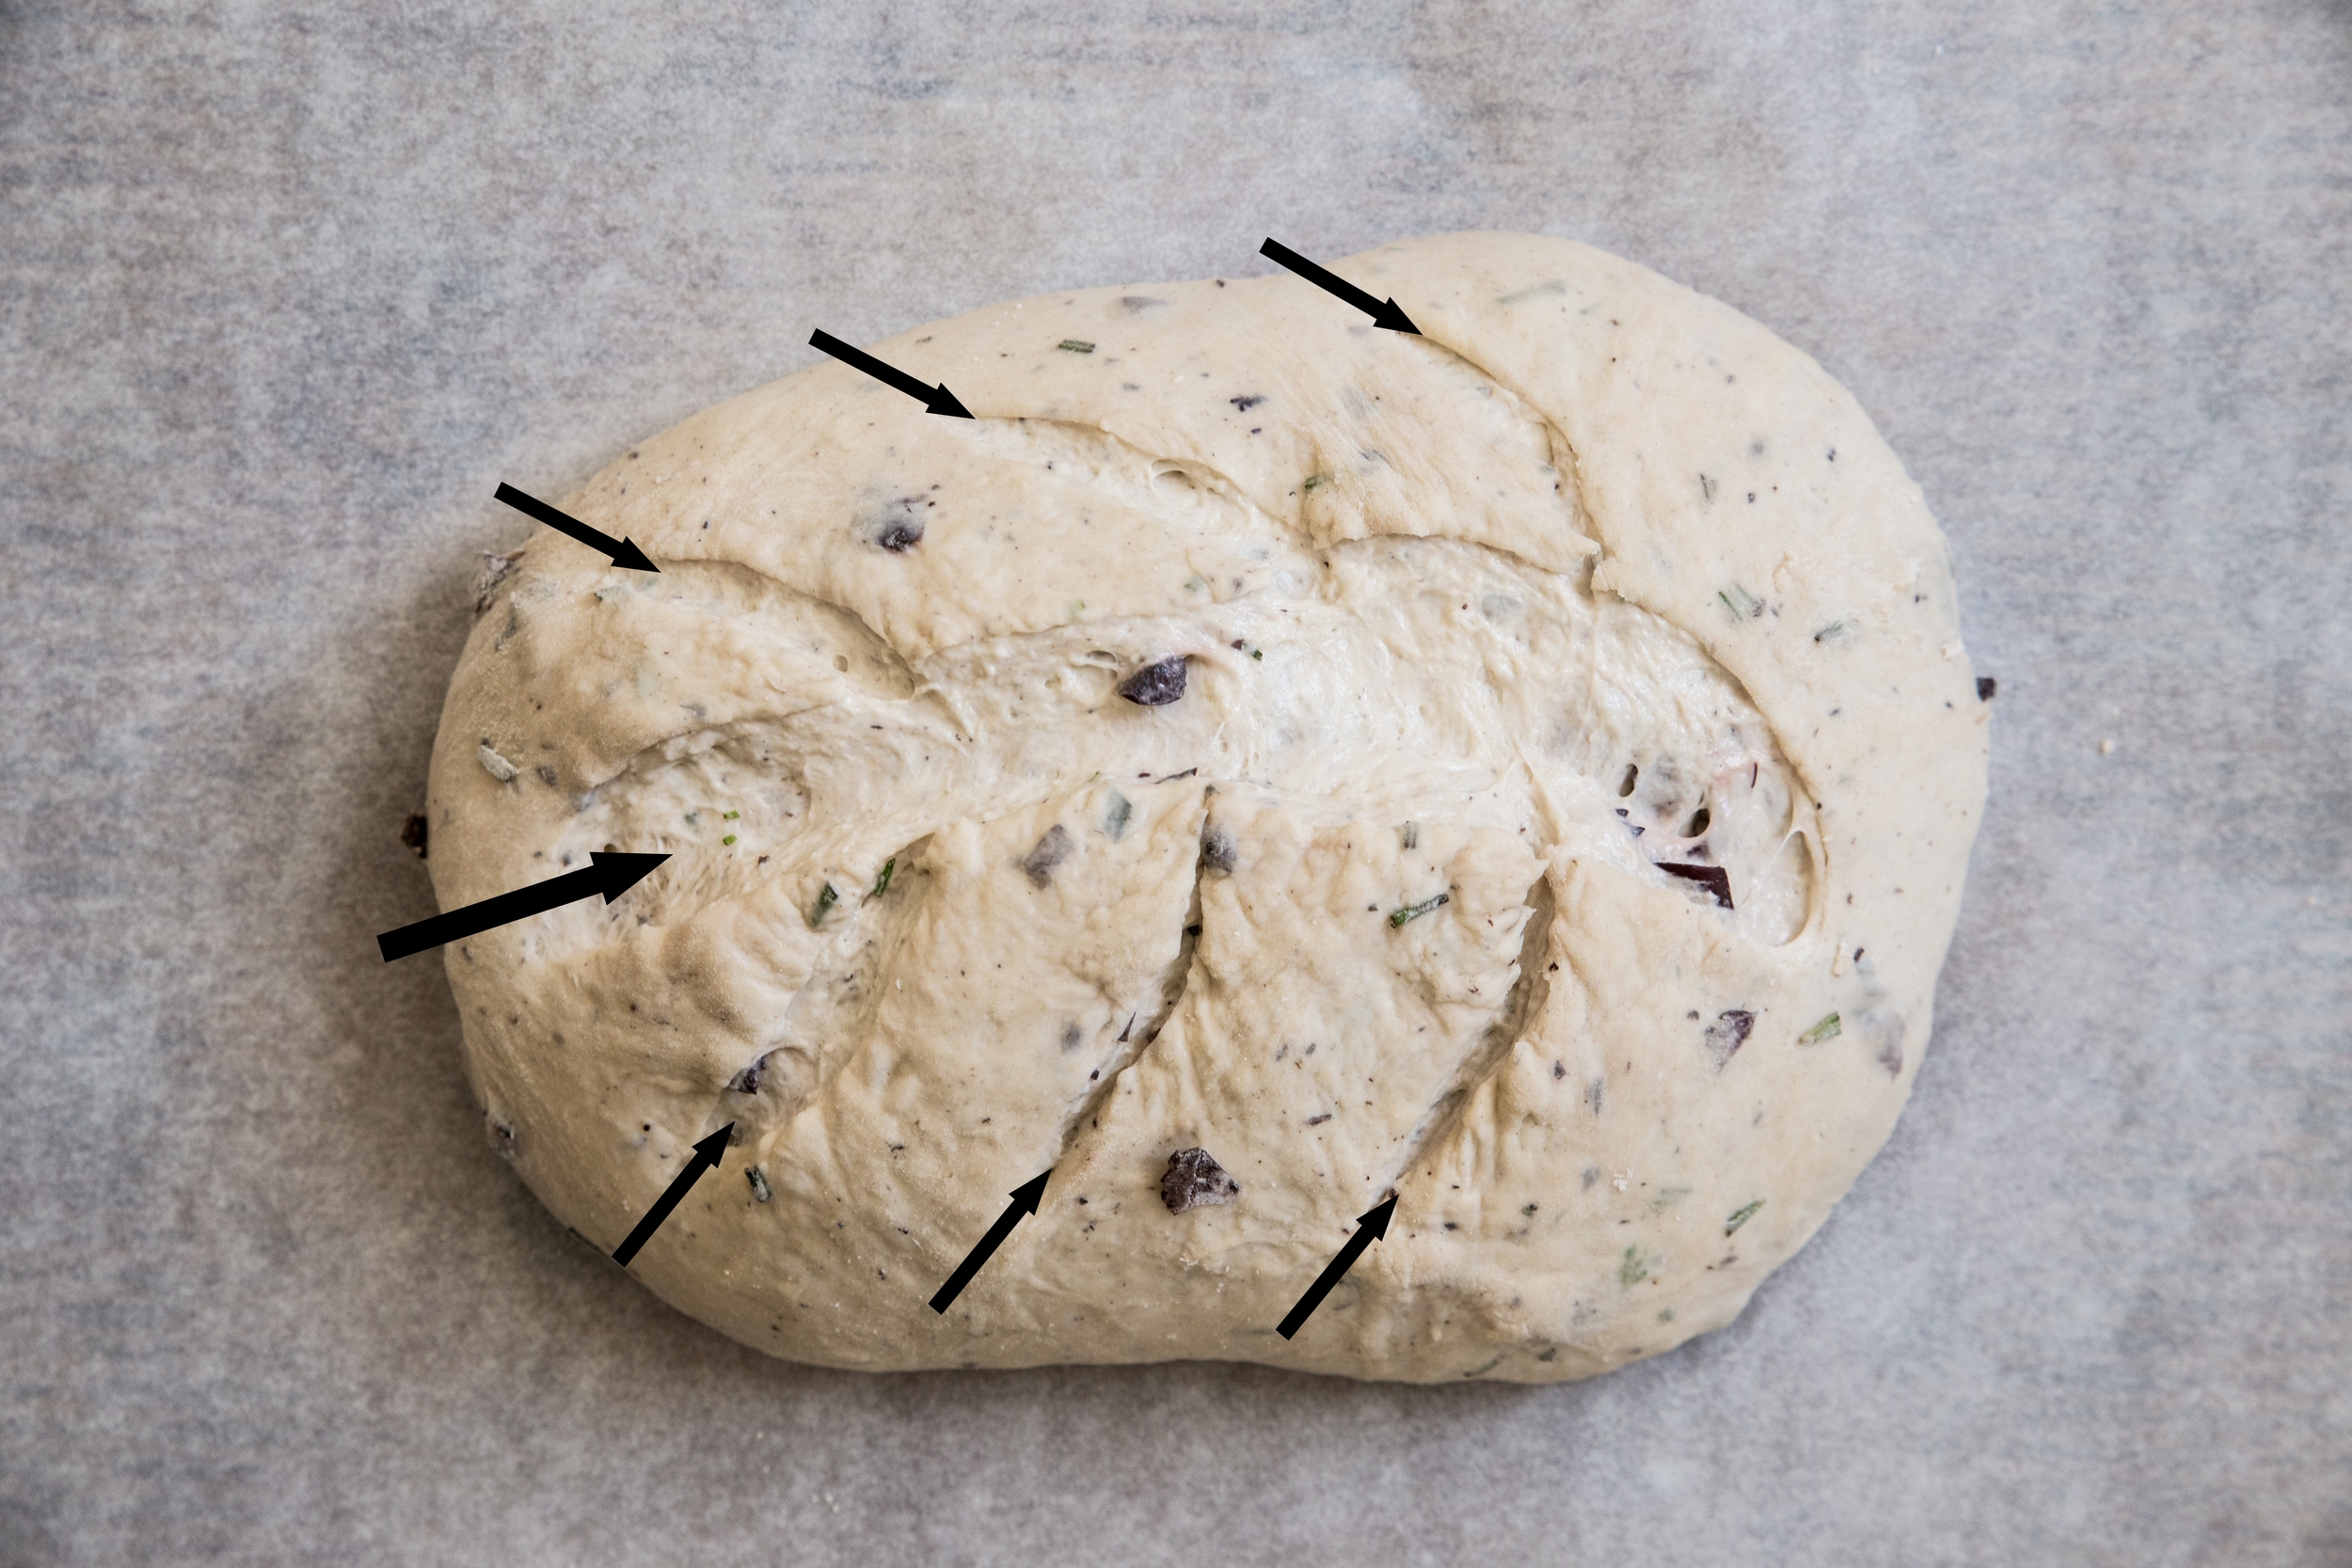
Using a lame (or sharp knife), slash a design into the top of the loaf. Slide the parchment paper onto the baking stone in the oven and quickly pour 1/2 cup water into the cast iron pan before closing the oven. This will create steam; do not open the oven door. Bake for 30-35 minutes, or until the loaf is well caramelized and the edges are very firm. Cool for 10-15 minutes before slicing and serving.

To restore the "crustiness" of the crust after the loaf has been stored, reheat in a 350 degree F (180 degree C) oven for 5-10 minutes, or until crusty.

*If using all-purpose flour, use only 1/2 cup water in the poolish instead of 3/4 cup. Bread and all-purpose flour absorb different levels of water and the recipe needs to be adjusted to accommodate this.

This post is sponsored through a partnership with King Arthur Flour. All thoughts and opinions are my own. 

Rosemary Soda Bread

IMG_0725-2.jpg

Winter, usually brusque and bitter, has taken on a milder disposition this year. Instead of windblown piles of snow so high the windows are partially covered, the snow is an afterthought. An inch of powder blows around by day and settles by night, simply to keep up appearances. Yet, the cold weather traditions of the Upper Midwest hold strong. We bundle up in layers, donning our hats and scarves early in the season (though we become looser on the dress code once we are adapted to the below freezing temperatures). We complain endlessly about the weather to one another, bonding over our shared displeasure with wind and iced car windows.

And, of course, there's the soup.

Sundays are for rich, hearty soups. When the weekend comes to a close, I try to make a large pot to last a few meals. My mother did this while I was growing up, and I am certain her mother did it for her as well. Soup is a comfort food, a way to squeeze in extra vegetables and keep our bodies warm.

Lately, I have been experimenting with making my own bone broth and creating twists on old favorites. Zuppa Toscana has been a well seasoned request, year after year. I throw in carrots, celery and extra handfuls of kale, and take out the cream. The flavor remains, but it becomes an arguably healthier dish. Tonight will be vegetable barley, with hamburger and leftover bacon just to throw the name in contention.

As experience has revealed, fresh bread tops the list as the perfect side to soup. This quick bread recipe takes as long to bake as the soup takes to stew, making them an inseparable duo. 

Rosemary Soda Bread is a quick bread that can go from an idea to a loaf in an hour. The bread is on the denser side, risen through baking soda alone, but the quality reminds me of a good biscuit. Seasoned with dried rosemary, the bread takes on a subtle flavor, but still pairs well with flavors both sweet and savory. While this bread works well to soak up hearty soups and gravies, I also find it at home with a spread of dark berry preserves.

One Year Ago:  Chocolate Almond Biscotti and Grapefruit Rum Cocktails
Two Years Ago:Toasted Almond Cookies with Fig Filling, Coconut Raisin Granola, and Hot Cocoa Popsicles
Three Years Ago:Beer Bread, Baked Corn Tortilla Chips, Roasted Pepper Feta Scones, and Flourless Chocolate Rum Cake
Four Years Ago:Vanilla Rum Soaked French Toast, Cocoa Almond Meringues, Banana Bread Oatmeal 

Rosemary Soda Bread

Yields 1 loaf

3 1/2 cups (440 grams) bread or all-purpose flour
1 teaspoon baking soda
1 teaspoon dried rosemary
1 teaspoon salt
1/4 cup (57 grams) butter, melted
1/2 cup (115 grams) sour cream
1 cup (237 ml) milk

Preheat oven to 400 degrees F (205 degree C). 

In a large mixing bowl, whisk together the flour, baking soda, rosemary, and salt. Add in melted butter, sour cream, and milk, stirring with a spatula to bring dough together. 

Turn out on a lightly floured surface and knead dough until it forms a ball. Place onto baking sheet and flatten the top. Using a sharp knife, cut a 1/4-inch deep cross into the top of the loaf. Dust lightly with flour and dried rosemary. Bake for 45-55 minutes, or until lightly browned.

Serve with a spread of butter and jam (I used wild blueberry preserves from Bonne Maman), or use it to soak up a hearty broth.