Homemade Almond Milk

It has been four years since I was diagnosed with a dairy intolerance. The diagnosis itself was a great relief (I spent the first 22 years of my life with miserable abdominal health issues due to an unknown cause), but it was also a real slap to the face. My diet was based around dairy, and as I had been working as a professional baker at the time, it was my livelihood. Unlike most people with dairy issues, I could not handle dairy in any amount or in any form. I was devastated.

It took me a long time to adjust to my new, unwanted diet. I went through the stages of grief: denial, when I refused to eat dairy-free foods; anger, when I realized I would have to change my approach to food; bargaining, when I convinced myself dairy would be worth the pain (it never was);  depression, when I would stand outside the bakery counter staring at all the food I had given up; and lastly, acceptance. It took me a couple years to fully accept and embrace the dairy-free diet (and even longer to find delicious dairy-free counterparts to my favorite dairy-filled foods).

I am aware there is a certain irony to baking without baking's greatest giftsbutter, cheese, milk, and heavy cream. In fact, I couldn't even steal a lick from the spatula when I spent days preparing cupcakes for my sister's wedding.  Even though I write the recipes on Pastry Affair to include dairy ingredients, you can rest assured that the recipes are created dairy-free in my own kitchen.

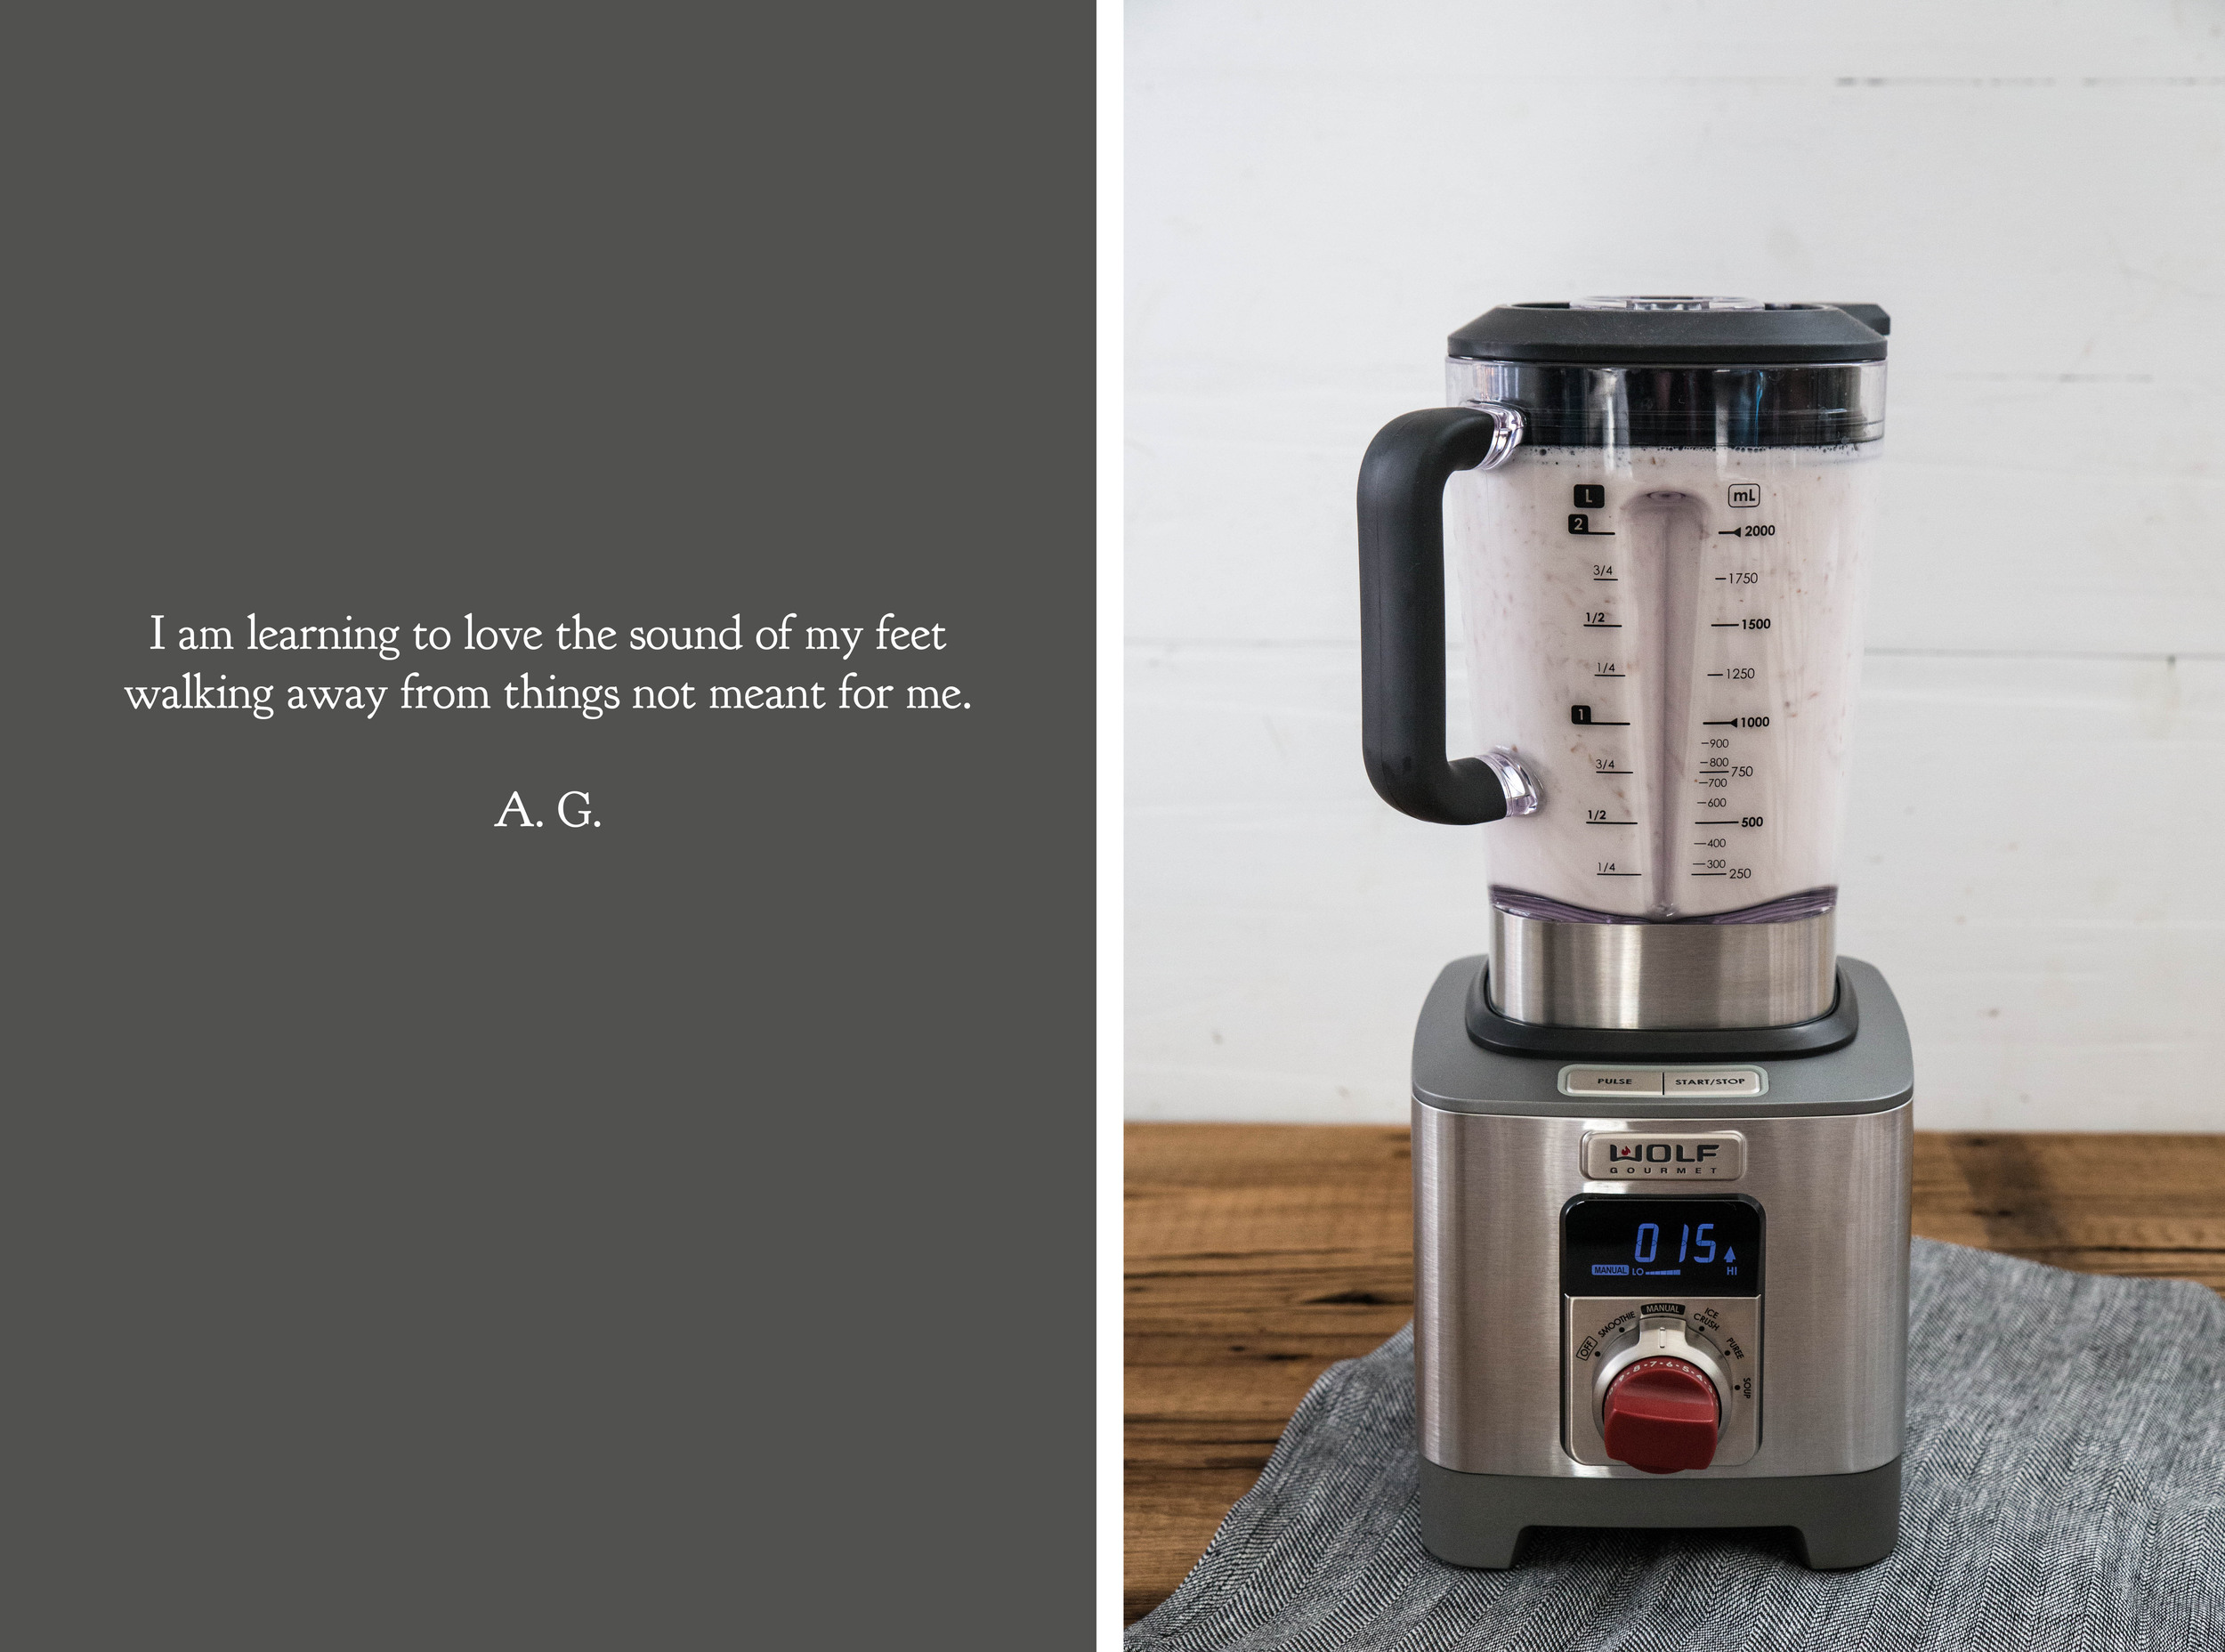
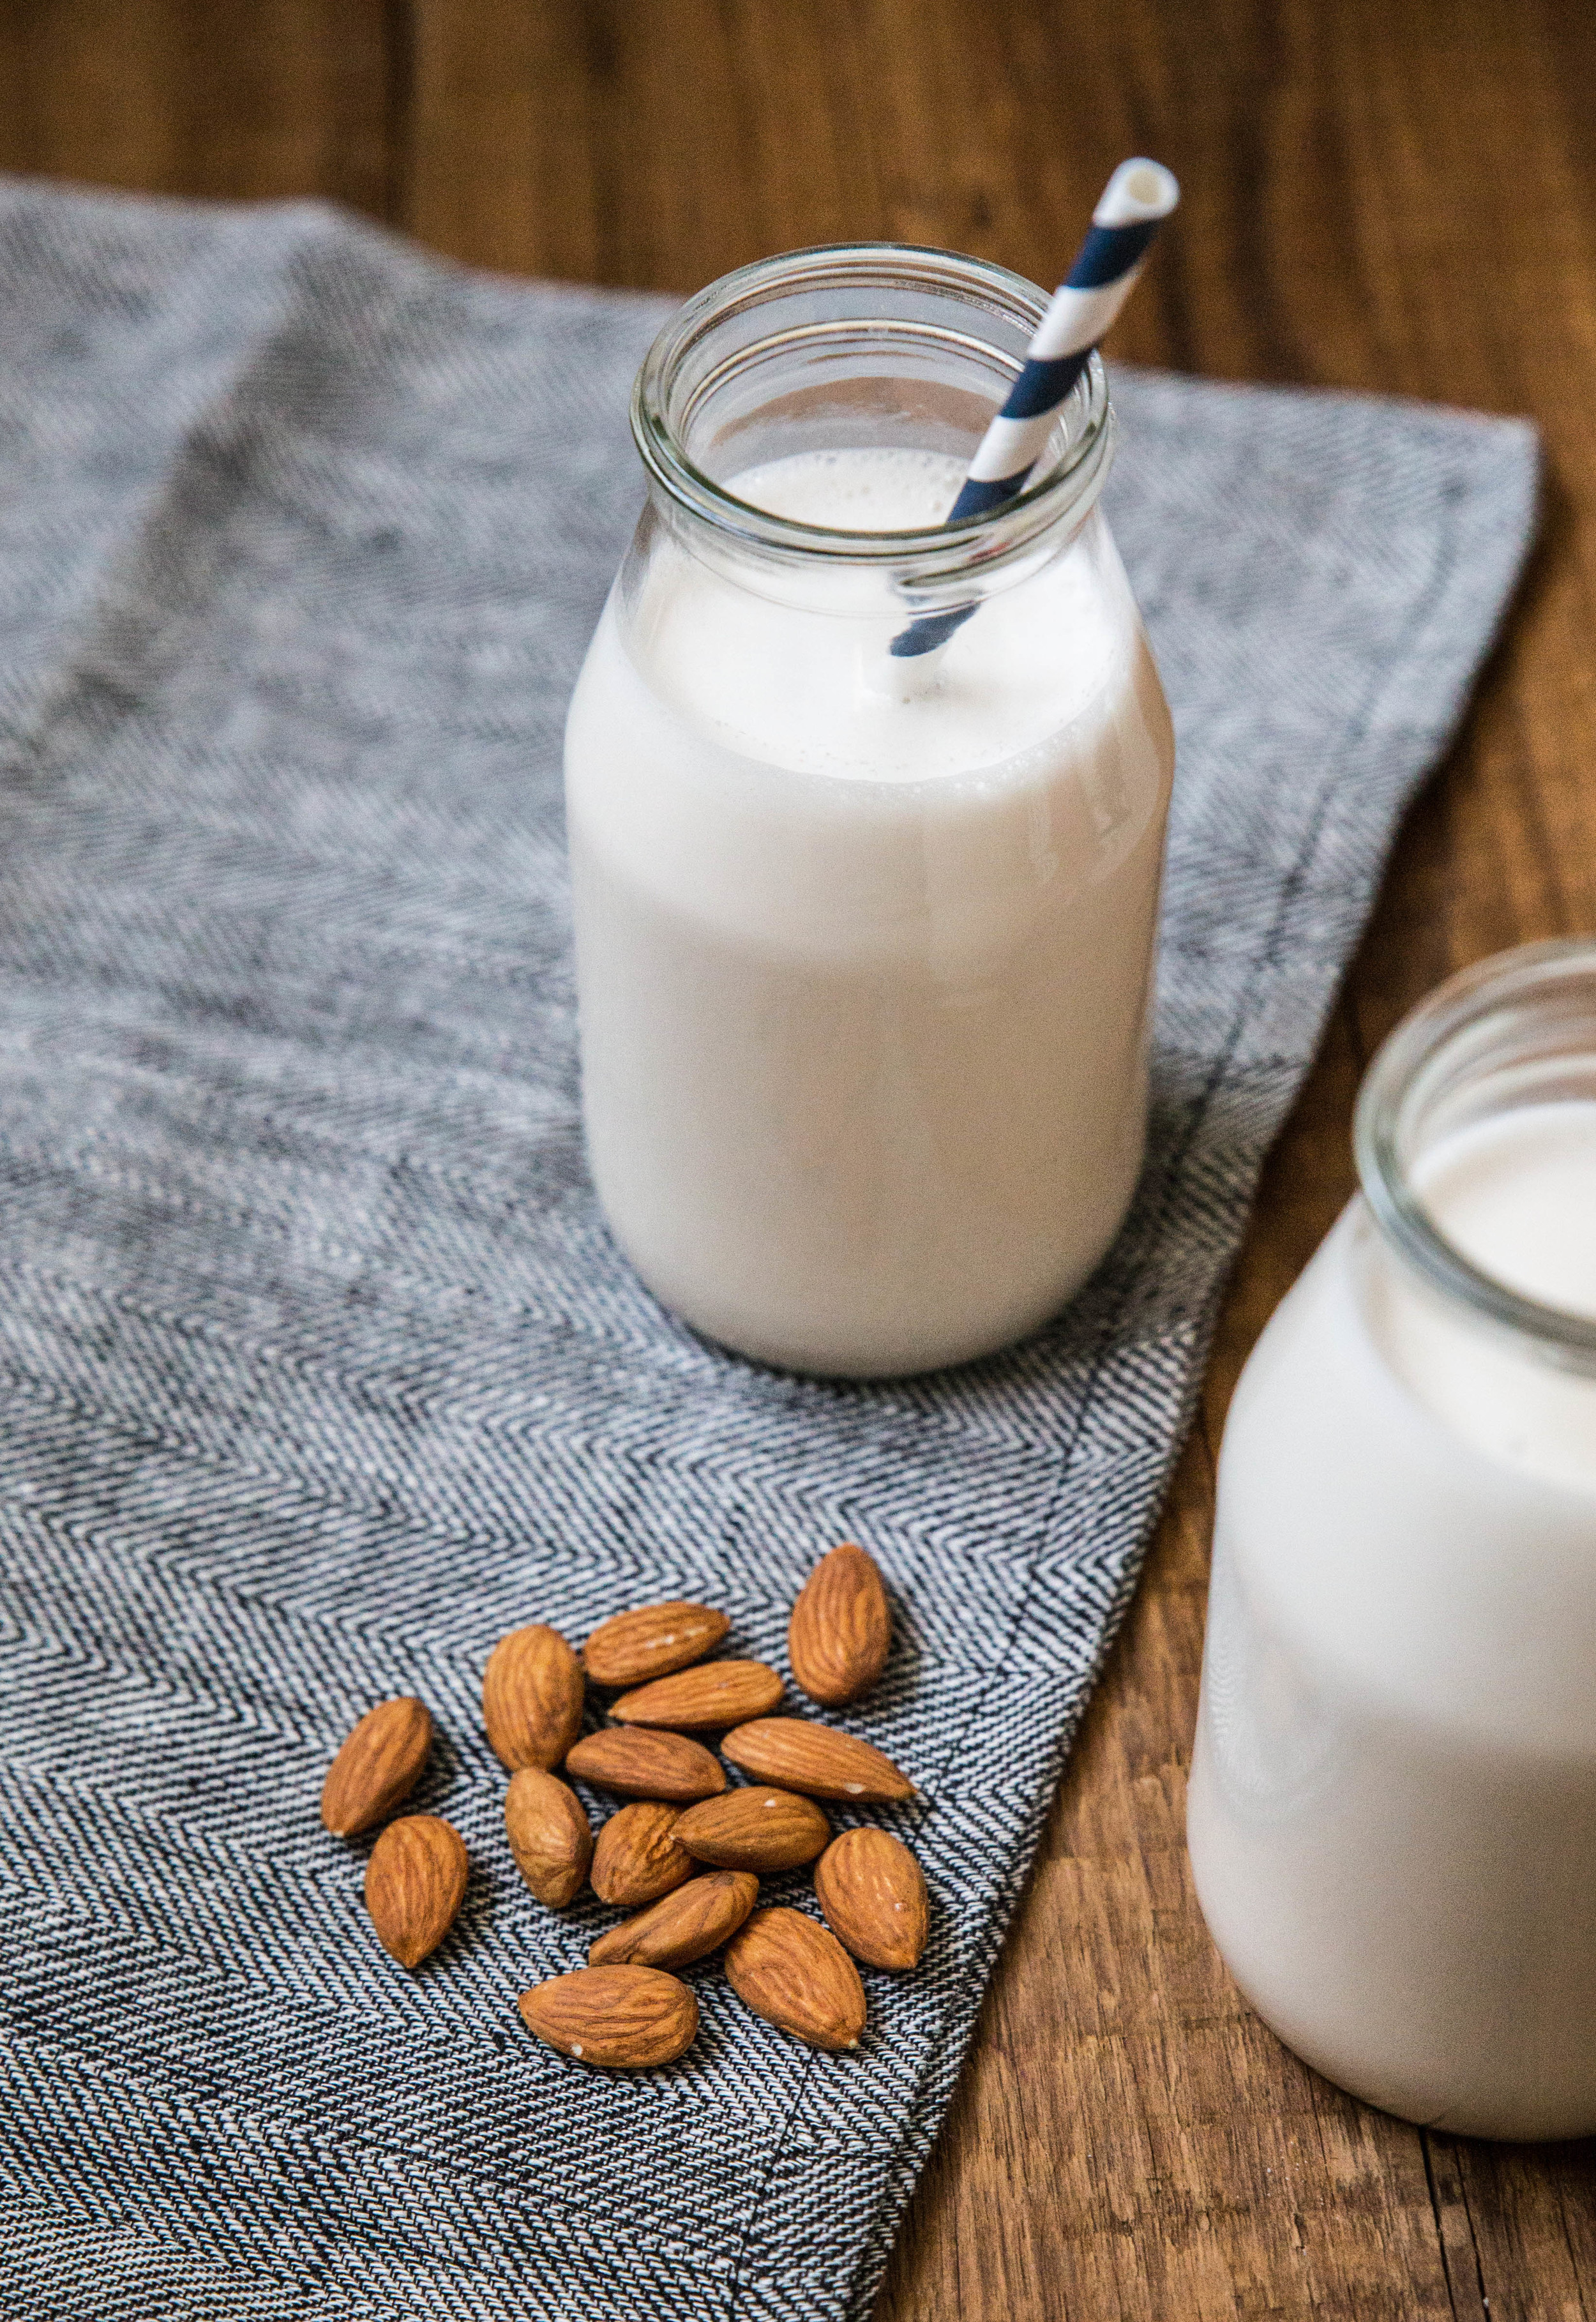
The first dairy-free alternative I fell in love with was almond milk. The milk is creamy with a subtle almond flavor, which works beautifully in baking and morning cereal. When Wolf Gourmet asked me to test their High Performance Blender, I knew that homemade almond milk would be my first challenge. I haven't made almond milk with my current low-end blender because it has a difficult time breaking down small foods. For example, the greens are in larger pieces than I prefer in this green smoothie, and there is a visible level of grain in this chocolate hazelnut spread that could be eliminated with a high powered blender. 

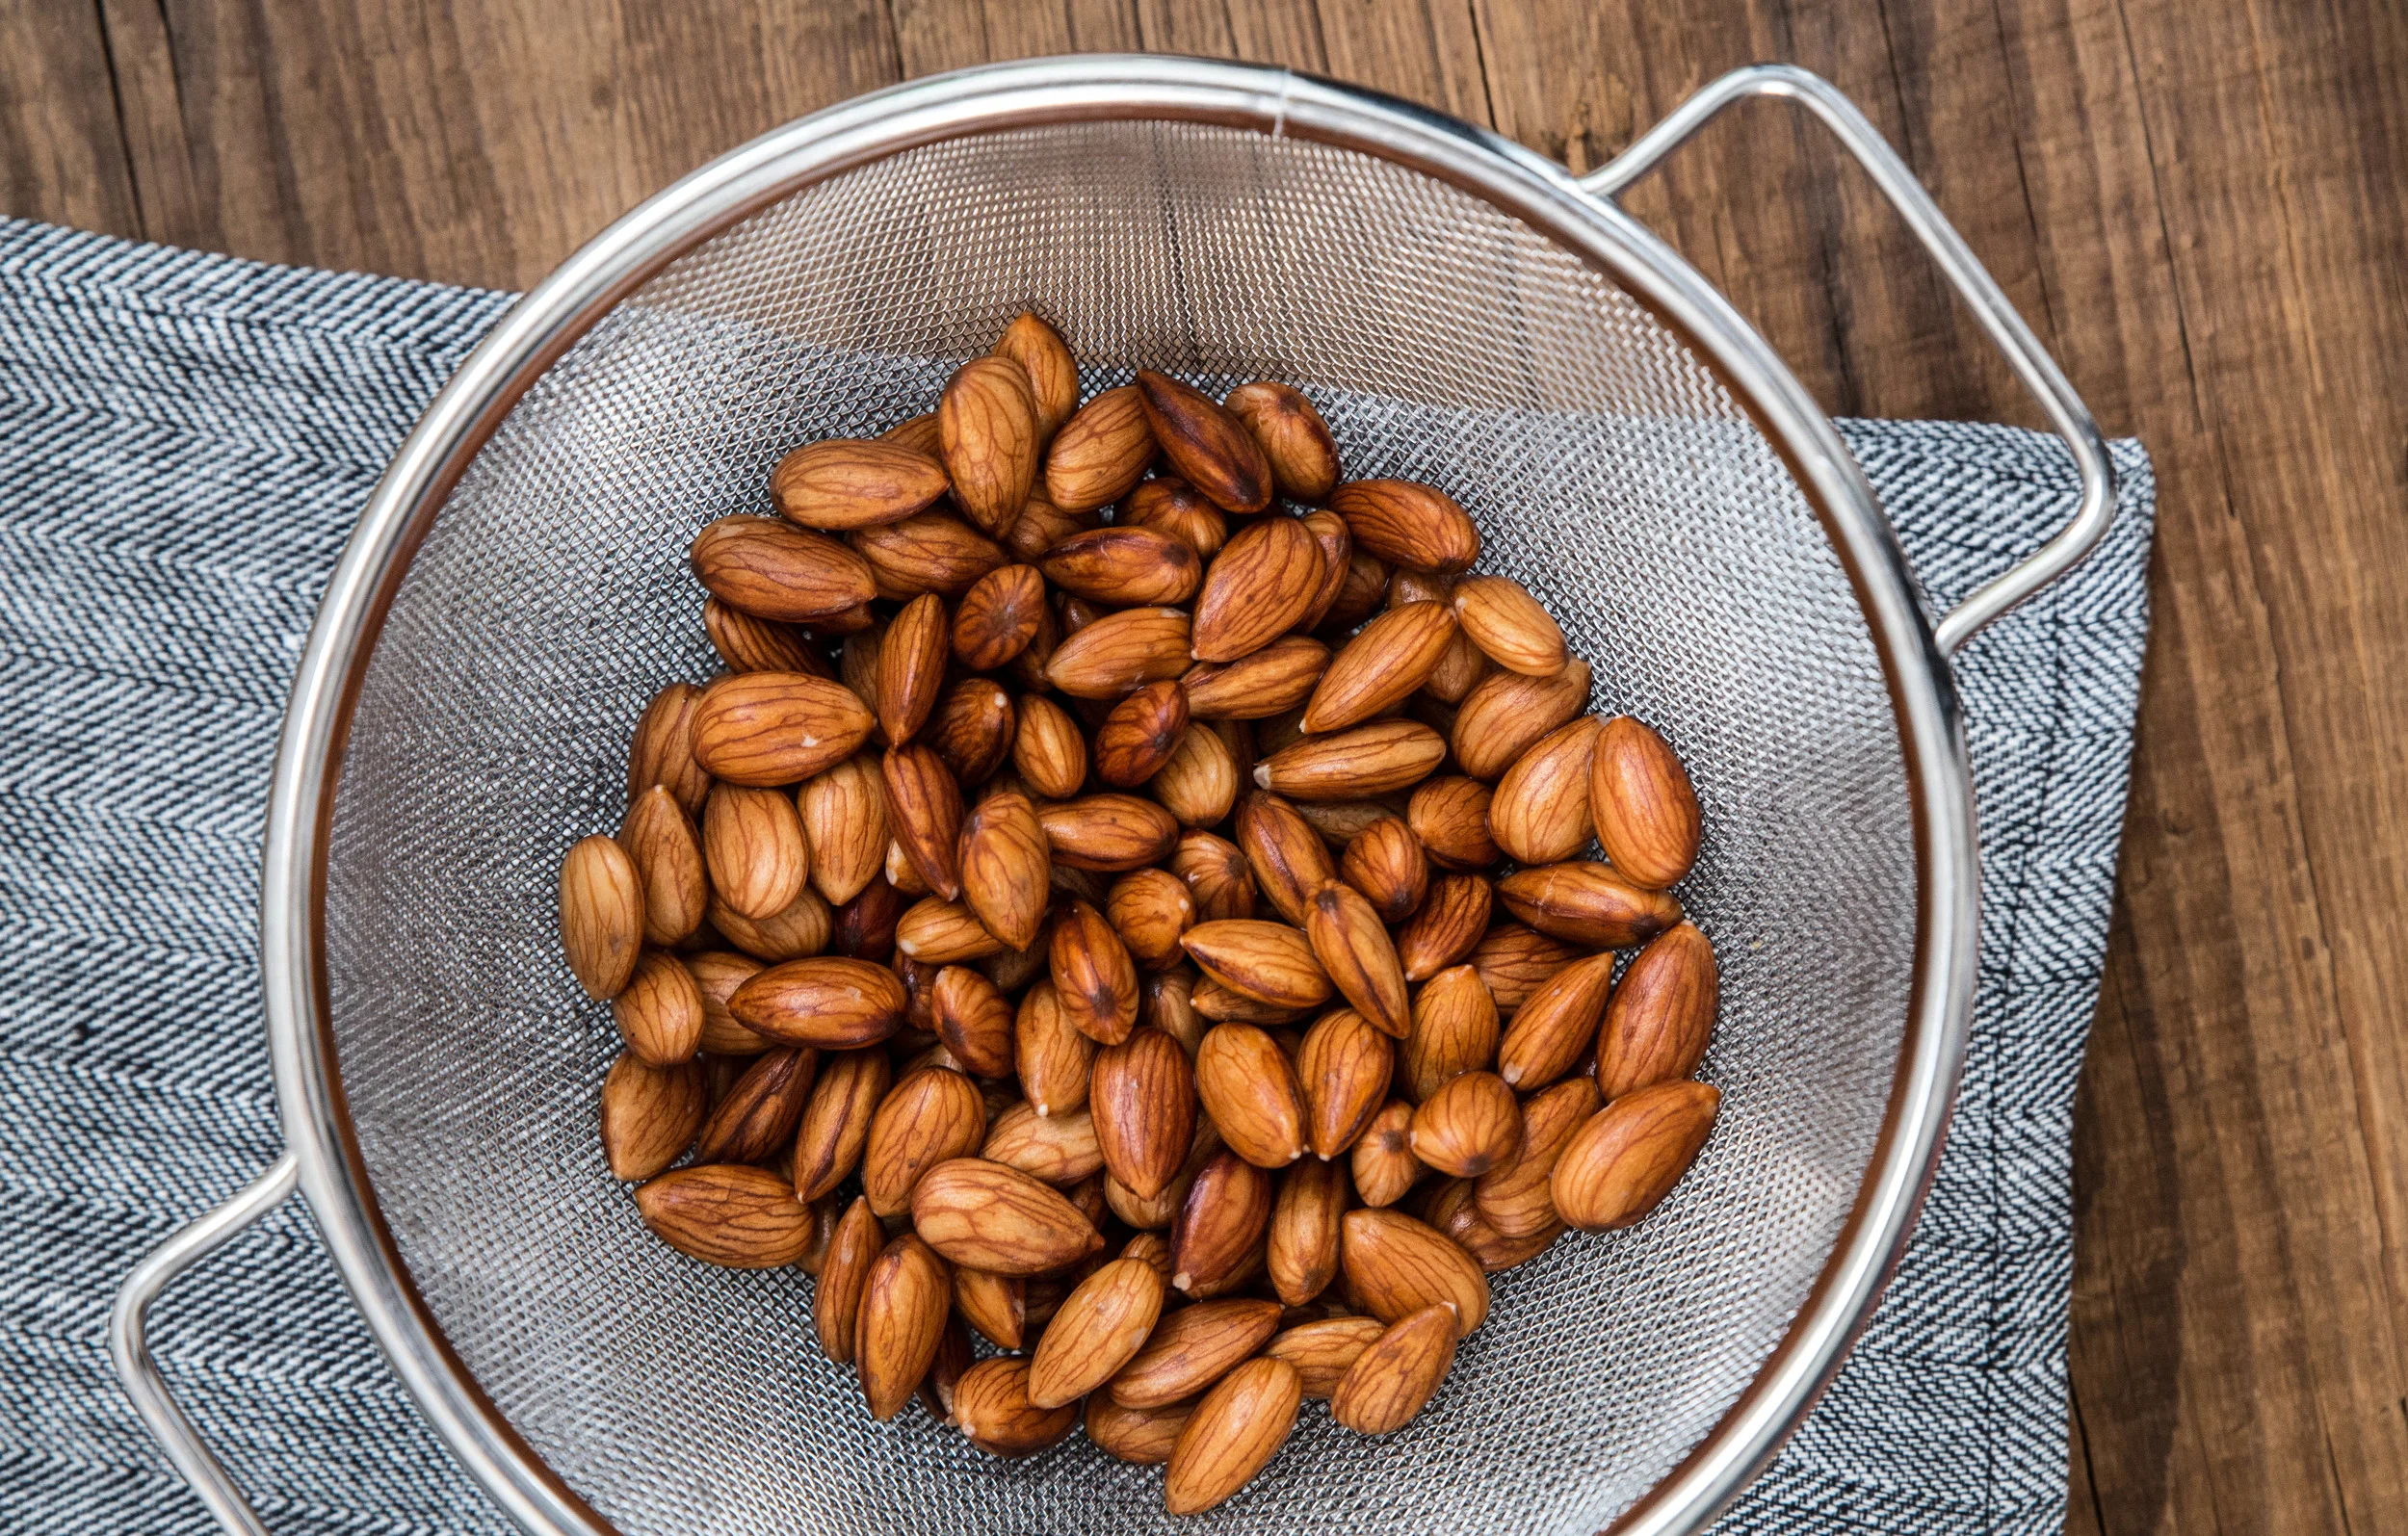
Essentially, almond milk is made by blending almonds with filtered water. The almonds are first soaked overnight to soften. Ideally, to create the creamiest milk, you need to extract as much as possible from the almonds by breaking them down into very fine pieces. When I set the Wolf Gourmet blender to task, the leftover almond pulp was finer than almond meal. I have used other high-end blenders, but I prefer this one because it not only includes presets for the most common blended foods (like smoothies and purées), but it also has a timer that helps you keep track of time elapsed.

While the almond milk can be left unsweetened, I added vanilla extract and maple syrup to give it a subtle flavor and sweetness.

Edit: Giveaway is closed and the winner has been chosen.

Homemade Almond Milk is incredibly easy to make at home and can be customized to your tastes. This version uses vanilla extract to provide a light flavor and maple syrup for a subtle sweetness. If you have a sweeter palate, feel free to add more maple syrup, or even honey, to taste. This almond milk has a similar thickness to 2% milk. For almond milk with a thinner consistency, add more water when blending; likewise, for a thicker almond milk, reduce the amount of water. The almond milk can be used in the same manner as dairy milkfor cooking, baking, and drinking.

One Year Ago: Banana PB Green Smoothie and Cherry Hand Pies
Two Years Ago: Lavender Vanilla Bean Cake and Plum Almond Galette
Three Years Ago: Coconut Sorbet, Cherry Almond Crumble, Nutella Espresso Rolls, & Brownie Cookies
Four Years Ago: Almond Butter Cupcakes, Summer Berry PavlovaMango Coconut Popsicles, & French Silk Pie
Five Years Ago: Butterbeer, Butterbeer Cupcakes, Cherry Almond Muffins, & Plum Clafouti
Six Years Ago: Mocha FrappuccinoBerry Lime Panna Cotta, & Grilled Peaches

Homemade Almond Milk

Yields about 6 cups

2 cups (225 grams) whole almonds
8 cups (1.9 L) filtered water, divided
3 tablespoons maple syrup
1-2 teaspoons pure vanilla extract, to taste

Place almonds in a container and cover with 3 cups filtered water. Seal container and allow to soak overnight, for 8 hours up to 2 days.

Strain almonds and rinse with fresh water (the almonds release phytic acid while soaking, which prevents the body from absorbing nutrients; rinsing the almonds removes this acid). Place almonds and remaining 5 cups filtered water in a blender. Add maple syrup and vanilla extract. Blend on high for 2-3 minutes. Using a nut bag, layered cheesecloth, or fine mesh strainer, strain the almond milk to remove the pulp. If using the fine mesh strainer, run the milk through several times to eliminate pulp. The leftover pulp can be used in smoothies, muffins, or breads or it can be dehydrated and used in the same manner as almond flour.

Keep refrigerated. Almond milk stays fresh for 5 to 7 days.

Disclosure: A complimentary High Performance Blender was provided for review by Wolf Gourmet. As always, all thoughts and opinions are my own.

Chocolate Chunk Coconut Oil Cookies

Perhaps it's due to the recent wedding of my younger sister, but I've been feeling stagnant in my own life lately. I'm waiting—waiting to be engaged, waiting to be married, waiting to have children. The clock ticks and my number hasn't been called. In many ways, I feel like my "real" life hasn't started yet, as if my life is on hiatus, waiting for the next season to begin.

Realistically, I know all of this is not true. My current state of being is nothing to complain about. I have an amazing job working as a high school teacher, a delicious hobby, the freedom to travel, and few responsibilities or worries. However, knowledge of these truths and my current feelings about them are two different things. The head and the heart are often at odds. I need to remind myself that life is happening now, not in a year or two. It's time to brush off the restlessness and embrace where I am now.

This past weekend I packed up and moved again (for the sixth time since starting this blog). It's not a starter house, as I have daydreamed about, but it is into a nicer apartment with much quieter neighbors. Patience is a virtue, I'm told. Sometimes, though, it takes a bit of a push to remember.

When I am feeling restless, I like to bake a batch of my favorite comfort desserts. Chocolate chunk cookies, now and always, will top the list. Since learning I was lactose intolerant a few years ago, I have been on the hunt to find a recipe sans butter or vegan butter replacement. After a dozen trials over the years, I landed on this version featuring coconut oil.

Unlike most butter recipes, the coconut oil is liquid when added. As a result, the cookies do not spread much in the oven. To combat this, the dough is rolled into balls and flattened with the palm of a hand to the desired thickness. Press the dough lightly for thick cookies with a soft center and crunchy outside, or press down firmly for thin, crisp cookies. The choice is yours.

Chocolate chunk coconut oil cookies are a dairy-free alternative to the classic. The cookies feature large chunks of chocolate and a customizable texture. To elevate the traditional cookie, espresso powder is added to enhance the chocolate flavor and flaky sea salt is sprinkled on top for a sweet and salty contrast (though both of these additions are optional). While I could not detect a coconut flavor from the oil, a subtle one may appear depending on the brand used. As always, serve with a large glass of milk.

One Year Ago: Raspberry Rhubarb Sorbet 
Two Years Ago: Cookies & Cream Ice Cream
Three Years Ago: Sparkling Lemon Drop, Berry Cheesecake Tarts, Mint Sugar, & Frozen Strawberry Bars
Four Years Ago: Chocolate Cherry CakeCoconut Scones, & Roasted Strawberry Coconut Ice Cream 
Five Years Ago: Quinoa Pudding, Blueberry Hand Pies, Harry Potter Treats, & Cauldron Cakes
Six Years Ago: Margaritas, & Chocolate Chip Raisin Oatmeal Cookies

Chocolate Chunk Coconut Oil Cookies
Adapted from Seven Spoons by Tara O'Brady

Yields about 2 dozen

1/2 cup (113 grams) coconut oil, liquid state*
3/4 cup (150 grams) brown sugar, packed
1/4 cup (50 grams) granulated sugar
1 large egg
2 teaspoons vanilla extract
1 3/4 cups (215 grams) all-purpose flour
1 teaspoon baking soda
1/2 teaspoon espresso powder, optional
1/2 teaspoon salt
6 ounces (170 grams), semi or bittersweet chocolate, coarsely chopped **
Flaky sea salt, optional

Preheat oven to 350 degrees F (180 degrees C).

In a large mixing bowl, stir together the coconut oil and sugars until uniform. Beat in the egg and vanilla extract. Stir in the flour, baking soda, espresso powder, and salt until uniform. Stir in the chopped chocolate.

Roll the dough into balls, about 1 1/2 tablespoons in size, and place 2 inches apart on a cookie sheet. Press down the dough with the palm of your hand until the dough is disk-shaped, about 1/2-inch in height. Sprinkle with flaky sea salt, if desired. Bake for 10-12 minutes, or until golden.

*Coconut oil melts at a temperature of 76 degrees F (24 degrees C). Microwave oil for a few seconds to melt, if necessary.

**Use dairy-free chocolate to keep the cookies fully dairy-free.

Blueberry Crumble Bread

My younger sister was married last weekend in a beautiful flora-filled, woodland-themed wedding. As the maid of honor, I spent the last couple weeks dedicated to last minute wedding planning. Along with throwing a bridal shower, my waking hours were filled with running errands, assembling welcome boxes, and crafting table decorations to minimize the stress on the bride. All the behind-the-scenes work was worthwhile, as the wedding day went by effortlessly and my sister and new brother-in-law never stopped smiling.

As a gift to the happy couple, I baked all of the cupcakes for the wedding—vanilla bean, chocolate, coconut, and dulce de leche. Even though I used to work in a bakery and could whip up large numbers of cupcakes in a few hours, it was a new experience doing so with the single-batch equipment of a home baker. Eighteen pounds of butter later, I breathed an audible sigh of relief that the recipes held up when quadrupled and hugged my KitchenAid mixer after it whipped Swiss meringue buttercream on high for a solid three hours. At the wedding, the cupcakes disappeared quickly, which is the best compliment a baker can receive.

After a busy couple of weeks, it feels good to take time for myself to relax. One of the benefits of being a teacher is the summer vacations, and I have been treating this week as a much needed holiday. Stretching out under the sun with a good book, and spending time in the kitchen playing around with new ideas has consumed my time. As an extension to these lazy mornings, I baked up this Blueberry Crumble Bread and have been enjoying a slice as I fill out Sudoku puzzles in the daily paper.

My productive side will come out soon, but for now I'm enjoying this rare slow, languid pace of life.

Blueberry Crumble Bread is a great addition to breakfast or served as an afternoon snack. A moist, vanilla-scented bread is bursting with fresh blueberries. The sweet crumble on top features ground cinnamon, which enhances the natural flavor of the berries. Serve the bread alongside a cup of coffee or tall glass of milk, and share with a good friend. 

One Year Ago: Scenes from NYC, Blueberry Oat Crumble Muffins, & S'mores Tarts
Two Years Ago: Chocolate Cacao Banana Bread, Chocolate Espresso Custard & Mixed Berry Quinoa Crumble
Three Years Ago: Boozy Margarita Lime Cake, Double Chocolate Muffins, Rhubarb Ginger Bars, Nutty Rhubarb Oatmeal, & Dill Dinner Rolls
Four Years Ago: Cherry Almond Granola, Vegan Chocolate Chunk Cookies, Cherry Cream Cheese Muffins, Blueberry Breakfast Quinoa, Vegan Brownies, & Banana PB Smoothie
Five Years Ago: Cinnamon Raisin Baked French Toast, Chocolate Almond Oat BarsTropical Vacation Cocktail, Dried Blueberry Granola, & Bizcochitos
Six Years Ago: Bittersweet Chocolate Sherbet, Rhubarb Jam, & Tapioca Pudding

Blueberry Crumble Bread

Yields 1 loaf

Blueberry Bread
1/2 cup (113 grams) butter
2/3 cup (130 grams) granulated sugar
1 large egg
1 tablespoon vanilla extract
2 teaspoons baking powder
1/4 teaspoon salt
2 cups (240 grams) all-purpose flour
1 cup (250 mL) milk
2 cups (340 grams) fresh blueberries*

Crumble Topping
3 tablespoons (45 grams) butter
1/3 cup (65 grams) granulated sugar
2/3 cup (83 grams) all-purpose flour
1 teaspoon ground cinnamon

Preheat oven to 350 degrees F (180 degrees C). Grease a 9 x 5-inch loaf pan and set aside.

For the blueberry bread, beat together butter and sugar until light and fluffy in a large mixing bowl. Add the egg and vanilla and beat to combine. Stir in baking powder, salt, flour, and milk. Gently fold in blueberries. Transfer batter to the prepared pan and set aside.

For the crumble topping, beat together butter and sugar until well combined. Stir in flour and cinnamon. Crumble the topping evenly over the batter. Bake for 45-60 minutes, or until crumble topping browns and a toothpick inserted into the center comes out clean. Cool in pan for 15-20 minutes before transferring to a cooling rack to cool completely.

*Frozen blueberries can also be used, but note that the berries will dye the entire bread a shade of indigo.