
S'mores Tarts
/
Campfires and s'mores compose many of my childhood summer memories. As a Girl Scout growing up, s'mores were our reward after a long day of hiking, canoeing, and cooking dinner over flames at camp. We would sing silly songs—with laughter as our melody—and toast marshmallows, stretching out these perfect moments with a just one more, please. I hold these memories particularly close when settling into the summer season.
It is fitting then, especially considering my own experience, that s'mores originated with the Girl Scouts. The first recipe for this dessert appeared in the handbook Tramping and Trailing with the Girl Scouts in 1927. The folklore says that when a girl had eaten one she would always ask for "some more." Over time, the popularity of the treat grew until it became the summer phenomena it is today. The dessert still holds ties to its roots, however. A s'more made over a roaring campfire will always be superior to any counterpart. The smoke, night sky, and good company are irreplaceable ingredients.


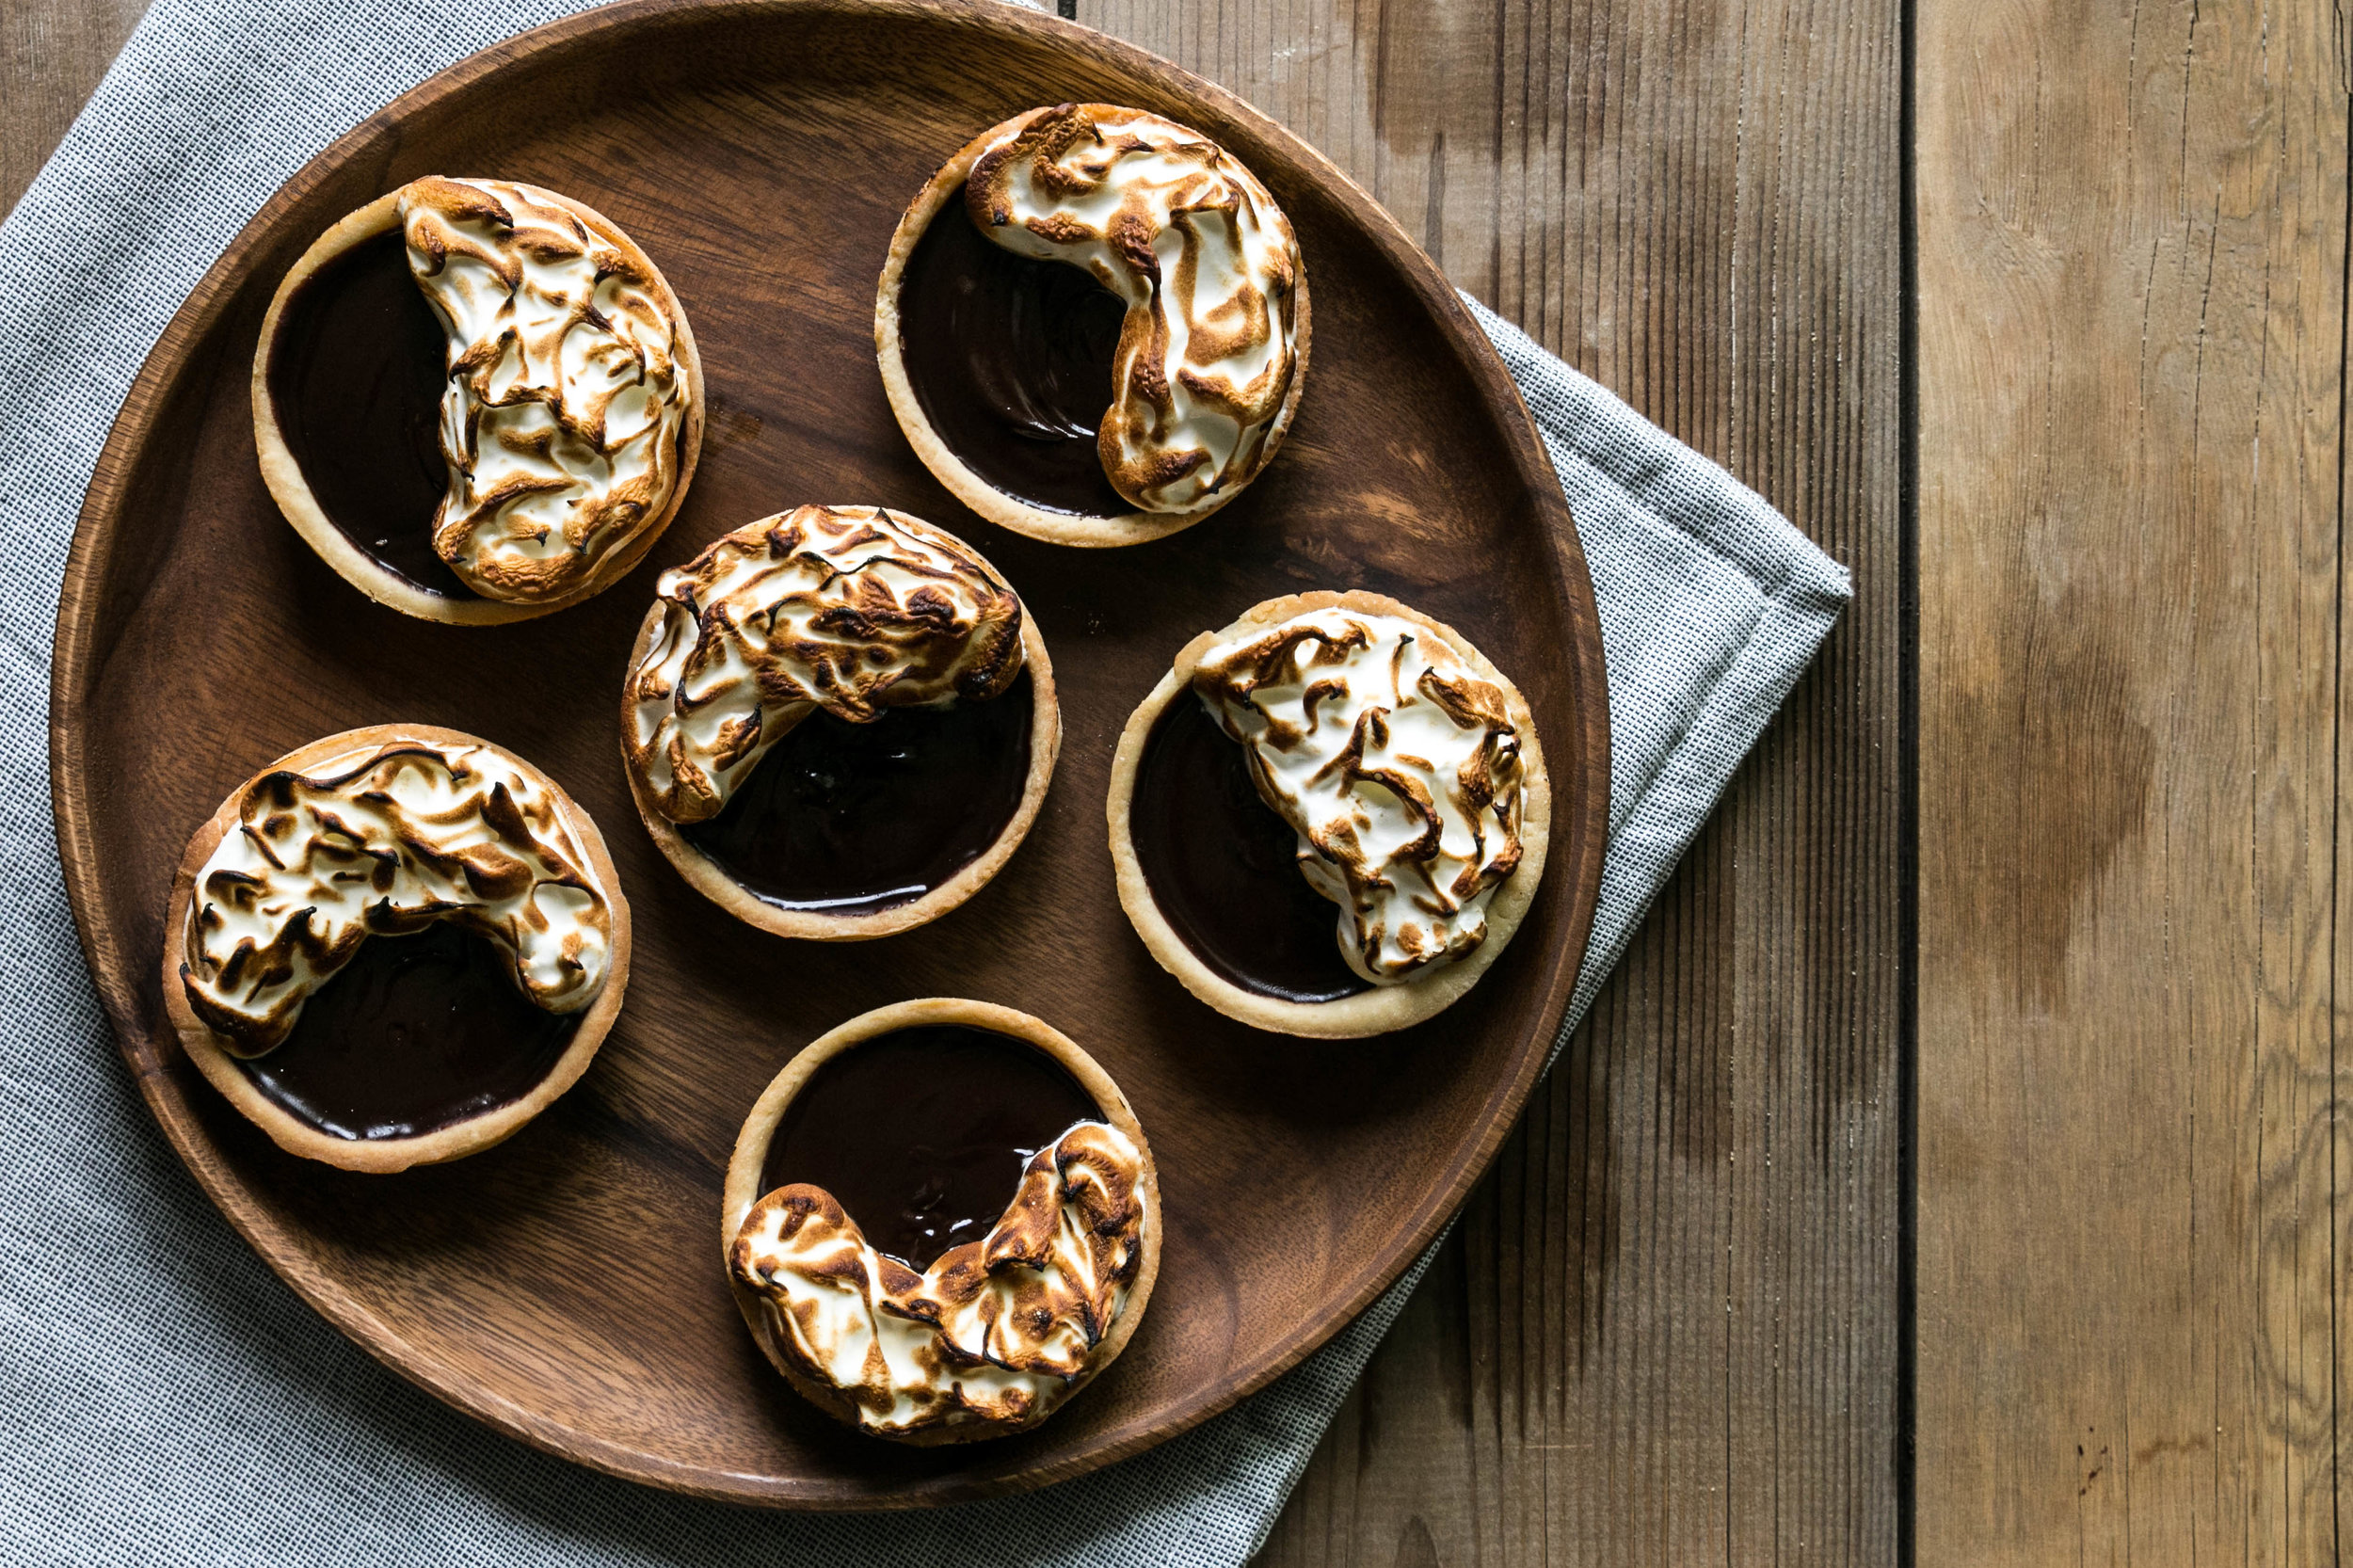
S'mores are not often thought of as an elegant dessert (as anyone with a crumb-filled lap and a sticky marshmallow face and fingers would agree). With these s'mores tarts, I wanted to find a little more of that sophistication while keeping the traditional flavors intact. Thus, a thin crust holds in a rich chocolate filling and is topped with an airy marshmallow topping.
While I still adore a classic campfire s'more, I find them too sweet to eat more than one. With the tarts, I was able to cut back on the sugar by using dark chocolate and covering the tarts partially with the marshmallow topping. Of course, if the classic sweetness is your preference, please use your favorite milk chocolate and drown these tarts in as much toasted marshmallow as you desire.
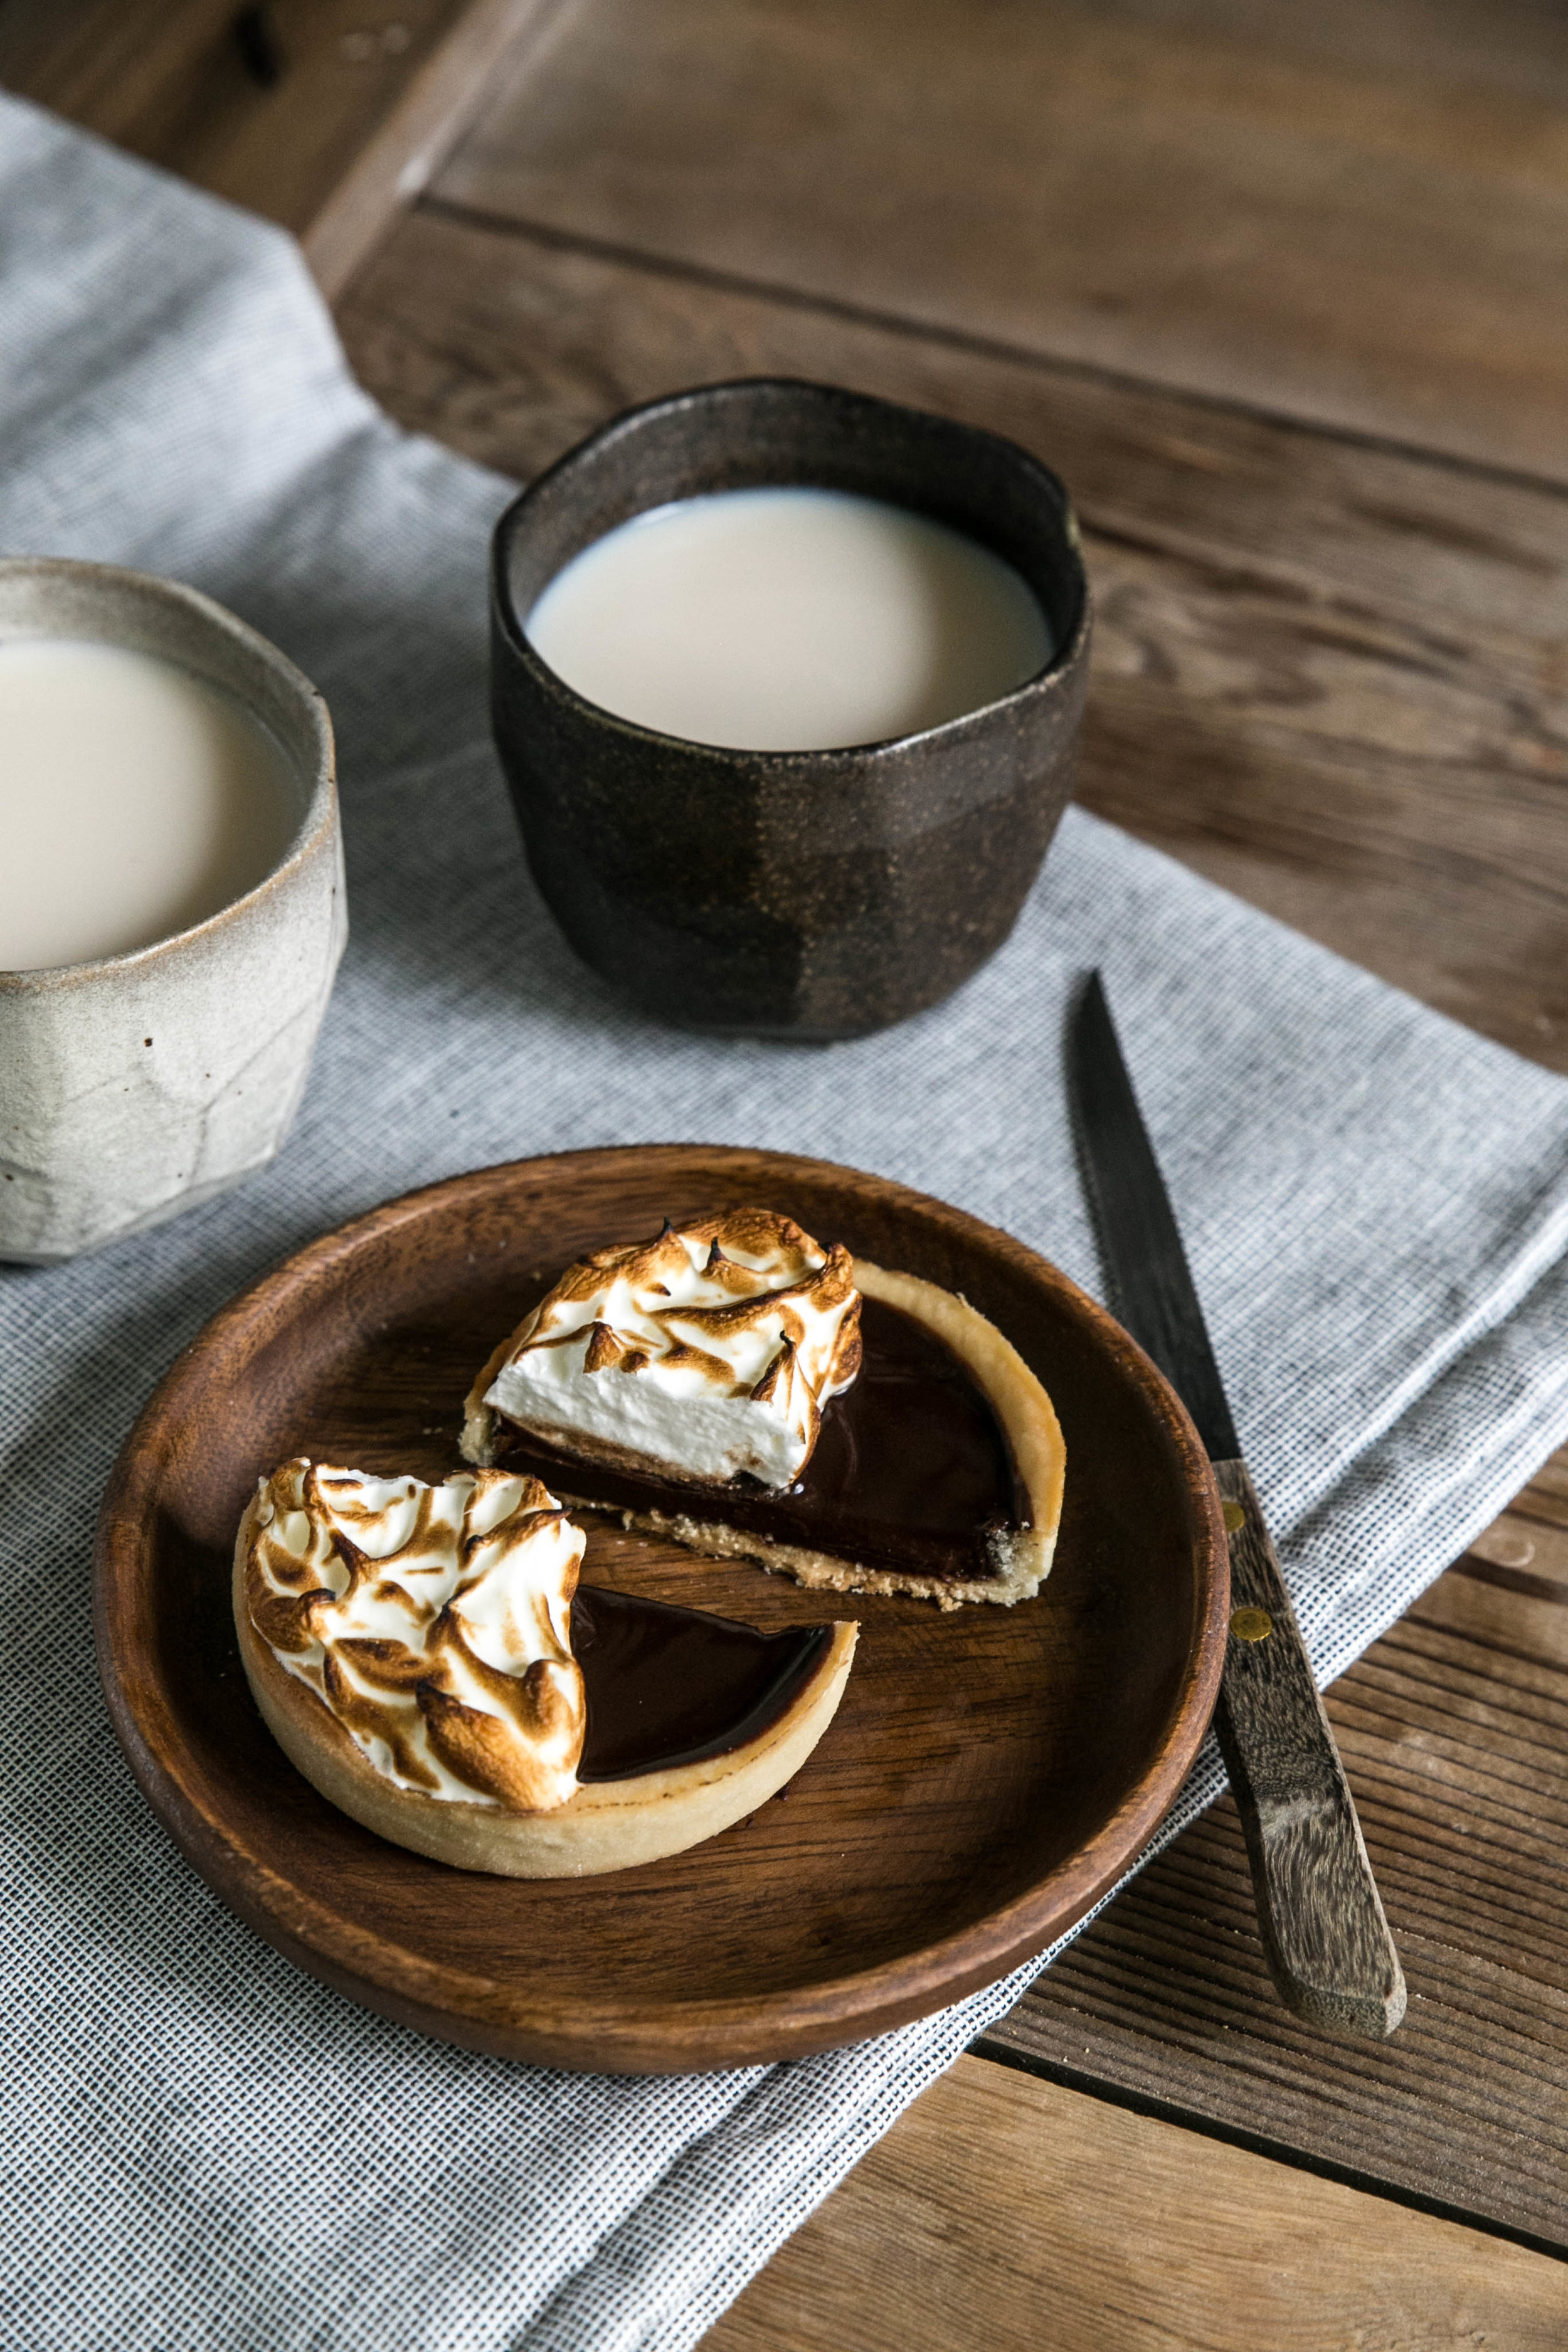

S'mores Tarts feature a rich chocolate filling surrounded by a cookie crust and topped with a vanilla flavored marshmallow topping. The marshmallow topping can be toasted using an oven broiler, but flame torches yield much more control with the finished product. I personally find kitchen torches to be small, disappointing, and overpriced. If you are up for a bit of adventure, acquaint yourself with your pyromaniac side, and pull out a full-size blow torch for these tarts. You'll be glad you did.
One Year Ago: Mixed Berry Quinoa Crumble
Two Years Ago: Rhubarb Oatmeal, Dill Dinner Rolls, Sparkling Lemon Drop, and Berry Cheesecake Tarts
Three Years Ago: Vegan Chocolate Chunk Cookies, Cherry Cream Cheese Muffins, Blueberry Breakfast Quinoa, Vegan Brownies, and Banana Peanut Butter Protein Smoothie
Four Years Ago: Chocolate Almond Oat Bars, Tropical Vacation Cocktail, Blueberry Granola, and Bizcochitos
Five Years Ago: Blueberry & Raspberry Mini Tarts
S'mores Tarts
Yields 6 small tarts
Tart Dough
8 tablespoons (115 grams) butter, room temperature
1/3 cup (66 grams) granulated sugar
1 large egg
1 teaspoons vanilla extract
1/4 teaspoon salt
1 2/3 cup (210 grams) all-purpose flour
In a medium mixing bowl, place the butter and sugar. Beat until lighter in color and texture. Add the egg, vanilla, and salt and continue mixing until uniform, scraping down the sides as needed. Add the flour, mixing until the dough comes together and begins to gather in the bowl. A food processor can also be used to speed up the process, if available.
Remove dough and shape into a cylinder. Wrap in plastic wrap and refrigerate for a minimum of 30 minutes.
Preheat oven to 400 degrees F (205 degrees C).
Unwrap dough and slice cylinder into 6 even pieces. On a lightly floured surface, roll out each slice into a circle 2-inches larger than the tart pan. Gently place dough into pan, pressing it along the edges. If necessary, additional dough can be used to cover up cracks or tears. Using a rolling pin, roll it along the top of the pan to cut off excess dough. Puncture a couple dozen holes into the bottom of the tart using a fork; this will prevent the dough from rising.
Bake for 15-20 minutes, or until they are dry in appearance and touch. Cool to room temperature.
Chocolate Filling
6 ounces (170 grams) milk, semi-sweet, or dark chocolate, finely chopped (as per preference)
1/2 cup (120 ml) heavy cream *
Place chopped chocolate in a bowl. Set aside.
On the stovetop or in the microwave, heat the cream until near boiling. Pour over the chopped chocolate and allow to sit for 5 minutes to melt the chocolate. Stir until smooth.
Divide chocolate filling evenly between the cooled tart shells, using an offset spatula to smooth the top of each tart.
Marshmallow Topping **
3 large egg whites
1/2 cup (100 grams) granulated sugar
1 teaspoon vanilla extract
Wipe a large bowl with a paper towel soaked in a small amount of lemon juice or vinegar to remove traces of grease. Add egg whites and sugar and, over a double boiler, whisk constantly over hot water until the sugar dissolves. When rubbed between your fingers, the egg whites should feel hot and smooth (approximately a temperature of 140 degrees F/60 degrees C). This will generally take 3-8 minutes, depending on the temperature of the water.
Using a mixer, whip the egg whites until thick, glossy peaks form. This may take anywhere from 8-10 minutes. Beat in the vanilla extract.
Using a pastry bag, pipe topping over each tart. The tarts may be covered partially (as shown) or fully covered. Alternatively, an offset spatula can be used to spread topping over the tarts.
For a toasted look, use a kitchen torch (or a full-sized blow torch, as I did) to add the toasted look to the topping. I recommend practicing on leftover topping before starting on the tarts. Alternatively, an oven set to broil can be used to toast the topping. This is a little less precise, but will also yield a toasted appearance.
Store and serve at room temperature. The marshmallow topping may "weep" slightly on the second day, but it does not affect the flavor or texture of the tarts.
* I have also used soy milk (dairy-free) to great effect.
** The recipe yields enough marshmallow topping to completely cover the tarts, if desired.


