Blueberry Thyme Scones

With the summer growing season in full swing, my deck garden has taken off and is showcasing the color green in its many shades. While the vegetables are still in the early stages of growth, the herb garden has positively flourished, and I now have the happy problem of possessing more herbs than I (and my neighbors) know what to do with.

One of my favorite ways to enjoy herbs is through sweet preparations. The fruit and herb pairings are often unexpected, yet delicious. Basil pairs beautifully with blueberry—like in this Blueberry Basil Galette—and thyme makes a lovely complement to blueberries, plums, and pears alike.

For these scones, I started by rubbing fresh chopped thyme leaves into granulated sugar to bring out the flavor and oils. The key to using fresh herbs in baking is to use small amounts so that the dish is not overwhelmed. Thyme, in particular, can become bitter if used in large quantities, so it is better to err on the side of less than more.

While the blueberries are responsible for nearly all of the sweetness inside these scones, I like to drizzle the tops with a vanilla glaze to push the sweetness to my ideal level. The thyme brings a depth of flavor that lingers at the end—enough to add something unique without becoming overwhelming.

If you are also dealing with a particularly prolific herb garden, I hope you look for new ways to put the herbs to use in both savory and sweet preparations. The combinations can be suprising and satisfying.

These Blueberry Thyme Scones are a sweet way to start the day. A traditional blueberry scone is made unique with the addition of fresh thyme, which lends an earthy blend of lemon and mint tones. I prefer my scones extra sweet so I sprinkle the scones with raw sugar before baking. Once they emerge from the oven, I drizzle them with a vanilla glaze, but you can adjust the level of sweetness for your preference.

Blueberry Thyme Scones

Yields 6-8 servings

Blueberry Thyme Scone
2 tablespoons granulated sugar
2 teaspoons fresh thyme leaves, finely chopped
2 cups (240 grams) all-purpose flour
1 tablespoon baking powder
1/2 teaspoon salt
8 tablespoons (113 grams) cold unsalted butter, cubed
1 large egg
1 teaspoon vanilla
1/2 cup (120 mL) heavy cream, plus extra for brushing
6 ounces (170 grams) fresh blueberries
1 tablespoon raw or demerara sugar (optional)

Vanilla Glaze (optional)
1 cup (113 grams) powdered sugar
1 teaspoon vanilla extract
1 tablespoon heavy cream

Preheat oven to 350 degrees F (180 degrees C).

For the scones, in a large mixing bowl, rub together the granulated sugar and finely chopped thyme between your fingers until fragrant. Add the flour, baking powder, and salt, whisking together until smooth. Add the cubed butter and rub between your fingers until the dough resembles coarse sand with a few larger pieces remaining. Set aside.

In a small bowl, whisk together the egg, vanilla, and heavy cream. Pour over the scone batter. Add the blueberries and lightly mix until the dough comes together. The dough will be somewhat sticky.

Place the dough on a lightly floured surface. With floured hands, form the dough into a circle. You may need to fold the dough to evenly distribute the moisture, but no more than a few times to avoid overworking the dough, which will keep the scones tender. Flatten the dough until it is about 1-inch thick. Using a sharp knife, cut 6-8 equal pie-shaped wedges. Transfer scones to a baking sheet using a flat spatula and brush the tops of the scones with heavy cream. Sprinkle tops with raw sugar, if desired. Bake for 25-30 minutes, or until lightly browned.

For the glaze, in a small bowl, whisk together the powdered sugar, vanilla, and heavy cream until smooth. If glaze is too thick, add heavy cream 1 teaspoon at a time until glaze is thick, but still runs.

Lightly drizzle glaze over scones. Allow glaze to set before serving.

Rhubarb Almond Bars

IMG_0038-2.jpg

Last summer, I built a trio of large, self-watering cedar planters to start a deck garden. Our home is blessed with a large deck and, since the main living space overlooks the deck, I wanted to give it a little more life. Although we have plenty of yard space for a garden, we also have many critters (and deer) visiting frequently so it made more sense to elevate the garden to keep the plants safe from late night nibblers.

Each planter is 2 ft. by 6 ft., which leaves plenty of room for experimentation.

My interest in gardening is relatively new, but this hobby has quickly turned me into an enthusiastic plant lady. After killing every houseplant I attempted to grow up for many years, I was astonished when my black thumb seemingly turned green after moving into our house.

Apparently the trick for a green thumb is simply having large southeast facing windows—who knew?

Unfortunately, the first attempt at gardening in the outdoor planters was not very successful. In my eagerness to grow my own vegetables, I overplanted the space and didn’t do enough research on how to individually care for each plant. In addition, because the planters are self-watering (through a process of diffusion and soil osmosis), the plants with deep root systems ended up with root rot by midsummer.

By summer’s end, the only “successful” plants were the bell peppers (which grew only one picture perfect pepper each), the green beans, and the herb garden. Everything else—the tomatoes, cabbages, cucumbers, etc.—ended up producing very little or finally completing their slow death.

While the self-watering feature was definitely a curse, I only needed to water the plants once the entire season, so my laziness is more than willing to find a way to work within these constraints.

This year I am taking the failures of the previous summer and using them to (hopefully) do better this time around. To start, I did a little more planning and left more space for the plants to expand. Only plants with shallow root systems are allowed (peppers, onions, shallots, lettuce, carrots, herbs, green beans, flowers); the plants with larger root systems have been relegated to individual, well-draining containers (tomatoes).

I have my fingers crossed for now, but it will be another month or two before I’ll be able to label it a success or failure. Stay tuned.

I have plans to do a little landscaping and put in a rhubarb plant later this summer, but it will still be a couple years before we can harvest. Until then, the farmer’s market has everything I need.

I originally planned to make a strawberry rhubarb dessert, but I didn’t get around to baking until after the strawberries were past their prime. This recipe is all the better for it, because it allows the rhubarb flavor to truly shine. Paired with an almond oatmeal crust, these rhubarb-filled bars are a new way to enjoy this spring vegetable.

IMG_0043-2.jpg

This recipe for Rhubarb Almond Bars is an easy way to use and enjoy rhubarb. Almonds and oatmeal come together to form the base of the bars. Sliced raw rhubarb is added to the center (no cooking required!) before the bars are topped with the remaining crust and placed in the oven to bake. The nutty almond flavor compliments the tart rhubarb well. Cut into squares and serve warm, cold, or room temperature.

Rhubarb Almond Bars

Yields 16 servings (or 8 x 8-inch pan)

Almond Bars
6 tablespoons (100 grams) butter, room temperature
3/4 cup (150 grams) brown sugar, packed
1 large egg
1 teaspoon vanilla extract
1 teaspoon almond extract
1 1/2 cups (150 grams) old-fashioned oats
1 cup (120 grams) all-purpose flour
1/2 cup (45 grams) sliced almonds
1/2 teaspoon baking soda
1/2 teaspoon salt

Rhubarb Filling
3 cups (~14 ounces or 400 grams) fresh rhubarb, cut into 1/4-inch slices
1/4 cup (50 grams) granulated sugar
2 tablespoons cornstarch

Preheat oven to 350 degrees F (180 degrees C). Lightly grease an 8 x 8-inch pan.

For the almond base, beat together the butter and brown sugar in a large mixing bowl until uniform. Beat in the egg, vanilla, and almond extract, mixing until blended. Stir in the oats, flour, sliced almonds, baking soda, and salt. The batter will be slightly sticky. Using greased hands, press 2/3 of the batter into the bottom of the prepared pan. Set aside remaining batter.

For the rhubarb filling, stir together the sliced rhubarb, sugar, and cornstarch.

Spread the rhubarb filling over the top of the almond base. Crumble the remaining batter evenly on top. Bake for 40-45 minutes, or until lightly browned. Allow to cool slightly in pan before serving.

Banana Snacking Cake

Lately, I find myself gravitating towards familiar foods in my kitchen. The meals and desserts that I’ve enjoyed since childhood are on rotation—grilled cheese and tomato soup, spaghetti made with sauce from a jar, and chocolate chip cookies. It feels easier, in these final chaotic days of the school year, to reach for recipes that I know both forwards and backwards.

While there are no moments of surprise with new flavors or textures, the comfort of these routine meals is indulgent in a different way, for both body and soul.

This banana cake is one that I remember fondly from my childhood. Whenever the bananas were forgotten on the counter long enough to blacken, the mixing bowls would come out and this cake would emerge from the oven. The aroma of banana filling the air was the cue for the rest of my family to flock to the kitchen, stealing a bite or two before the cake had properly cooled.

It has been many years since I’ve last eaten this cake. Perhaps having my own little one in the house is causing these food memories to stir up, but, regardless of the reason, I am delighted to revisit this recipe.

IMG_9578-2.jpg

This banana cake is a simple, unpretentious snacking cake—however, that doesn't mean this cake isn't something worth talking about.

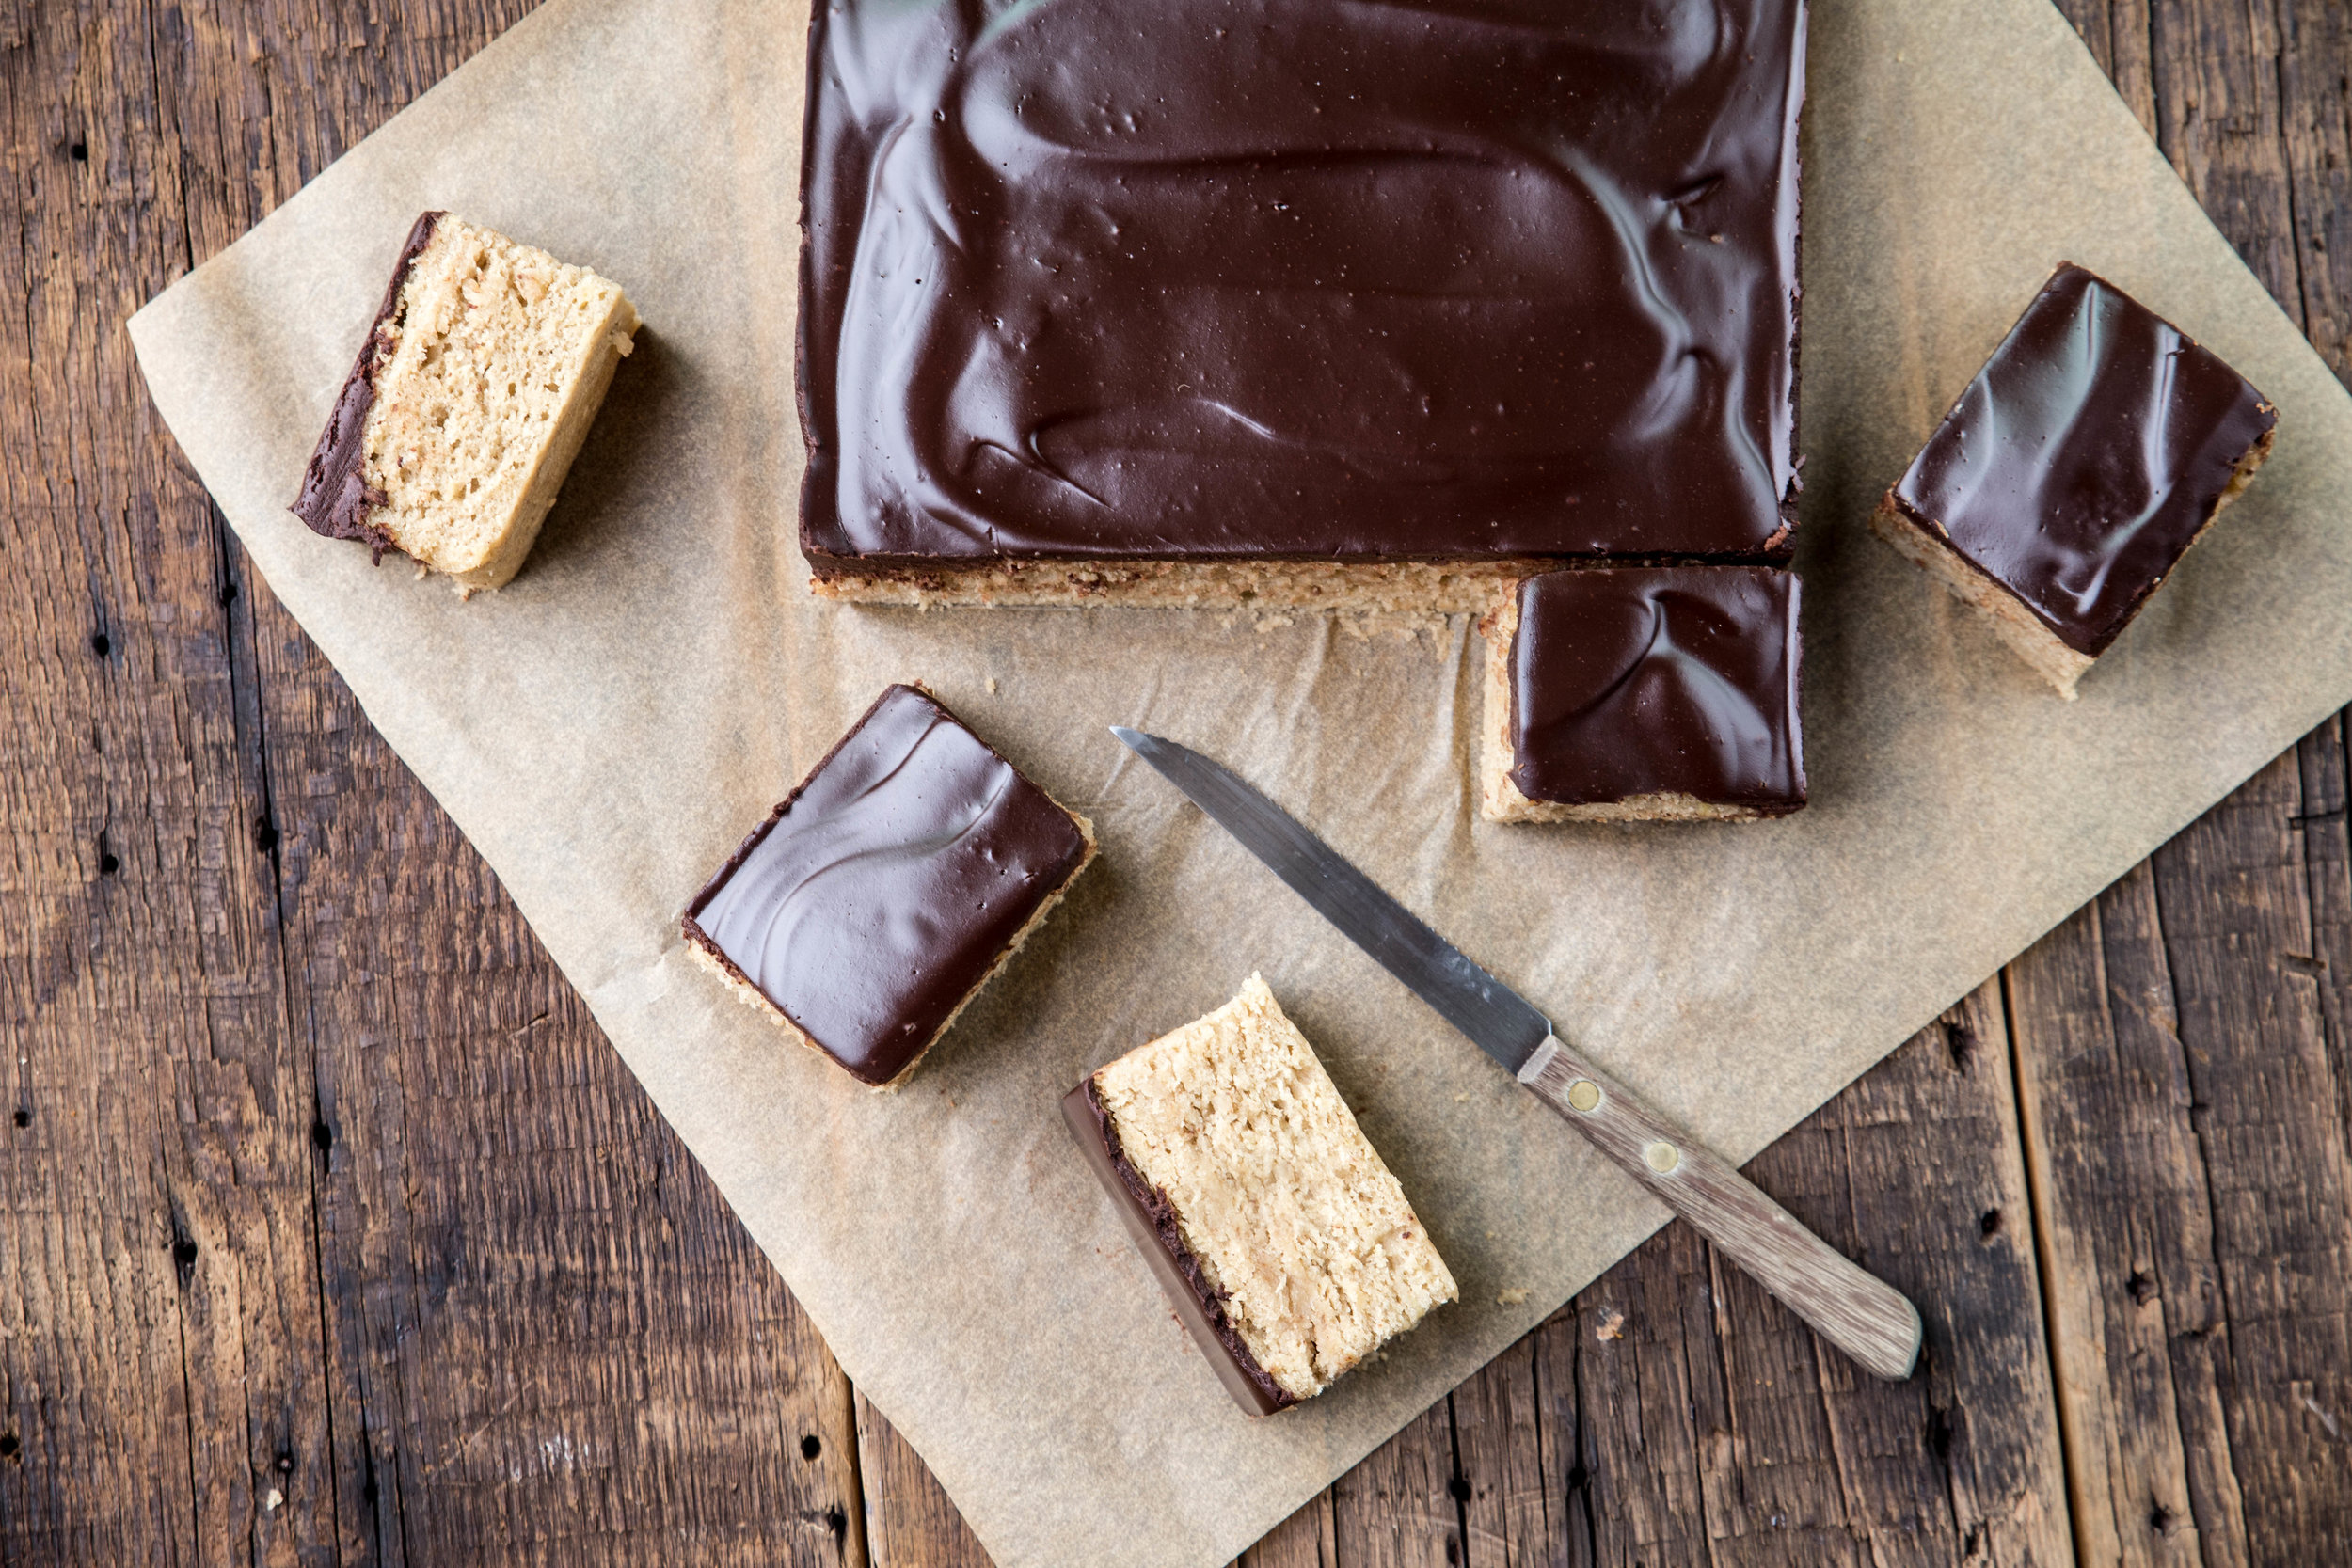
The texture is my favorite part of this cake. As with most banana breads and cake, the final product has a bit of heft, but I think it works in the cake’s favor instead of against it. The chocolate glaze is also made with butter instead of heavy cream like a traditional ganache, which lends itself to a more intense buttery, chocolate flavor.

All these years later, my family is still in debate about the best way to eat this cake. My dad and I prefer to eat this cake chilled. The cold brings out a heaviness to the cake we both love, and the chocolate glaze becomes stiff making it literally melt in your mouth. My sister, on the other hand, prefers the cake slightly warmed, which yields a lighter feel to the cake and turns the chocolate glaze silky smooth. Though our debate may never be settled, the truth is that this cake is delicious any way you choose to serve it.

Since it is my belief that snacking cakes should be easy to prepare, instead of making a chocolate glaze, you could simply add chocolate chips to the batter to bring in the chocolate flavor without needing to use more pans. The choice, as always, is yours.

This Banana Snacking Cake combines the classic flavors of chocolate and banana. The addition of mashed banana to the cake lends a moistness, while a touch of cinnamon brings out a greater depth of flavor. The chocolate glaze is simple to make, melting together only chocolate and butter, but I could eat it by the spoonful (and I usually do). The glaze spreads smooth when slightly warm and holds its shape like a dream. This cake is a good option to reach for when you are looking for a sweet snack and, if your kitchen is anything like mine, it will disappear before you are ready to see it go.

Banana Snacking Cake

Yields 9 x 13-inch cake

Banana Cake
2 1/2 cups (300 grams) all-purpose flour
1 tablespoon baking powder
1/2 teaspoon cinnamon
1/2 teaspoon salt
1/2 cup (113 grams) unsalted butter, room temperature
1/2 cup (100 grams) granulated sugar
3/4 cup (150 grams) brown sugar, packed
2 large eggs
3 medium ripe bananas, mashed
1 teaspoon vanilla extract
3/4 cup (180 mL) buttermilk (or regular milk)

Chocolate Glaze
6 ounces (170 grams) semi-sweet chocolate, coarsely chopped
1/2 cup (113 grams) butter, cubed

Preheat oven to 325 degrees F (160 degrees C). Grease a 9 x 13-inch baking pan.

To prepare the banana cake, whisk together flour, baking powder, cinnamon, and salt in a medium bowl. Set aside.

In a large mixing bowl, cream together the butter and sugars until light and fluffy. Add the eggs one at a time, beating well after each addition. Mix in the mashed bananas and vanilla extract.

Beat in the flour mixture and buttermilk in alternating additions, starting and ending with the flour. Pour batter evenly in the prepared baking pan and bake for 35-40 minutes, or until golden and a toothpick inserted in the center comes out clean. Allow the cake cool completely.

To prepare the chocolate glaze, melt together the chopped chocolate and cubed butter in a small saucepan over low heat until smooth and uniform. Spread evenly over the cooled cake and allow the glaze to set before cutting and serving the cake.