Pumpkin Espresso Bundt Cake

The changing of the leaves from green to hues of red and orange marks the arrival of autumn flavors. When the weather grows cold and the coats come out of the closet, turning on the oven feels right. In partnership with King Arthur Flour, each month I will challenge you with a new recipe, filled with step-by-step explanations and techniques, to help you grow and develop as a baker. For October, I aspired to bring together my favorite fall flavors in a recipe that is meant to be shared.

This month is all about cake, as we undertake the respected Bundt cake. Bundt cakes are an American classic. Introduced in the 1950s by pan manufacturer NordicWare, the name Bundt refers to the architecture of the pan the cake is baked in, not the type of cake itself. Bundt cake pans are taller than the traditional cake pan, with a hole in the center. The hole has a dual purpose—it gives the cake a unique ring shape and allows heat to reach the center of the cake so it can bake more evenly. 

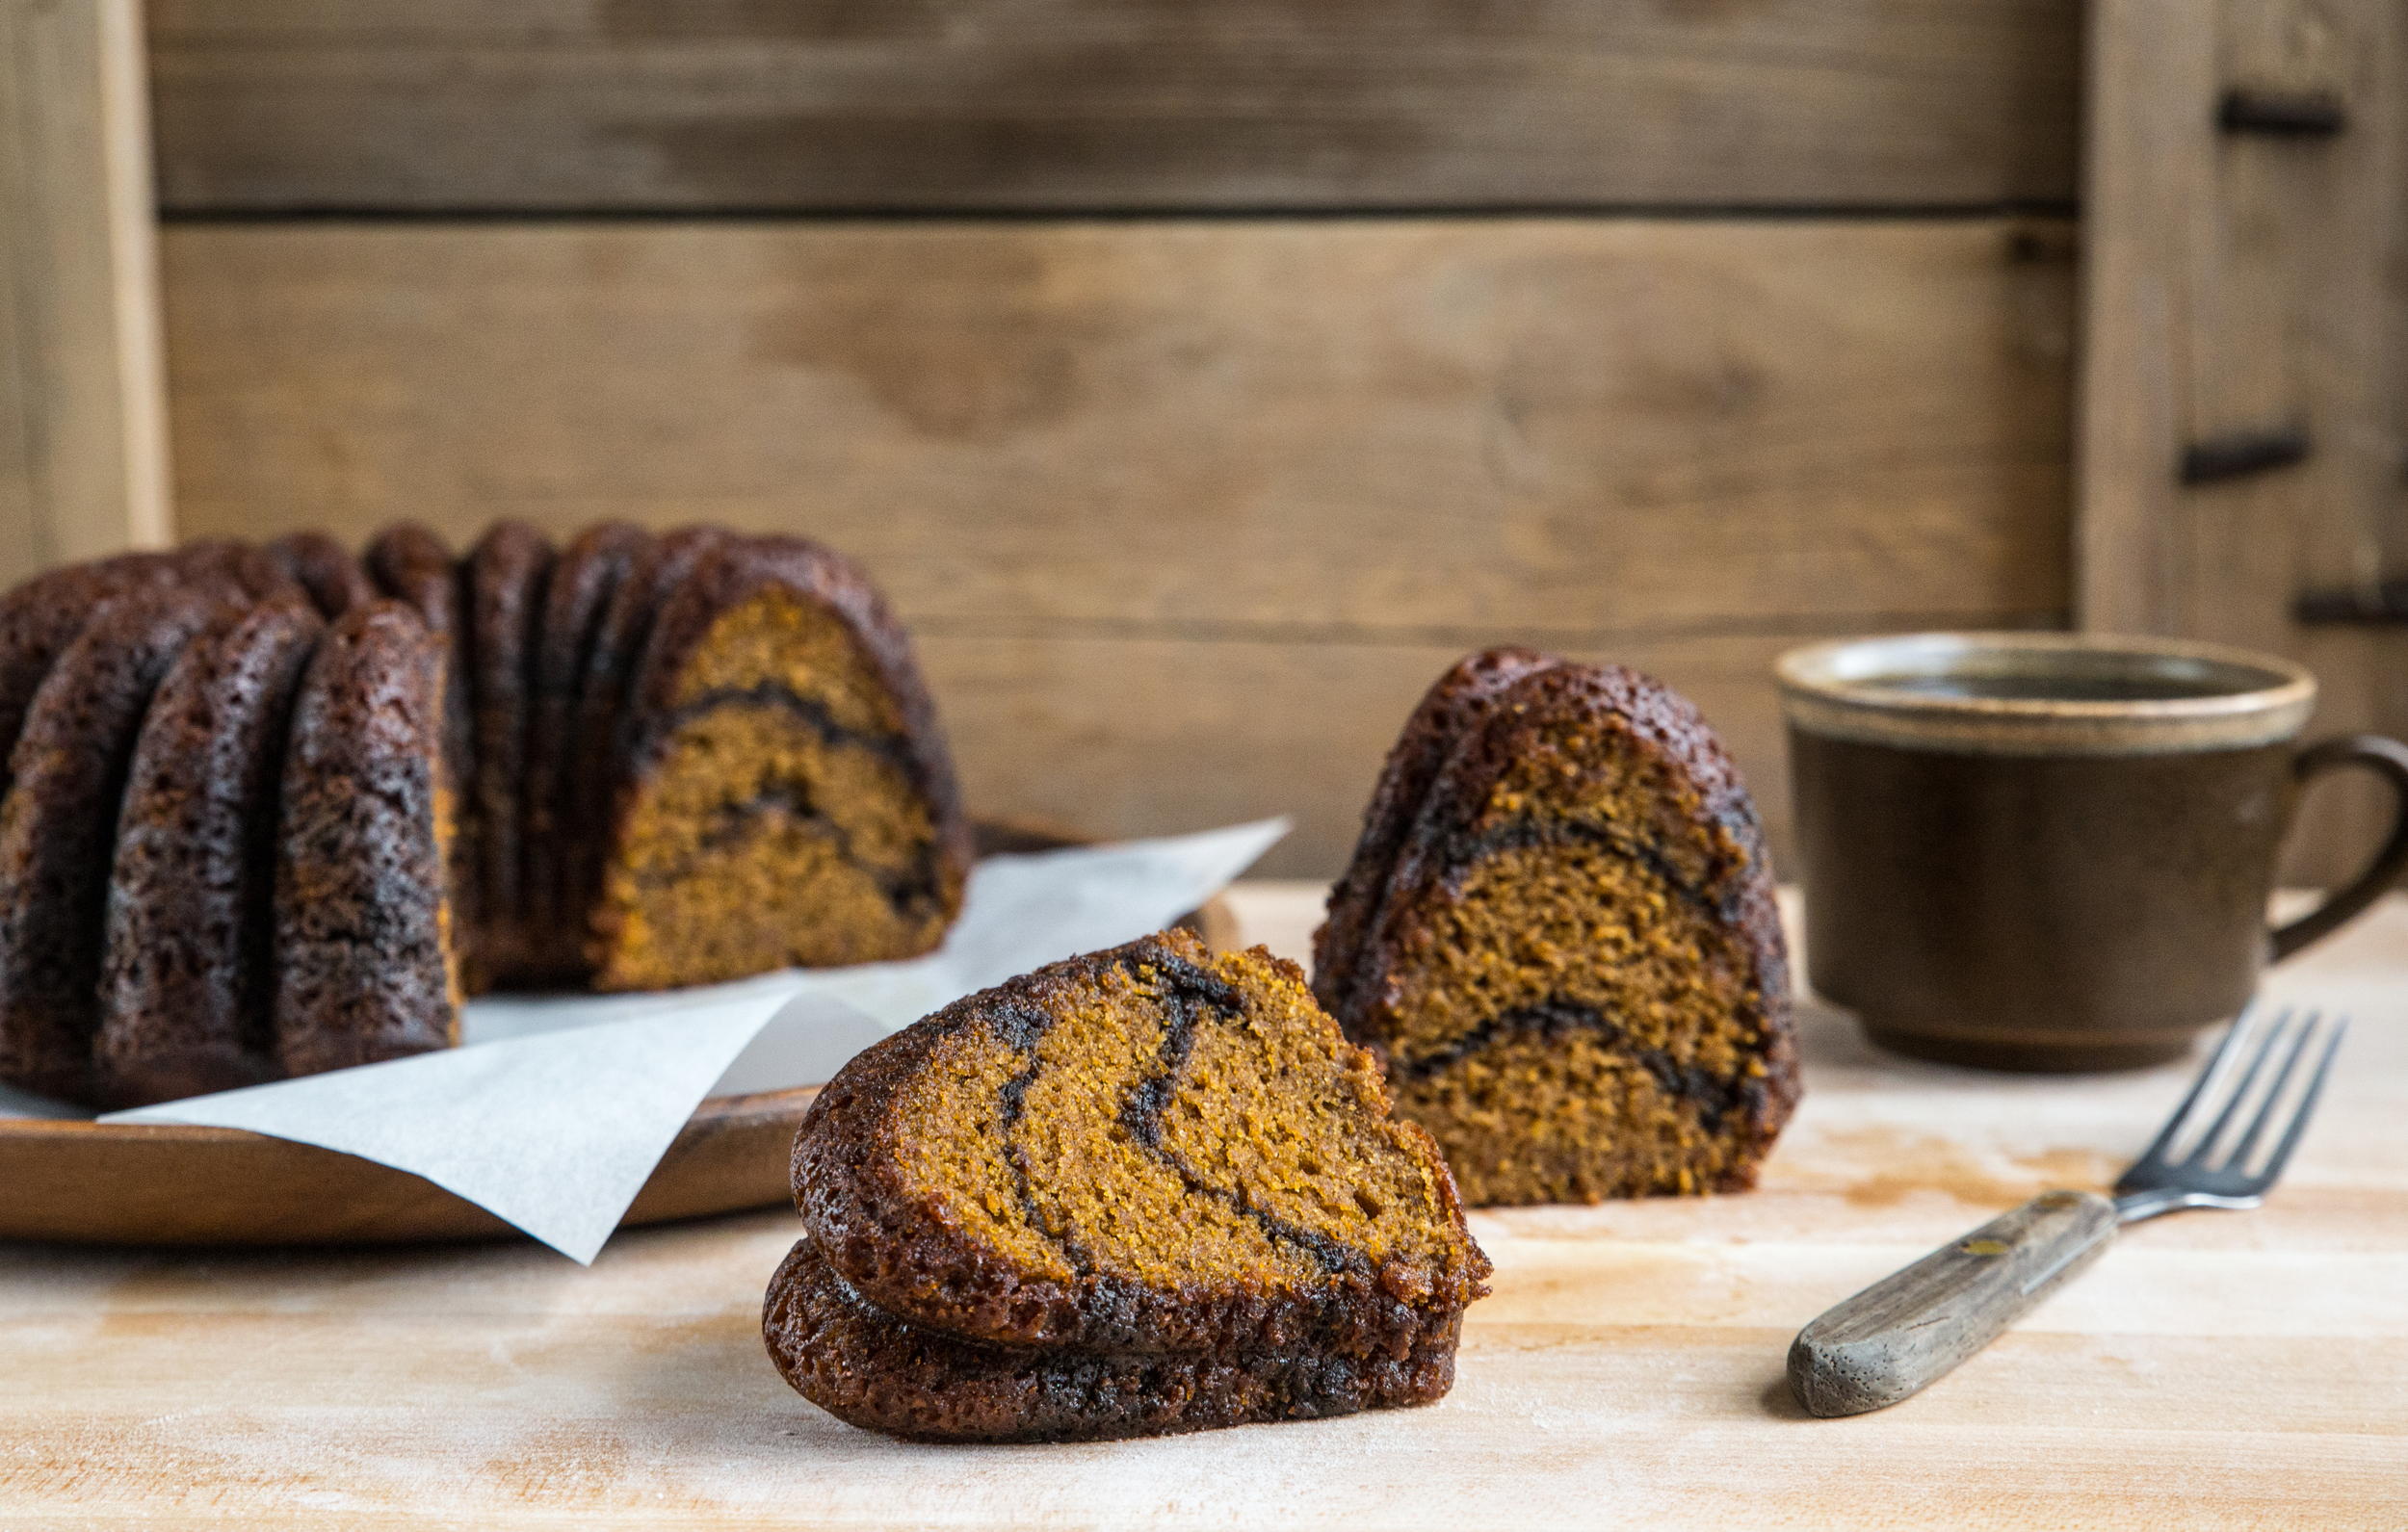
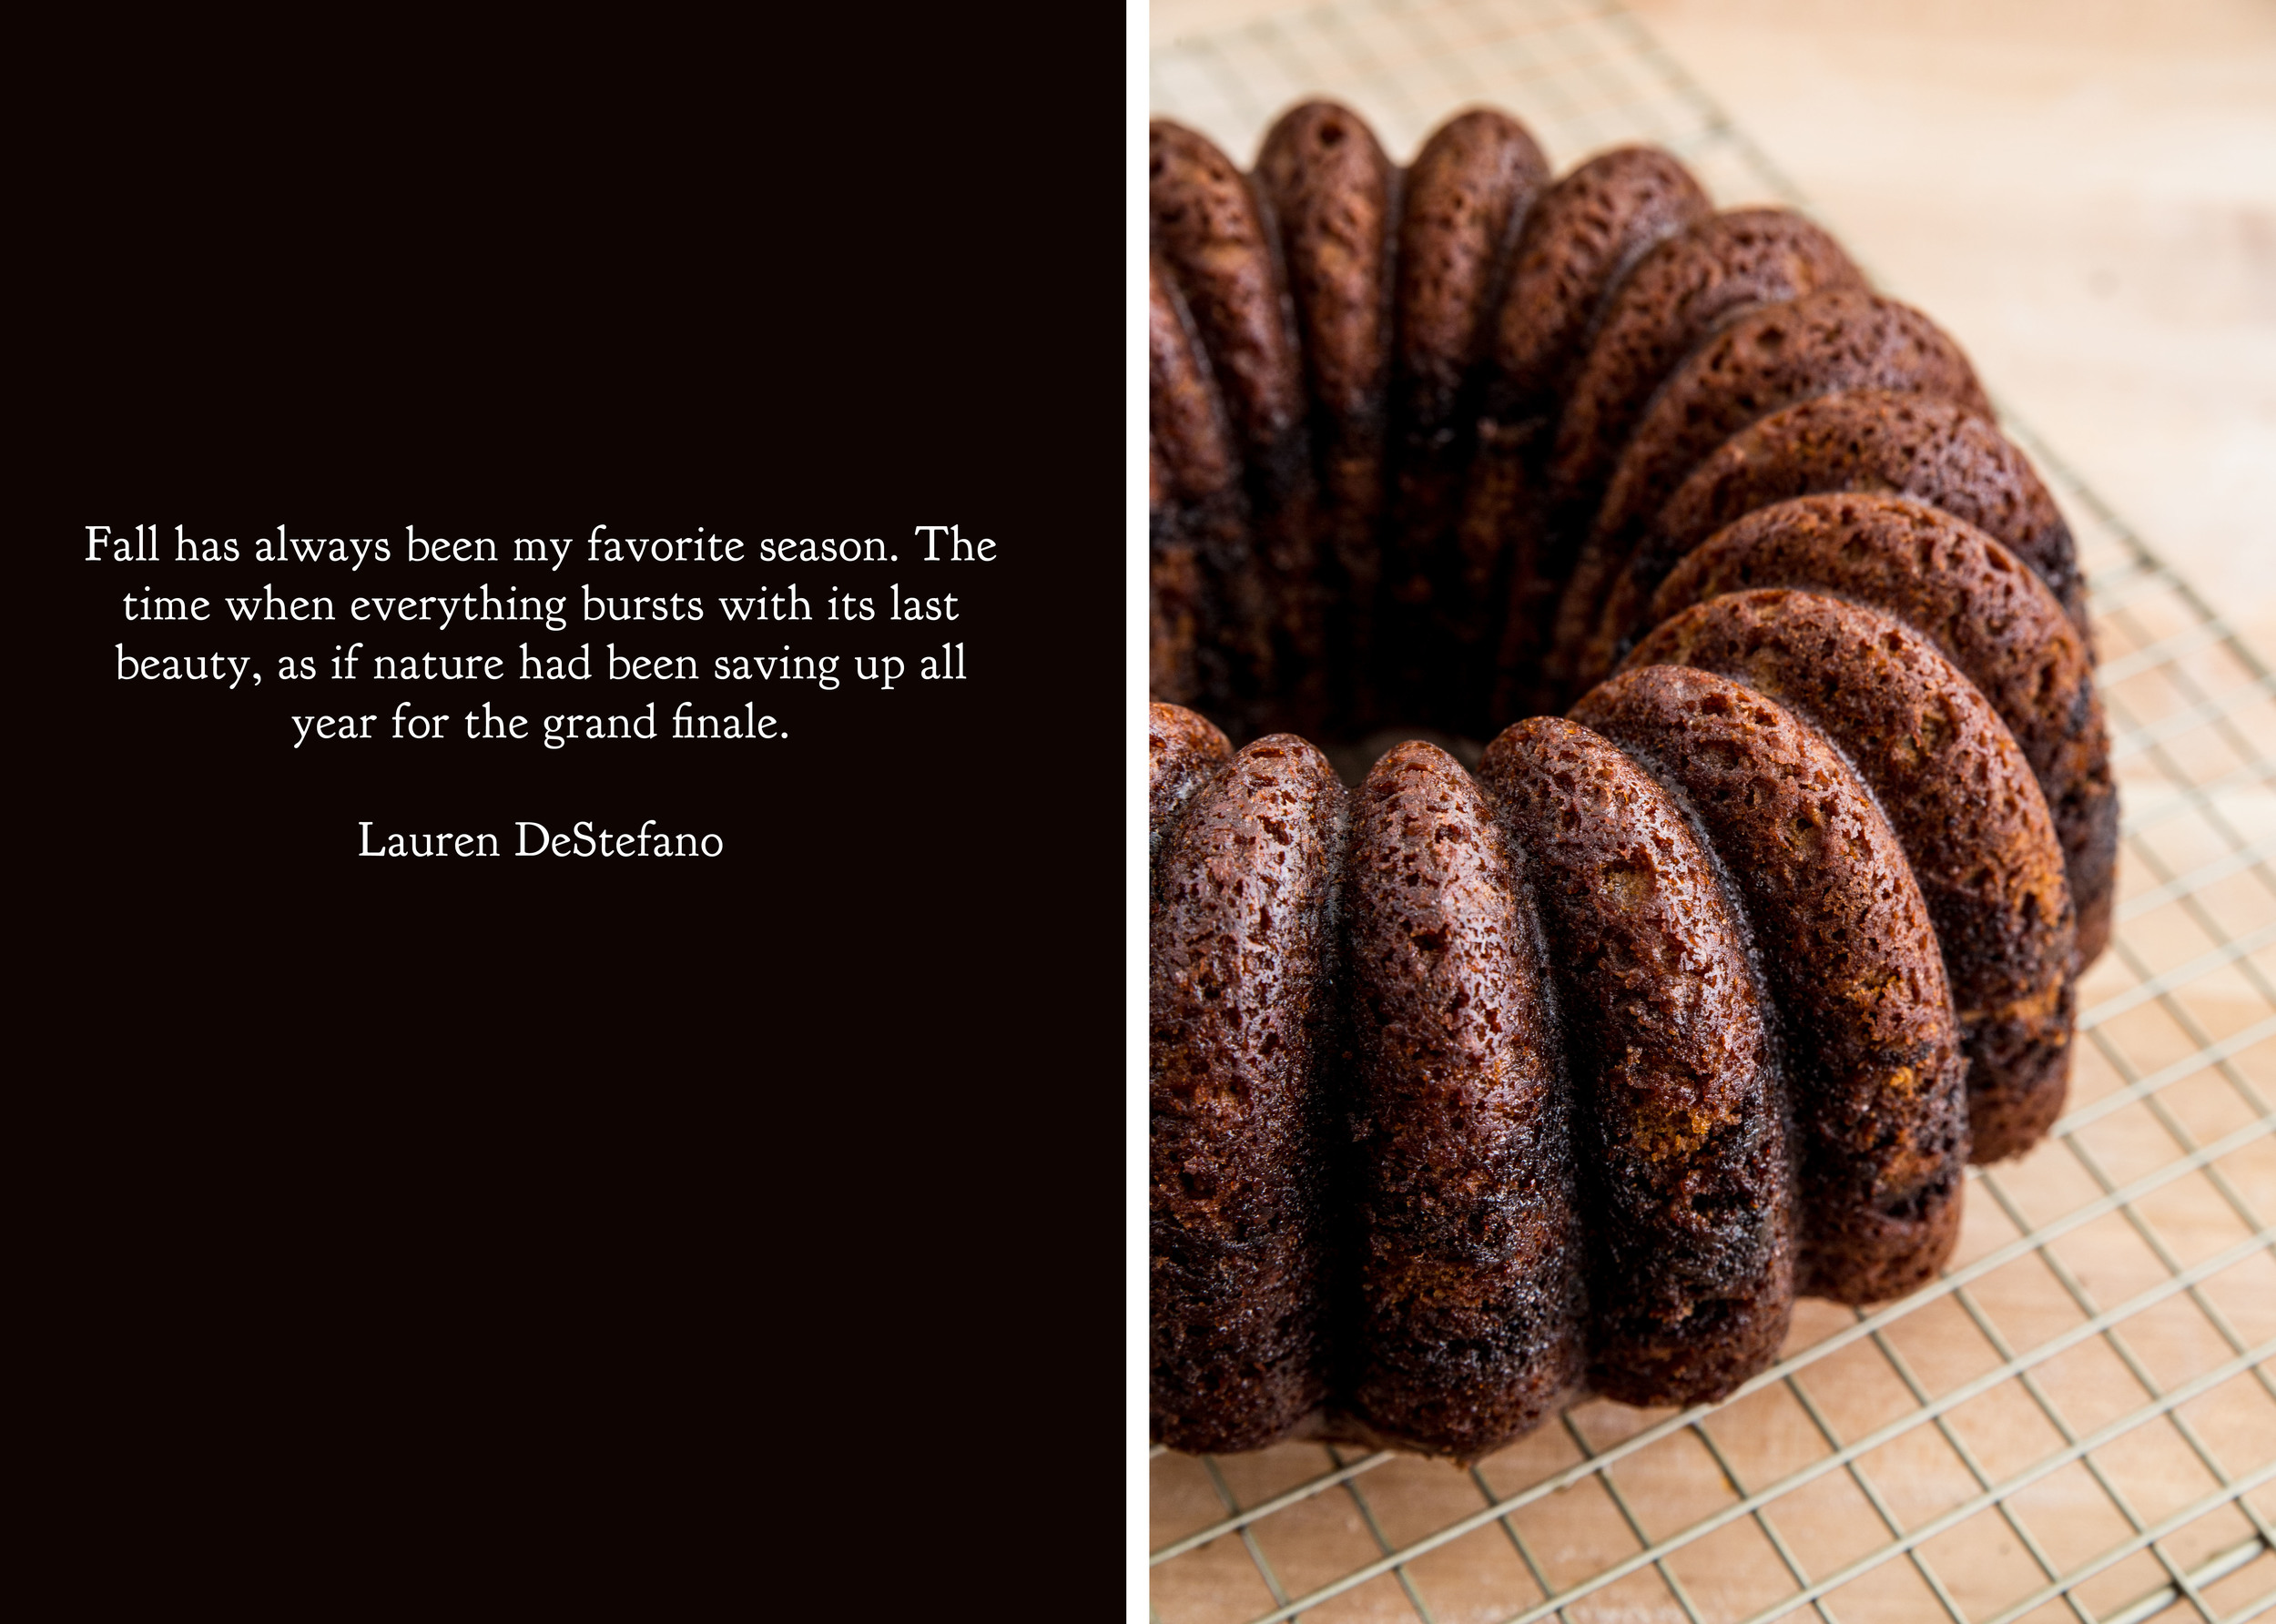
The Bundt pan used with this recipe is the NordicWare Party Bundt pan. The look is classic, but I love this particular shape because the portions are exceptionally easy to slice. 

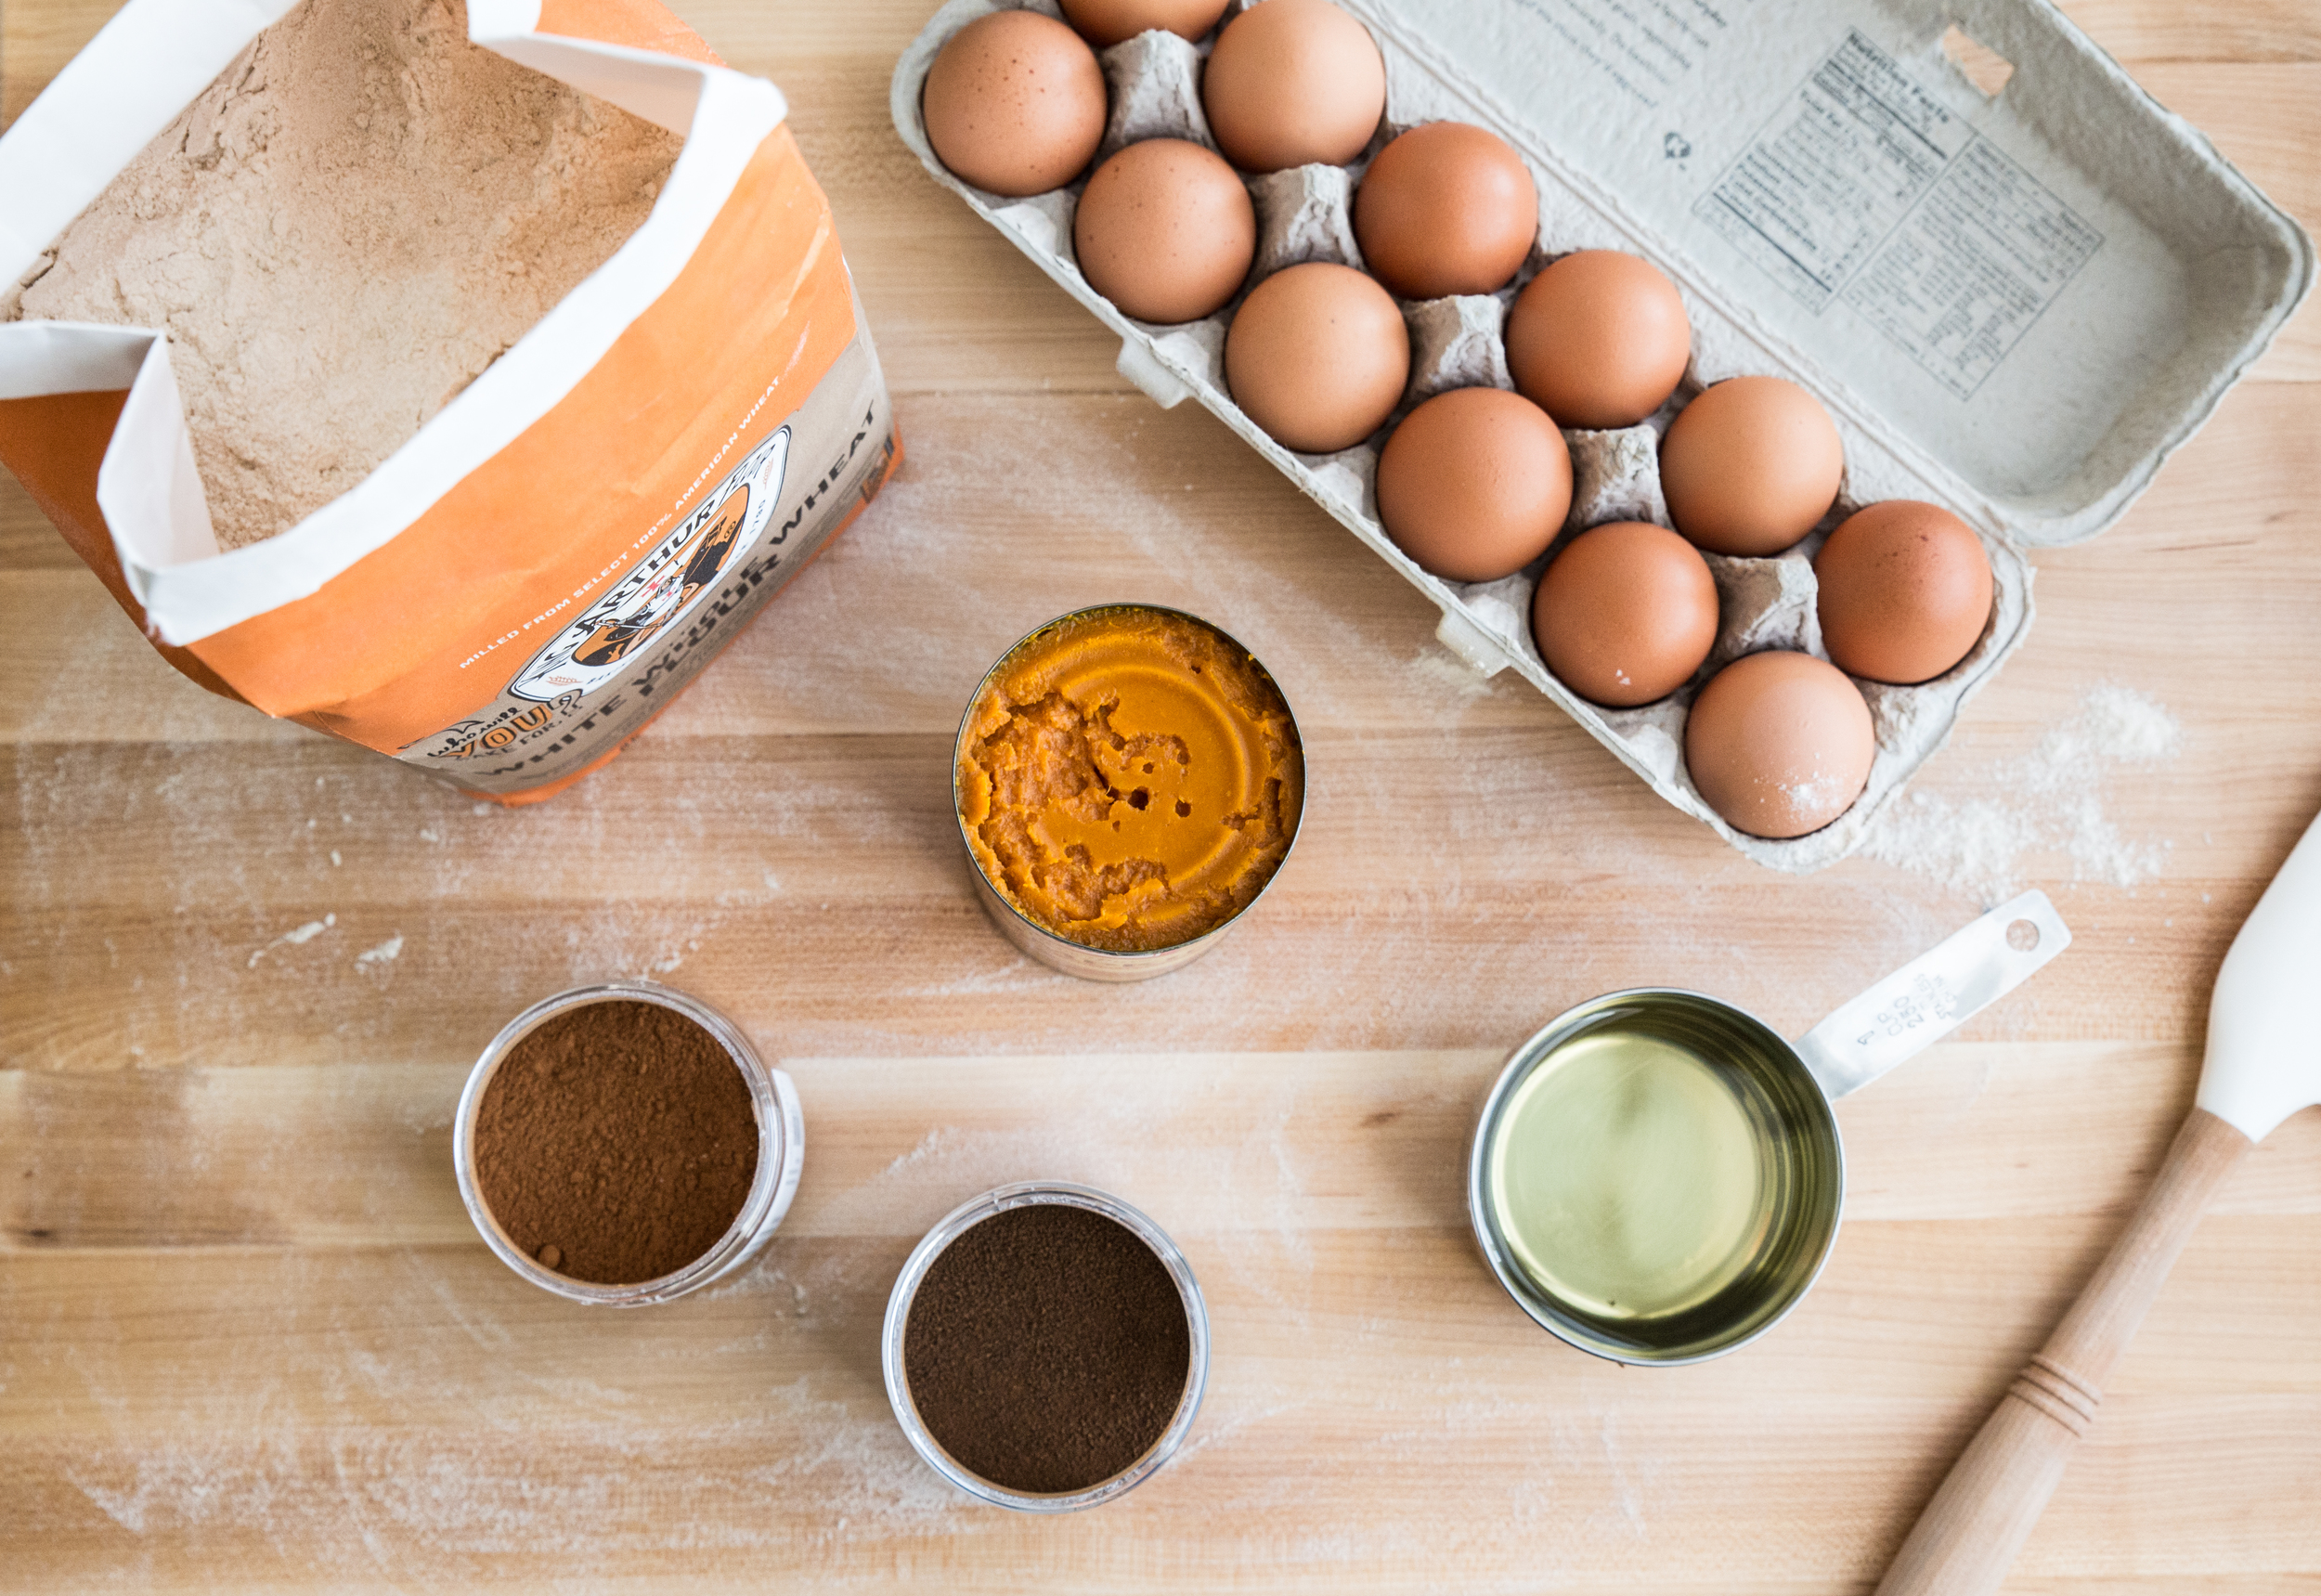
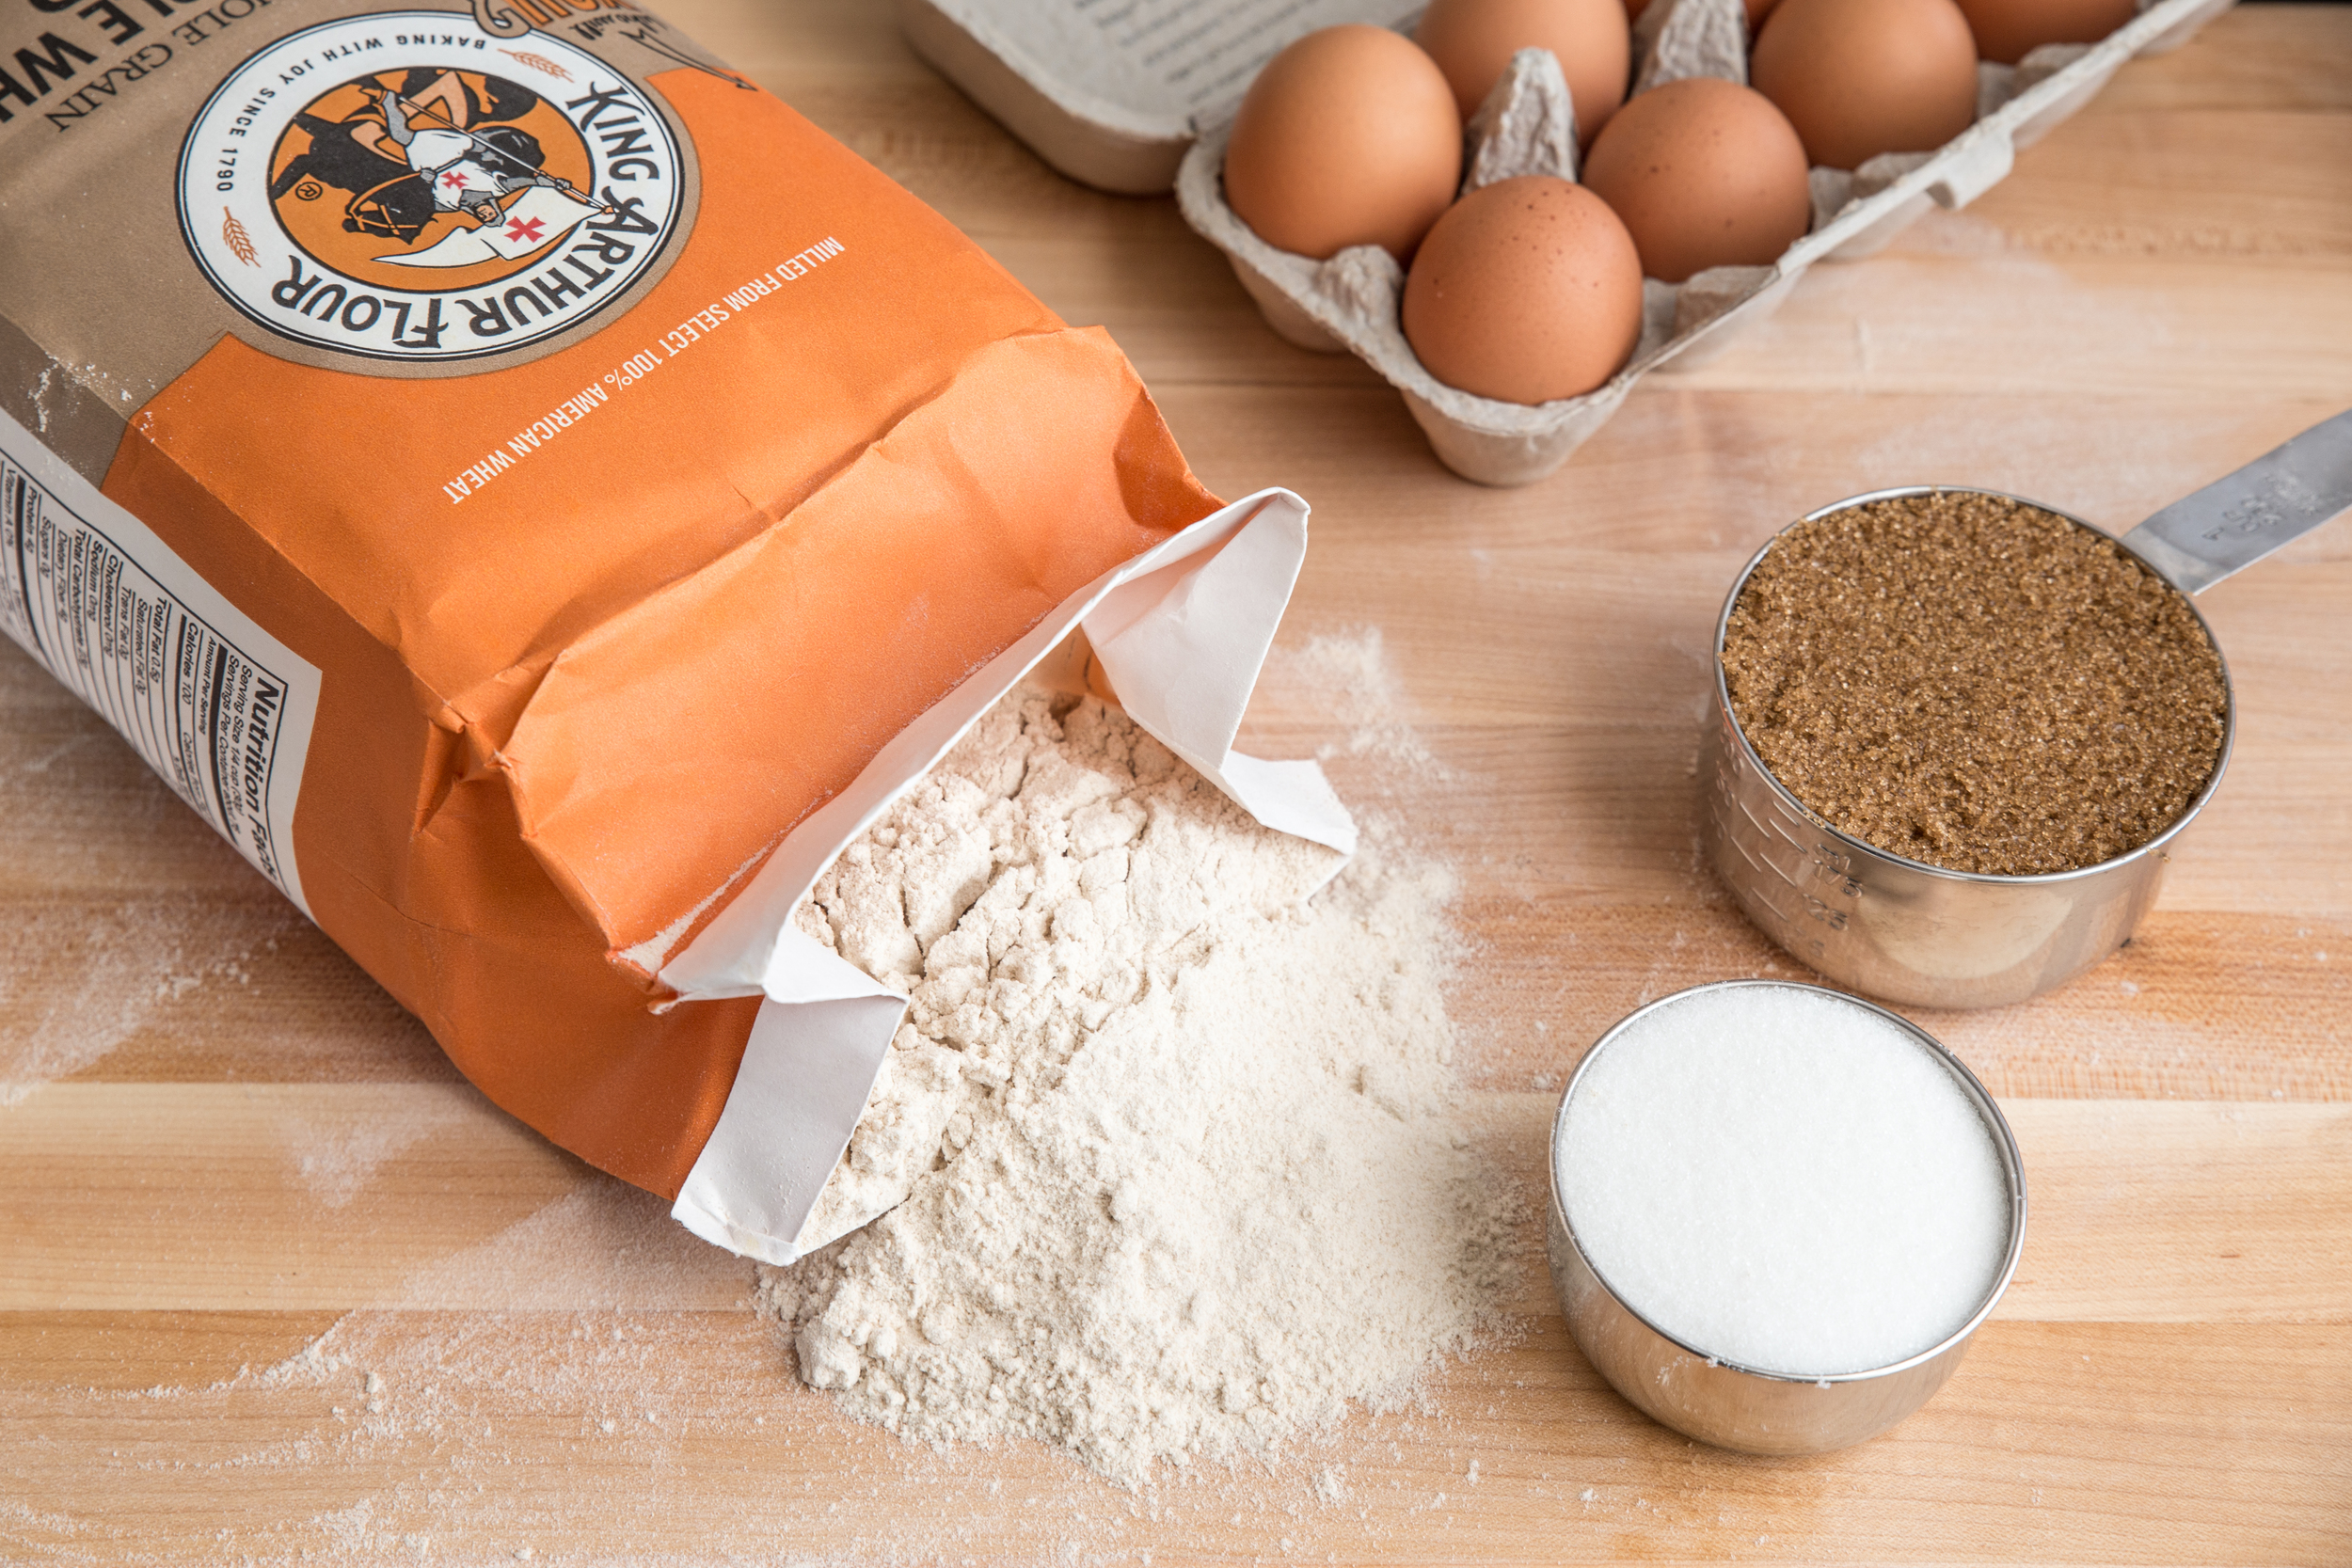
Traditional whole wheat flour is ground from red wheat. This cake is made with white whole wheat flour, which is ground from white wheat—a slightly different type of wheat, lighter in color and milder in flavor. White whole wheat flour is 100% whole grain and mirrors the nutritional attributes found in traditional whole wheat flour. Its milder flavor makes it a great flour to substitute in many classic all-purpose recipes.

White whole wheat flour is a pantry staple in my kitchen. Adding a little extra nutrition to my baked goods, without compromising the flavor, feels like a superhero power.

The pumpkin cake starts with a mixture of pumpkin puree, eggs, and vegetable oil. The eggs act as a binder between the ingredients, but also add moisture to the final product. The main fat is vegetable oil instead of butter. This makes it dairy free(!), but the neutral flavor of the oil also allows the pumpkin and spice flavors to become more pronounced.

Both granulated and brown sugar is added, for sweetness and a greater depth of flavor, before the dry ingredients are folded in. In this recipe (and most traditional cake recipes), it is important to make sure that there are no lumps in the batter after the final beating. This is especially true for butter cake recipes. Small clumps of butter and sugar left in the batter, often hidden in beaters and the tops of spatulas, will melt in the oven and create holes in the finished cake. 

A well greased Bundt pan is necessary in order to remove the cake in one piece. I find it sufficient to use a heavy layer of cooking spray. When finished spraying, hold the pan up to the light and tilt it, making sure that every crevice is fully covered. Do any touch-ups with the cooking spray now, if necessary.

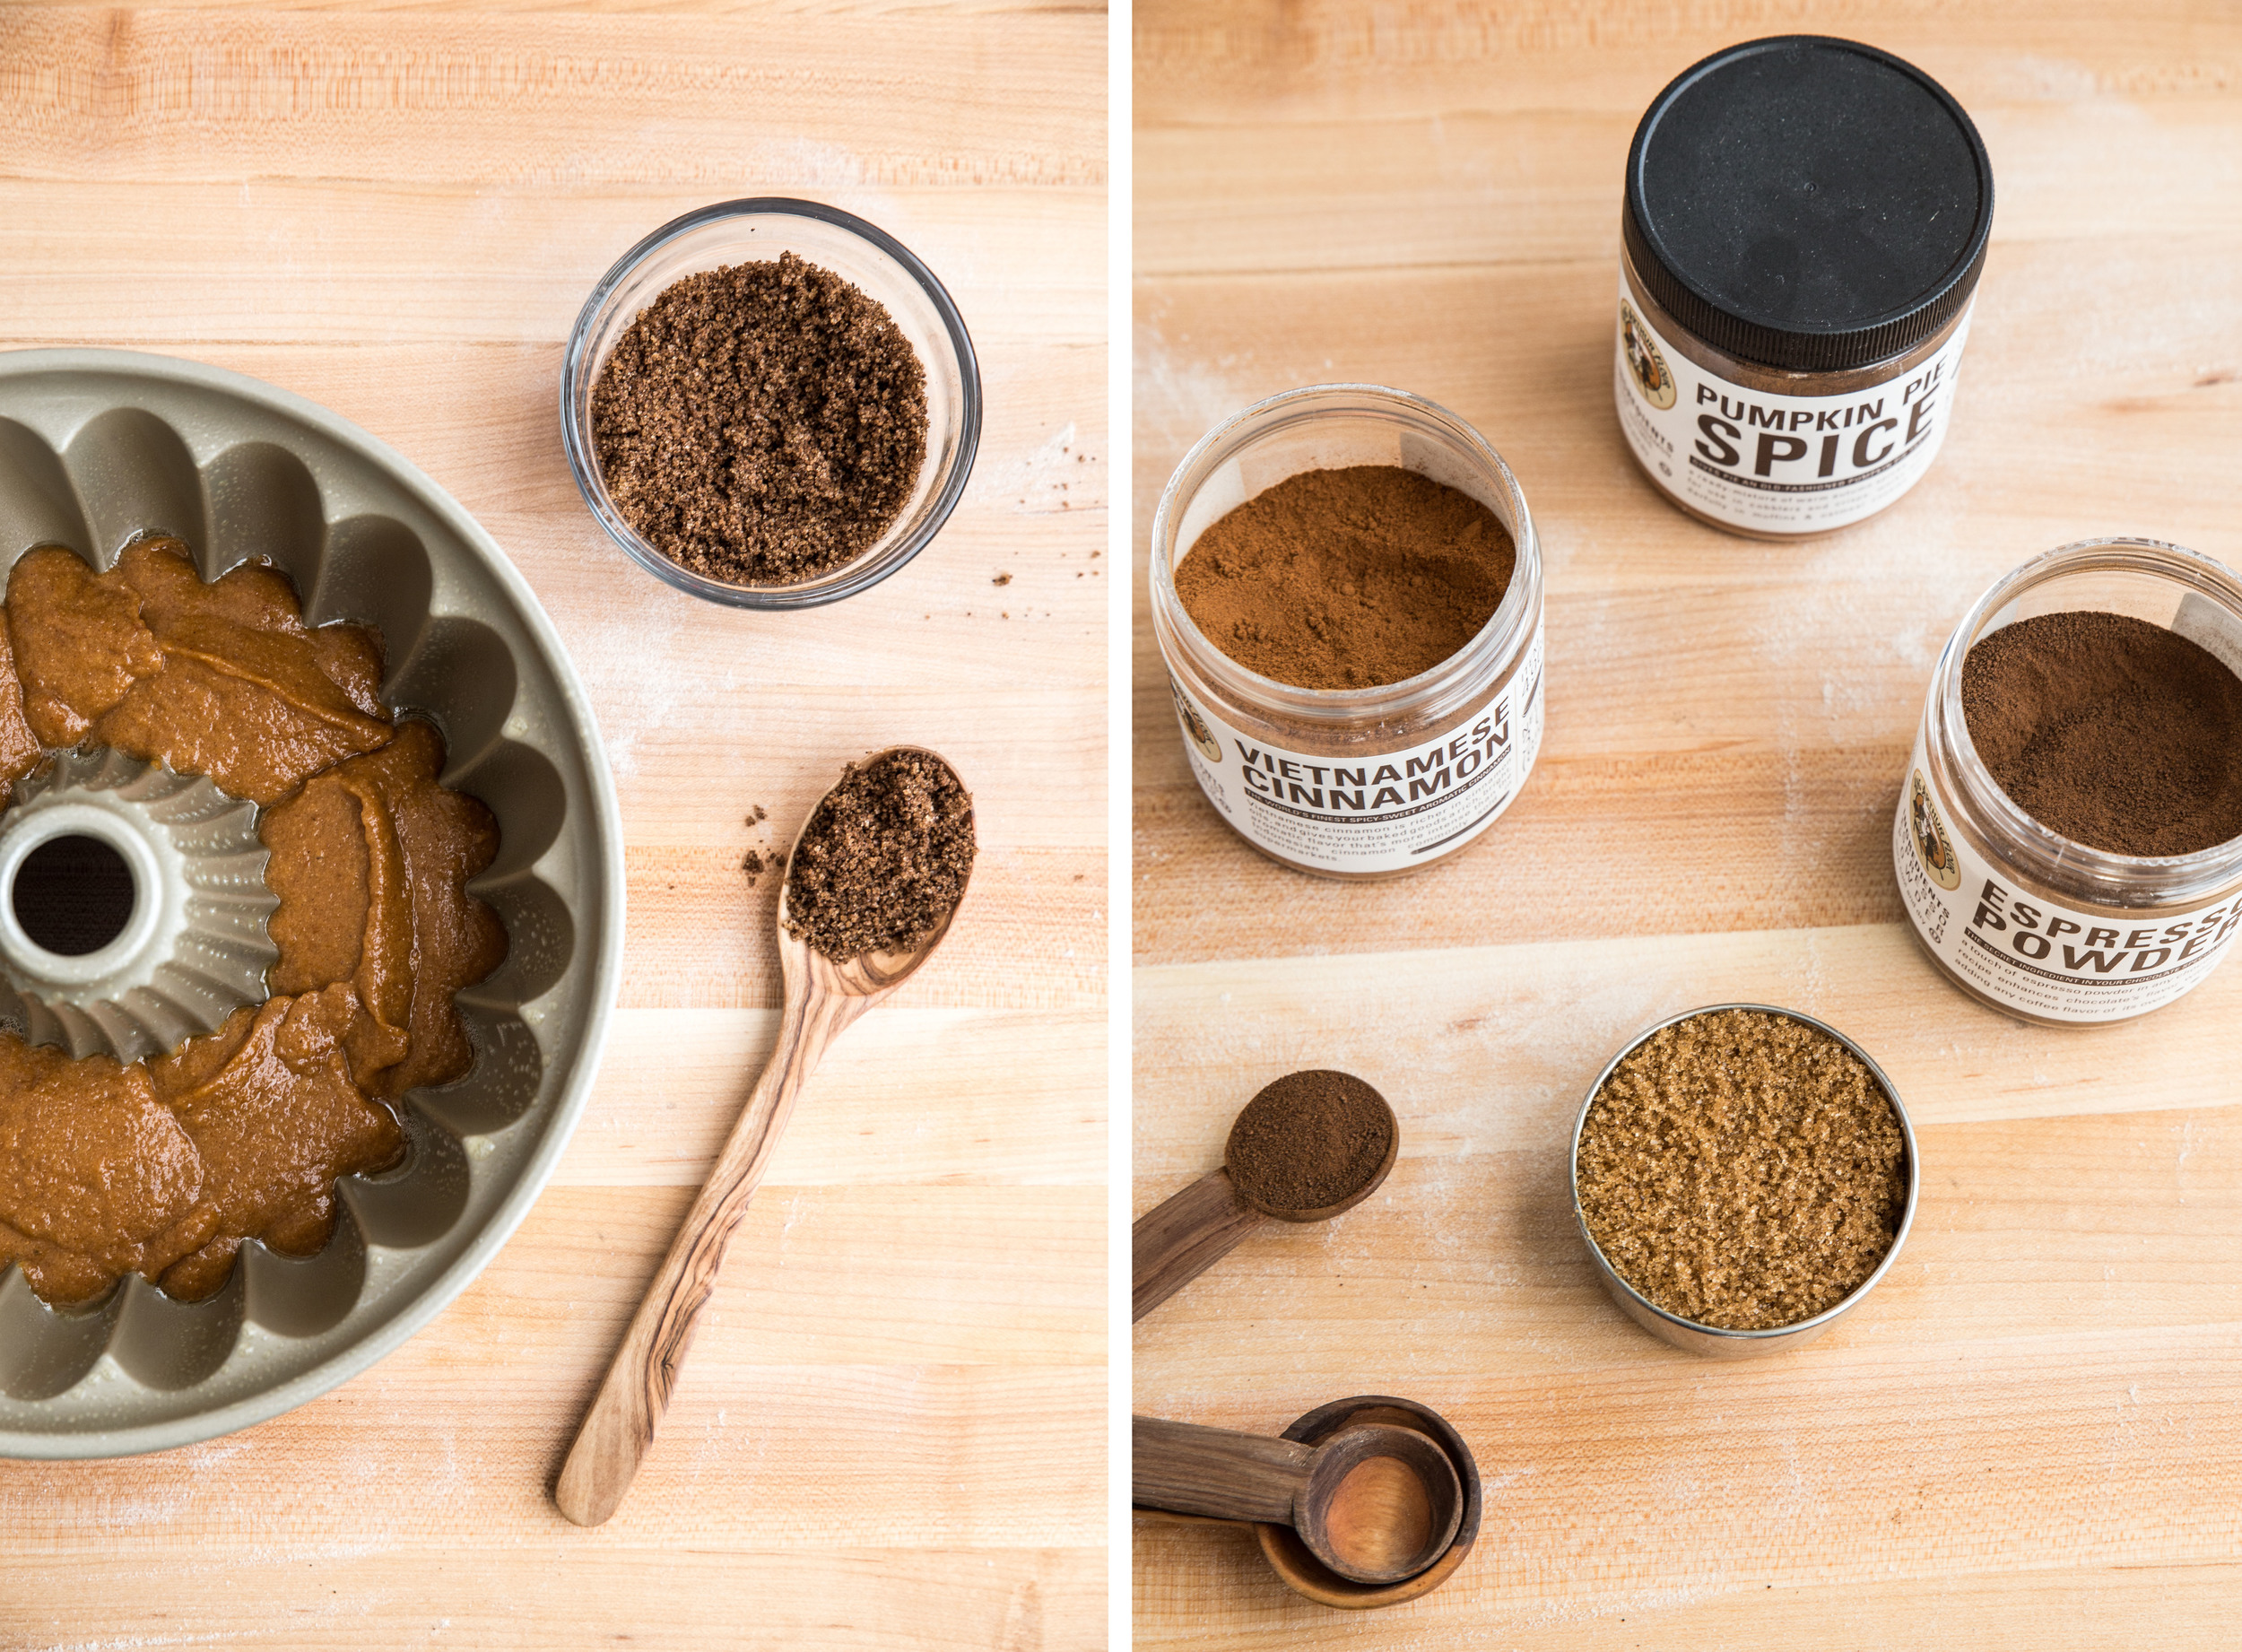
To create a swirled effect between the pumpkin cake and espresso filling, the ingredients are layered in the pan, alternating between cake batter and a thin layer of brown sugar mixed with cinnamon and espresso powder. Before putting the cake in the oven, tap the pan on the counter to release any bubbles that may have developed when layering.

Though it may be tempting, do not open the oven door while the cake is baking. The rush of cool air into the oven can cause the cake to collapsethis is especially true during the first 20 minutes, when the fragile cake is gaining the most height. When finished baking, cool the cake for fifteen minutes before unmolding.

Unmolding the cake may feel like the most difficult part of this recipe, but it just takes a bit of bravery. Avoid using an off-set spatula to release the cake from the edge of the pan. The spatula can scratch the pan (making it more difficult to remove cakes later) or slice directly into the cake if you slip. Because Bundt pans tend to have ornate designs and curved edges, off-set spatulas can cause more harm than good.

Instead, tap the pan firmly against your work surface to loosen the cake from the edges of the pan. Cover the top of the Bundt pan with a cooling rack, flip it over, and carefully lift the pan off the cake. 

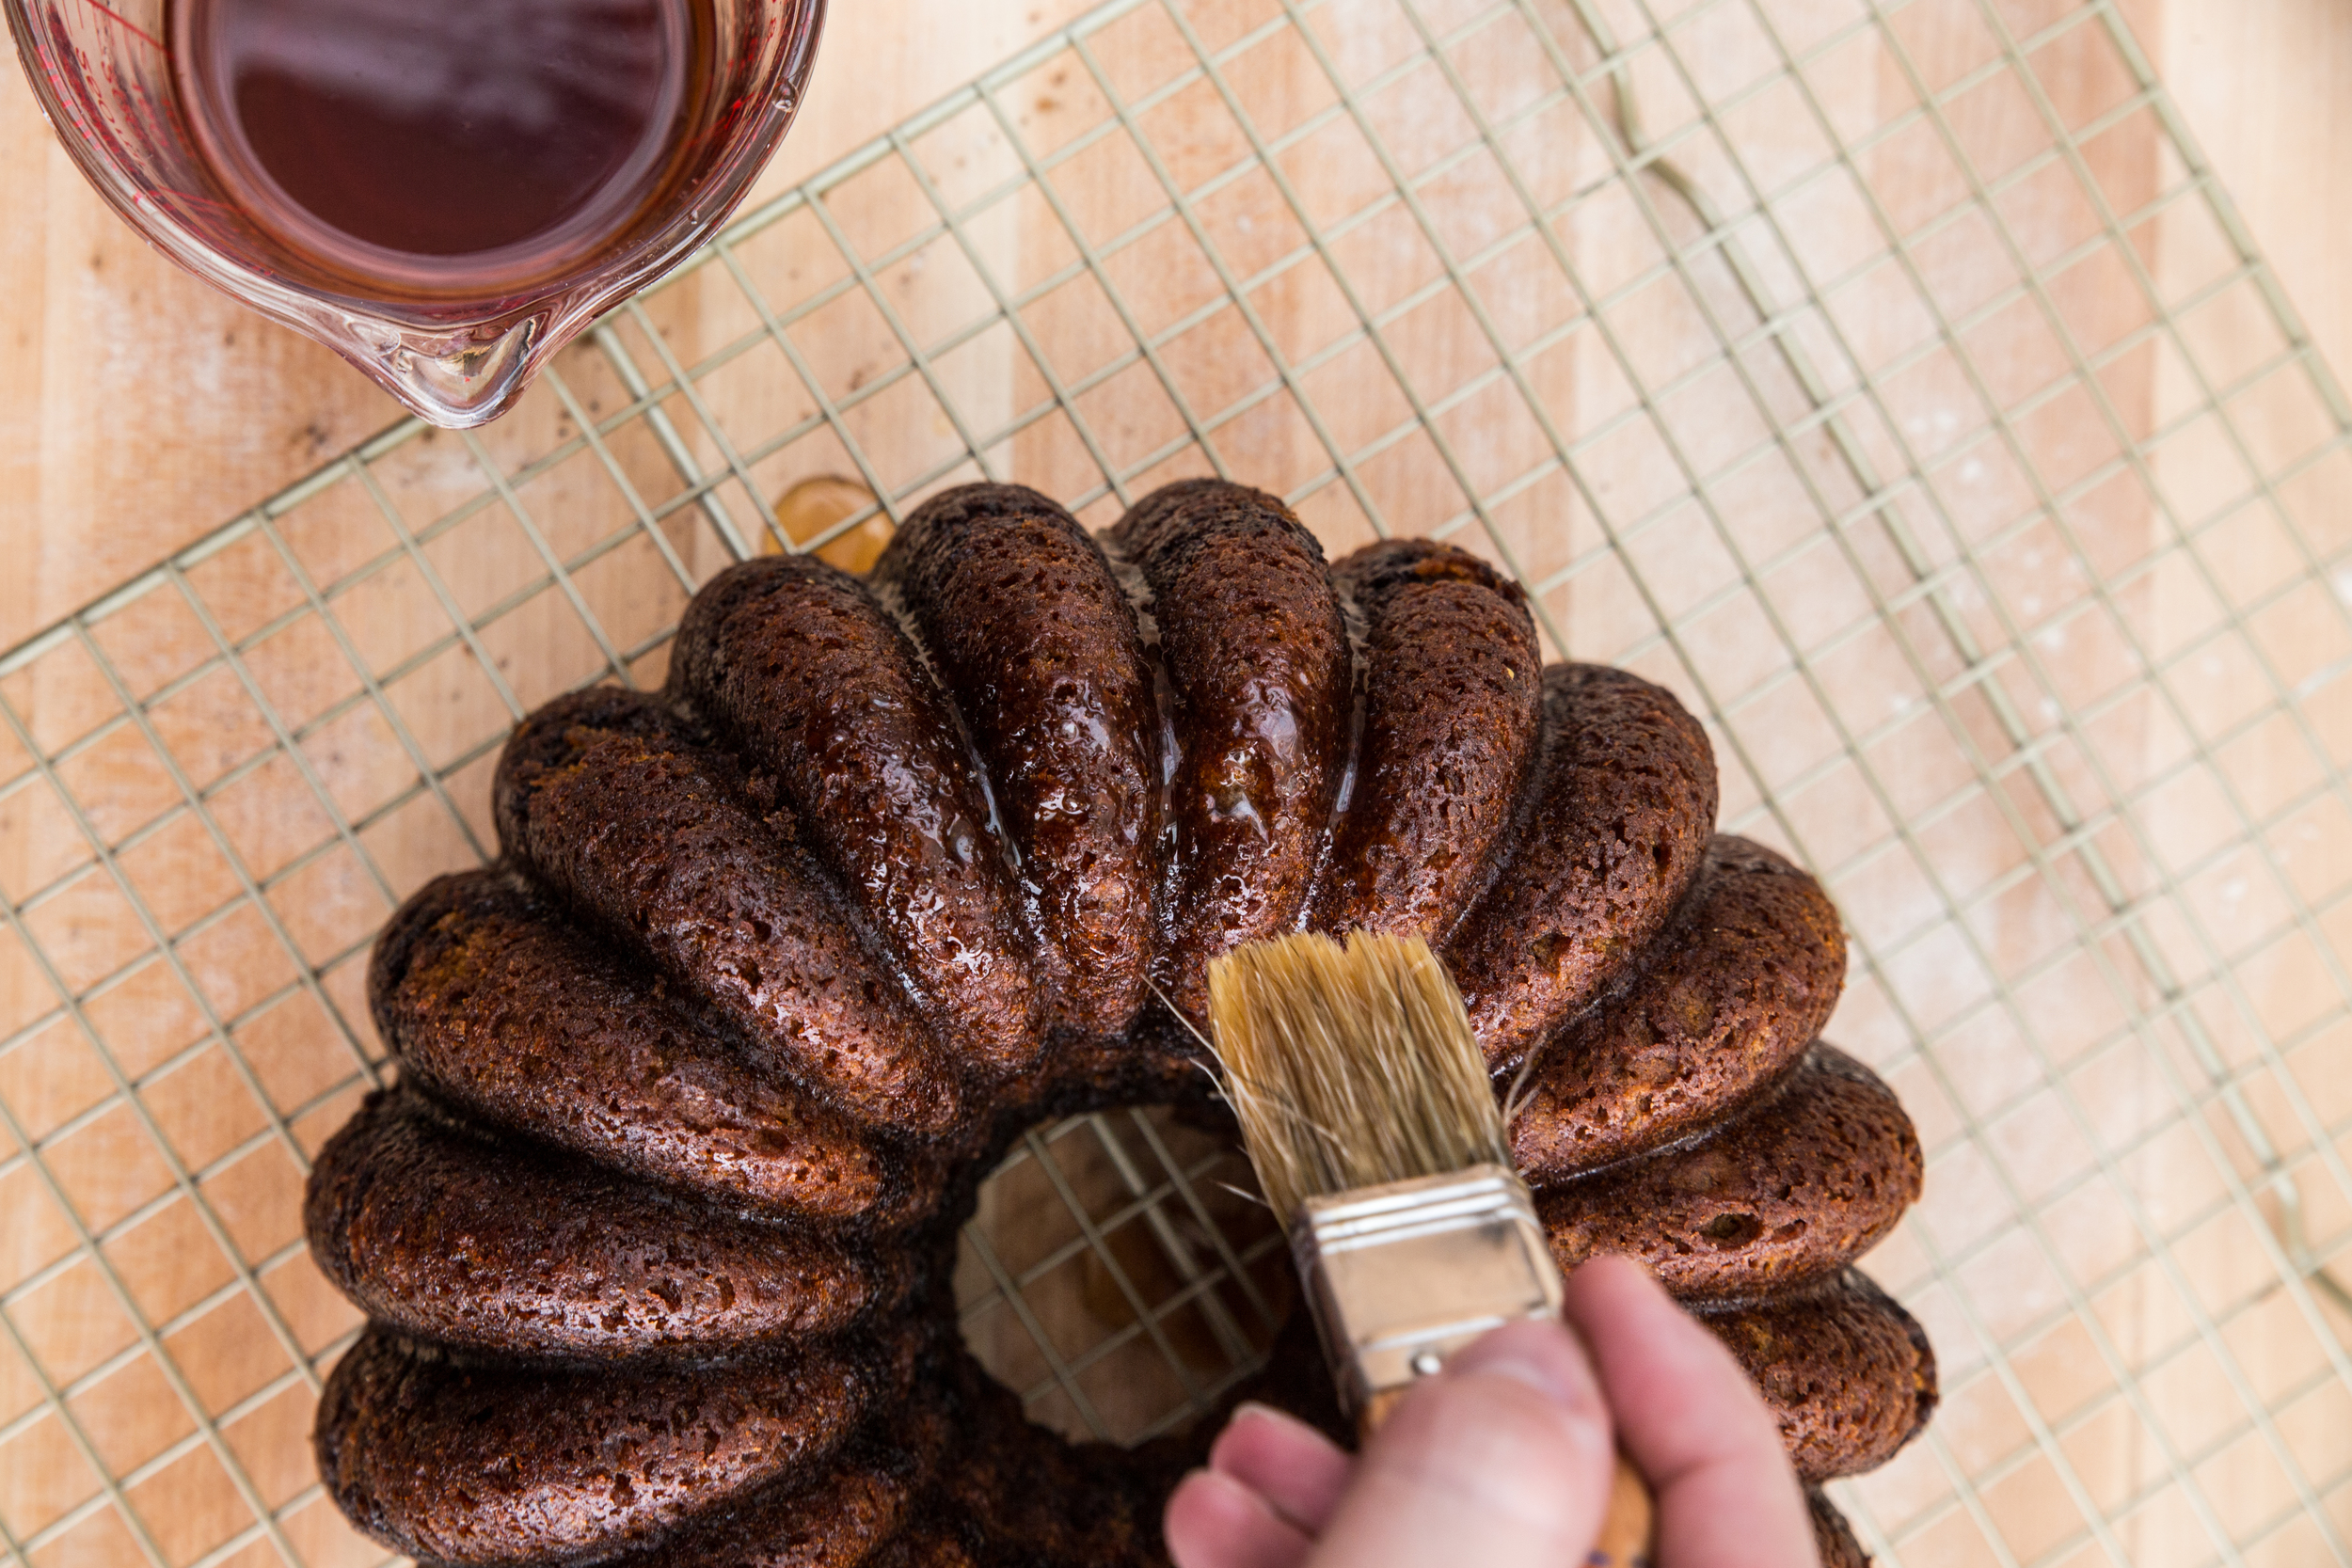
While still warm, use a pastry brush to apply a coffee rum glaze to the cake. Using a pastry brush instead of pouring the glaze over the cake lets the glaze be applied evenly, allowing the cake to absorb it more effectively. The glaze not only adds another layer of flavor to the cake, but it helps to seal in the cake's moisture, keeping it fresher for a longer period of time. Once the glaze is set and the cake is no longer wet in appearance, it can be cut and served.

IMG_9809.jpg

Pumpkin Espresso Bundt Cake is spiced with the classic flavors of autumn and layered with a sweet espresso filling. The cake is glazed with a mixture of strong coffee and rum to bring out the flavors in the filling and seal in the cake's moisture. When served alongside a cup of hot coffee, the cake truly shines. Share with family and friends.

One Year Ago: Vegan Caramel and Rustic Apple Tart
Two Years Ago: Apple Cinnamon Pancakes and Classic Apple Pie
Three Years Ago: Peanut Butter Cup Cookies, Pumpkin Waffles, Spider Cupcakes, and Apple Scones
Four Years Ago: Red Wine Chocolate Cake, Pear Spice CakePumpkin Latte Cheesecake, and Apple Cake
Five Years Ago: Butternut Squash Custard, Pumpkin Bread Pudding, Banana Nut Bread, and Apple Tart

Pumpkin Espresso Bundt Cake

Yields 8-10 servings

Pumpkin Cake
1 1/2 cups (370 grams) pumpkin puree
4 large eggs
3/4 cup (177 mL) vegetable oil
1 cup (200 grams) brown sugar, packed
3/4 cup (150 grams) granulated sugar
1 teaspoon vanilla extract
2 cups (250 grams) King Arthur White Whole Wheat Flour
2 teaspoons baking powder
1 teaspoon baking soda
1 1/2 teaspoons pumpkin pie spice
1 teaspoon ground cinnamon
1 teaspoon salt

Espresso Filling
1/3 cup (66 grams) brown sugar, packed
1 tablespoon espresso powder
1/2 teaspoon ground cinnamon

Coffee Rum Glaze
1/3 cup (78 mL) strong coffee
1 1/2 tablespoons dark rum
1/3 cup (66 grams) granulated sugar

Preheat oven to 350 degrees F (180 degrees C). Heavily grease a 10-cup Bundt pan. Set aside.

For the pumpkin cake, beat together the pumpkin, eggs, oil, brown sugar, granulated sugar, and vanilla extract in a large mixing bowl until well blended. Stir in the flour, baking powder, baking soda, pumpkin pie spice, cinnamon, and salt until smooth and uniform in appearance. Set aside.

For the espresso filling, whisk together the brown sugar, cinnamon, and espresso powder in a small mixing bowl. Set aside.

In the prepared baking pan, spoon in 1/3 of the pumpkin cake batter evenly into the bottom of the pan. Sprinkle 1/2 of the espresso filling over the top. Spoon another 1/3 of the pumpkin cake batter into the pan and sprinkle with the remaining espresso filling. Layer the remaining cake batter on top and smooth with an off-set spatula.

Bake for 50-60 minutes, or until a toothpick inserted into the center comes out clean. Allow cake to cool in pan for 15 minutes before transferring to a cooling rack.

While the cake is baking, make the coffee rum glaze by whisking together the strong coffee, rum, and granulated sugar. Brush all of the glaze evenly over the cake with a pastry brush while it is still warm. Serve after the glaze has fully set. 

Bake with me! Show off your finished Pumpkin Bundt Cakes by tagging them with #kingarthurflour.

This post is sponsored through a partnership with King Arthur Flour. All thoughts and opinions are my own. 

Blackberry Coconut Scones

IMG_0996-2.jpg

In my early days of baking, there was a steep learning curve to overcome. A combination of inexperience and failure to read the directions caused many items to go straight from the oven and into the trash. It was the scones, however, that left me dumbfounded. Pan after pan came out dry or bitter or flavorless; they were inedible, in every possible way. It was almost absurd that I was not able to recreate this simple pastry in my own kitchen. I say almost because nothing is laughable about throwing that much butter in the bin.

It wasn't until I got a job in a bakeryand was tasked with baking dozens of scones on a daily basisthat I found my knack for this particular pastry.

In truth, scones are no more difficult to create than a biscuit. Fat is cut into flour, liquid is added to bring it together, and the servings are cut from the dough. Perhaps it was a lack of confidence that held me back long ago, but now I feel I could create a scone with my eyes closed, even years after working behind the pastry case. 

Blackberries are often discounted at my local market. Emerging from my winter cocoon, these berries feel like a bite of spring; I fill my basket each time I spot the red sale sign. With an excess of berries last Sunday, I added them to a basic coconut oil scone recipe to create a complement to brunch. Coconut oil has quickly become my favorite fat for scones because it results in a tender, delicate crumb. These (vegan!) scones may be simple, but the taste is lovely.

Blackberry Coconut Scones combine the fresh berry with coconut in three of its formscoconut milk, coconut oil, and coconut flakes. The result is a tender, flaky scone that foils the tart berry against the sweetness of the pastry. A light coconut glaze is drizzled over the top for an extra touch. While it could be omitted, I find it worth the extra effort.

One Year Ago:  Peanut Butter Chocolate Frosted Cake and Orange Coconut Pull-Apart Bread
Two Years Ago: Lemon Pudding Cake, Grapefruit Margaritas,  Chocolate Oatmeal Flaxseed Muffins, and Chocolate Chip Raisin Oatmeal Cookies
Three Years Ago: Cinnamon Sugar Muffins, Basic Caramel Sauce, Rum Raisin Ice Cream, and Butternut Squash & Spinach Tart
Four Years Ago: Yeasted Chocolate Coffee Cake, Meyer Lemon Curd, Lemon Chocolate Tart, and Peanut Butter Swirled Brownies

Coconut Scones with Coconut Glaze

Yields 6-8 scones

Blackberry Coconut Scones 
1  1/2 cups (187 grams) all-purpose flour 
1/4 cup (56 grams) granulated sugar 
2 teaspoons baking powder 
1/2 teaspoon salt 
1/3 cup coconut oil (solid state) 
1/2 cup unsweetened coconut flakes 
6 ounces (170 grams) fresh blackberries
3/4 cup (175 ml) coconut milk

Preheat oven to 375 degrees F (190 degrees C).

In a large mixing bowl, whisk together the flour, sugar, baking powder, and salt. Cut in the solid coconut oil with a pastry blender (or your fingers) until the mixture resembles coarse sand. Gently fold in the coconut flakes, fresh blackberries, and coconut milk until the mixture comes together.

Turn out dough onto a lightly floured surface and form into a disk roughly 1-inch thick. Cut the dough into 6-8 pie shaped wedges and move to a baking sheet. For extra sweetness, sprinkle granulated sugar over the top of the scones. Bake for 16-18 minutes, or until the edges take on a light color. Allow scones to cool completely before glazing.

Coconut Glaze 
1/2 cup (62 grams) powdered sugar 
1 tablespoon coconut milk
1 teaspoon vanilla extract

In a small bowl, stir together all ingredients. Using a spoon, drizzle glaze over cooled scones. Allow at least 15 minutes for the glaze to set before serving.

Chocolate Orange Cake

The feeling of spring is in the air, unusual for this time of year. Normally, the Upper Midwest is still buried in a thick layer of white, and spring is just a dream over the horizon. But now the snow has melted, and with unseasonally warm weather and longer daylight hours, I feel the anxiousness of  summer to arrive. To subdue my restlessness (and dread that winter will shortly reappear), I headed to the place where I feel calm.

With a few hours to spare, I decided on baking an everyday cake. With no occasion to celebrate or holiday to observe, a cake makes an ordinary weekend feel a little brighter.

Oftentimes, I feel that some cakesespecially cupcakesact entirely as acceptable vessels to consume frosting. When an average cake, perhaps slightly dry, is covered with a mound of buttercream, there is little complaint. Good buttercream frostings have this redeeming power (and thank goodness as it has rescued many a cake of mine).

With this particular cake, however, I prefered the cake itself to be the true star. To make the crumb tender, sour cream and buttermilk were used to soften the texture. Orange zest was rubbed into the sugar to release a vibrant orange scent and flavor. And, once the cakes were baked, the layers were brushed with fresh orange juice to give it a final touch.

As a lover of chocolate and orange flavors together, this cake managed the fusion with ease.

This Chocolate Orange Layer Cake is fresh and light. The cake is tender which balances the glaze that is thick and rich. I suggest a lighter touch of glaze than seen in the photographsjust enough to seal in the layersso it will meld with the cake instead of acting as a separate layer. For all the chocolate and orange lovers, this cake is for you.

One Year Ago:  Almond Cake
Two Years Ago:Chocolate Pudding, Black Tea Cake with Honey Buttercream,  Blueberry Lemon Pancakes, and Lavender Lemon Shortbread
Three Years Ago:Cappuccino Pancakes with Mocha Syrup, Hot Cocoa Cookies, Rosemary Focaccia, and Swedish Visiting Cake
Four Years Ago:Chocolate Blueberry Ice Cream, Heart Shaped Cinnamon Rolls, Mexican Hot Cocoa Mix, and Brown Butter Crispy Rice Treats

Chocolate Orange Cake with Glaze

Yields 2 layer 8-inch cake or 3 layer 6-inch cake

Chocolate Orange Cake
1 3/4 cups (350 grams) granulated sugar
Zest of 2 oranges
2 large eggs
1/2 cup (118 ml) vegetable oil
1/2 cup (115 grams) sour cream
1 teaspoon vanilla extract
1 3/4 cups (220 grams) all-purpose flour
3/4 cup (65 grams) cocoa powder
2 teaspoons baking soda
1 teaspoon baking powder
1/2 teaspoon salt
1 cup (237 ml) buttermilk
6 tablespoons freshly squeezed orange juice

Preheat oven to 350 degrees F (180 degrees C). Grease baking pans.

In a large bowl, combine granulated sugar with orange zest, rubbing it between your fingers to release the oils. Beat in the eggs, vegetable oil, sour cream, and vanilla extract until well combined. 

Gradually mix in the flour, cocoa powder, baking soda, baking powder, and salt, alternating with splashes of buttermilk. Stir until batter is uniform.

Divide batter evenly between baking pans and bake for 40-50 minutes, or until a toothpick inserted into the cake comes out clean with a few crumbs. While cakes are cooling, use a fork to poke a few holes in the top of the cake and evenly brush on the orange juice so it soaks in. Cool cakes to room temperature (or chill) before frosting.

Chocolate Orange Glaze
12 ounces (340 grams) semi-sweet chocolate
8 tablespoons (113 grams) butter
Zest of 1 orange
1/2 cup (115 grams) sour cream
1 tablespoon orange liqueur (optional)
Orange zest, for garnish (optional)

In a medium saucepan, melt the chocolate and butter on low until smooth. Remove from heat and stir in orange zest, sour cream, and orange liqueur. Allow to cool for 15-20 minutes to thicken.

To assemble, carefully place one layer of cake onto a serving platter, brushed side up. Spoon glaze onto surface until desired thickness. Arrange the second cake layer on top of the first and frost the cake with remaining glaze. I have found that a cold cake is easier to frost because the chocolate glaze will harden when it comes into contact with the cake. However, waiting until the frosting is thick and can hold its shape will also work and be easier to spread along the side. I also suggest a thinner layer of glaze than shown in the photographs to have a more even cake-to-frosting ratio.

Before serving, dust the top of the cake with orange zest.