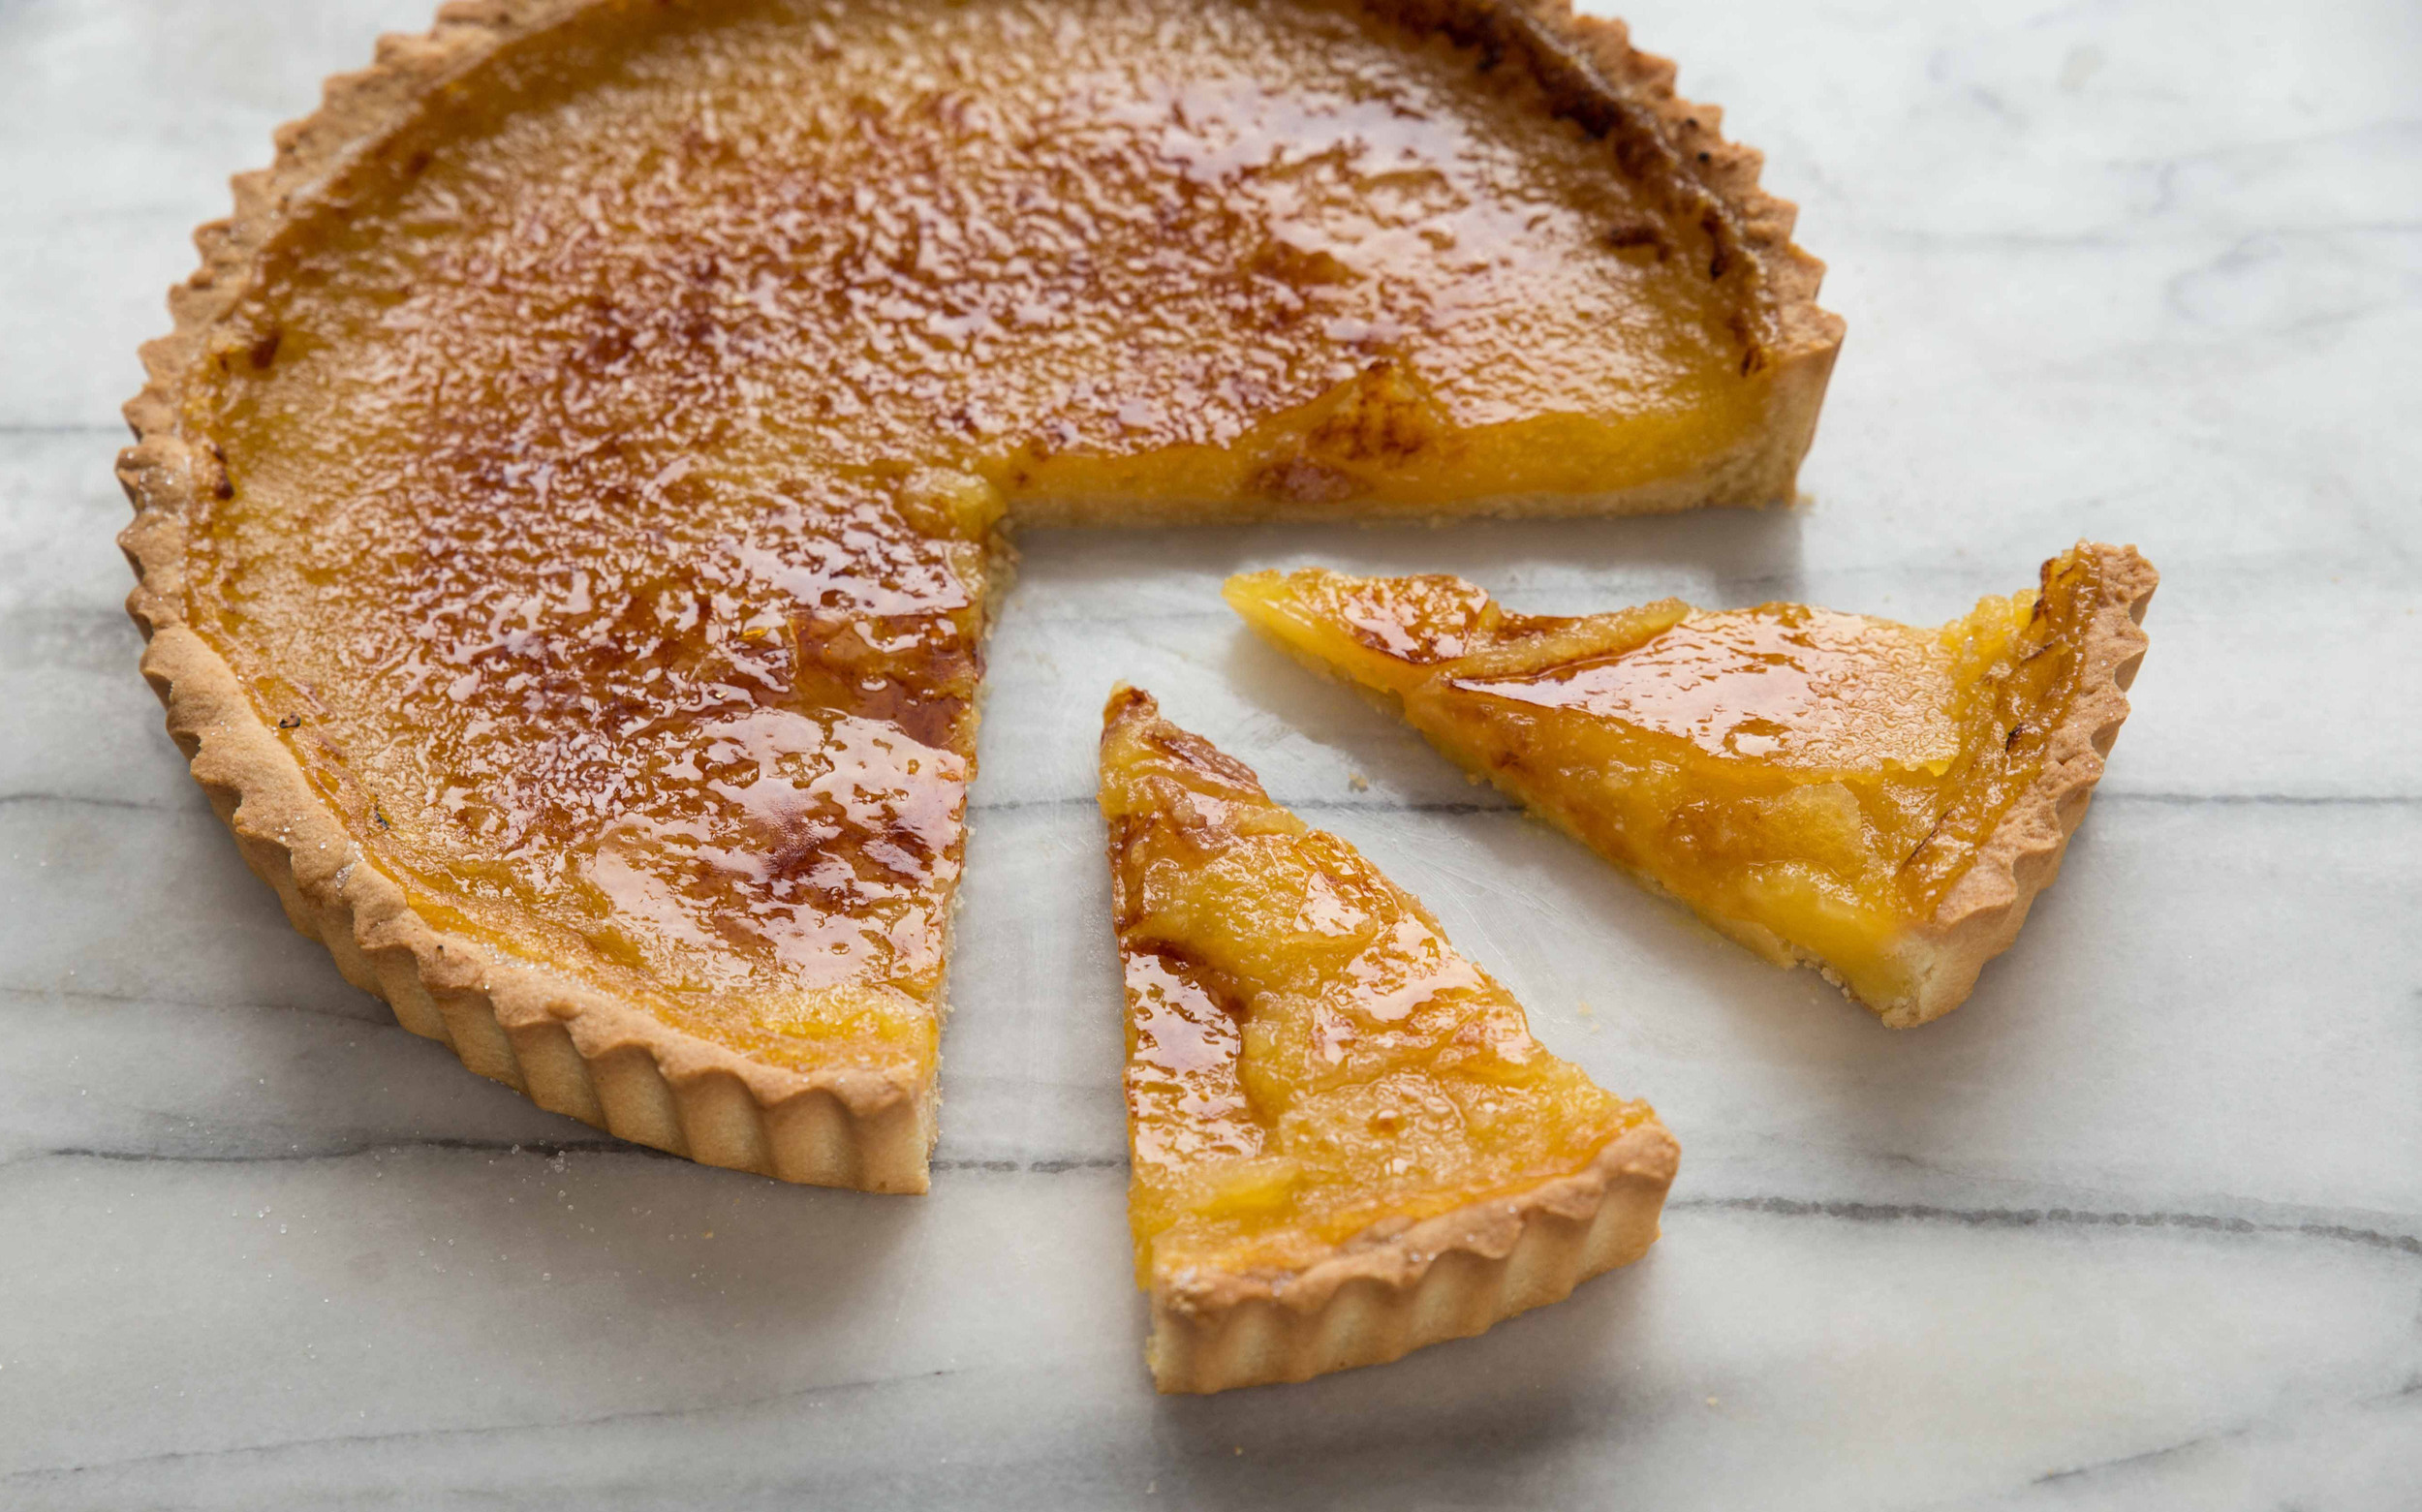
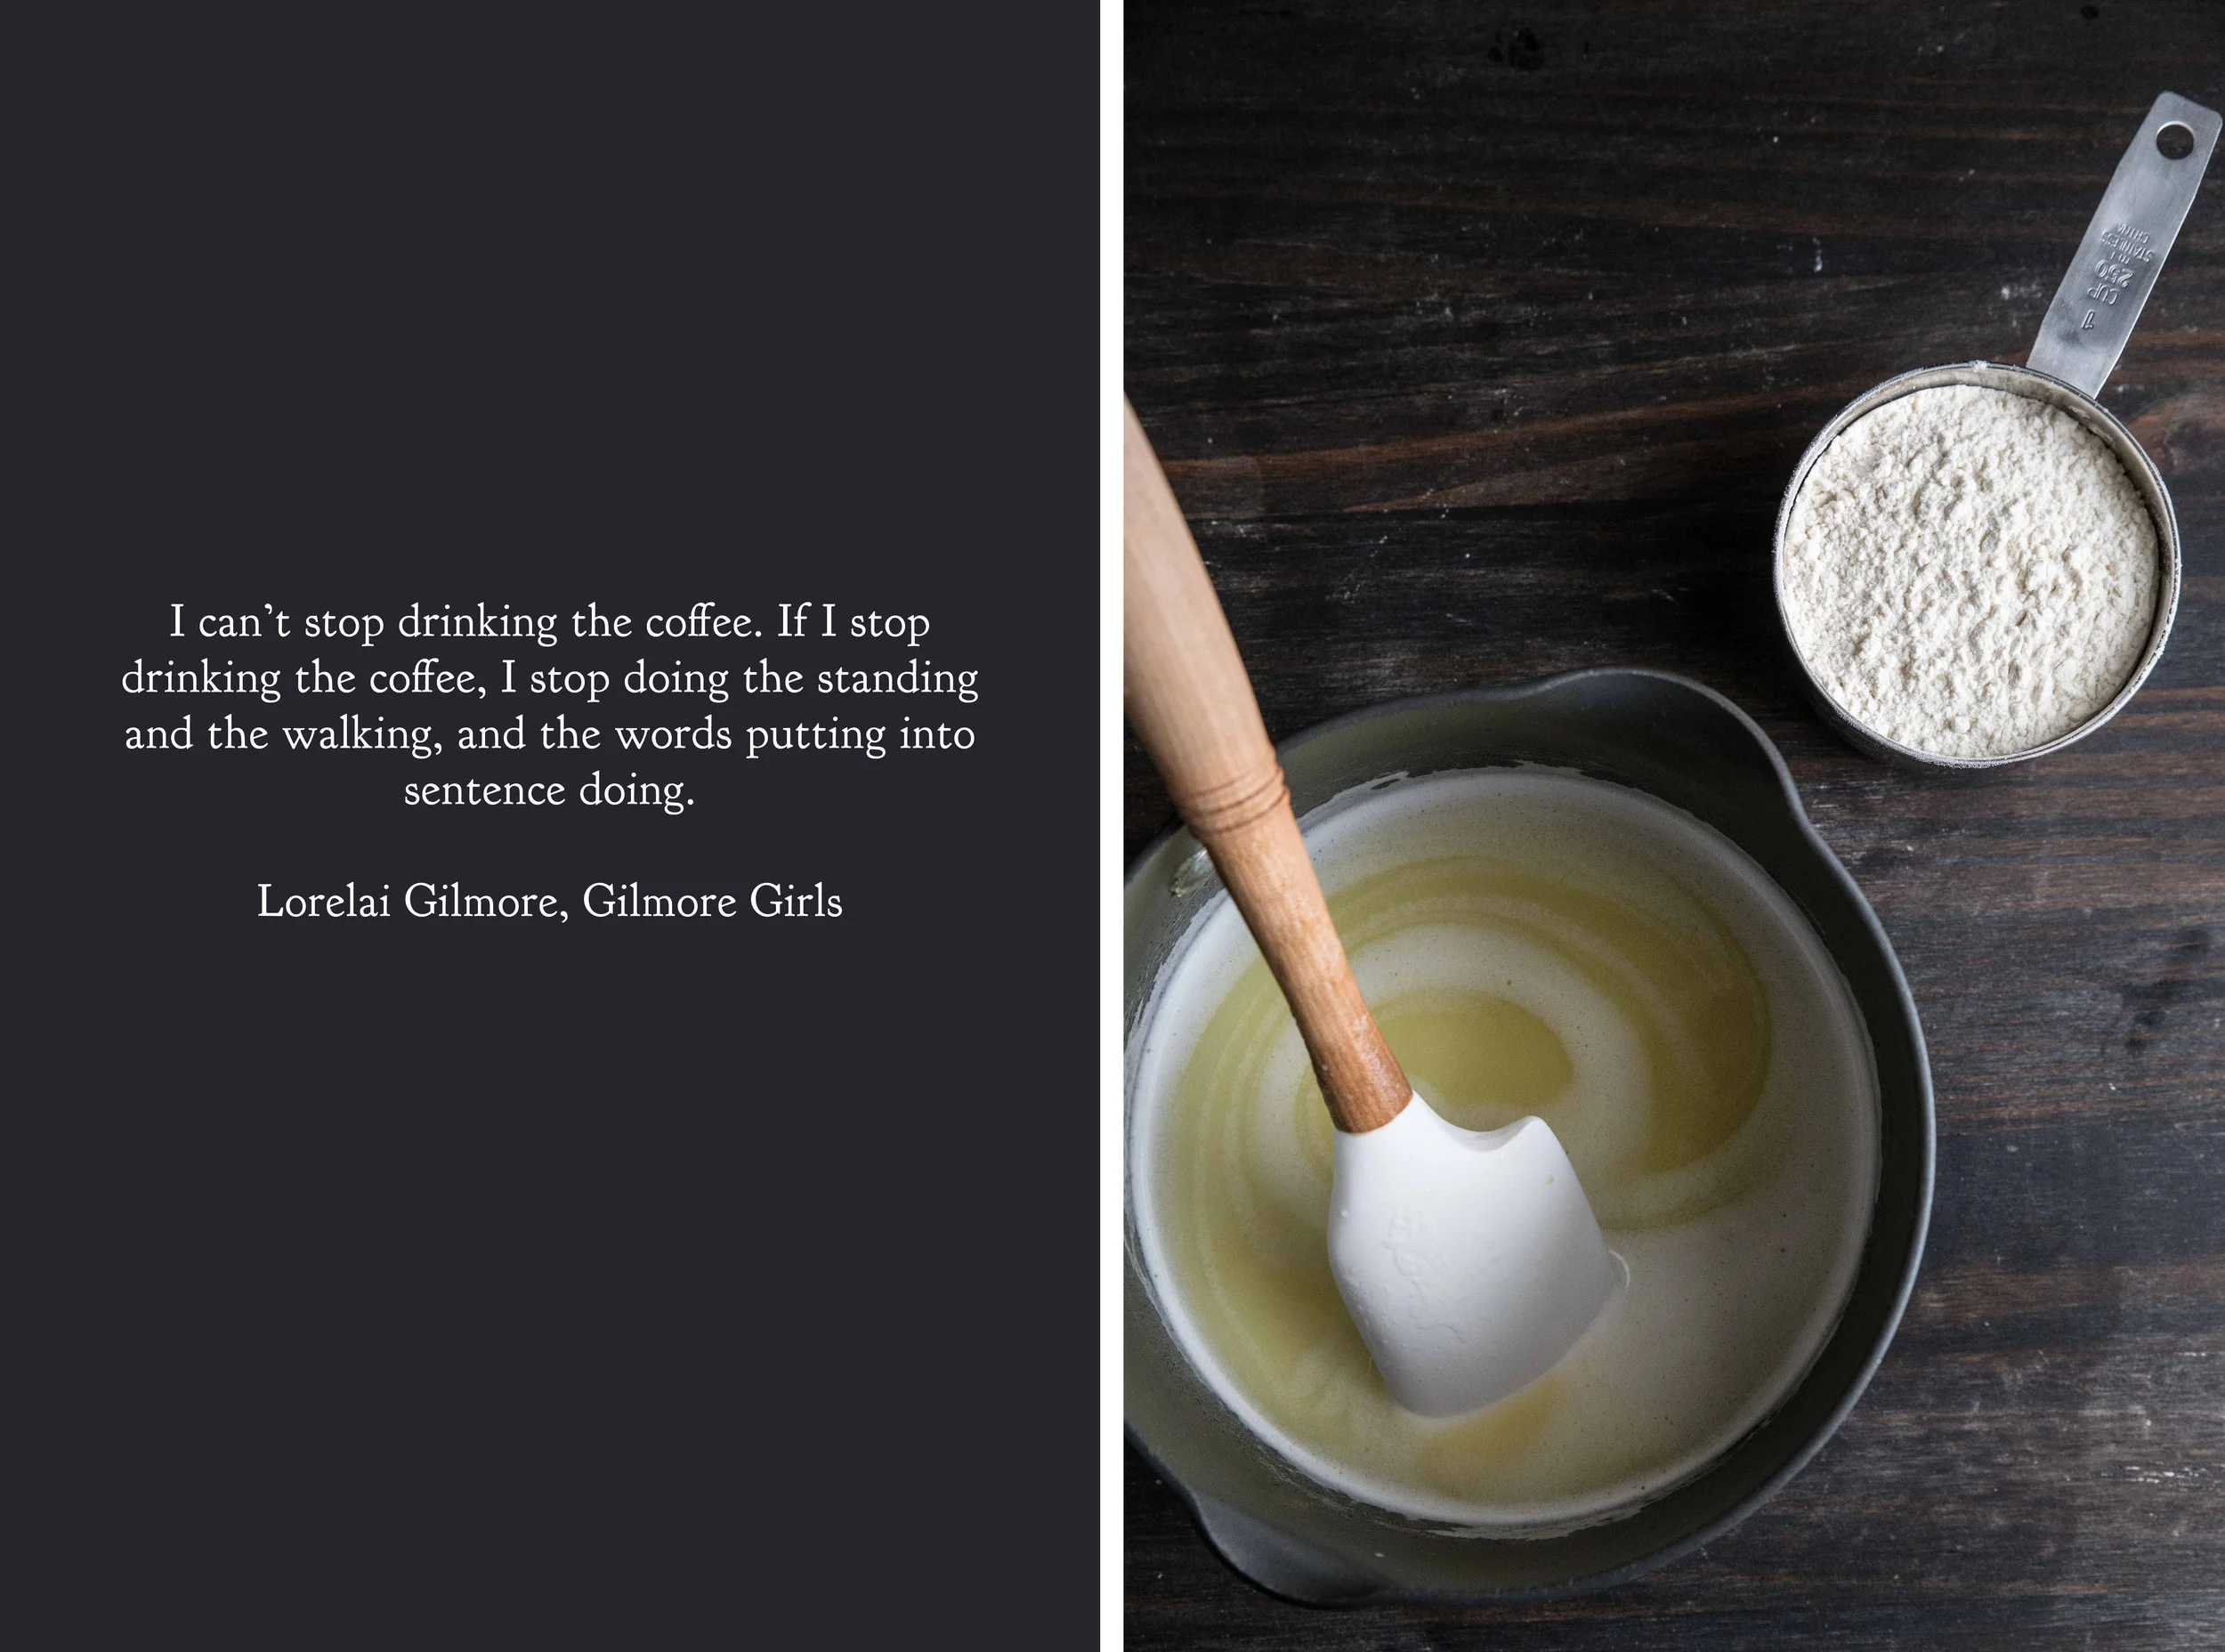
Coffee Eclairs

Pastries are my first love. When I lived in Montreal, the scents of butter and yeast swirled out onto the sidewalks, luring me into the small pâtisseries. I could rarely resist. Naturally, baking became my second love, which developed from a desire to create that which I first loved.

In partnership with King Arthur Flour, each month I want to challenge you with a new recipe to help you grow and develop as a baker. This month we're taking on coffee éclairsa classic French pastry merged with the American love of caffeine.  Eclairs feature a pastry shell filled with custard and glazed with chocolate. The name éclair comes from the French for "flash of lightning," an apt name because the pastries are often eaten "in a flash."

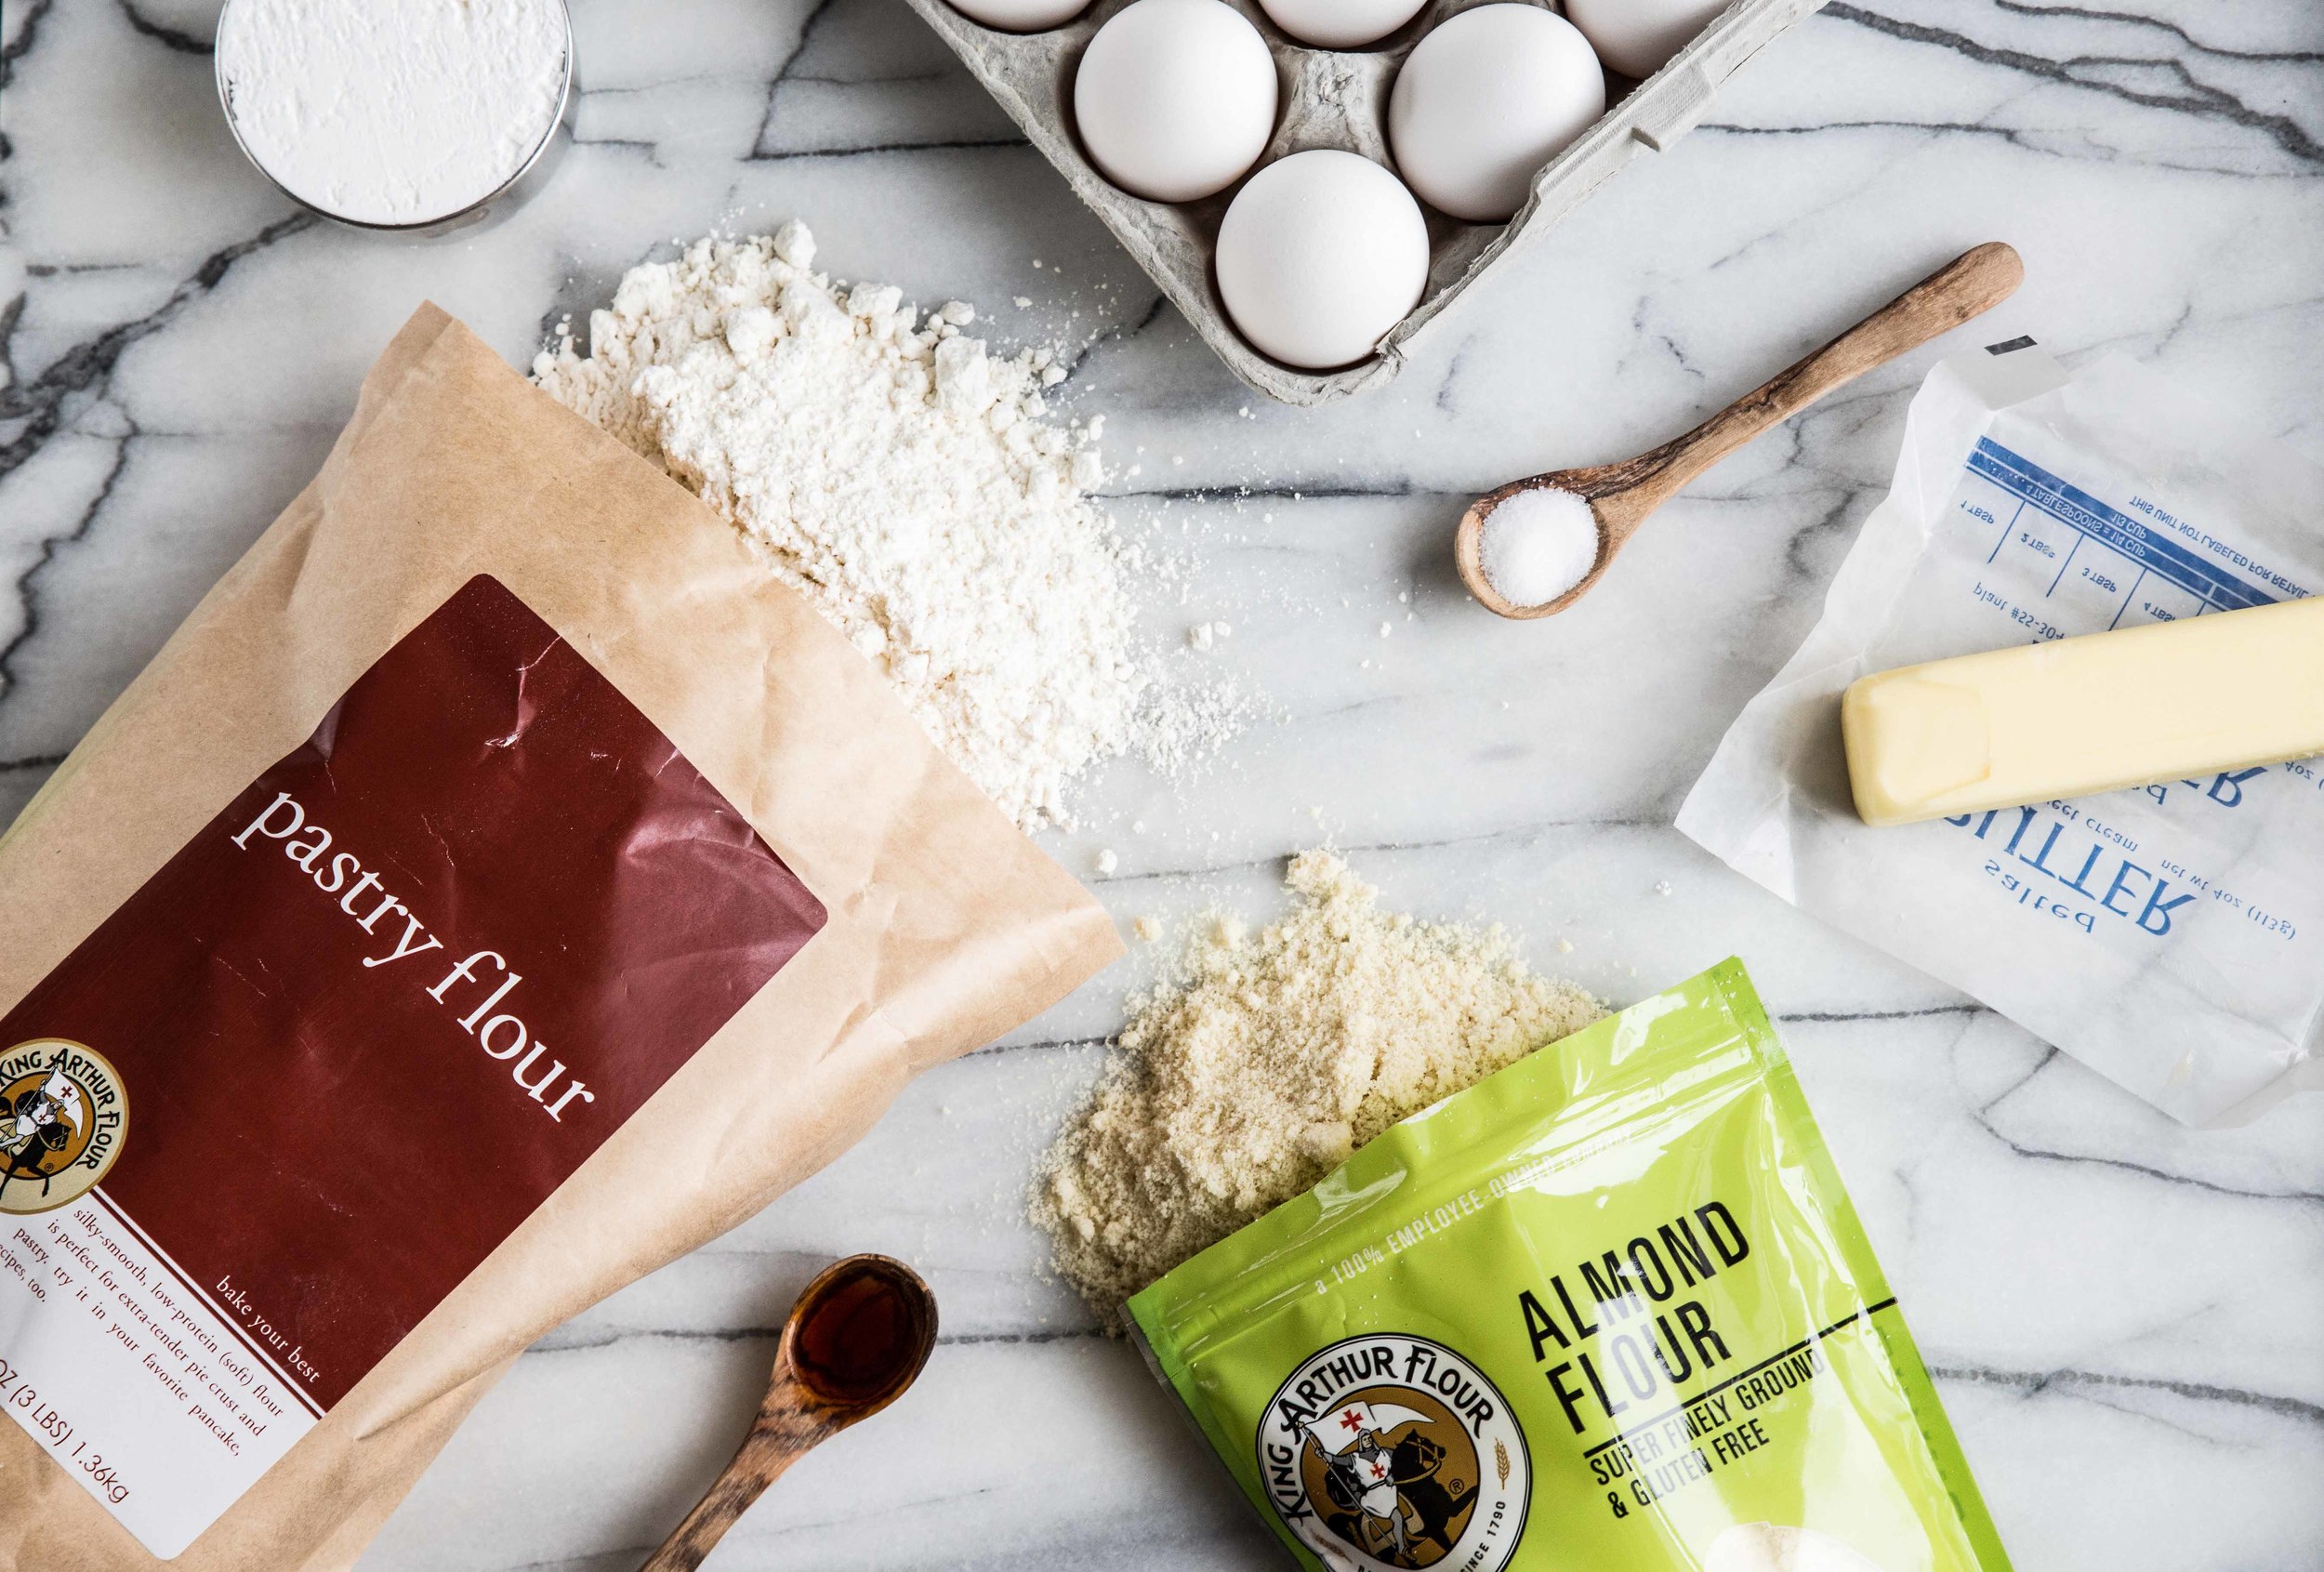
The pastry shell of an éclair is pâte à choux or choux pastry. Choux pastry forms the base of many popular desserts, including cream puffs, profiteroles, crullers, and gougères. The pastry consists of butter, water, flour, salt, sugar, and eggs, but the technique in which they are combined makes all the difference.

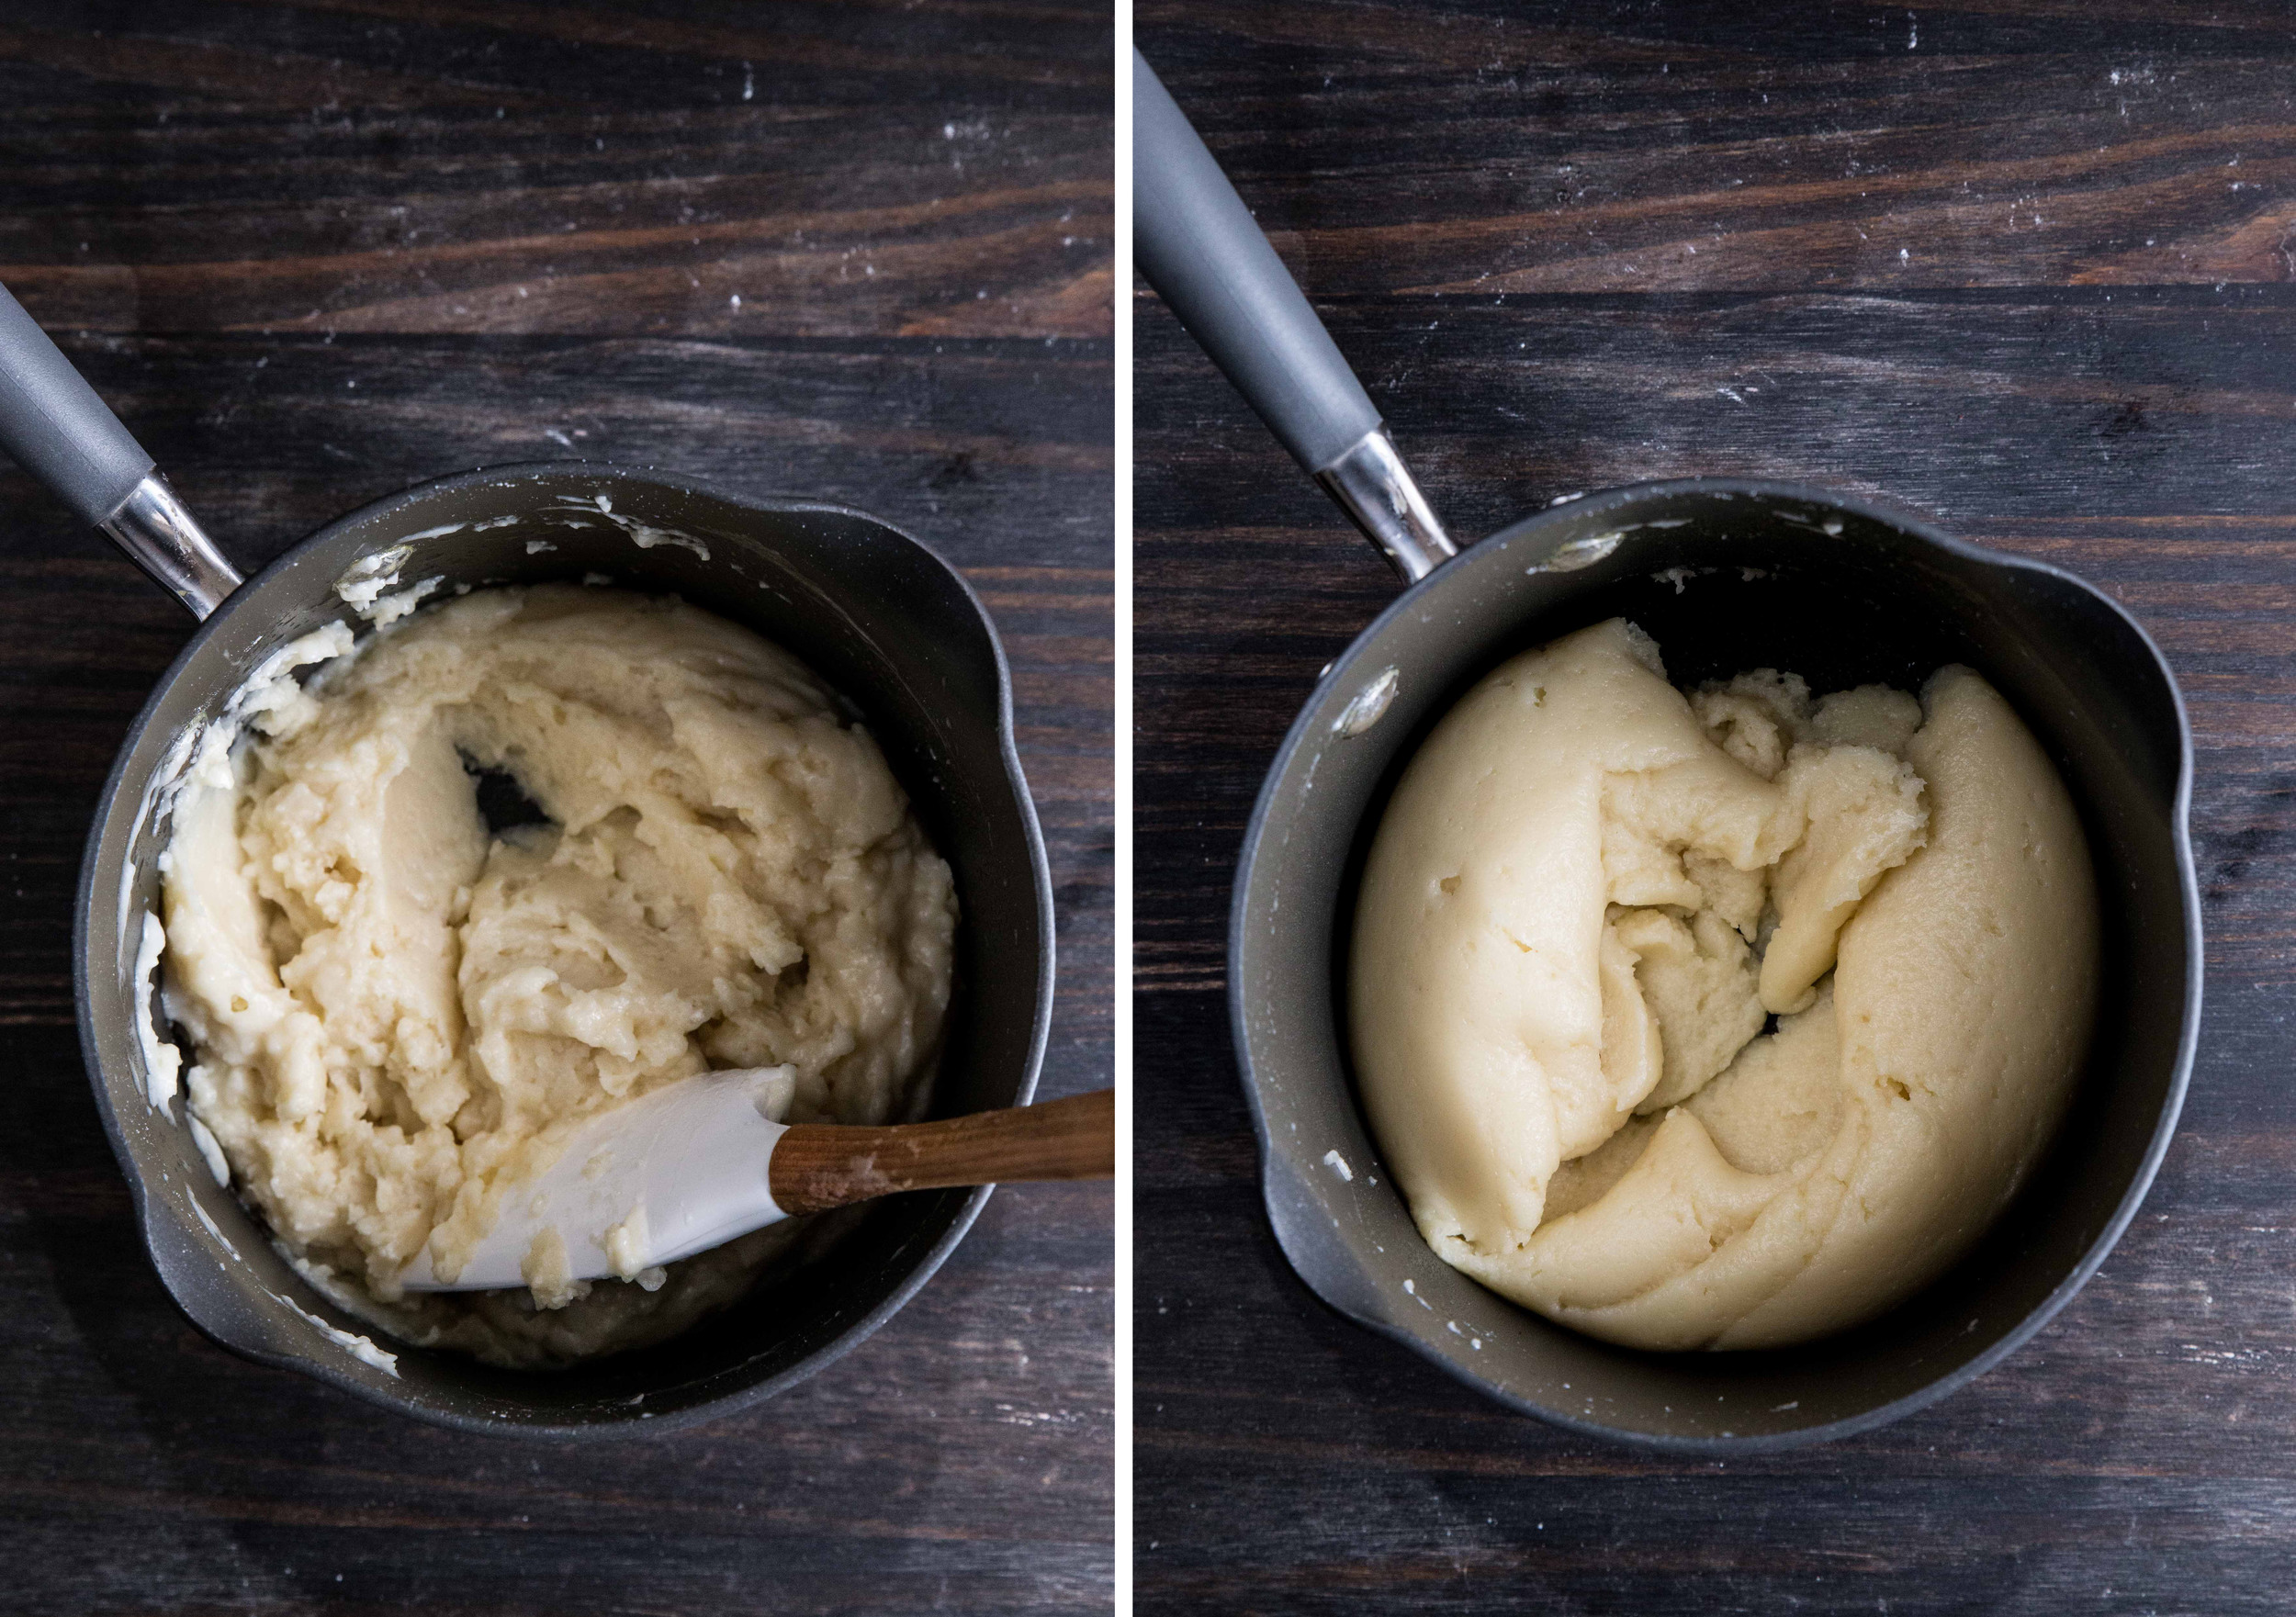
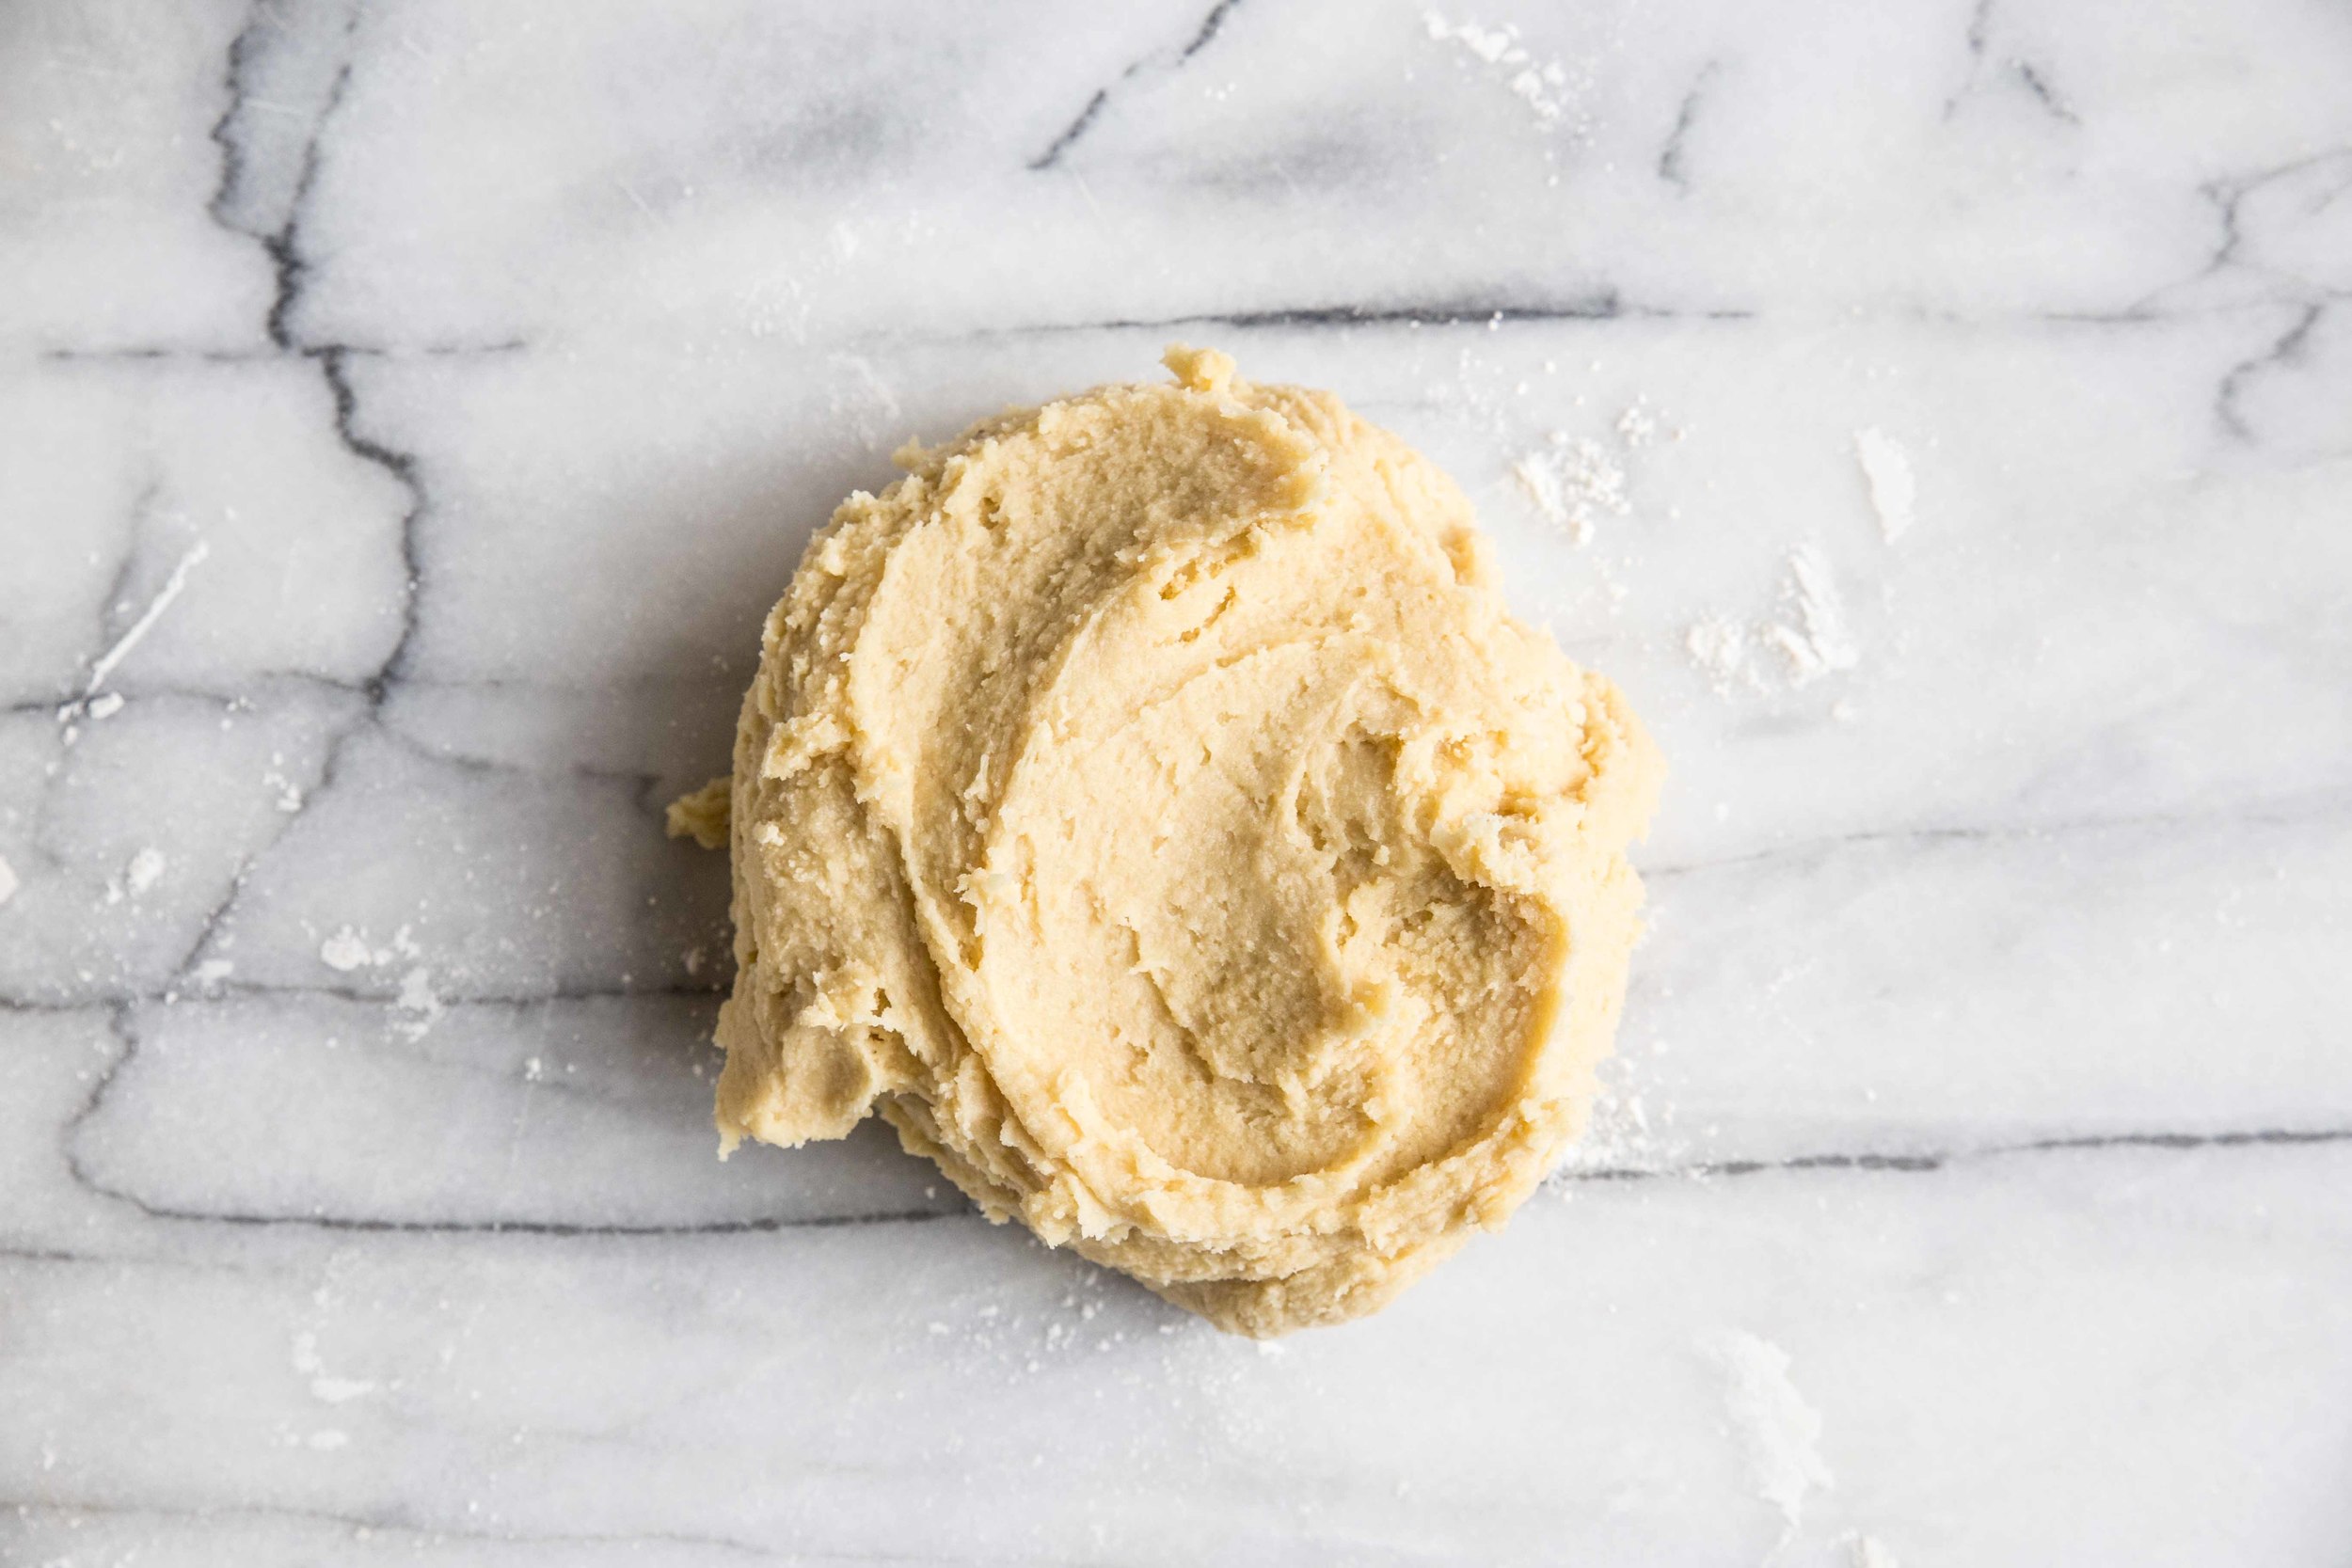
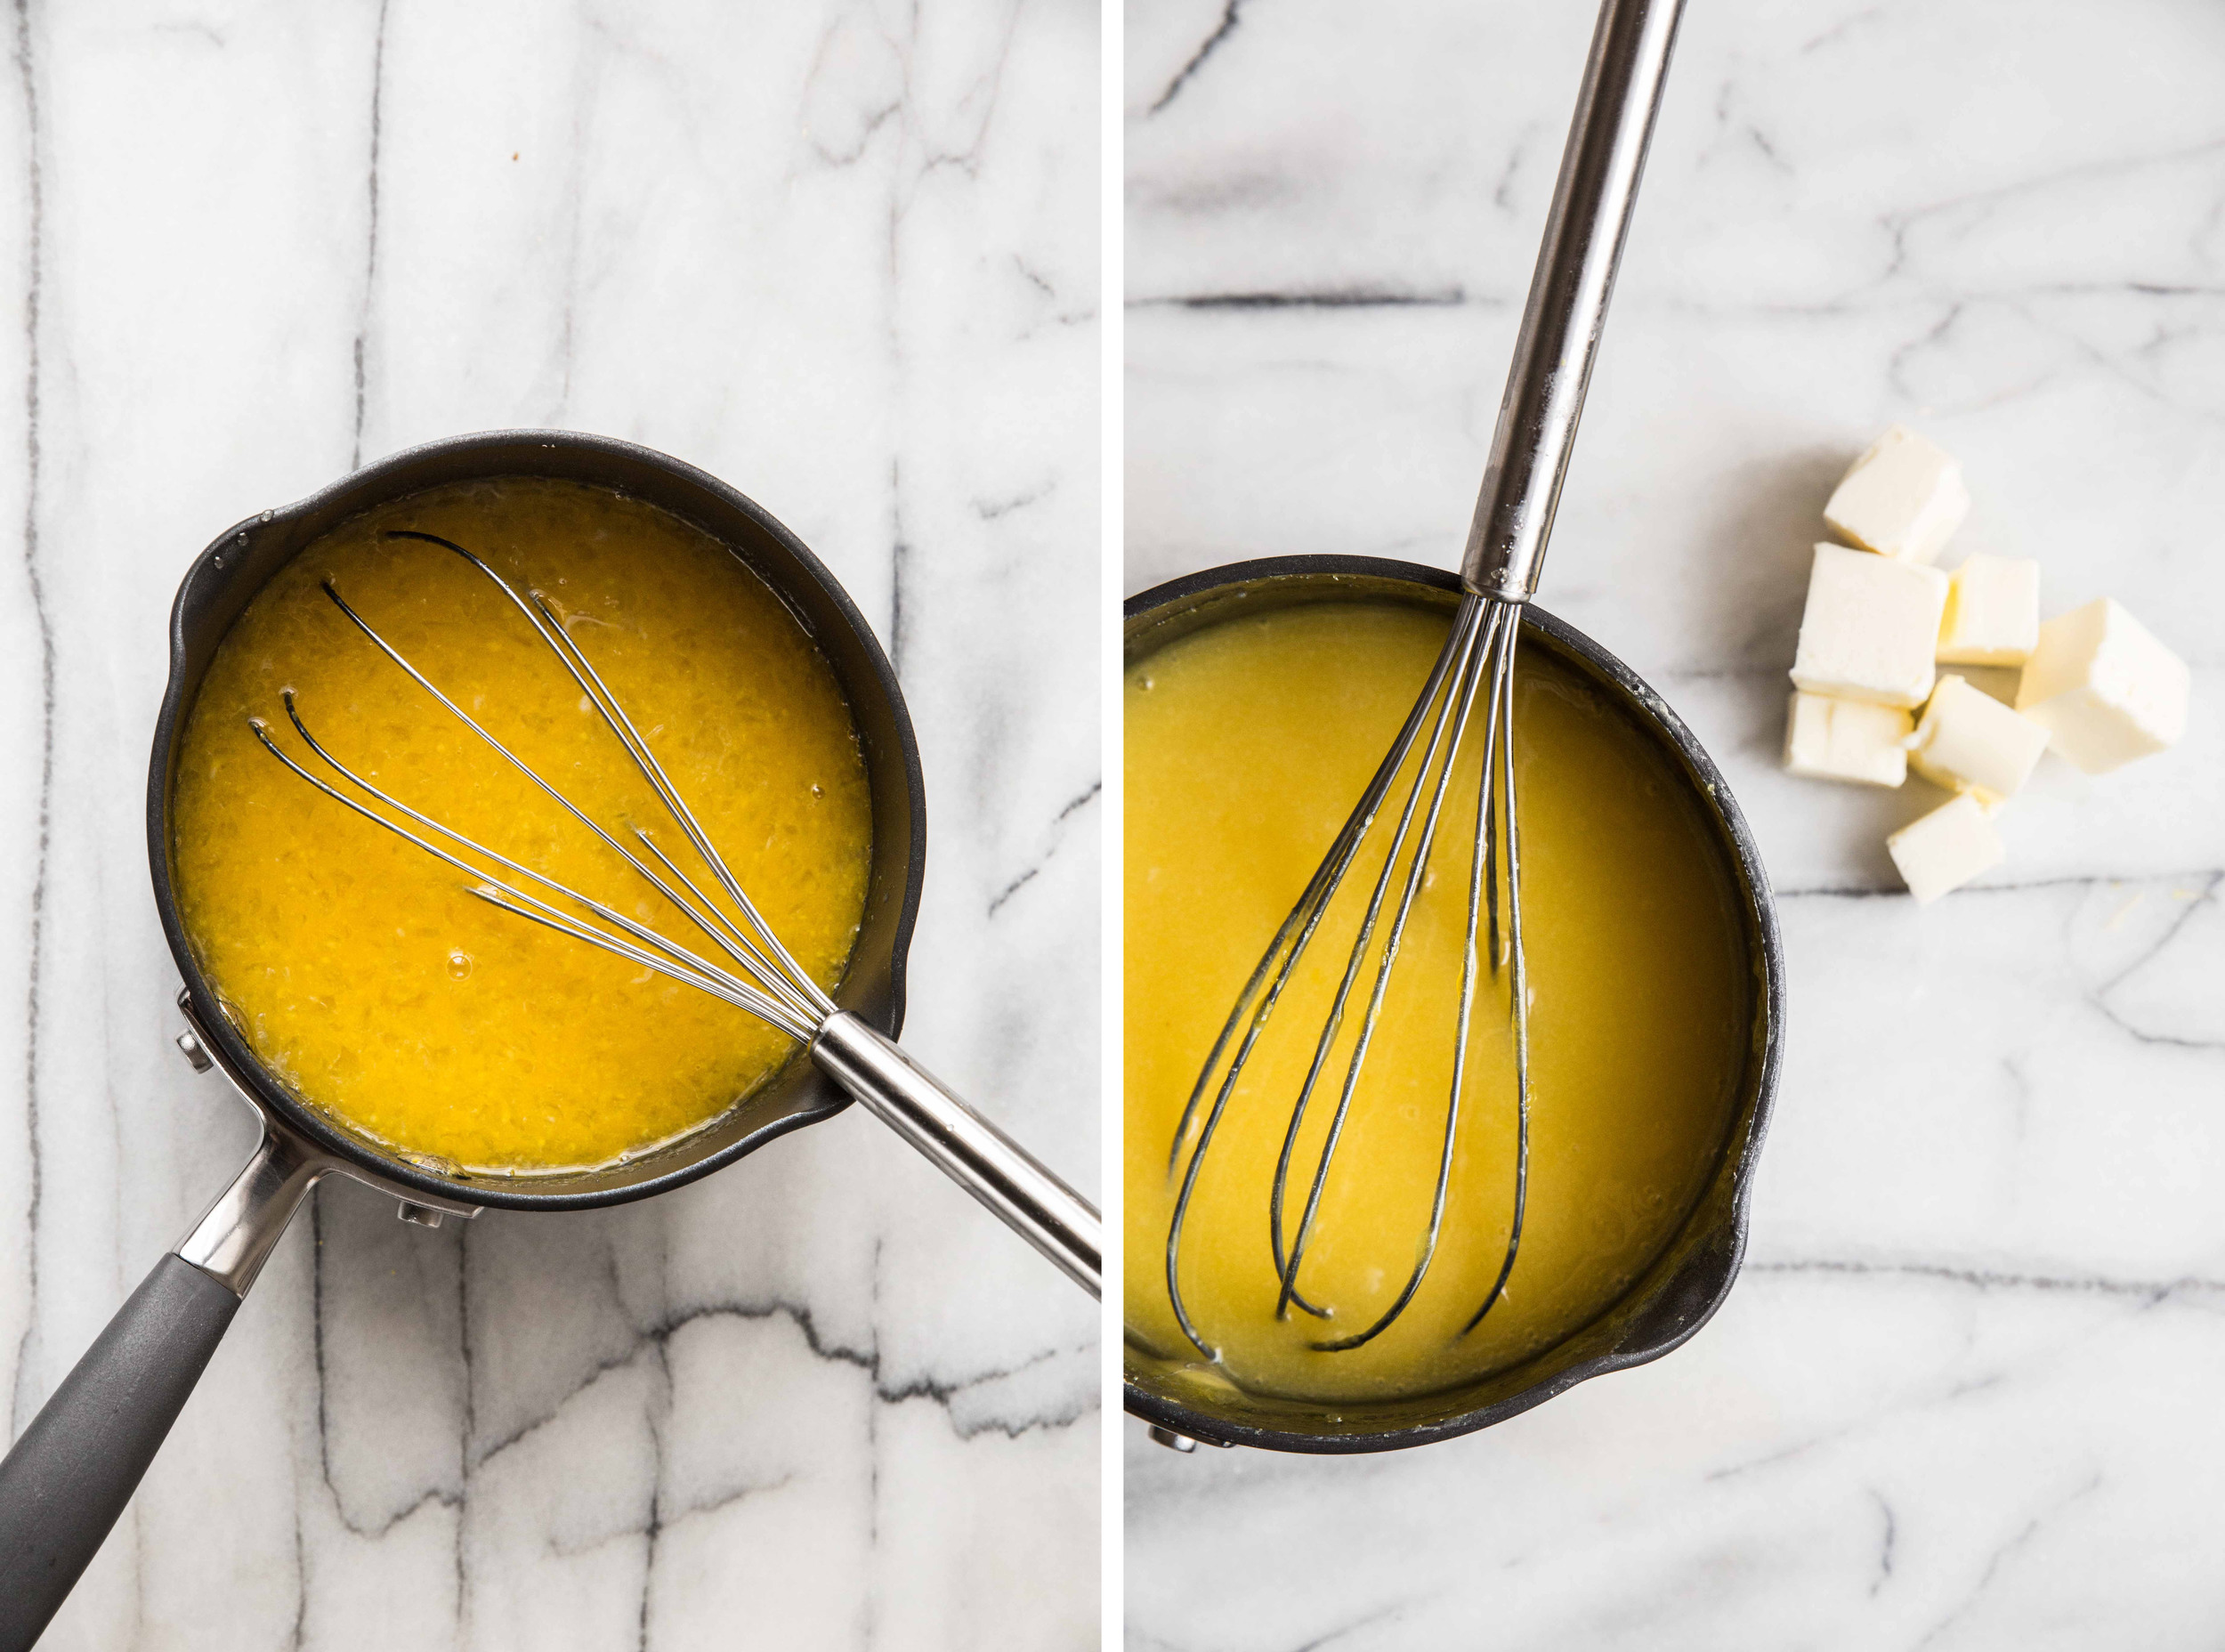
Unlike most pastries, choux is cooked on the stove before it is baked. Choux starts by bringing the butter and water to a boil. The flour is added and stirred until uniform, as shown in the top left photo. It has a resemblance to dry mashed potatoes. The choux is placed back on the stove and stirred constantly for 2-3 minutes. As the pastry loses moisture, it will begin to pull away from the sides of the pan and form a ball. The dough will also form a film on the bottom of the pan, a starchy layer from the flourthis is a good sign. When the dough looks like the image in the top right, it is done.

IMG_1059.jpg

The batter should cool for several minutes before the eggs are mixed in to prevent scrambling them. When the eggs are added one at a time, the dough and egg will look like they will never combine, but after enough mixing, the batter will become smooth. While you can use a mixer to do this step, I prefer to do it by hand. Using the same pot creates fewer dirty dishes and a little elbow grease never hurt anyone.

The batter is the correct consistency when it forms a V-shape on the end of a spatula. It should drip off very slowly. If the batter is not dripping, add water, a tablespoon at a time, until it reaches the right consistency.

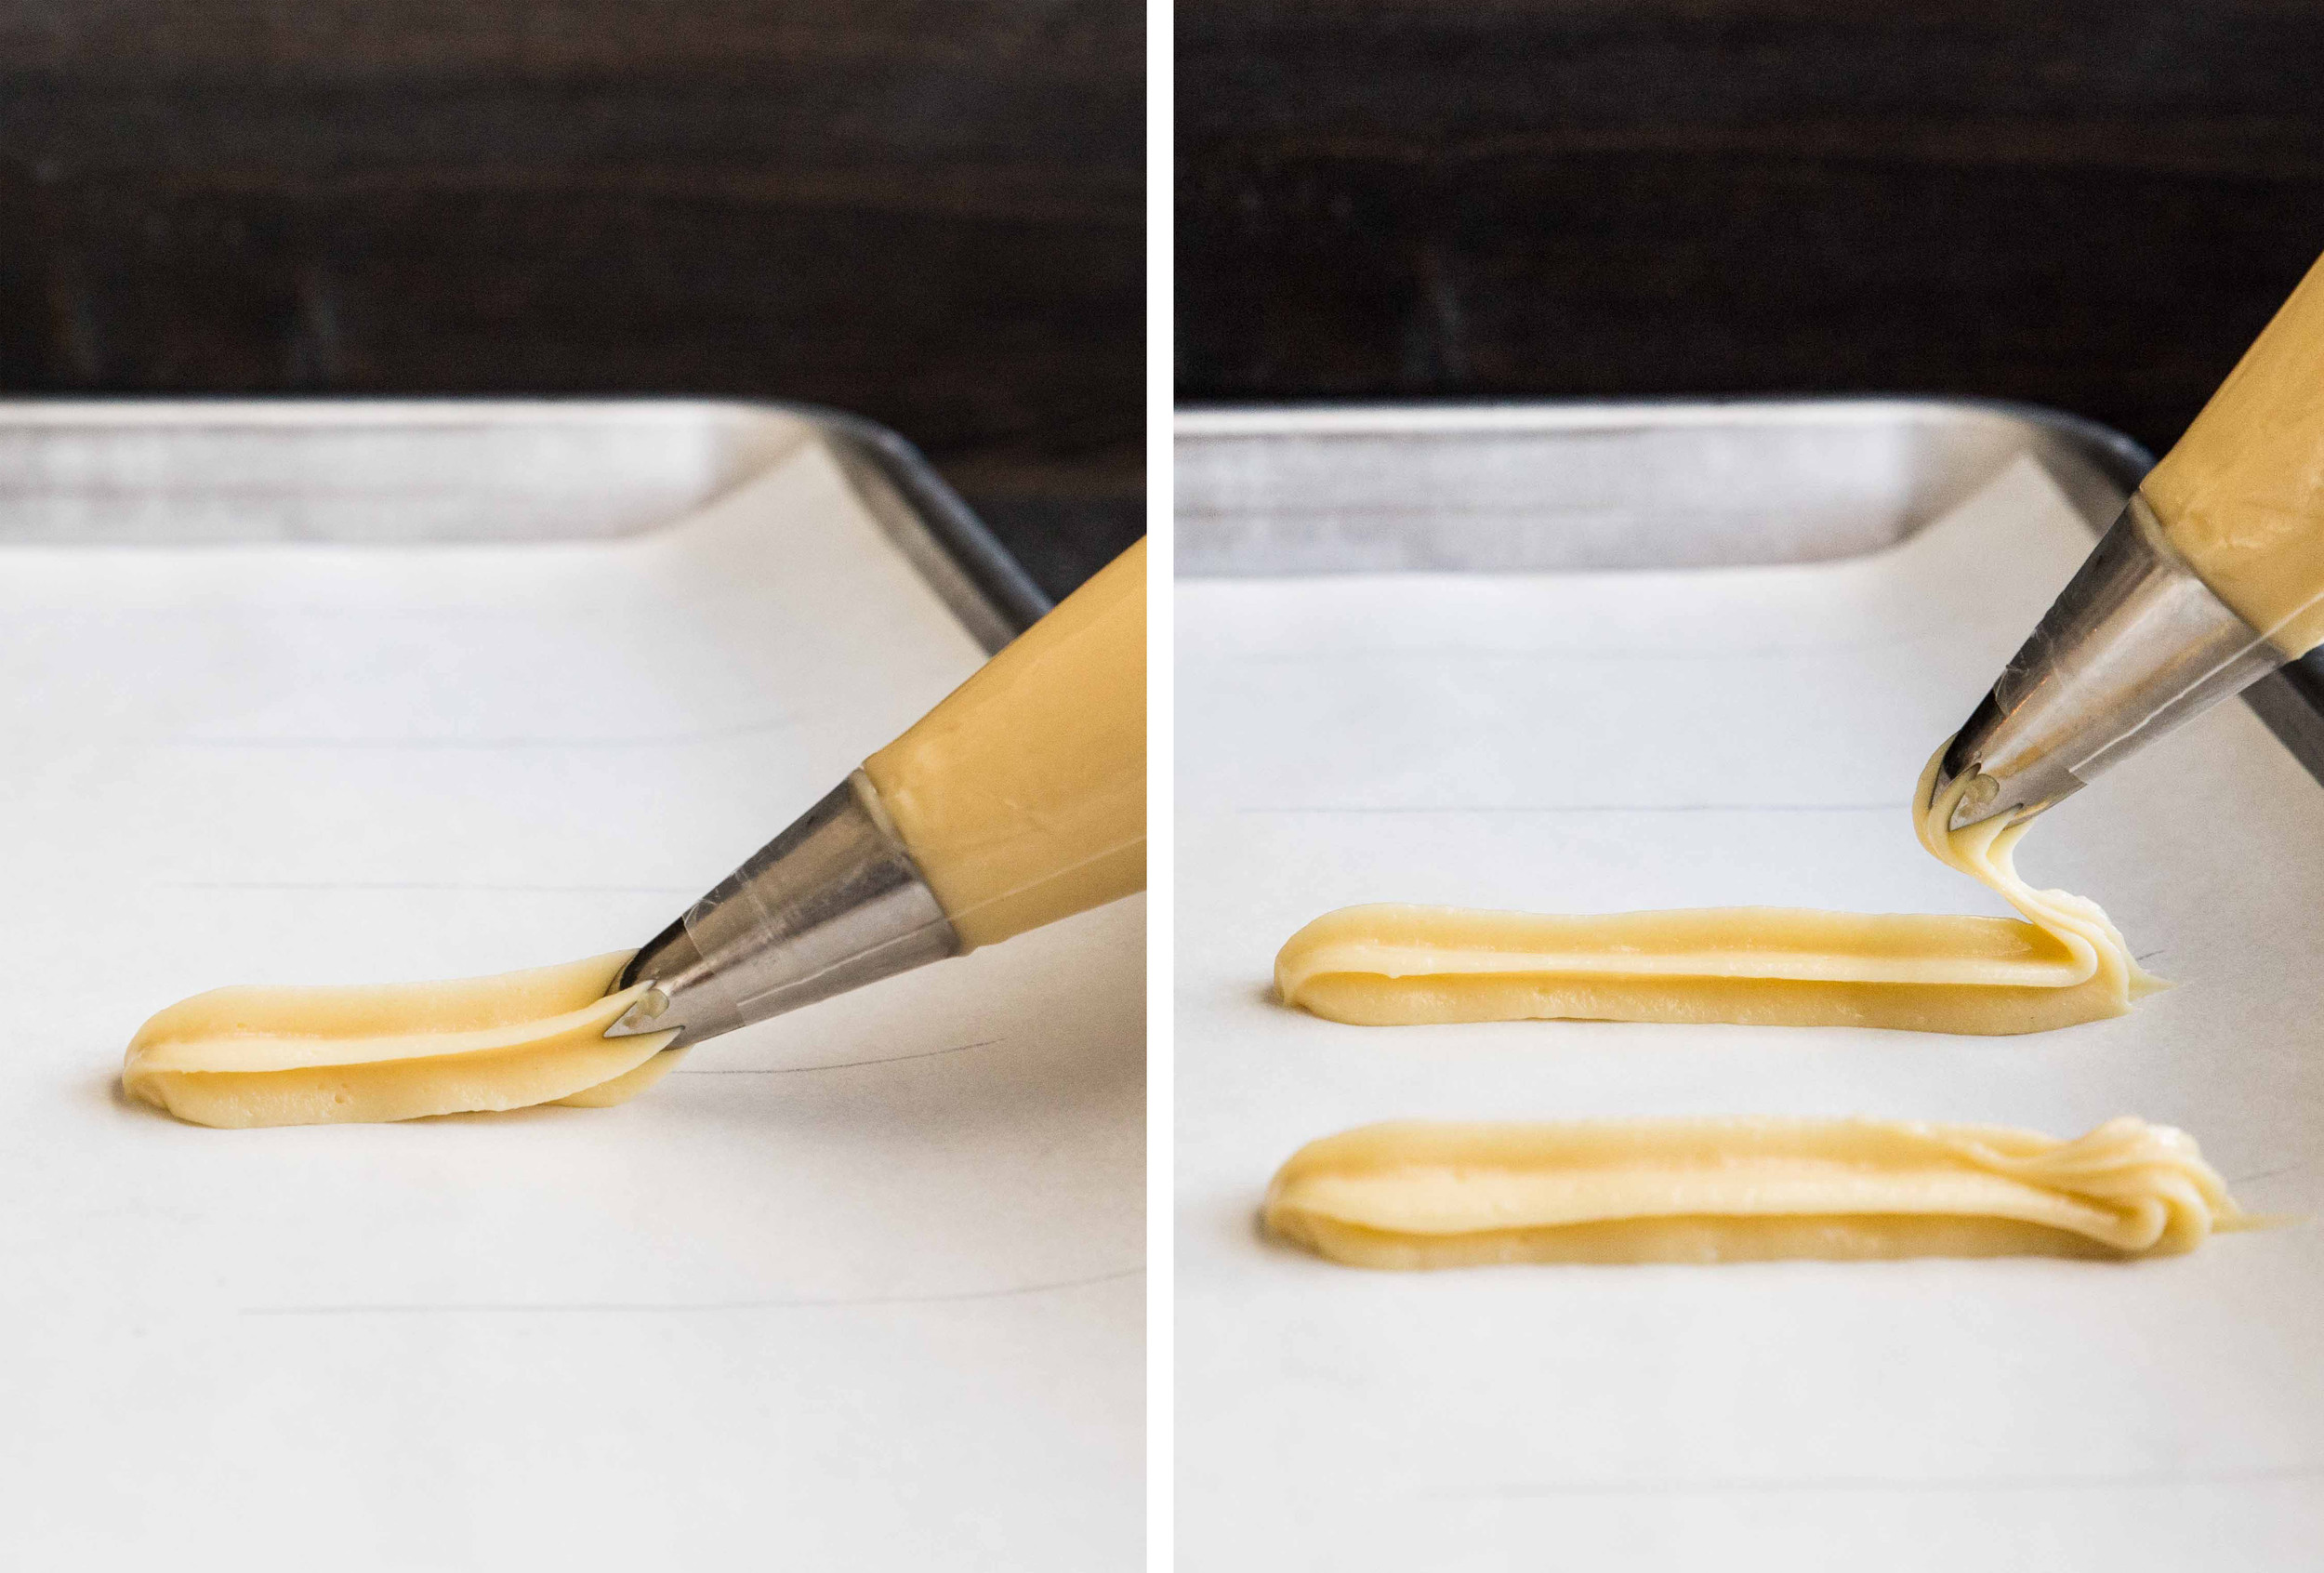
Place the choux in a piping bag with a large tip. The éclairs can be piped with a star or round tip (I used a 1 M). I prefer the star tip because the ridges make the éclairs easier to hold when filling and glazing. Eclairs are typically piped so they are 4 inches long and 1 inch wide. In order to make the eclairs uniform, I create a guide by using a ruler to draw 4-inch lines on parchment paper. Keep the lines at least 2 inches apart and make sure to flip the parchment upside down so the ink does not bleed onto the pastry.

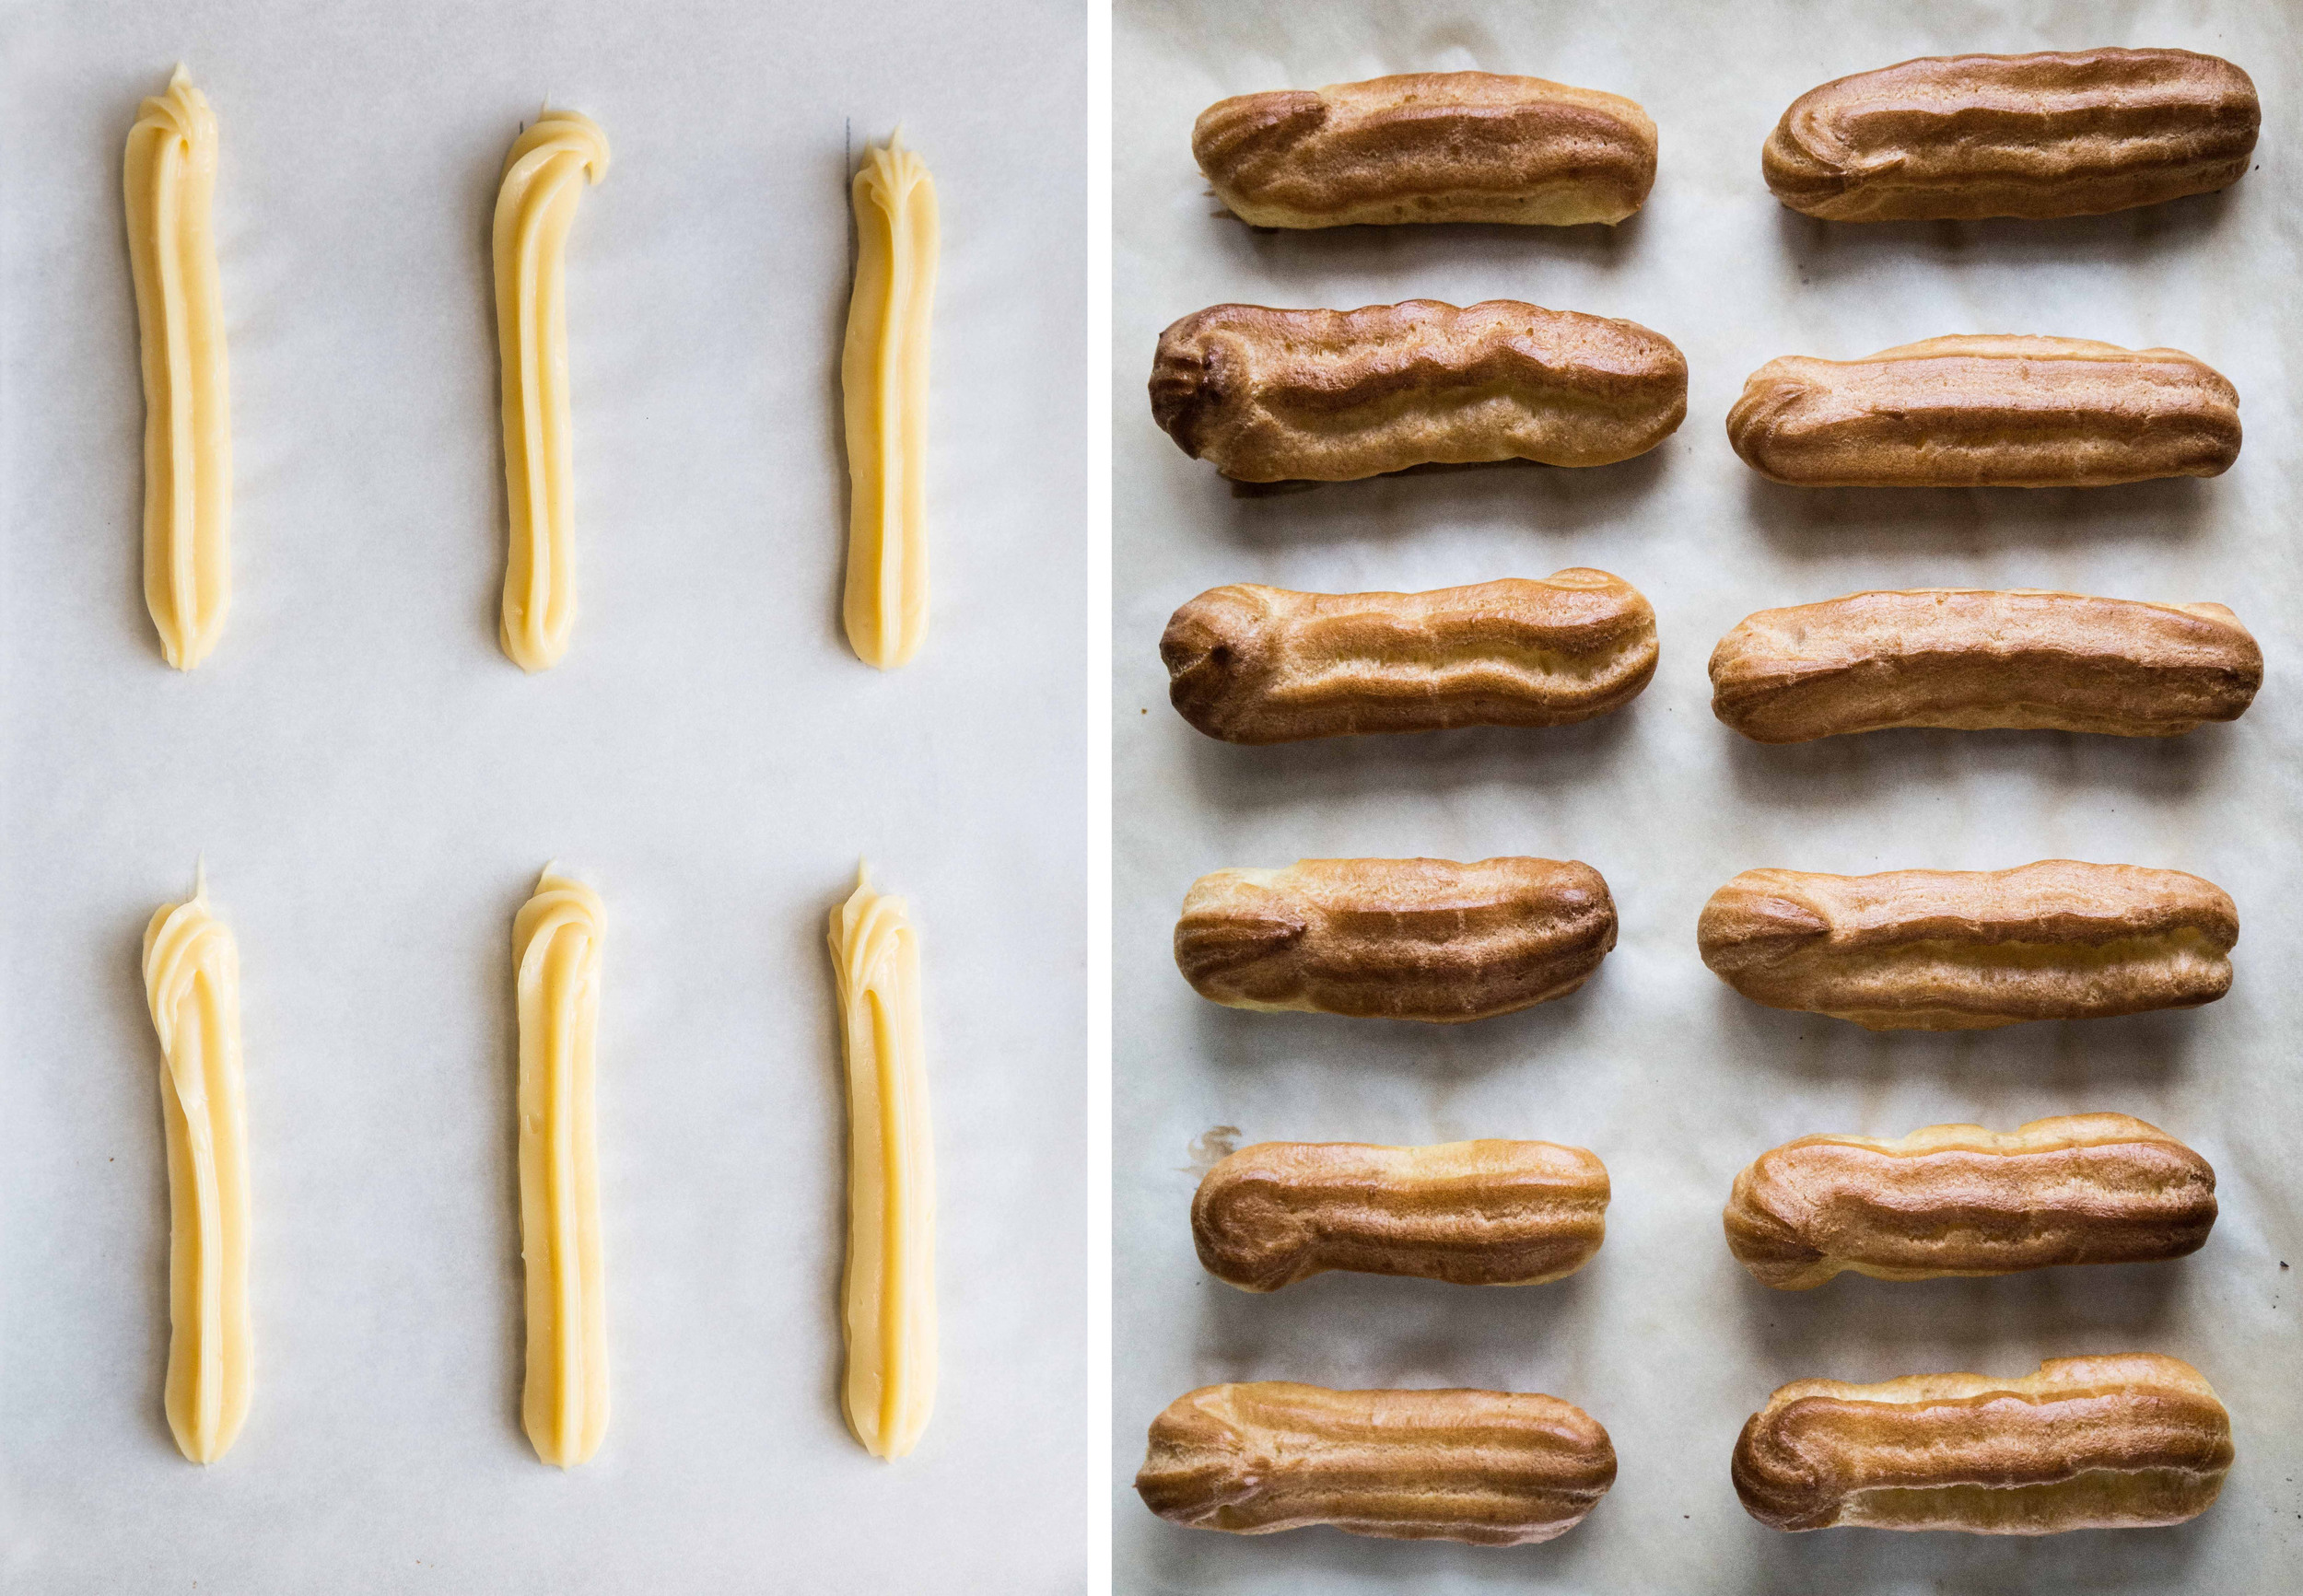
When piping, keep the bag at a 45 degree angle to the surface, but do not touch the surface. When you reach the end, stop the pressure and bring the tip back over the pastry, folding the remainder over onto itself (as shown above). Don't worry about having a perfect shape here. The choux loses much of its shape when it puffs in the oven.

You will know the choux has finished baking when it has a uniform dark brown color. This is often a shade darker than you think it should be. If it’s too light in color, the pastry will have a gummy interior, which you definitely do not want. When finished, the oven is turned off, the door is cracked, and the choux is left for another 15 minutes to dry.

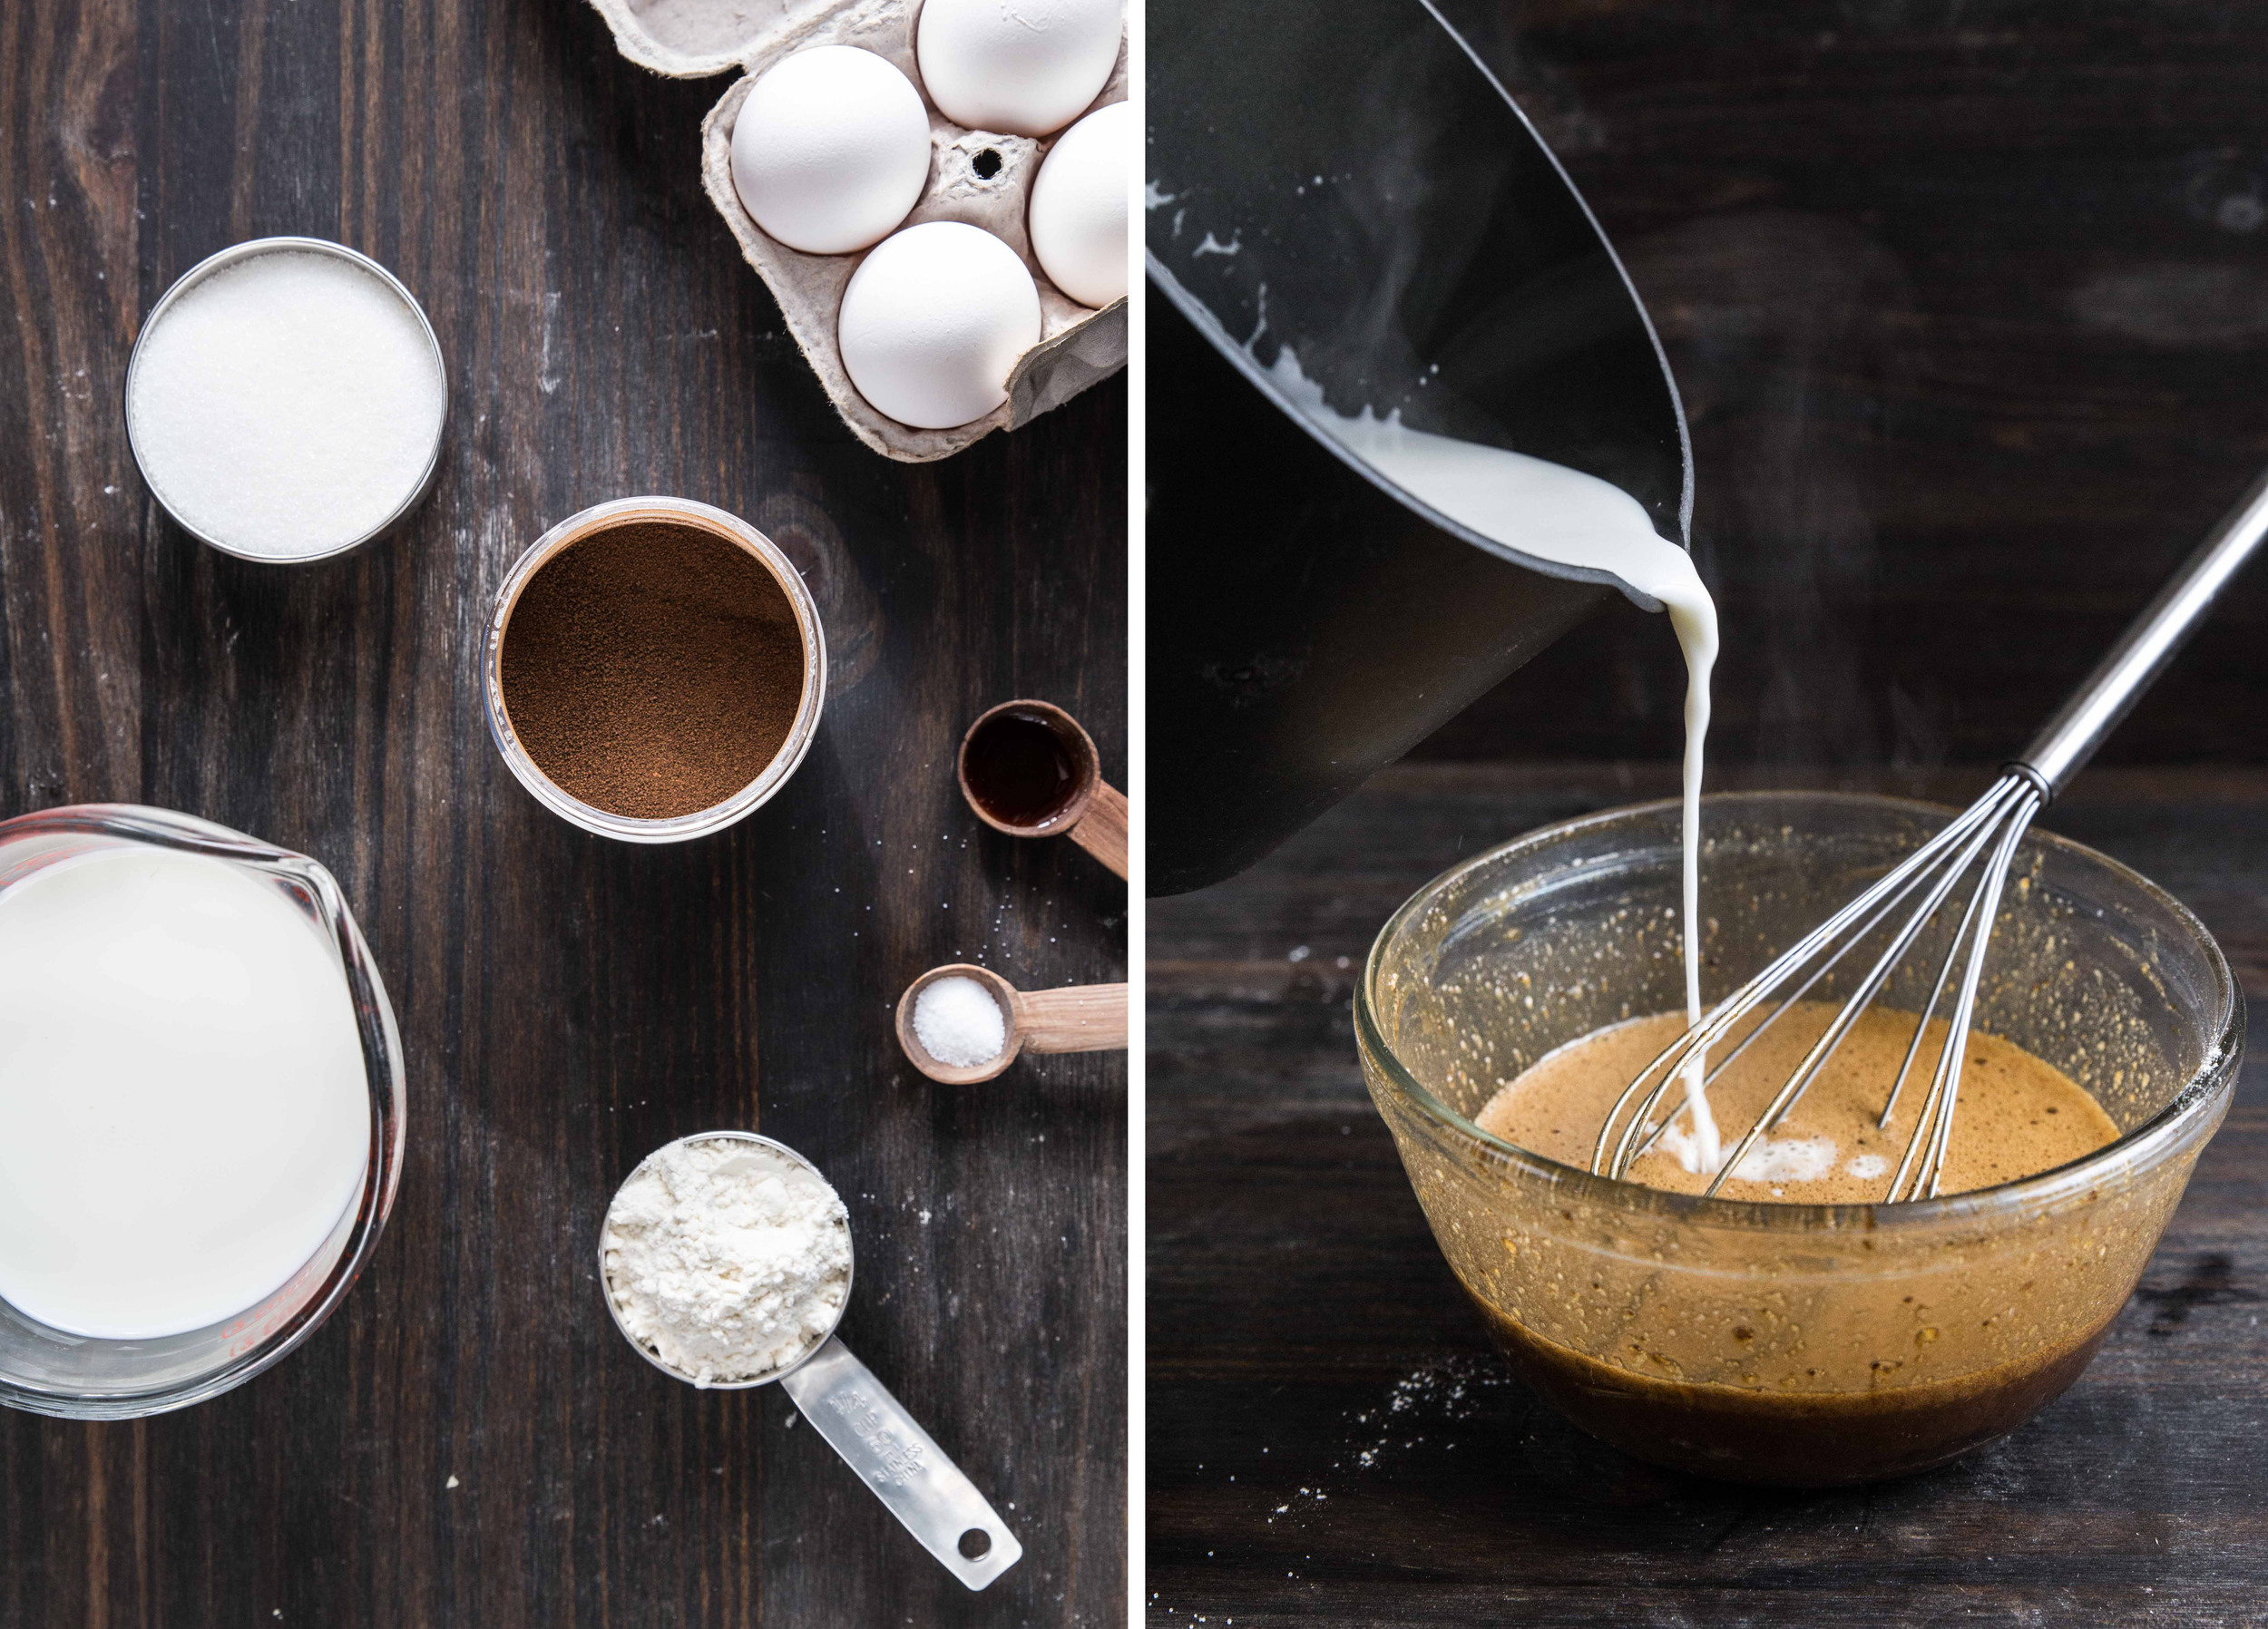
Pastry cream is made in a similar method to pudding (in fact, pastry cream is actually just a rich pudding). Sugar plays an interesting role in the creation. Whole milk and half of the sugar are brought to a boil over medium-high heat. The sugar increases the boiling point of the milk which makes it less likely to burn when heating. In a separate bowl, the remaining ingredients are whisked together. The remaining sugar helps prevent the flour from clumping  when mixed with the milk.

Once the milk has boiled, pour a small amount into the egg mixture and whisk to bring up the temperature of the egg mixture. This process tempers the eggs and prevents them from scrambling when added back to the hot milk. The pastry cream should be cooked at a full boil for at least one minute in order to thicken. When it is the consistency of pudding, it should be removed from the heat and run through a fine mesh strainer to remove any lumps. The pastry cream should be refrigerated before using. While this pastry cream is coffee flavored, you can leave out the espresso powder for a vanilla flavor.

The pastry cream can be made several days in advance as long as it is kept airtight in the refrigerator.

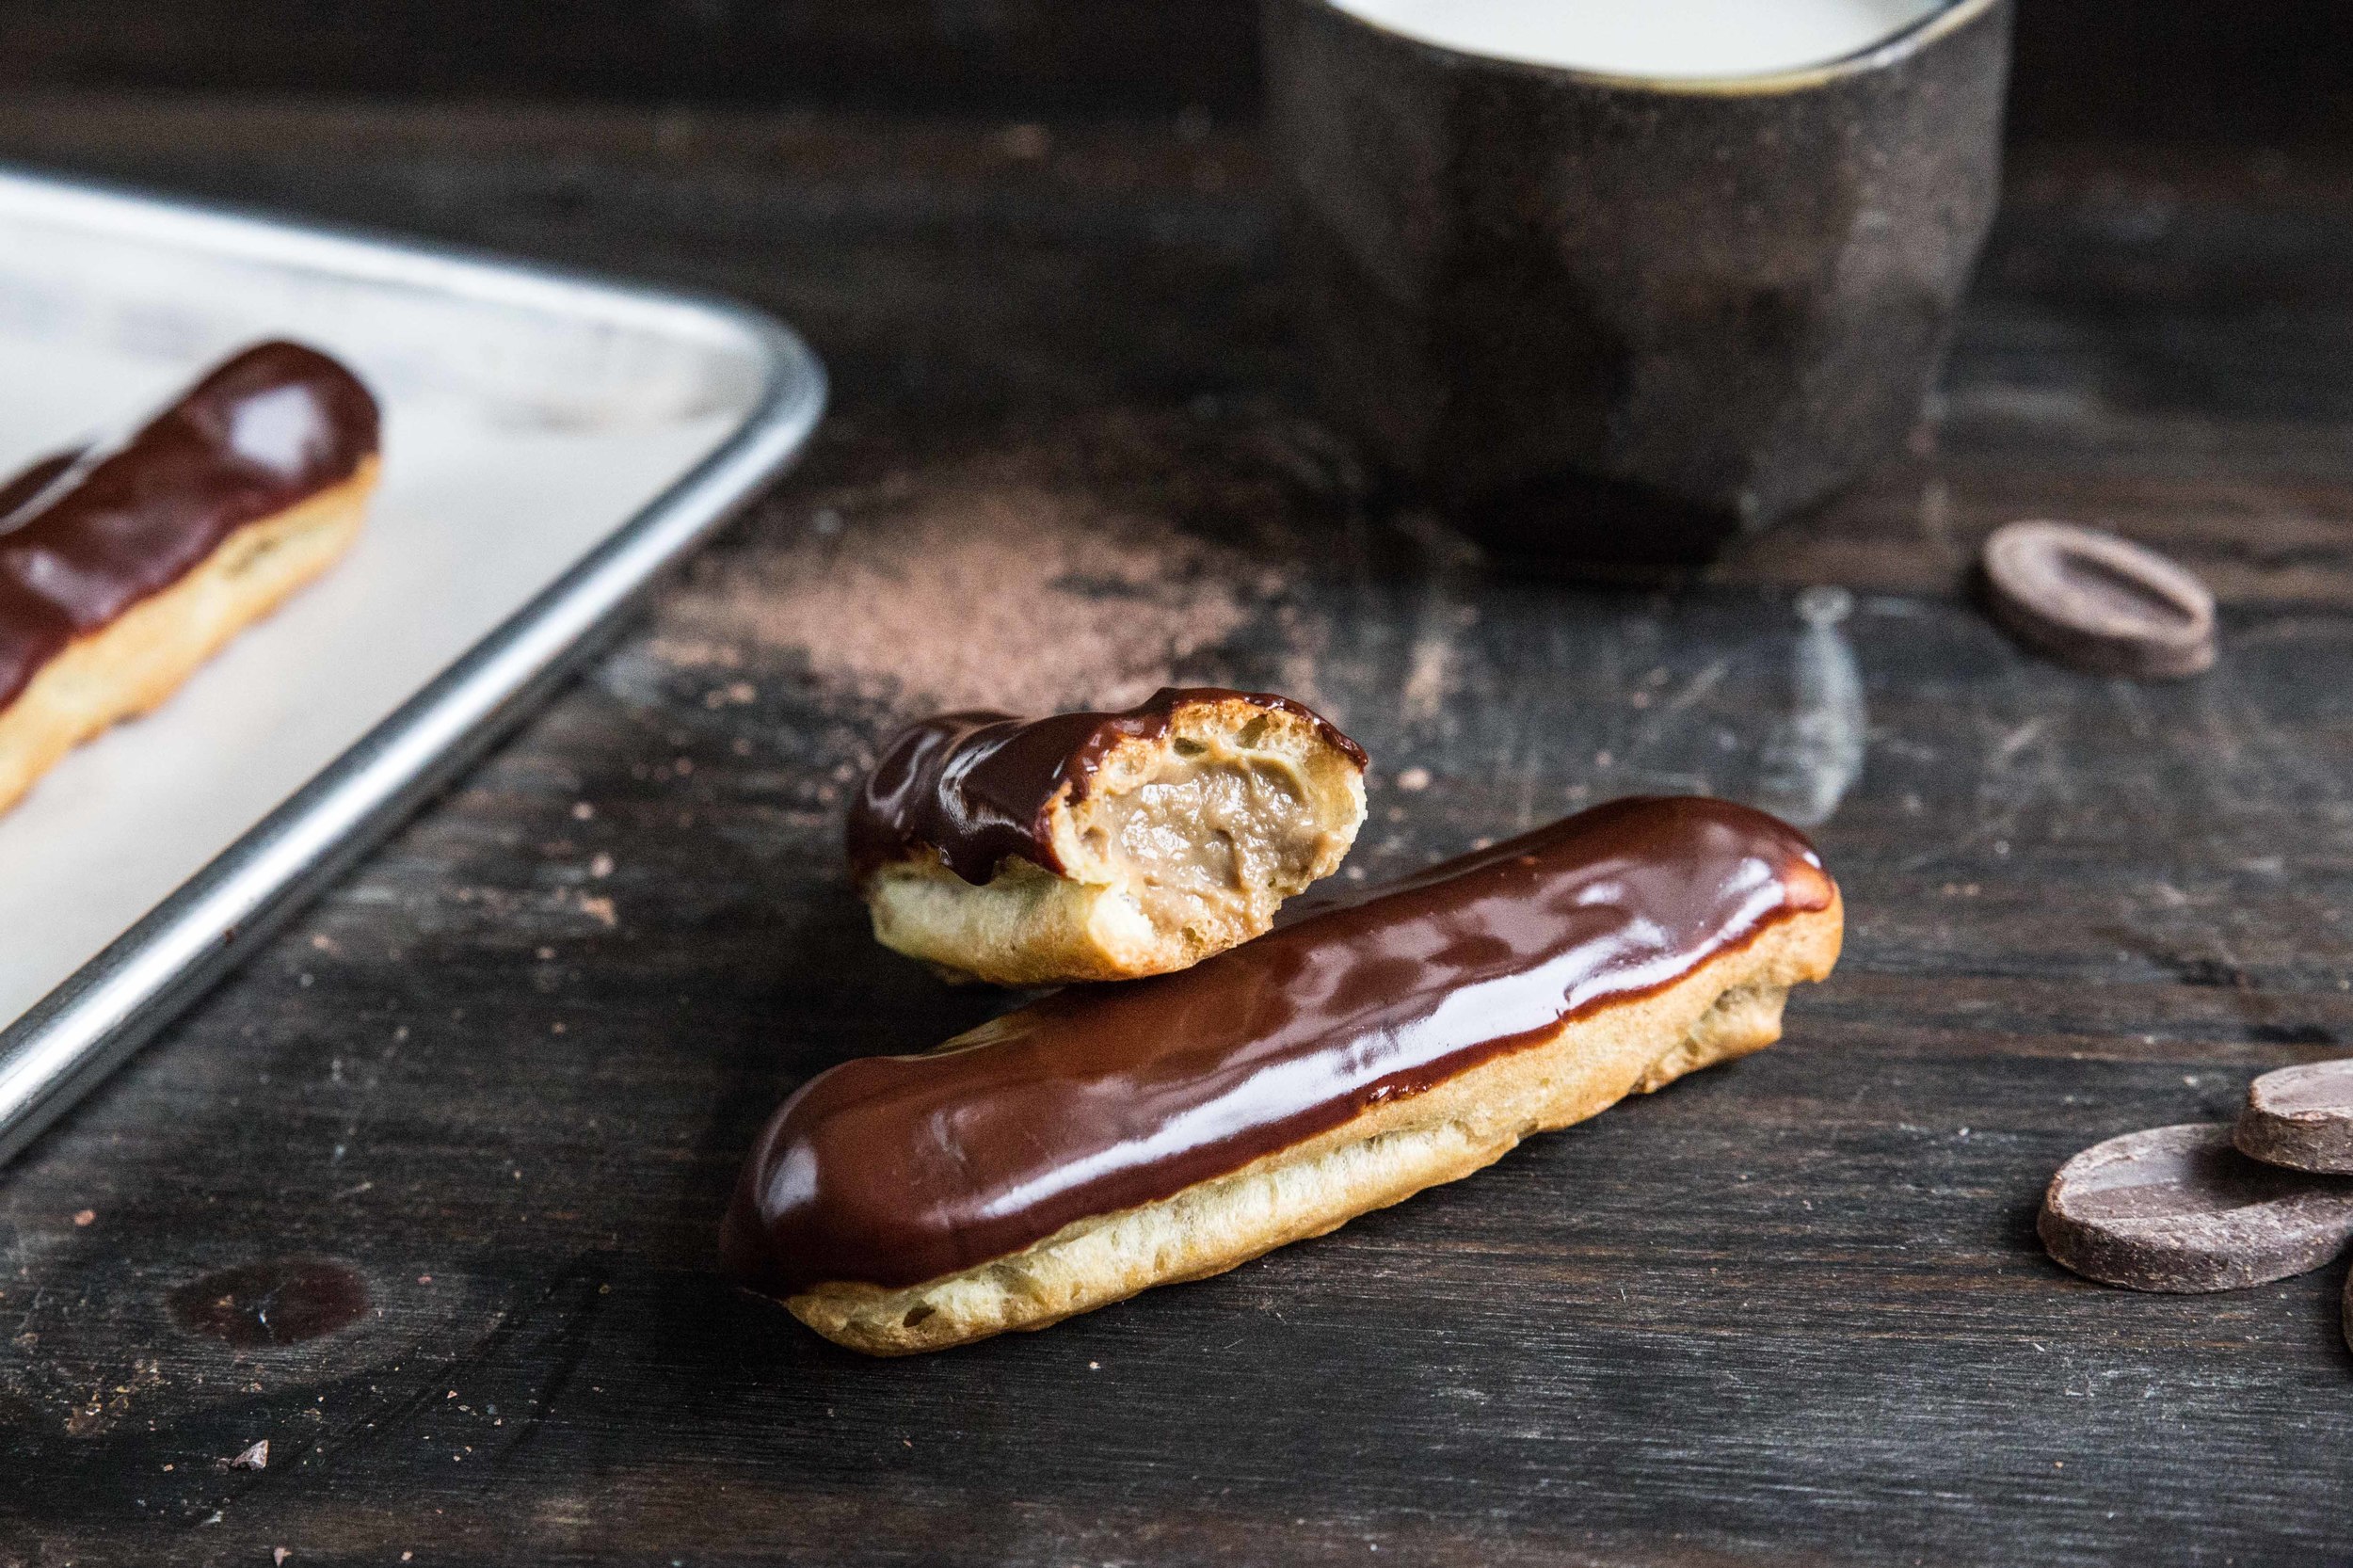
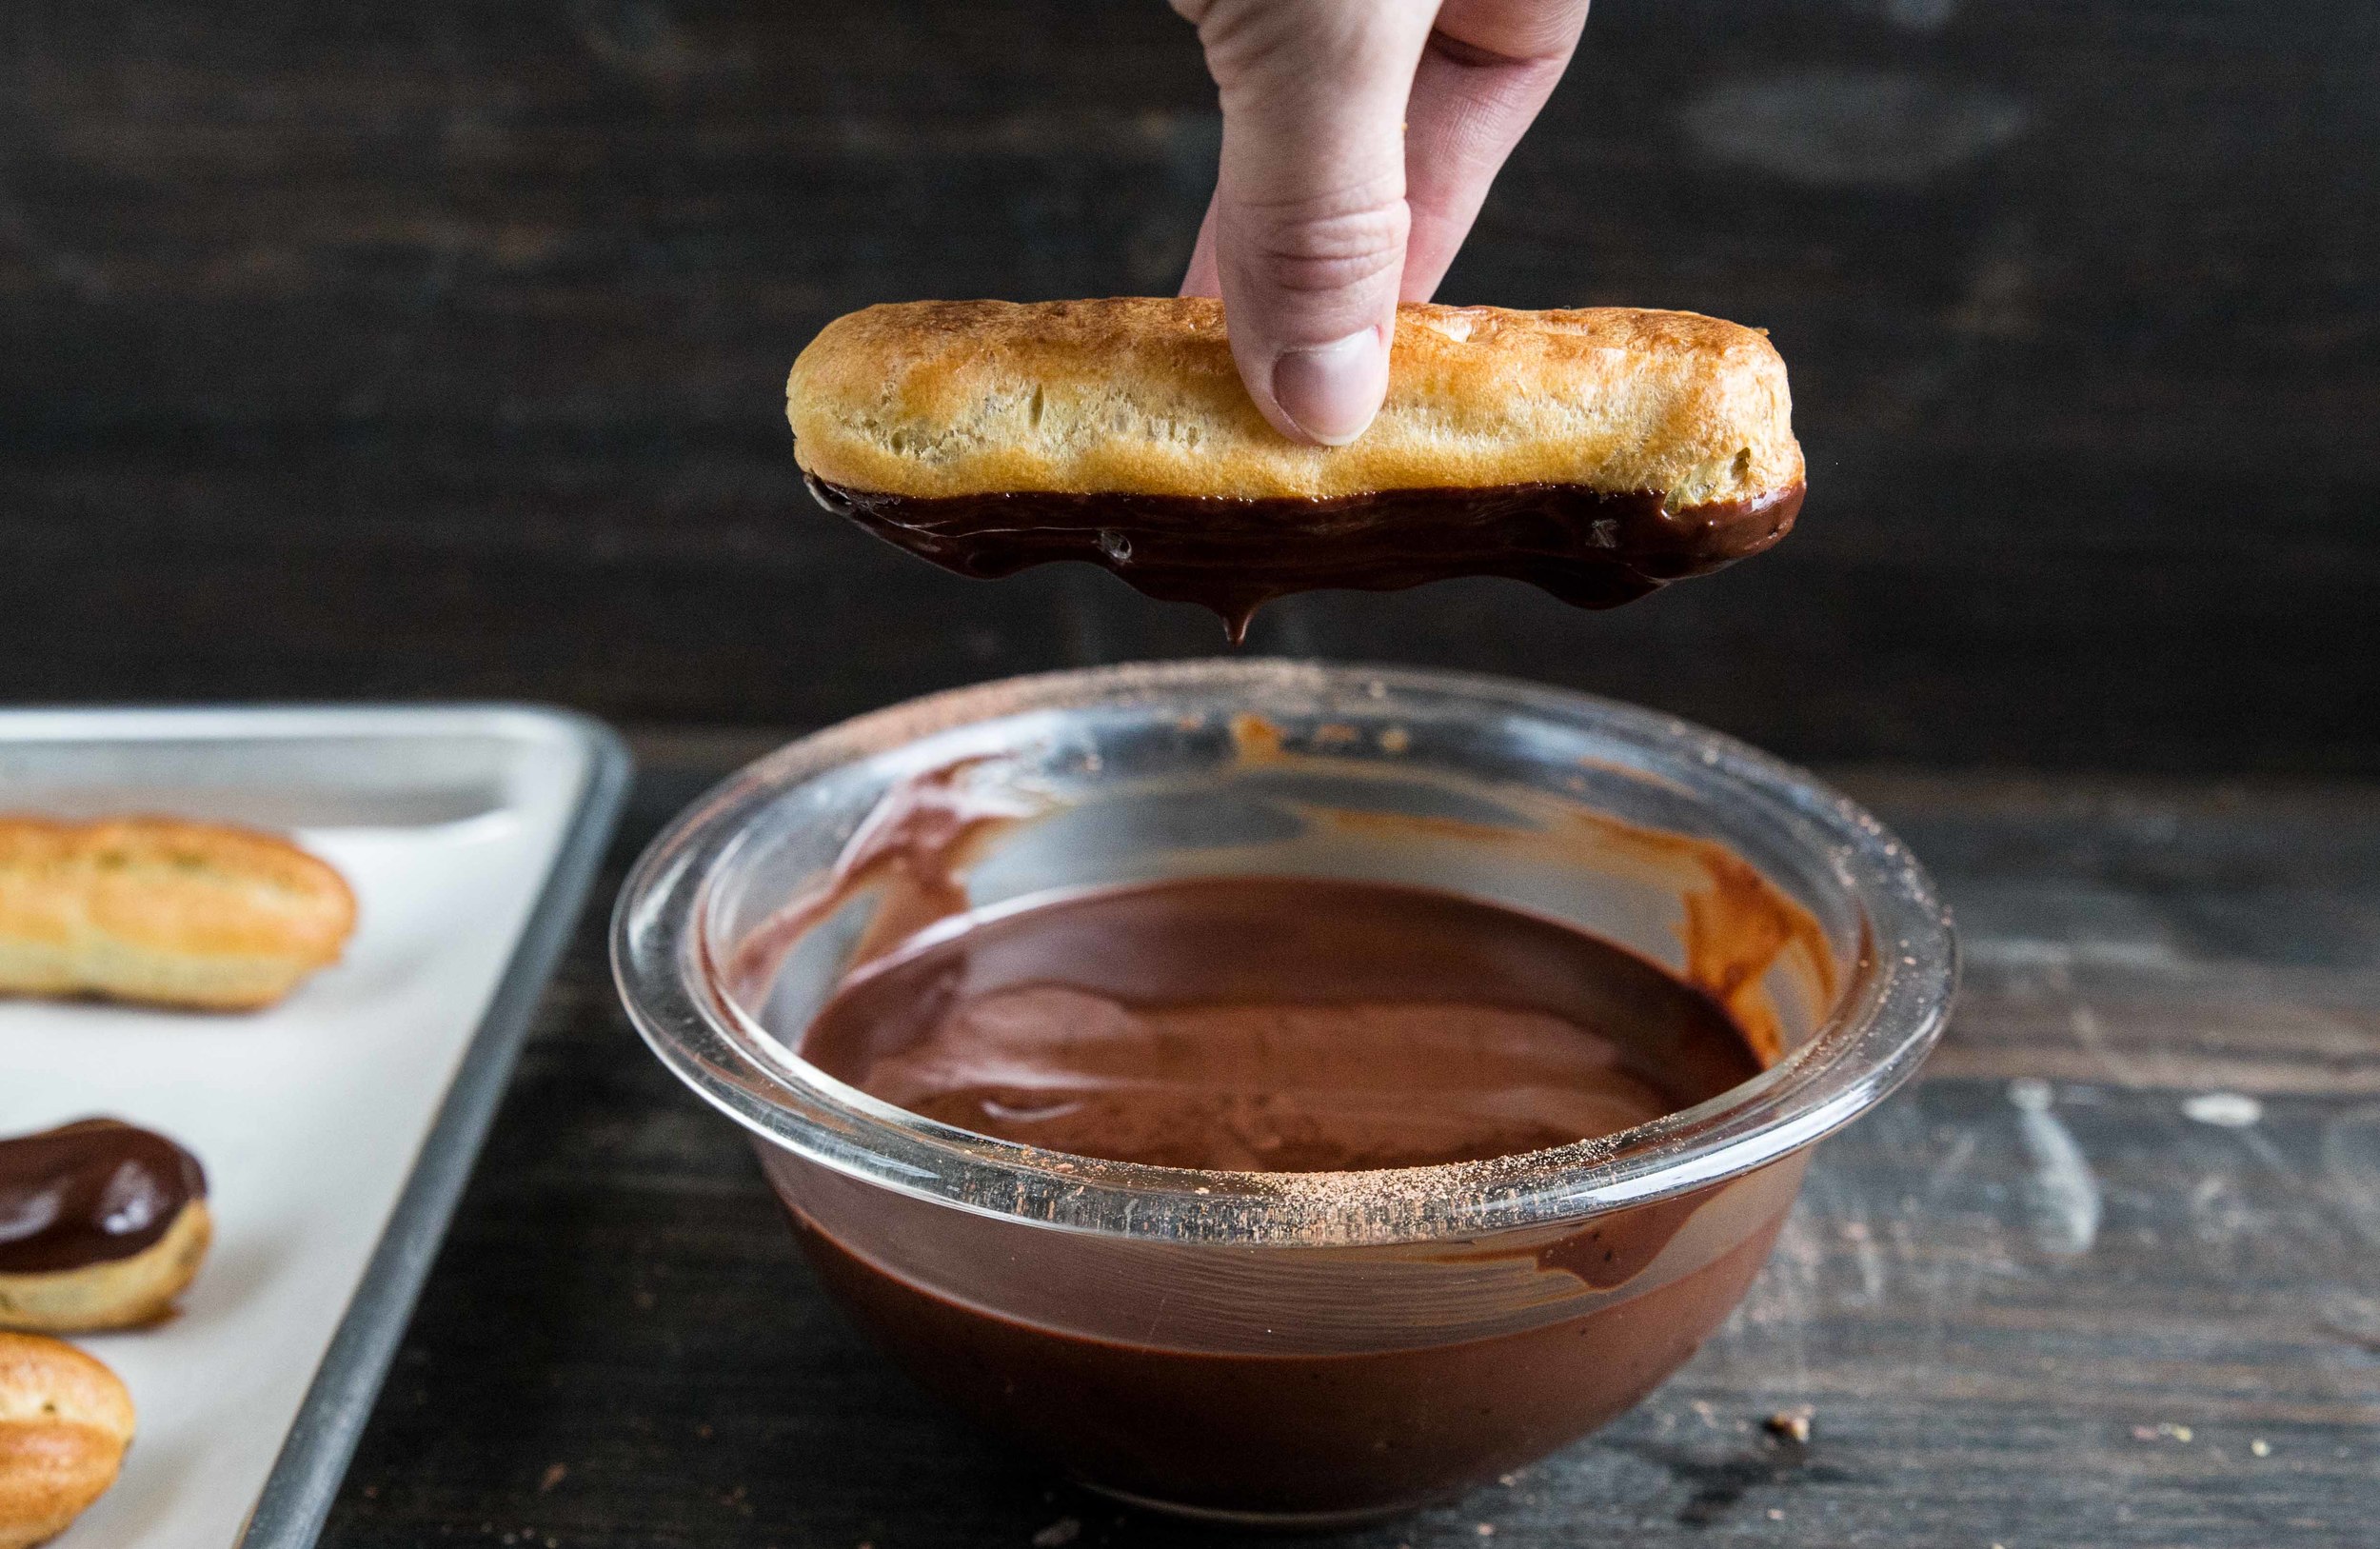
The éclairs are coated in a glaze of chocolate ganache. The ganache is made by pouring near boiling cream over chopped chocolate. The mixture is allowed to set for at least 5 minutes before stirring to encourage even melting. Espresso powder is added to enhance the flavor of the chocolate. This recipe makes more than you'll need for the eclairs, but I prefer to have extra when dipping to make the process easier. The leftover ganache can be rolled into truffles, drizzled over baked goods, or eaten by the spoonful.

The chocolate ganache can also be made several days in advance. Warm the chocolate before using.

To assemble the éclairs, use a sharp knife to poke a hole into both ends of the pastry shell. With a pastry bag filled with the chilled pastry cream, pipe the filling into both ends. You'll be tempted to overfill the pastries, but you don't want to do it. When overfilled, the pastry cream will leak out every time the pastry is handled, causing a mess everywhere (I speak from experience). If you hold the pastry up to the light while filling, you can see the cream fill the pastry and it makes it easier to get the right amount.

The tops of the éclairs are then dipped into the melted chocolate. Make sure you use a bowl that's at least 5-6 inches in diameter to make dipping easier. Let the chocolate set before serving; it happens faster in the refrigerator.

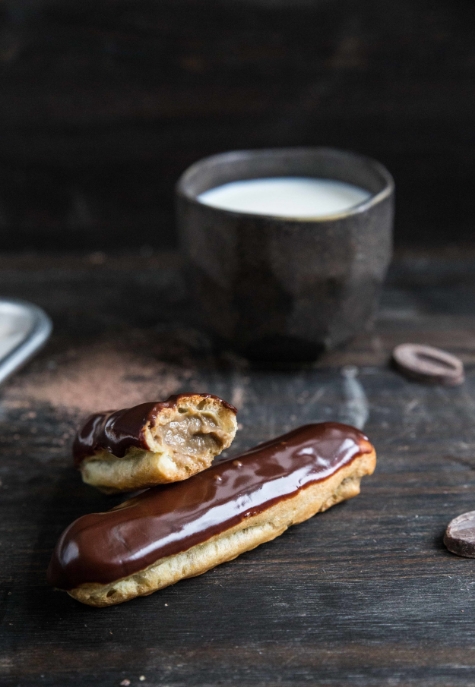
These éclairs are a classic French pastry with a coffee twist. The pastry shell is made from choux pastry, which puffs and hollows in the oven. The interior is filled with a rich coffee pastry cream and glazed with dark chocolate. Most of the work for the éclairs can be done several days in advance, making the assembly a quick maneuver. Serve to friends and family and celebrate your own love of pastry.

One Year Ago: Chocolate Raspberry Tarts
Two Years Ago: Chocolate Almond Biscotti
Three Years Ago: Pomegranate White Wine Panna Cotta, Toasted Almond Cookies, and Coconut Raisin Granola
Four Years Ago: Beer Bread, Baked Tortilla Chips, Roasted Pepper Feta Scones, and Chocolate Rum Cake (GF)
Five Years Ago: Banana Bread Oatmeal and Chocolate Blueberry Ice Cream

Coffee Eclairs

Yields 2 dozen

Dough
1/2 cup (113 grams) unsalted butter
1 cup (250 mL) water
1 teaspoon granulated sugar
1/2 teaspoon salt

1 cup (120 grams) King Arthur Unbleached All-Purpose Flour
4 large eggs

Filling
1/2 cup (100 grams) granulated sugar, divided
1/4 cup (40 grams)
King Arthur Unbleached All-Purpose Flour
1 tablespoon espresso powder
2 large eggs
2 large egg yolks
1 teaspoon vanilla extract
1/2 teaspoon salt
1 3/4 cups (415 mL) whole milk

Glaze
8 ounces (225 grams) Valrhona dark chocolate or semi-sweet chocolate, coarsely chopped
1 cup (250 mL) heavy cream
1 teaspoon
espresso powder

Preheat oven to 425 degrees F (220 degrees C).

For the dough, combine the butter, water, sugar, and salt in a large saucepan. Bring to a boil over medium-high heat. Remove pan from heat, add the flour, and stir until uniform. Return to heat and continue stirring. In 2-3 minutes, when the dough visibly pulls away from the sides of the pan, forms into a ball, and forms a film on the bottom of the pan, remove from heat. Let dough cool in pan for 4-5 minutes.

Add the eggs one at a time, using a spatula to beat them in, making sure the first egg is completely incorporated before continuing. Once all the eggs have been incorporated and the mixture is smooth, put the dough into a piping bag fitted with a large star or round tip. Pipe the dough into 4-inch long, 1-inch wide tubular shapes on parchment-lined sheet pans. Bake for 25 minutes, or until uniformly brown in color. Turn oven off and crack open the door, drying out the shells for an additional 15 minutes.

For the filling, whisk together 1/4 cup sugar, flour, espresso powder, eggs, egg yolks, vanilla extract, and salt. Set aside.

Place the milk and remaining 1/4 cup sugar in a medium saucepan and bring to a boil. Immediately remove from heat. Temper the egg mixture with the milk and return back to the saucepan. Bring back to a boil, whisking constantly, until mixture thickens into a pudding consistency. Remove from heat and refrigerate until needed.

For the glaze, bring the heavy cream to a boil in a small saucepan. Immediately remove from heat and pour over chopped chocolate, allowing the chocolate to melt for 5 minutes before stirring until smooth and uniform. Stir in espresso powder. Set aside.

To assemble, place pastry cream in a pastry bag with a small round tip. Using a sharp knife, puncture a small hole at both ends of the eclairs. Pipe pastry cream into both ends; take care not to overfill. Dip tops of éclairs in chocolate glaze and allow to set until chocolate firms. Keep refrigerated.

This post is sponsored through a partnership with King Arthur Flour. All thoughts and opinions are my own.

Brûléed Lemon Tart

The cold weather that winter brings provides the perfect reason to turn on the oven. Warming the home with the scent of butter and sugar lifts spirits, countering the doldrums that can follow when we hibernate indoors. In winter, I turn to pastries with bright and bold flavors to counter the rich comfort food. With citrus fruit in peak season during the winter months, lemons are next pick on my menu.

In partnership with King Arthur Flour, each month I want to challenge you with a new recipe, filled with step-by-step explanations and techniques, to help you grow and develop as a baker. This month we're taking on a brûléed lemon tart.  Lemon tarts, or tarte au citron, are a classic French dessert, combining a tart lemon filling with a buttery crust. This version of a lemon tart blends the French classic with a burnt sugar top to add a new textural dimension.  

The tart dough combines a mixture of pastry and almond flour. Pastry flour naturally creates tender baked goods. Pastry flour has less protein than all-purpose flour, which means that less gluten forms in the dough. Almond flour is also added to the dough; the subtle nutty flavor complements the bright citrus fruit, and adds to the crust’s delightful texture. To counteract the lower amount of gluten in the flours, an egg is added as a binder. With powdered sugar for sweetness and butter for tenderness, the tart dough comes together in a similar fashion to cookie dough.

By using these nontraditional flours, the baked crust takes on a crumbly, melt-in-your-mouth quality that matches the silkiness of the lemon filling.

The tart dough will have a texture similar to cookie dough when prepared. Because the dough is too soft to roll out into a sheet, it is directly pressed into the tart pan with the heel of your hand. I find it easiest to tear the dough into pieces and spread them out evenly on the bottom of the pan. This technique makes it relatively simple to press the dough into a uniform thickness. I also reserve a small amount of dough to fill in thin spots after pressing, especially along the sides of the pan where it tends to be an irregular thickness.

The dough is then poked with a fork along the bottom of the pan to release air when it is baked. This prevents the dough from rising, helping keep its original shape.

Before baking, the tart dough is chilled in the refrigerator for 30-60 minutes. By chilling the dough, it allows the gluten in the dough to relax, which minimizes shrinking during the baking process. Chilling also hardens the butter, will contribute to the crust's flaky texture when baking. Overall, chilling the dough is a win-win situation when it comes to pastry.

The lemon filling is made in a similar fashion to lemon curd. To start, lemon zest is rubbed into granulated sugar with your fingers, releasing the oils in the peel to create additional flavor. Freshly squeezed lemon juice is mixed in with a few eggs, which are used to thicken the filling. The picture on the left shows the filling before heating.

While heating, the filling should be whisked constantly to prevent the eggs from curdling. After 8-10 minutes, the eggs will have thickened the mixture enough so that the whisk will leave tracks in the filling. This is when you will know it is done. I prefer to run the filling through a fine mesh strainer to remove the zest and remaining solids to give the filling a silky smooth finish. This is shown in the picture on the right.

Butter is added one cube at a time to the filling to lend a rich creaminess. Each cube of butter should be fully melted and incorporated into the filling before adding another. This slow process of adding the fat in the butter to the water in the filling creates an emulsion, making the filling stable.

The tart crust is baked separately before adding the filling. This prevents a soggy tart crust and produces a crust that is tender and buttery instead. Then the filling is added and finishes baking until set. The tart is left to cool to room temperature for several hours to set up the filling. For the perfect slices with clean edges, I suggest covering the tart after it has cooled and allowing it to sit overnight at room temperature.

Just before serving, sprinkle the top with a generous amount of granulated sugar and use a torch to melt it into a crisp topping. While a kitchen torch will do, I like to bring out the full-sized blowtorch for this job (I was gifted one for Christmas several years ago, and love finding excuses to use it). To prevent the sugar from burning, start by holding the torch a good distance away from the tart, slowing moving closer, until you find the right height to caramelize, but not burn the sugar. Also keep the torch away from the edge of the tart crust; it will burn if you are not careful.

If serving a few pieces instead of the entire tart, just sugar and torch those individual slices. The sugar topping will not stay crisp once stored.

Brûléed Lemon Tart is a bright, citrus dessert to add color and flavor to these cold winter days. A tender crust holds in a creamy lemon filling, which balances the tart lemon with the sweetness of sugar. The tart is burnt using a torch to add a crisp, textured topping. Serve the whole tart at once for family and friends, or individual slices one at a time for you and the ones you love.

One Year Ago: Pear Vanilla Sorbet
Two Years Ago: Pear Chocolate Scones
Three Years Ago: Chocolate Chunk Ginger Cookies and Vanilla Bean Marshmallows
Four Years Ago: Dark Chocolate Oatmeal
Five Years Ago: Zuppa Toscano and Quick Chocolate Cake

Bruleed Lemon Tart

Yield 8-12 servings

Tart Dough
8 tablespoons (113 grams) unsalted butter, room temperature
1/2 cup (60 grams) powdered sugar
1 large egg
1 teaspoon vanilla
1/2 teaspoon salt
2 cups (225 grams)
King Arthur Pastry Flour
1/2 cup (50 grams) King Arthur Almond Flour

Lemon Filling
Zest of 3 lemons
1 1/4 cups (250 grams) granulated sugar, divided
1/2 cup (120 mL) fresh lemon juice
3 large eggs
6 tablespoons (85 grams) unsalted butter, cubed

In a large mixing bowl, beat together the butter and powdered sugar until light. Add the egg, vanilla, and salt and continue mixing until uniform, scraping down the sides as needed. Add the flours, mixing until the dough comes together and begins to gather in the bowl.

Press dough into an 10-inch ungreased tart pan evenly on the bottom and sides. Poke a fork into the bottom to release air while baking. Refrigerate for 30 minutes to 1 hour.

To make the lemon filling, combine the lemon zest and 1 cup sugar in a saucepan. Mix together with your fingers until fragrant. Whisk in the lemon juice and eggs.

Cook the mixture over medium to medium-high heat, whisking constantly, until it thickens (you should be able to make tracks in the mixture with your whisk). This will take about 8-10 minutes. Use a fine mesh strainer to remove the zest. Add the butter, one cube at a time, whisking until it is fully incorporated before adding another. Set aside.

Preheat oven to 350 degrees F (180 degrees C).

Bake chilled tart dough for 15-20 minutes, or until dry in appearance and touch. Add lemon filling and continue baking for 25-30 minutes, or until filling has set. Cool to room temperature.

Just before serving, sprinkle the remaining 1/4 cup sugar over the tart.* Using a torch, melt the sugar and form a crisp top. Serve immediately.

*If serving a few pieces instead of the entire tart, only sprinkle and torch the pieces going to be served. The sugar topping will not stay crisp once stored.

This post is sponsored through a partnership with King Arthur Flour. All thoughts and opinions are my own.


Caramel Apple Crumble Pie

The days have been blurring together, an amalgam of daily commutes, hastily pieced together dinners, and the bright glow of the television screen. Each day feels the same in color and energy as the one that came before it. This routine, exciting once, grows monotonous. While the familiarity may be comfortable, the pattern feels stagnant and tired.

After weeks of this repetition, I needed variety, a fresh feeling and a new experience. So I took it upon myself to make a change. I joined a hot yoga studio. I signed up for glass blowing classes. I announced to my boyfriend that we were going to go for a walk.

Sometimes I forget I have the power to change my everyday. 

Baking is one of the activities I do to keep life interesting. As a recipe developer, I rarely come back to the same recipes once they are complete, trying to invent new takes on old favorites instead. The dessert table becomes an ever evolving area of flavors and textures. This Caramel Apple Crumble Pie was born from a combination of two of my favorite fall desserts: apple crisp and apple pie

While there will be a few failures now and then, when the recipe comes together as easily as this recipe did, it turns out right.

IMG_9890.jpg
IMG_9946.jpg

Caramel Apple Crumble Pie brings together spiced apples, flaky pastry, and a crisp oatmeal crumble. Drizzled in warm caramel, the dessert becomes a play on autumn flavors and textures. Serve with vanilla ice cream and enjoy alongside friends and family.

One Year Ago: Maple Syrup Cake with Toasted Almonds
Two Years Ago: Butternut Squash Biscuits, Apple Crisp, and Pumpkin Spiced Doughnuts
Three Years Ago: Pear Crisp, Pumpkin Rolls, Butternut Squash Cake, and Filled Molasses Cookies
Four Years Ago: Applesauce, Caramel Apple Cider, Honey Cinnamon Chickpeas, and Caramel Apple Tart
Five Years Ago: Apple Chips, Apple Cider, Ginger Pear Cake, Fig & Balsamic Jam, and Pumpkin Oatmeal

Caramel Apple Crumble Pie

Yields 8-10 servings

Apple Pie Filling
Single Pie Crust Recipe, chilled
3 lbs (1.4 kg) apples, peeled, cored, & sliced
1 tablespoon lemon juice
1/2 cup (100 grams) brown sugar, packed
2 tablespoons all-purpose flour
2 teaspoons ground cinnamon
1/4 teaspoon ground nutmeg
1/8 teaspoon ground cloves
1/4 teaspoon salt
1 tablespoon boiled cider (optional)

Crumble Topping
1/4 cup (57 grams) butter, room temperature
1/3 cup (66 grams) brown sugar
2/3 cup (60 grams) old fashioned oats
1/3 cup (40 grams) all-purpose flour
1/2 teaspoon ground cinnamon
1/8 teaspoon ground nutmeg
1/4 teaspoon salt
Milk, for brushing
1/2 cup (280 grams) caramel sauce*

Preheat oven to 375 degrees F (190 degrees C).

For the apple filling, in a medium bowl, coat the apple slices with lemon juice to prevent browning. Add the brown sugar, flour, spices, salt and boiled cider and toss over the apples until they are evenly coated. Set aside.

For the crumble topping, beat together the butter and brown sugar until light. Stir in the oats, flour, spices, and salt until uniform. Set aside.

On a lightly floured surface, roll out the pie dough round into a 12-inch circle. Place the round into a 9-inch pie plate (or tart pan), folding the edges under and pressing into a decorative pattern. Place the prepared apples into the pie round, mounding them in the center. Break off small pieces of the crumble topping and sprinkle uniformly over the top.

Brush the exposed edges of the pie dough with milk to help them brown. Bake for 55-60 minutes, or until the crumble and crust are golden brown. If the edges begin to darken too quickly, cover with aluminum foil to prevent additional browning.

Cool the pie for at least 3 hours before slicing to allow the juices to set. Drizzle each slice with 1-2 tablespoons of warm caramel sauce before serving.

*To create a vegan version of the pie, use a dairy-free margarine for the butter in the crust and crumble (I prefer Earth Balance Vegan Butter), almond or soy milk for brushing, and a recipe for vegan caramel sauce.